J.M.Pearce (talk | contribs) mNo edit summary |
|||
| (32 intermediate revisions by 14 users not shown) | |||
| Line 30: | Line 30: | ||
Image:Basic-pulley.jpg|[[Pulleys]] | Image:Basic-pulley.jpg|[[Pulleys]] | ||
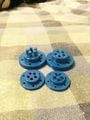
Image:compar2.jpg|[[Low force snaps for easy assembly/dis-assembly of mating parts]] | Image:compar2.jpg|[[Low force snaps for easy assembly/dis-assembly of mating parts]] | ||
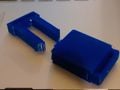
Image | Image:Clips.jpg|[["Backpack" Snap-fit Clips]] | ||
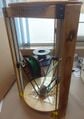
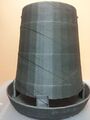
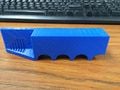
Image:Fig_9(11).jpg |[[Chicken_Feed_Holder]] | Image:Fig_9(11).jpg |[[Chicken_Feed_Holder]] | ||
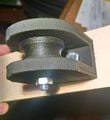
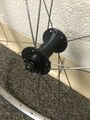
Image: Hub.jpg |[[Bicycle_Hub]] | Image: Hub.jpg |[[Bicycle_Hub]] | ||
Image:ModeledProsthetic_limbprosthetic.png |[[Limb_Prosthetic]] | Image:ModeledProsthetic_limbprosthetic.png |[[Limb_Prosthetic]] | ||
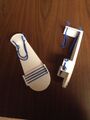
File:Pedal4r.JPG|black mamba bicycle pedal[[ | File:Pedal4r.JPG|black mamba bicycle pedal[[Black_Mamba_Bike_pedal]] | ||
Image:bike_7up.jpeg |[[7up]] | Image:bike_7up.jpeg |[[7up]] | ||
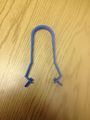
Image:Umbilical Cord Clamp.jpeg|[[Umbilical Cord Clamp]] | Image:Umbilical Cord Clamp.jpeg|[[Umbilical Cord Clamp]] | ||
Image:Newspaper_Briquette_Maker_Prototype.jpg|[[Newspaper Briquette Maker]] | Image:Newspaper_Briquette_Maker_Prototype.jpg|[[Newspaper Briquette Maker]] | ||
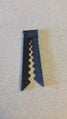
Image:Tool Cutting.JPG|[[ | Image:Tool Cutting.JPG|[[Field Dressing Tool]] | ||
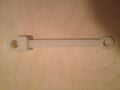
Image:Twfuller_spigot_2.jpg |[[Contoured Spigot for 5-gallon buckets]] | Image:Twfuller_spigot_2.jpg |[[Contoured Spigot for 5-gallon buckets]] | ||
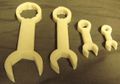
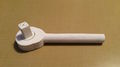
Image:Wrench_012.jpg|[[Lightweight Wrenches]] | Image:Wrench_012.jpg|[[Lightweight Wrenches]] | ||
| Line 58: | Line 58: | ||
Image:Water_Wheel.jpg|[http://www.appropedia.org/Micro-Turbines_for_Water_Power MicroTurbine for Water Power] | Image:Water_Wheel.jpg|[http://www.appropedia.org/Micro-Turbines_for_Water_Power MicroTurbine for Water Power] | ||
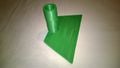
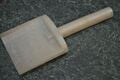
Image:Hand_shovel.JPG|[[Hand Shovel]] | Image:Hand_shovel.JPG|[[Hand Shovel]] | ||
Image:Rain water collector.jpg|[[ | Image:Rain water collector.jpg|[[Rain_water_filter/bottler]] | ||
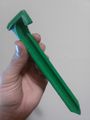
Image: | Image:SeedDrillPoke.JPG|[[Seed Drill Punch]] | ||
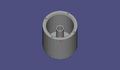
Image:Pelton wheel iso.png|[[ | Image:Pelton wheel iso.png|[[Bike Hub Pelton Turbine]] | ||
Image:printed_splitter.jpg|[[Garden Hose Splitter]] | Image:printed_splitter.jpg|[[Garden Hose Splitter]] | ||
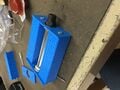
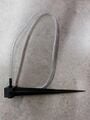
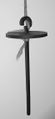
Image:Hinge.jpg|[[Compost Toilet Hinge]] | |||
Image:Blade.jpg|[[OSAT_Wind_Turbine]] | |||
Image:Drip_Irrigation_Stake_assembly.jpg|[[Drip irrigation stake]] | |||
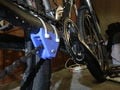
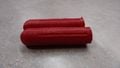
Image:Grip1.jpg|[http://www.appropedia.org/Handlebar_grips Handlebar Grip] | |||
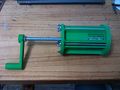
Image:Wood_WorkingClamp_Parts.png|[[Clamps: "Wooden" Handscrew Style]] | |||
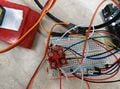
File:PhotoresistorHolder.jpeg|[[Heliostat or Sun Tracker]] | |||
image:Drop_spindle.jpg| [[Drop Spindle for Spinning Wool into Yarn]] | |||
Image:Cutter.JPG| [[PET Bottle Shredder]] | |||
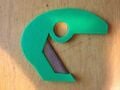
Image:Densiometer.jpg| [[Simple Forestry Densiometer]] | |||
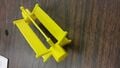
Image:Pump_assembly.jpg| [[OSAT_3D_Printable_Treadle_Pump]] | |||
Image:Knife.jpeg|[[3D_Printed_Carpet_Knife]] | |||
</gallery> | </gallery> | ||
=Template= | =Template= | ||
| Line 82: | Line 95: | ||
==Abstract== | ==Abstract== | ||
# Paragraph description of the OSAT - why is it Appropriate? What need does it fulfil? Are there case studies you have found of a technology being used successfully? | # Paragraph description of the OSAT - why is it Appropriate? What need does it fulfil? Are there case studies you have found of a technology being used successfully? | ||
# Picture of completed print using [[ | # Picture of completed print using [[Image:Wood_WorkingClamp_Parts.png|200px|right]] | ||
== Bill of Materials== | == Bill of Materials== | ||
| Line 133: | Line 146: | ||
</nowiki> | </nowiki> | ||
[[category:OSAT 3D-Printable Designs]] | |||
Revision as of 14:47, 14 December 2014
Assignment
- Identify an OSAT that you would like to design to be a 3D printable technology
- Make sure someone else has not already done it : existing designs here.
- Reserve your OSAT by signature tagging with ~~~~ next to the OSAT on the list generated by the Appropedia community: Requests for 3-D printable open source appropriate technology. You can add your own ideas to the list, more than one of you can tackle the same tech in a different way, you may improve upon existing designs if you do so in a significant way. Do this by 11/18
- Design 3D printable components with ONLY OS CAD packages (e.g. OpenSCAD, FreeCAD, or Blender)
- Create a Appropedia page for your project. (Easiest way to create a page is to search for the name of it and then click on the red link or in the list put double square brackets around it)
- Include the following sections on your page using the template below (copy and paste wiki markup into your page)
- Add picture and link to your project page in gallery below.
- Print component and bring to class - Complete and due by 12/4
Grading
- 20% Print quality
- 30% Documentation
- 25% Design (design for printing, plastic minimization)
- 25% Function - Is it OSAT? Does it work?
Automatic reductions: -50% no source or the use of non-OS software -10% per day for late
Gallery
Add your image and link the gallery below in a single line after the last one in the list
- 777 OSAT 3-D Printable Designs
-
-
-
-
-
-
-
-
-

-
black mamba bicycle pedalBlack_Mamba_Bike_pedal
-
-
-

-
-

-
-
-
-
-
-

-
-
-
-
-
-
-

-
-
![[1]](/w/images/thumb/9/95/DoorHinge.jpg/120px-DoorHinge.jpg)
-
-
-
-
-
-

-
-
-
-
-
-

-
-
-
-
-
-


.jpg)


.JPG)


![[1]](/File:DoorHinge.jpg)


Template
Copy the wiki markup below to your page to use as a template
Title of the device or system
Project developed by [your name linked to your user account]
Template:Statusboxtop Template:Status-design Template:Status-prototype You can help Appropedia by contributing to the next step in this OSAT's status. Template:Boxbottom
Abstract
- Paragraph description of the OSAT - why is it Appropriate? What need does it fulfil? Are there case studies you have found of a technology being used successfully?
- Picture of completed print using

Bill of Materials
- Provide a full BOM -- Materials needed for fabrication of device and alternative materials if they are not available, prices/sources of non-printable parts
- Upload and link to all source files
- Upload and link to all STLs
Tools needed for fabrication of the OSAT
- MOST Delta RepRap or similar RepRap 3-D printer
Skills and Knowledge Necessary to Make the OSAT
- If you used special skill – link to relevant wikipedia or wikiversity articles/courses
Technical Specifications and Assembly Instructions
- Provide directions for print/assembly - be detailed enough in your “how to” to ensure that someone could construct the device from your description. Consider the elegance of IKEA like instructions.
- Include print time estimate
- Include assembly time estimate
- Including drawings or pictures of the device at stage of assembly at minimum. (http://www.appropedia.org/Special:Upload)
- Consider video if appropriate
| Example video summary of textbook |
|---|
Error in widget YouTube: Unable to load template 'wiki:YouTube' |
Common Problems and Solutions
- Include common mistakes/problems to avoid in building your OSAT and how to overcome them
Cost savings
- If your solution is not a low cost one then it is not really appropriate.
- Estimate your costs
- Find a commercial equivalent
- Calculate $ savings and % savings
References
- The sources of information (e.g. engineering handbooks, journal articles, government documents, webpages, books, magazine articles etc.). References should use the <ref> </ref> and <references/> tags and can be in any format but should include all the information necessary for someone else to find the same information you did. For example: [1]
- ↑ web page: Department of Energy (DOE) Landscaping and Energy Efficiency, DOE/GO-10095 (1995) Available: http://www.eren.doe.gov/erec/factsheets/landscape.html
Based on the developmental needs addressed (e.g. food, heat, electricity, clean water, health care, etc.) be sure to label your device in the proper categories e.g. use [[Category:Water]]. Be sure to categorize your device so that it will be easy to find – for example “Low voltage connection basics” is categorized in [[Category:How tos]] [[Category:Electricity]] [[Category:Electric lighting]].