
Open Source Digitally Replicable Lab-Grade Scales

| Type | |
|---|---|
| Authors | Benjamin R. Hubbard Joshua M. Pearce |
| Location | Michigan, USA |
| Status | Designed Modelled Prototyped Verified |
| Verified by | MOST |
| Years | |
| Links | https://www.academia.edu/43453161/Open_Source_Digitally_Replicable_Lab_Grade_Scales https://www.mdpi.com/2410-390X/4/3/18 https://www.preprints.org/manuscript/202004.0472/v1 |
| Assembly instructions | https://osf.io/me9a8/ |
|---|---|
| Design files | https://www.myminifactory.com/object/3d-print-open-source-digitally-replicable-lab-grade-scale-126135 |
| Hardware license | CERN-OHL-S |
| Certifications | Start OSHWA certification |


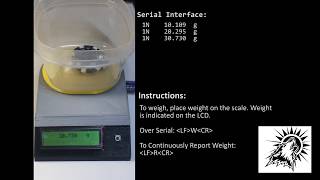
This study provides designs for a low-cost, easily replicable open-source lab-grade digital scale that can be used as a precision balance. The design is such that it can be manufactured for use in most labs throughout the world with open-source RepRap-class material extrusion-based 3-D printers for the mechanical components and readily available open-source electronics including the Arduino Nano. Several versions of the design were fabricated and tested for precision and accuracy for a range of load cells. The results showed the open-source scale was found to be repeatable within 0.05 g with multiple load cells, with even better precision (0.005 g) depending on load cell range and style. The scale tracks linearly with proprietary lab-grade scales, meeting the performance specified in the load cell data sheets, indicating that it is accurate across the range of the load cell installed. The smallest load cell tested (100 g) offers precision on the order of a commercial digital mass balance. The scale can be produced at significant cost savings compared to scales of comparable range and precision when serial capability is present. The cost savings increase significantly as the range of the scale increases and are particularly well-suited for resource-constrained medical and scientific facilities.
- Repository contains all source code of designs, paper contains instructions for assembly and use
- Quick download of STLs
- Older version: 3-D Printable Digital Balance
Electronics Assembly
[edit | edit source]Some requests have been submitted for more detailed instructions to assemble the electronics on a solder breadboard. Below details one possible approach to wiring this balance, which Benjamin used in assembling the third iteration of this scale. The breadboard is a grid with pads identifiable by letters running on one axis, and numbers along the other axis (much like the game of Battleship). This will be used to locate parts on the breadboard. This design is based on the schematic provided on OSF.


Required Items
[edit | edit source]- 4cm x 6cm Solder Breadboard (Possible source)
- 200mm/8" lengths of twisted pair (i.e. from Cat5 cable):
2xGreen / Green-White1xBlue / Blue-White1xOrange / Orange-White1xBrown / Brown-White1xBlue / Orange
- 22AWG Solid Core Wire (Possible Source):
2x40mm/1.5" Yellow1x20mm/1" Green3x30mm/1.25" Green1x40mm/1.5" Green1x25mm/1" Red1x45mm/1.75" Red4x8mm/0.25" No Sheath
- 220 Ohm Resistor
- 10k Trimmer/Potentiometer (Possible Source)
- Female Header Pins (Possible Source):
2x15x11x6x11x4x1
- Male Header Pins:
1x4x1
- 16x2 LCD (Possible source)
- NO Push Button
- Heat Shrink (Possible source):
- 1x45mm (cut in half)
- 3x45mm
- 5x45mm
Install the header pins
[edit | edit source]Solder the headers onto the breadboard as listed.
| Size | Breadboard position |
|---|---|
| 15 x 1 | T0 - T14 |
| 15 x 1 | N0 - N14 |
| 6 x 1 | A4 - F4 |
| 4 x 1 | B14 - E14 |
| Size | Breadboard position |
|---|---|
| 4 x 1 | C1 - F1 |
Finally, use the 4 colorless pieces of wire to connect the 4 male header pins to their associated 4 female pins on the 6x1 header. The other two receivers on the female header (in A4 and B4) are not used, but installed to aid in locating the HX711 amplifier.
Install the Potentiometer
[edit | edit source]Potentiometers have three pins, 1 (fixed), 2 (wiper/variable), 3 (fixed). In this assembly, Pin 1 is GND, Pin 2 is the output, and Pin 3 is Vcc.
- Pin 1 (GND): F7
- Pin 2 (Wiper): B8
- Pin 3 (VCC): F9
Install Jumper Wires on the Breadboard
[edit | edit source]This will use all of the 22AWG Solid Core wires except for the 3x 30mm Green wires. The purpose of these wires is to connect already installed pins to other, already installed, pins. They are run to a pad next to the pin of interest. The extra lead must be bent to contact the solder on the pin of interest so that they can be soldered together. In the table below, each jumper is labeled Pad to insert into: Pad to solder together.
| Wire | End 1 | End 2 |
|---|---|---|
| Green 40mm | E13: E14 | M3: N3 |
| Yellow 40mm | D13: D14 | M4: N4 |
| Yellow 40mm | C13: C14 | M5: N5 |
| Red 45mm | B13: B14 | M6: N6 |
| Green 20mm | L3: M3 | G7: F7 |
| Red 25mm | M14: N14 | G9: F9 |
| 220 Ohm | L14: M14 | I14 |
Wire the button
[edit | edit source]Connect one of the Green/Green-White twisted pairs to the pins of the button, covering the exposed wire with the 2 pieces of 1mm heat shrink. The other ends will be attached to the breadboard at the end, as this has to be installed in place (in the scale).
Wire the LCD
[edit | edit source]The LCD has 16 pins, labeled 1-16, 1 being VSS and 16 being LED- (as shown in the schematic). This will be wired using all the remaining twisted pairs and the 3 30mm pieces of Green Solid 22AWG wire.
- Take the Green/Green-White twisted pair. Connect a single end of all 3 solid-core wires to one end of the Green wire in the twisted pair, making a three-wire pigtail. Cover the solder joint with the 3mm heat shrink. This will be used to ground the LCD.
- Connect the three pigtail ends to pins 1, 5, and 16 on the LCD. Connect the corresponding end of the Green-White wire to 15. The other end of the Green/Green-White twised pair will be attached to the board to power the backlight on the LCD.
- Take the Brown/Brown-White pair. Connect Brown to 14 and Brown-White to 13.
- Take the Blue/Blue-White pair. Connect Blue to 12 and Blue-White to 11.
- Take the Orange/Orange-White pair. Connect Orange to 6 and Orange-White to 4.
- Take the Blue/Orange pair. Connect Blue to 3 and Orange to 2.
- Take the Green/Green-White pair. Connect Green to K3:L3 and Green-White to H14:I14
Without shrinking it, put the 5mm heat shrink around the 4 single-color twisted pairs (leave the Blue/Orange pair free) Do not shrink it yet! It will be used to hold the wires in place and out of the way of the load cell once the board is complete.
Now, time to attach the LCD to the breadboard. Do this keeping in mind how you want the wires to lay in the scale housing (try a dry-fit before cutting wires to length!) The numbering below uses the same convention as installing the jumper wires: insert into the first pad, and solder to the second pad. I also solder the pad that the wire is inserted into for extra strength.
- Take the Orange/Blue pair. Connect Blue to A8:B8 and Orange to F10:F9
- Take the Brown/Brown-White pair. Connect Brown to S6:T6 and Brown-White to S7:T7
- Take the Blue/Blue-White pair. Connect Blue to S8:T8 and Blue-White to S9:T9
- Take the Orange/Orange-White pair. Connect Orange to S10:T10 and Orange-White to S11:T11
With the wires in place and laying properly in the balance housing, go ahead and heat the heat shrink, helping fix their shape and prevent them from contacting the load cell.
Finish Installing the Button
[edit | edit source]This is the most uncomfortable part of the installation, which is the primary reason for extra length on this twisted pair.
- Feed the Green/Green-White twisted pair from the button through the hole on the face of the balance housing.
- Connect Green to J3:K3 and Green-White to M10:N10
Install the board and LCD
[edit | edit source]If you haven't already, secure the LCD in its slot on the housing, directing the wires around the boss for the load cell. If any wires rest in contact with the load cell, reliable measurements will be impossible. Secure the breadboard in place, being sure that the USB port on the Arduino Nano (which will go on the 2 sets of 15x1 headers) will be accessible. If the breadboard isn't sitting tightly, secure it down with hot glue on two or three corners.
Finishing Up
[edit | edit source]This isn't quite complete. Put the Arduino Nano in place on the sets of 15x1 headers, then load on some code to run just the lcd (and print something on it). If using the mass balance code, comment out the initialization of the balance/load cell/HX711, as this will hold everything up (since the HX711 isn't installed yet). This will power up the LCD, but you likely won't be able to see anything. Use a screw driver or knob to adjust the potentiometer. This controls the contrast on the LCD, so adjust it until the text is clearly visible on the display. Once that is set, it won't need to be adjusted again.
Power down, install the HX711 into the other set of female headers, and install a load cell, connecting it to the four male headers on the breadboard.
At this point the scale should be functional! Congratulations, you sunk my battleship!
See also
[edit | edit source]- Open Source Vacuum Oven Design for Low-Temperature Drying: Performance Evaluation for Recycled PET and Biomass
- Open Source Scientific Bottle Roller
- Open Source Lab
- Building research equipment with free, open-source hardware
- Open source science
- Open-source hardware
- Open-source syringe pump
- Open Source 3-D Printed Nutating Mixer
- Open Source Laboratory Sample Rotator Mixer and Shaker
- Open Source 3-D Printed ISO 8655 Compliant Multichannel Pipette
- 3-D printable open source dual axis gimbal system for optoelectronic measurements
- Open Source Cold and Hot Scientific Sheet Press for Investigating Polymer-Based Material Properties
- Open Source Inert Gas Glove Box
| Authors | |
|---|---|
| License | CC-BY-SA-4.0 |
| Organizations | MOST, MTU |
| Cite as | Brhubbar, J.M.Pearce (2020–2025). "Open Source Digitally Replicable Lab-Grade Scales". Appropedia. Retrieved July 9, 2026. |