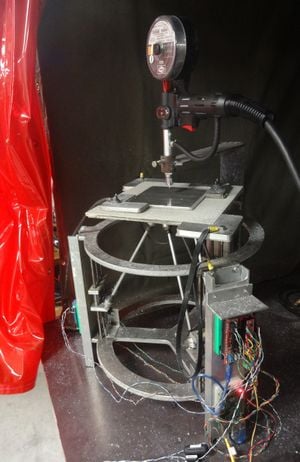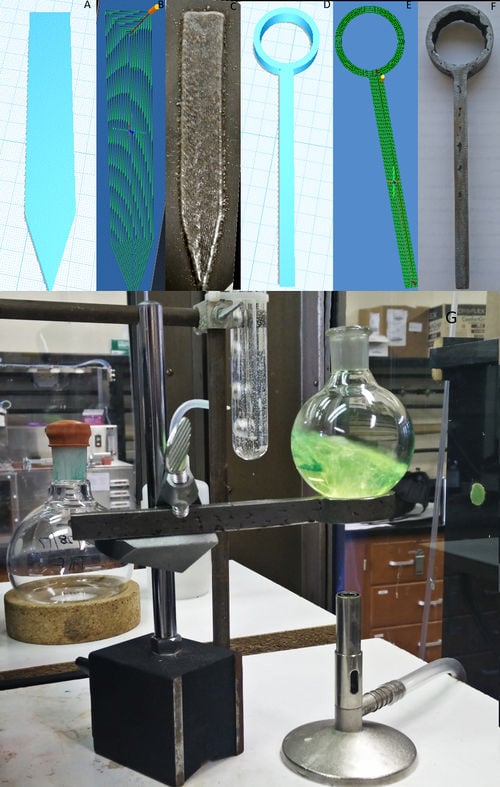
For the first version see open-source metal 3-D printer (This is actually version 3, although we use two - this is better so start here)
BOM and Blue Prints[edit | edit source]
- https://osf.io/ytvgm/ (includes OpenSCAD, STLs and BOM)
Software[edit | edit source]
- Franklin
- Slicer and process improvements for open-source GMAW-based metal 3-D printing - better
- 3D Metal Printing Slicer Plugin
- Open Source Arc Analyzer: Multi-Sensor Monitoring of Wire Arc Additive Manufacturing
- Particle Swarm Optimization of Printing Parameters for Open-Source TIG-Based Metal 3D Printing
Applications[edit | edit source]
See also[edit | edit source]
- Applications of Open Source GMAW-Based Metal 3-D Printing
- Substrate Release Mechanisms for Gas Metal Arc Weld 3D Aluminum Metal Printing - how to get your print off the substrate with a hammer
- Low-cost Open-Source Voltage and Current Monitor for Gas Metal Arc Weld 3-D Printing
- Hypoeutectic Aluminum–Silicon Alloy Development for GMAW-Based 3-D Printing Using Wedge Castings
- Open-source Lab
- Open source 3-D printing of OSAT
- Life-cycle economic analysis of distributed manufacturing with open-source 3-D printers
- Environmental impacts of distributed manufacturing from 3-D printing of polymer components and products
- Building research equipment with free, open-source hardware
- Delft University of Technology - MIG+ Prusa I3
- Weld 3D - 1st commercial spin off (appears dead, see archived copy)
- see literature on "wire arc additive manufacturing" (WAAM)
- Mini Metal Maker- 3D printer designed specifically for metal clay which is then fired - $25 build instructions so quasi open source
- 3D Metal Printing Slicer Plugin
- In Situ Formation of Substrate Release Mechanisms for Gas Metal Arc Weld Metal 3-D Printing
- Integrated Voltage—Current Monitoring and Control of Gas Metal Arc Weld Magnetic Ball-Jointed Open Source 3-D Printer
- Aluminum substrate cleaning for 3-D printing:MOST
- Using an inverse delta to wax print for metal casting
Notes for Users[edit | edit source]

Background on the system[edit | edit source]
For the all metal delta-based printer, the drive mechanism utilized three NEMA17 stepper motors (5.5 kg-cm torque) with lead screws integrated into their shafts, requiring no couplings between the motors and lead screws. The trapezoidal-threaded lead screws had a 5 mm pitch and were 300 mm in length. The three motors were arranged vertically on a 394 mm circle, spaced 120° apart. In general, the 3-axis stage was based upon an industrial delta robot design commonly used for pick-and-place operations, except allowing for greater movement in the z-direction. Control was provided by an Arduino-based controller. Franklin Firmware (software resident on the printer's microcontroller) controlled the motion of the printer, translating commands from a printer server running on a host computer. The host computer, in turn, served a web interface from which the end user was able to control stage motion, queue print jobs, and make configuration changes.
An alternative is to buy a product offered by one of our partners, CNC Router Parts. Rather than a router, attach a weld gun. This system is much more expensive than the MOST delta-based printer, but it allows you a larger print area (or multiple print areas) and you can use a chill plate to help extract heat. Franklin can also be used to control this printer setup.
Weld Unit[edit | edit source]
If choosing between a Millermatic 190 or a Millermatic 140, we recommend the 190. It behaves much better with the long print cycles that exist with 3-D printing. However, if you have the budget for a MIG-based welder that will allow you to pulse the arc and/or control the waveform, by all means use it. We use a standard Miller Spoolmate weld gun for aluminum welding. For steel welding we use an M-100 weld gun, also from Miller our America Makes project partner. You can see what you are doing with these low cost welders using this:
Software/Firmware[edit | edit source]
We originally modeled our parts in OpenSCAD, sliced them using Cura, and used an in-house developed firmware known as Franklin. You could use any 3-D modeling software that allows you to export the part as a.STL file (e.g. FreeCAD). If you choose to use Cura, it may be beneficial to download our Cura plug-in. This plug-in helped to transform Cura from a traditionally plastic-based slicing software to a metal-based one; the print paths that work to print plastic parts often do not work with metal. We are currently working on a metal-Cura that goes far beyond the plug in.
If you use Cura, you should manually review the produced GCode as there can occasionally be strange artifacts in the code. Alternatively, you can write your GCode manually. There's currently no ideal, low-cost, open source slicing software ideally suited for metal. We have a graduate student developing a slicing software now, but it is not ready for distribution. Our Franklin site has information regarding download and use of Franklin to control the printer motion. At the bottom of the Franklin site is a link to our recently released paper related to Franklin that has all the details you will need to understand its operation.
Substrate Choice & Cleaning[edit | edit source]
We print both aluminum and steel on 1/4" thick A36 steel sheets machined to ~6"x6" with rounded corners. We print aluminum on steel as this provides a weak interface so the aluminum samples can be removed from the substrate by hand or with a hammer. If you have the funds, you might also be able to obtain the same effect printing steel on titanium (or on any material that ferrous based metals form brittle phases). Other methods for steel and aluminum are discussed in our papers:
- Substrate Release Mechanisms for Gas Metal Arc Weld 3D Aluminum Metal Printing - how to get your print off the substrate with a hammer
- In Situ Formation of Substrate Release Mechanisms for Gas Metal Arc Weld Metal 3-D Printing
If you employ one of these substrate release mechanisms, keep in mind the first layer is going to look and sound terrible - the goal here IS to get a bad weld. This corrects itself in the subsequent layers.
It is important to clean substrates prior to use to prevent porosity and issues with weld arc formation. We degrease the substrates and then gently abrade them with a scotch brite pad. Gentle abrasion removes oxides and dirt without grinding them further into the substrate. The use of scotch brite pads is controversial in the welding community - some swear by them, others avoid them completely, but we have had good success using them. We rinse the substrates with isopropyl and allow them to air dry thoroughly prior to use. Use of compressed air is not recommended as many compressed air sources contain moisture. Moisture can introduce porosity into welds.
See also: Aluminum substrate cleaning for 3-D printing:MOST
Weld Alloys[edit | edit source]
Use good-quality weld alloys! We were originally using the cheapest weld alloys we could find on the internet. Not all manufacturers clean oxides or drawing fluid from their weld wire and these can significantly affect weld quality. For aluminum, AlcoTec and Hobart are quality vendors that we have had success printing. Aluminum silicon alloys (4043, 4943, and 4047) seem to be the easiest to print. 0.030" diameter wire is the easiest to work with although you could develop strategies for using larger wire diameters.
Aluminum Weld & Print Parameters[edit | edit source]
Aluminum Weld & Print Parameters[edit | edit source]
Weld parameters are dependent on the welder used and the part printed. For a 1"x1.25"x4" testblocks, we have found the following parameters to be a good starting point for multi-layer parts:
- Weld Power: Low - a setting of "1" on the Millermatic 190
- Wire Feed Rate: "55" on the Millermatic 190 ~ 125 mm/sec
- Print Speed: 10 mm/sec
- Wire Stick-Out (distance between weld gun tip and workpiece): 10mm
- Shield gas: Pure Ar at 0.24 L/sec flow rate. This could be increased but I wouldn't decrease this number.
- Layer Height: ~2-3 mm
- Lateral Bead Spacing: ~2-4 mm
- Pause after each layer: 60 sec
With aluminum you are fighting heat; aluminum tends to get hot easily and stay hot. In large, multi-layer parts you want to minimize heat input into the part. In welding, heat input is directly proportional to welding and inversely proportional to weld speed and wire stick-out. Increase power to increase the heat input, increase speed or wire stick-out to decrease heat input. The settings given above are not ideal for single-layers, but have been optimized for multi-layer parts. For single-layers increase power and wire feed rate.
Steel Weld & Print Parameters[edit | edit source]
Steel is relatively easier to work with. We recommend the following starting settings:
- Weld Power: 5 volts on the Millermatic 190
- Wire Feed Rate: "29" on the Millermatic 190 ~ 25 mm/sec
- Print Speed: 7 mm/sec
- Wire Stick-Out (distance between weld gun tip and work piece): 10 mm
- Shield gas: C25 at 30 CFH (Cubic Feet per Hour)
- Layer Height: 2 mm
- Lateral Bead Spacing: 1 mm
- Pause after each layer: at least 60 sec
You need to clean the nozzle and the head of the weld gun from spatters during the pause after each layer. Please make sure that the holes for shield gas are not clogged by spatters.
Preventing Porosity[edit | edit source]
Humid environments significantly contribute to porosity in welds. If you can get the system off of the ground floor of a building, employ a dehumidifier, or avoid printing on very humid days, your porosity levels will be lower. Keeping substrates and wires clean will also go a long way toward good prints. Choose good quality weld alloys. Products such as nozzle jellies are available at most hardware stores. You can use them to prevent spatter build up near the contact tip (ensuring a consistent even flow of shield gas), however use of these jellies is commonly known in the welding community to increase weld porosity.
Safety[edit | edit source]
Please see the section on safety on our original design. Any safety measures one would take for welding should also be adhered to for weld-based 3-D printing. The arc can cause sunburns and long-term exposure has been linked to skin cancer and thyroid cancer. Staring at the arc can result in very painful headaches and damage to the eye. Weld masks and welding curtains prevent this. Welding does produce fumes and weld-based 3-D printing produces more fumes than average welding. Print in a well-ventilated area. We print in a fume hood. Keep the path to ground clean and debris/oxide free. In our delta-based printer, the path to ground is the metal clamp mechanism that holds the substrate in place. Before putting a substrate on the printer, it i' a good idea to clean the clamps with a metal file and/or sandpaper. The welder will find ground; control the path you want it to take to ground to prevent equipment damage.
When in doubt, perusing the online welding forums and welding literature can be incredibly helpful. Standard solutions employed in welding often translate nicely to weld-based 3-D printing.

