
Backpack Delta: Building the Lower Platform


Constructing the Lower Platform
Before You Begin
[edit | edit source]- Make sure you have the everything to build the lower platform:
- Hardware:
- 3 – M3x35mm socket head screws
- 3 – M3 ny-lock nuts
- 6 – M3 Flat Washers
- Printed Parts:
- 3 – Motor Ends
- 3 – Platform Spacers
- Required Tools:
- 2.5mm Alan Wrench
- 5.5mm Combination wrench
- Recommended Tools:
- 3mm or 1/8” Drill bit
- Hardware:
Building the lower platform
[edit | edit source]- Take 1 M3 x 35mm and put 1 washer on it. Insert it into one of the two holes opposite the motor mount.
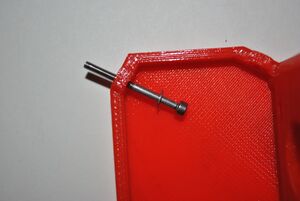
Step One - Slide the screw through the hole in the platform spacer. make sure the flat part is down.
- Place another motor end on the screw after the platform spacer, followed by 1 washer and 1 ny-lock nut. Do not tighten the nut all the way, keep the nut loose, in order to attach the other two platform spacers. Repeat steps 1-3 for the rest of the motor mounts and spacers. Once complete, tighten all the screws and nuts.
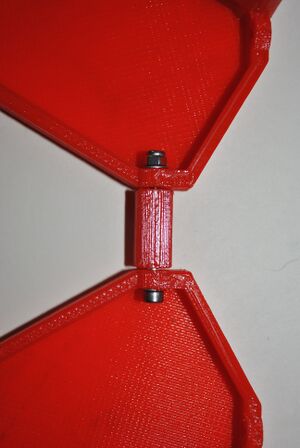
Steps 2 & 3 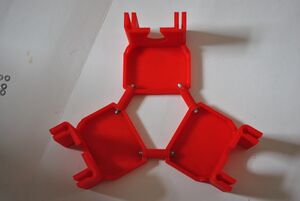
Steps 2 & 3
| Authors | |
|---|---|
| License | CC-BY-SA-3.0 |
| Cite as | Nick Anzalone (2013–2025). "Backpack Delta: Building the Lower Platform". Appropedia. Retrieved July 12, 2026. |