
Las Malvinas ecoladrillo schoolroom

| Type | Ecoladrillo |
|---|---|
| Authors | Ariel O'Callaghan Shalyn Eppler Camille Penny Jocelyn Gwynn Luis Garcia Amber Smith Ers66 |
| Location | Dominican Republic, Las Malvinas, Santo Domingo |
| Status | Deployed |
| Years | 2012 |
| Cost | USD 314.59 |
The objective is to construct a classroom that will hold approximately 25 students under the age of 10. The classroom will be constructed using primarily locally sourced materials and will explore alternative building methods. The classroom be at least equally as durable as with conventional construction methods and will be cost efficient.
Background
[edit | edit source]Las Malvinas II is a community in Santo Domingo Norte. Santo Domingo is the capital city of the Dominican Republic. There are more than 150 families who live in this semi-rural setting, situated next to the Isabella River. By a vote of hands, the community decided that the project they want to collaborate on the most is to add another classroom on to their school using alternative construction methods.
As there is an abundance of both plastic bottles and waste paper, the alternative construction methods that are most appropriate are the use of papercrete and ecoladrillo. Papercrete is similar to concrete blocks but are made with recycled paper. Ecoladrillo uses wooden frames, plastic bottles, chicken wire, and concrete in the construction of walls.
Criteria
[edit | edit source]| Criteria | Constraint | Weight |
|---|---|---|
| Safety | The classroom meets or exceeds local building codes | 10 |
| Reproduction Costs | The total cost of construction is less than the cost of traditional construction. | 8 |
| Appropriate Materials | Building materials are local, alternatively resourced, and may be easily obtained by the community. | 7 |
| Aesthetics | The classroom looks good with the existing school structure while having a unique appearance that draws positive attention to its alternative construction. | 8 |
| Ease of Use | The classroom comfortably accommodates the most number of students possible for the given space, up to 35 students. | 7 |
| Community Interest | Maximize community involvement to develop their interest in the project, as well as their skills and knowledge necessary to replicate the project later. | 10 |
| Research and Development Costs | Spend no more than US$1000 | 5 |
Literature Review
[edit | edit source]See Literature Review for relevant research completed for this project.
Final Design
[edit | edit source]The final design is a traditional concrete column-and-beam style structure with alternatively constructed, non load bearing infill. The alternative material used throughout the infill is primarily ecoladrillo. Papercrete is used in a section of one of the windows. Resourced waste wood is used as panels between the beams and roofing that allows for ventilation. The floor is tiled with discarded broken tiles from a factory, using an ancient Roman technique of laying tile floors.
Ecoladrillo
[edit | edit source]Ecoladrillo is made from clean plastic bottles and trash, wood, chicken wire, and plaster. The plastic bottles and trash make up the majority of the wall. Plastic bottles are stuffed with clean non-organic trash and are then stacked into a wooden frame with chicken wire stretched over each face to hold everything together. A plaster is then applied to each face.

Collect plastic bottles. They need to have caps in order to keep moisture out. Water bottles are preferable because they are typically cleaner. Bottles with short shallow necks are also preferable because they stack better than bottles with long steep necks.

Clean out bottles and let them dry. Left over organic residue or moisture encourages mold growth

If possible, secure wire ties within the structure's columns and beams, spaced ever 20-40 cm. There should be two at each point, with a width just below the width of the wood for the frame (3" space for 2"X4" wood). It is also crucially important to secure wire ties at the corners. All of these ties will be used later to tighten the chicken wire and make it flush with the columns and beams. It improves wall strength, and makes plastering the edges much easier.

Build wooden frame to house ecoladrillo using 2"X4". Sections should be no bigger than 1 meter squared because larger sections make stacking bottles and securing chicken wire more difficult. Using 2"X4" allows for two layers of offset bottles, which increases wall thickness, strength, and insolation. Other sizes of wood may also be used.
Secure one side of the wall with chicken wire using wire ties in the columns and beams and staples in the wood frame. The backside of a hammer can be used to pull chicken wire taught before being secured

Secure one section of the other side of the wall with chicken wire from the bottom up to the height of one row of bottles, leaving the top open to add bottles.

Using uniform bottles that have been cleaned and dried, place 2 offset rows into the frame. Offset rows fit best with the prescribed wood size and also reduces empty space between bottles. Fill any noticeable gaps with crushed bottles or clean plastic trash.

Stretch the chicken wire and secure it up to the height of another row of bottles. It is important to keep the chicken wire taught as you secure it up the frame.

Using similar bottles to the rows below, place 2 offset rows of inverted bottles. Their necks should fit in between the necks of the bottles below and stack nicely. It is incredibly important to use similar width bottles in these 4 rows so that their necks fit in between each other. However, a different set of uniform bottles can be used in the next 4 rows.

Repeat steps 7-9 until section is filled. Fill in any empty space with more crushed bottles and clean plastic trash

Stretch and secure chicken wire using wire ties and staples to close off the section

Use additional wire ties to cinch the two walls of chicken wire together where necessary. The walls have a tendency to bow out at each level of bottles and will need to be cinched together.

Repeat steps 6-12 until wall is complete. Stuff any additional large gaps with clean plastic trash
It is important for the chicken wire to fully reach the columns and beams so that the plaster can fully reach and bind with the columns and beams (plaster does not adhere well to bottles without chicken wire).
Sawdust Plaster
[edit | edit source]Due to the availability of sawdust as a waste product from a local coffin manufacturer we came up with a formula for sawdust plaster. The interior has 3 layers of sawdust plaster. The first 2 are of the ratio described below, and the final finish layer has additional cement added to the mix. The exterior has 2 layers of sawdust plaster, both of the ratio described below. A third finish layer is then applied that does not use any sawdust. This finishing layer is a traditional cement plaster to which we added iron oxide, a natural pigment, to dye the walls yellow thus eliminating the need for paint. The edges between the columns and beams and the walls on both the exterior and interior are cut in using a traditional cement plaster due to the difficulty in getting the sawdust plaster to bind with the dry concrete of the columns and beams.

In a large water tight container, mix 4 parts water with 1/4 parts lime until lime is completely dissolved.

Add 4 parts dry sawdust to the mix, stirring as you go to ensure even consistency, and let soak for an hour. The sawdust should be fine, but not granular, and it should be almost fully submerged in water for the soak. If this is not the case, add more water and adjust the ratio for the next batch. All of the sawdust needs to soak with the lime, however too much water at this stage will require adding dry sawdust later, which weakens the consistency and integrity of the mix.

Mix wet sawdust mixture with 3 parts sifted sand. It is best to mix on a tarp rather than on the ground in order to keep the ratio very consistent. The water from the sawdust mixture should be enough for the entire plaster mixture, but even if the mix seems dry, refrain from adding more water until cement is fully mixed.

Add 2 parts cement and continue mixing. The plaster should be able to be troweled smooth. If this is not the case then first attempt adding water to improve the consistency. If this does not work then begin adding small amounts of cement until the consistency is right.

Apply the first layer using a trowel or by hand with gloves on. Throw the plaster at the ecoladrillo so that it fills in the gaps between the bottles and completely surrounds the chicken wire. This is a thin layer where bottles and chicken wire can still be exposed. The limited use of cement makes application difficult and somewhat of an art form. If the mix is too dry, the plaster will crumbled and bounce off the wall when you try to apply it. It needs to be wet enough to go through the chicken wire without breaking, but not so wet that it slides off the wall.

Apply the second layer by throwing on the plaster and troweling smooth. Small amounts of plaster for each throw will have an easier time sticking to the wall and being troweled smooth. Large throws have a tendency to fall off the wall, especially when trying to smooth it out. Wetting the wall before application is important. This layer should cover any exposed bottles and chicken wire and begin to even out any major depth differences of the wall.

Once the second layer is dry enough, use a long thin piece of wood to plane the wall, scraping off bulges and filling in holes with more plaster.

Apply the final layer using a trowel to smooth it out and a sponge to even the texture. Once this sets up a little, use water and a large flat trowel to make the final smoothing touches. The sawdust in the mix will give the wall a slightly rough texture.
A good size mix uses 22 gallons of sawdust, 2 gallons of lime, 16 and 1/2 gallons of sifted sand, 1 bag of cement, and roughly 20-22 gallons of water. This produces roughly 40 gallons of plaster which covers roughly 1 coat on 10 square meters of wall, depending on the thickness being applied.
Papercrete
[edit | edit source]Papercrete is a method of building traditional style concrete blocks out of paper. Soaked and shredded paper is mixed with sand and cement and then compressed into a block mould. Papercrete blocks can be stacked and mortared with papercrete mortar and used as a substitute for traditional concrete blocks.

Collect clean paper. It should be free of any food waste or organic material and free of any plastics. The more consistent the paper type the better. Newspaper works best, but most other plastic free paper products (with the exception of cardboard) work as well. As a general note, the easier to shred and re-pulp the paper, the better.

In a large watertight container, mix 8 parts water with 1/8 parts lime until the lime is completely dissolved.

Add 4 parts shredded paper, stirring as you go to insure even consistency. The more shredded the paper, the easier it will be to blend it later. The paper should be fully submerged in water and soak for at least an hour.

Using an industrial blender, blend paper until it is completely re-pulped. More water will make this process easier. The pulp should be a thick even consistency, but no so blended that fibers are too small to offer any tensile strength to the eventual block.

Lay blended paper fiber out on a tarp to sun dry for a few days. More water will need to be added later when mixing with the sand and cement, however using the pulp without drying it first will result in an overly wet mix.

Mix 4 parts dry paper pulp with 4 parts sand and 4 parts cement. Add enough water to the mix to activate the cement and ensure an even consistency. More water can be added later if necessary, however too much water at this stage is difficult to remedy. It is important to mix the paper, sand, and cement all at the same time to prevent clumping of the sand and paper.

The mix can now be poured into a mould, then pressed and set out to dry.
A block pressing machine compacts the mix and reduces the drying time by nearly 100%. This is important because in humid climates such as in Santo Domingo a shortened drying time is crucial to expanding the possibilities of papercrete.
Cost/m2 of Wall Area
[edit | edit source]Ecoladrillo With Sawdust Plaster
[edit | edit source]| Materials | Unit Price (RD$) | Quantity | Total/m2 (RD$) |
|---|---|---|---|
| Wire, 17'/lb, 10 gauge | $36/lb | 0.5 lbs, 9 ties | 18.00 |
| 1cm Chicken Wire, 3'wide | $66/yard | 2.5 yards | 165.00 |
| 2"X4", Pine | $15/boardfoot | 2.5 boardfeet | 37.50 |
| Bottles | $0 | 120 | 0.00 |
| Portland Cement | $267/ft3 | 0.4 ft3 | 72.09 |
| River Sand | $750/m3 | 0.01 m | 7.50 |
| Lime | $90/ft3 | 0.05 ft3 | 4.50 |
| Sawdust | $0 | 9 gallons | 0.00 |
| Total Cost / m2 of Wall Area | $314.59 | ||
Traditional Concrete Block
[edit | edit source]| Materials | Unit Price (RD$) | Quantity | Total/m2 (RD$) |
|---|---|---|---|
| Concrete Block, size 6 | $20 | 10 | 200.00 |
| River Sand | $750/m3 | 0.2 m3 | 15.00 |
| Portland Cement | $267/ft3 | 0.36 ft3 | 96.12 |
| Rebar 3/8" | $7.75/ft | 9 ft | 69.75 |
| Total Cost / m2 of Wall Area | $380.87 | ||
The cost of building ecoladrillo is slightly smaller per square meter than the cost of building with traditional concrete block. The trade off is that ecoladrillo is much more labor intensive and time consuming to build. If labor is not free or relatively cheap, ecoladrillo could easily become the more expensive material. However with the exception of labor, the most expensive component of building ecoladrillo is the chicken wire. Chicken wire has many alternatives, most of which are more expensive, however exploring cheaper alternatives would be an effective way of further lowering the costs.
Timeline
[edit | edit source]For a day-by-day timeline with photos please visit the Timeline page.
Discussion and Next Steps
[edit | edit source]Many new alternative construction methods are incorporated in the classroom at Las Malvinas II. In addition to the ecoladrillo infill and sawdust plaster, there is recycled broken tile flooring, recycled particle board upper infill, and some minor use of papercrete block. We are excited at the prospect of the continued interest and availability of the local block manufacturer in the process and production of papercrete. The use of sawdust as a major component in plaster is also new and we are looking forward to seeing how the plaster performs over the next year. As with all new methods and materials, there were numerous issues encountered in the development and implementation of all these alternative materials. Some of those issues as well as plans for future material development will be discussed in the following sections.
Discussion
[edit | edit source]The main issue regarding the construction of ecoladrillo infill is the insufficient amount and placement of wire to tie and tighten the chicken wire flush to the wall. Wire ties are secured to the rebar within the columns and beams at 20 cm increments, however none are placed at the corners where columns and beams or columns and floor met. In some places wire is nailed into the corner, offering a less secure but passable solution, but in others the only solution was to tie the interior chicken wire to the exterior to lock in the bottles and to keep the chicken wire from flaring out. However, this solution results in the chicken wire being less taught and creates a gap between the chicken wire and the corner which ultimately has to be filled in with mortar. The more taught and secure the chicken wire, the less severe the walls can potentially bow out. The more flush the chicken wire is with the columns and beams, the easier it is to apply the plaster and the less likely it is that the plaster will crack. The lesson learned is to overestimate the quantity of wire needed and to never neglect the corners.
The sawdust plaster mix and the papercrete block mix share a similar difficulty. Water retention in sawdust and in paper is significantly high, so when adding soaked sawdust or soaked paper to a mix, the water in those materials alone can make the mix overly wet and unusable. We found that equal parts water and sawdust is enough to fully soak and submerge the sawdust without making the final plaster mix too wet, however there is no way to adequately soak and repulp paper for papercrete without making the paper too wet. Pressing the paper dry before adding to the mix is a passable solution, but it is labor intensive and causes the paper to clump, weakening the integrity of the mix. The best solution is to lay out the wet paper pulp on a tarp to dry in thr sun, however, that can take up to 3 days in a humid tropical climate such as the Dominican Republic.
Next Steps
[edit | edit source]The next things to happen regarding the schoolroom in Las Malvinas II are:
- Interior walls are to be painted with a lime wash
- Liter of Light may be installed
- Interior will be readied for use
- Observations will be made and recorded regarding the durability of the walls
Updates
[edit | edit source]- Interior has been readied and classes have started
- Interior has been painted with a lime wash
-
 Schoolchildren waving from the front door.
 -
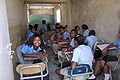 Schoolroom in use for the first time.
 -
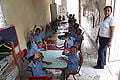 Younger kids in class.


| Authors | |
|---|---|
| License | CC-BY-SA-3.0 |
| Organizations | Practivistas Dominicana Program, Cal Poly Humboldt |
| Cite as | Cep42, Shalyn89, Joce.westcoast, Arieloc, Ers66, Lg137, Ams202 (2012–2026). "Las Malvinas ecoladrillo schoolroom". Appropedia. Retrieved July 10, 2026. |