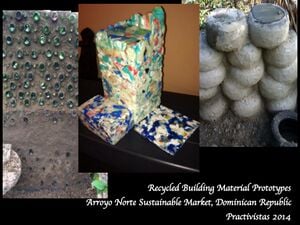
This page narrates a project implemented by Team Terrific between May and July of 2014 for the Practivistas Dominicana program in Santo Domingo, Dominican Republic. The project is to develop prototypes that can be utilized by community members in Arroyo Norte. The prototypes needed for this project are walls and tables for a new sustainable market, using mainly local resources from the waste stream.
Background[edit | edit source]
The newest project site for the Practivistas Dominicana program is in Arroyo Norte. Arroyo Norte is a community, which was built in close proximity to Duquesa, the dumpsite for Santo Domingo. The dumpsite is the largest in the country, and the community exemplifies Appropriate Technology by building homes, community centers, and markets out of the materials they have in abundance at the nearby dumpsite. They have asked for us to come in and use the waste materials to build prototypes with them for furniture and walls to construct a new supermercado in Arroyo Norte. This would be the first large market in the community. The market will be built in the near future, but for this project we will only be experimenting with materials to develop alternative designs for things necessary in a marketplace. The 25-room supermercado will need a funding source, which we hope our prototypes will help generate upon completion. Our role in this project is to develop aesthetically pleasing, structurally sound, and economically feasible prototypes for use in the supermercado.
Problem Statement[edit | edit source]
The objective of this project is to research and develop wall and table prototypes that can be reproduced and used in a sustainably constructed market in Arroyo Norte, Dominican Republic.
Criteria[edit | edit source]
The following table of criteria was developed in a community meeting and is used to evaluate alternative solutions.
| Criteria | Constraints | Weights |
|---|---|---|
| Resistance | Prototypes must successfully pass the spray test, scratch test, and tensile strength test. | 10 |
| Marketability | The prototypes must have potential for reproduction at minimum, and potential for revenue production at best. | 9 |
| Aesthetics | The prototypes must at least be visually acceptable to the community members involved, and at best look "clean". | 9 |
| Security | The wall prototypes must look secure and be resistant to break-ins. | 9 |
| Educational Value | The prototypes must display reused materials in some way. | 9 |
| Accessibility of Materials | At least 90% of materials used in the prototypes must come from the Arroyo Norte waste station. | 9 |
| Mobility | The furniture must be movable by 2 or less people. | 8 |
| Adaptability | The prototypes shall be created with room adaptability in mind. | 7 |
| Cost | The prototypes should minimize cost where possible. The walls shall not exceed $100 USD each, and the tables shall not exceed $50 USD each. | 6 |
Literature Review[edit | edit source]
See our Literature Review for relevant research completed for this project.
Construction[edit | edit source]
Timeline[edit | edit source]
The table below outlines a timeline for Team Terrific to complete the prototypes by Thursday July 3, 2014.
| Date | Activity |
|---|---|
| Monday, June 16 | Complete Budget/Finish negotiations with practivistas |
| Tuesday, June 17 | Brainstorm Explosion/Plastic Bottle cap Mold Extravaganza |
| Wednesday, June 18 | Complete plastic research/Brainstorm Explosion #2 |
| Thursday, June 19 | Work day - Melt massive amounts of HDPE Plastic #2/Finalize caps & bottles |
| Friday, June 20 | Purchase plastic tools to mass produce plastic tiles |
| Saturday, June 21 | Finish all plastic prototypes/Finish wood chips and resin |
| Sunday, June 22 | BEACH DAY |
| Sunday, June 29 | Build on and perfect prototypes/Beauty with Mama |
| Monday, June 30 | Work on presentations |
| Thursday, July 3 | Present Projects |
Costs[edit | edit source]
The table below describes the cost to replicate our completed prototype projects. The cost table below does not include experimental materials and tools. Costs are listed in Dominican Pesos.
| Quantity | Material | Source | Project | Cost ($) DOP | Total ($) DOP |
|---|---|---|---|---|---|
| 3 | "Calentador"/Sterno cans | La Sirena | Plastic Wire | 48.41 | 145.23 |
| 1 Quart | Waterproof wood paint | Centro Ferreteria J&R | Cable spool table | 750.00 | 750.00 |
| 1 | Paintbrush (small) | Centro Ferreteria J&R | Cable spool table | 250.00 | 250.00 |
| 5 | Sandpaper (60 and 220 grit) | JV Ferreteria Cerrajeria S.R.L. | Cable spool table | 37.17 | 185.87 |
| 2 | Wood palettes | Duquesa | Earthship Bar | 150.00 | 300.00 |
| 1 bin | Plastic #2 HDPE | Duquesa | Plastic Prototypes | 200.00 | 200.00 |
| 1 gallon | Soy Cooking Oil | La Cadena | Plastic Prototypes | 418.00 | 418.00 |
| 2 | 12" Clamp | La Sirena | Plastic Prototypes | 392.00 | 784.00 |
| 1 | Transportation of duquesa materials | Duquesa | Plastic Prototypes | 500.00 | 500.00 |
| 2 | Floral snippers | Ferreteria U&P | Plastic Prototypes | 350.00 | 700.00 |
| 2 | 4" clamps | Ferreteria U&P | Plastic Prototypes | 275.00 | 550.00 |
| 3 | Scissors | La Sirena | Plastic Prototypes | 100.00 | 300.00 |
| 1 | Propane-powered grill | Mexico/Duarte Blender Repair Shop | Plastic Prototypes | 1,800 | 1,800 |
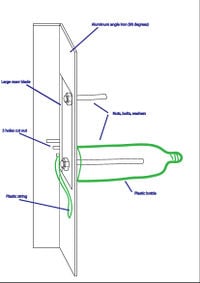
| 1 | Box cutter | La Sirena | Plastic Bottle Ripper | 63.33 | 63.33 |
| Total Cost | $6,946.43 | ||||
Completed Prototypes[edit | edit source]
This section illustrates a step-by-step tutorial on how to replicate the prototypes we created for the Arroyo Norte sustainable market.
Glass Bottle Wall[edit | edit source]
Materials needed:
- 100 Jumbo Presidente bottles
- earthen mortar: clay, sand, water
- shovel
- bucket
- level
- rebar
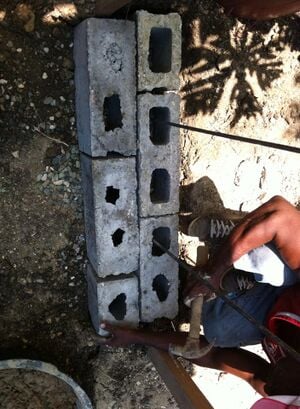
- eco-blocks
- gravel
- plastering trowel
- earthen plaster: cal putty, sawdust, sifter/ sifted sand, water
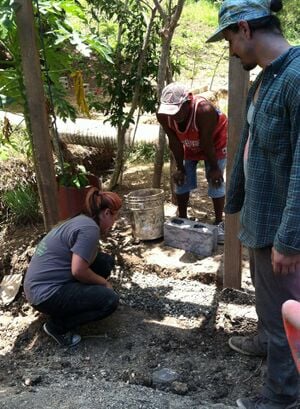
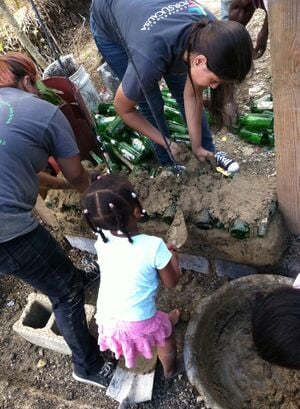
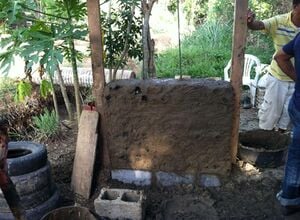
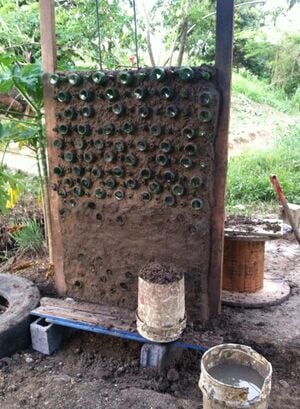
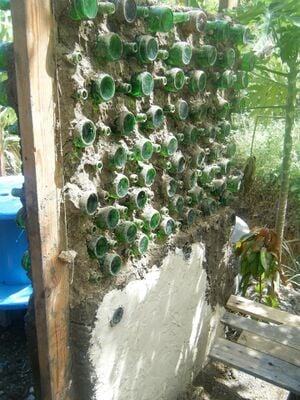
Lay earthen mortar, and add rows of large Presidente bottles. Each bottle was laid facing the opposite direction as the one next to it. As you move up the wall, take the time to pack the earth tightly around each bottle. Use a piece of wood on each side to check that each row is level before adding the next row of bottles.
Plaster over the wall with earthen plaster. To make earthen plaster, soak cal (lime) in a barrel of water for 24 hours (Note: cal soaked water is nutrient-rich and can be poured into soil, but make sure to wash cal off your hands within 1 hour, or it will irritate your skin). Then, pour out the water (into your plants), and add equal parts of lime putty and sifted sand to a large bucket, plus 2 handfuls of sawdust. Mix and apply to wall surface with a trowel. Once dry, the plaster and any remaining cracks can be sandpapered smooth to assist in weatherproofing the wall.
Plastic #2 Tiles: Melting In a Sandwich Press[edit | edit source]
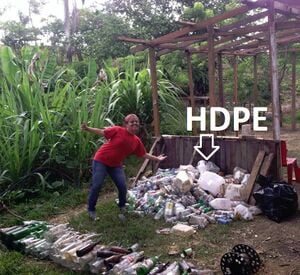
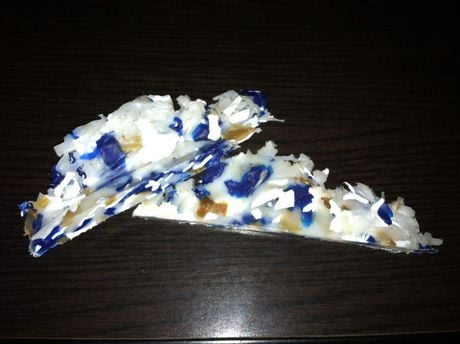
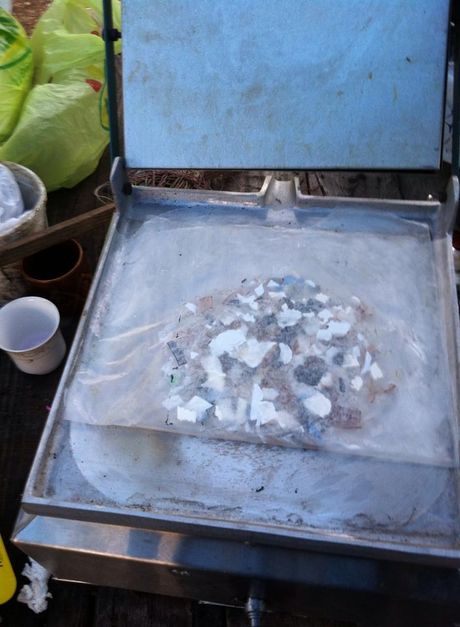
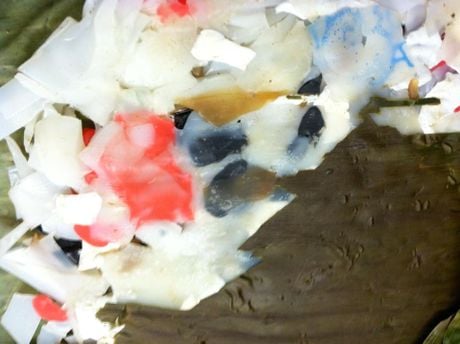
These tiles were melted using a sandwich grill to melt HDPE Plastic #2, which was taken from the waste stream in Arroyo Norte.
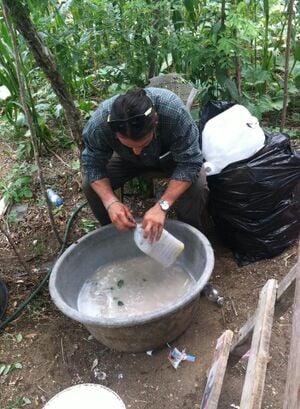
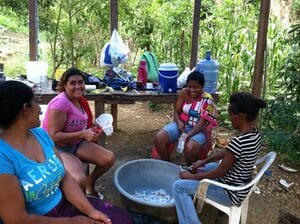
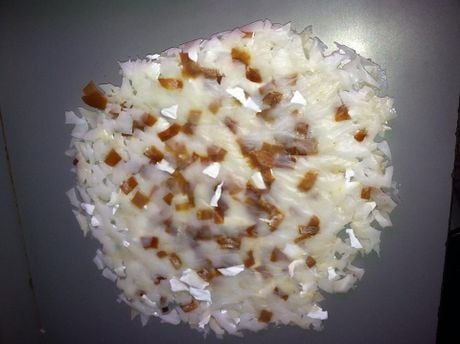
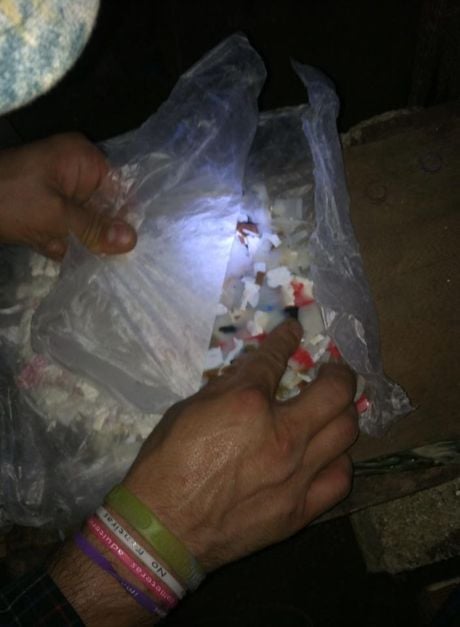
Thoroughly clean the HDPE plastic with a brillo pad, or to be really appropriate, you can use any abrasive material laying around like grass, plastic bags, etc. The point here is to have no dirt, residue, or discolor on the plastic because it will not be aesthetically pleasing after it melts.
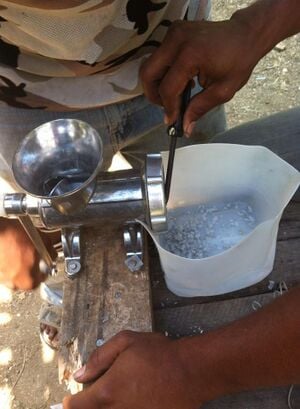
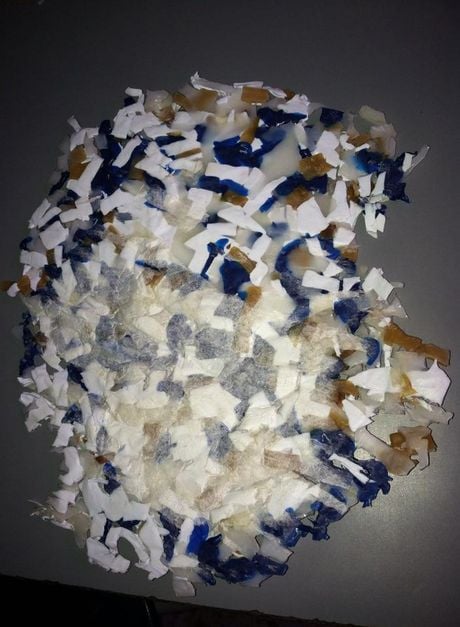
Cut the plastic: We experimented cutting plastic with a meat grinder to make even smaller pieces of plastic. Results: The final product was not worth the additional work of grinding plastic with the meat grinder. You need a very sturdy meat grinder to grind the plastic, which ours was not. Also, it could potentially work more efficiently if you connected the crank apparatus to a DC motor and a car battery.
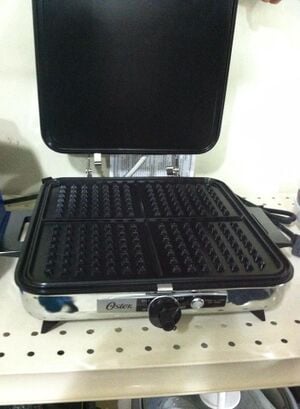
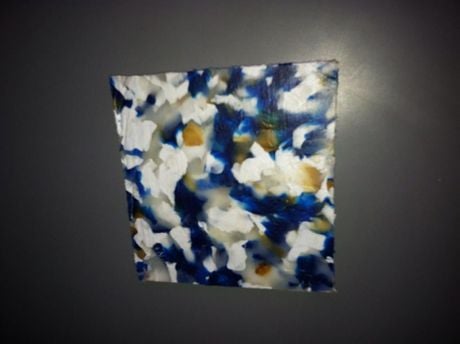
Melt the plastic: We experimented with melting plastic in a standard sized sandwich maker like this. First, we placed wax paper on the sandwich grill, placed plastic confetti on the paper, and placed a second piece of wax paper on top of the plastic confetti. Close sandwich grill and heat it up to 350 degrees F to melt the plastic. Results: The tiles were successful, but fairly thin. Also, wax paper melted to the plastic. Parchment paper is ideal for this method, and can be found at La Sirena (Jose Contreras) in Santo Domingo, Dominican Republic.
Melt the plastic: We purchased a propane powered large grill with a flat surface to melt larger pieces of tile in the same way as Step 5. Results: At the lowest setting, which is around 325 degrees F, we successfully melted 1/4" thick tiles of plastic without melting the wax paper.
Experimental Outcomes[edit | edit source]
The following documents explain experimental outcomes of our experiences melting HDPE plastic using an electric and a propane-powered sandwich press.
Electric Sandwich Grill
The following experiments document our experiences melting small pieces of HDPE #2 plastic into tiles using an electric sandwich grill and wax paper.
Propane Grill
The following experiments were performed using a large 12" x 12" flat paneled sandwich grill powered by propane.
Plastic #2 Molds: Melting in cooking oil[edit | edit source]
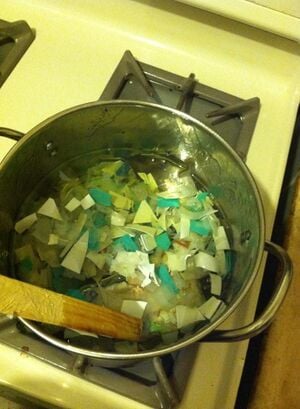
CAUTION: Melted plastic is extremely hot, and takes hours to cool. Wear safety gloves and wooden tools when working with melted plastic and eye protection around hot cooking oil.
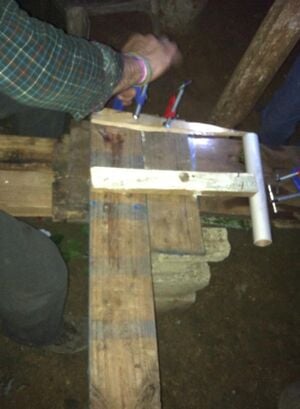
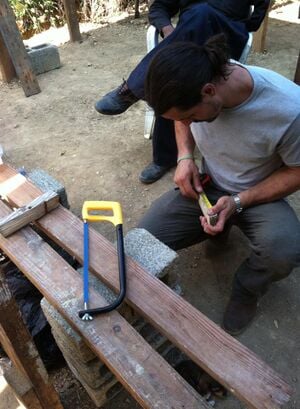
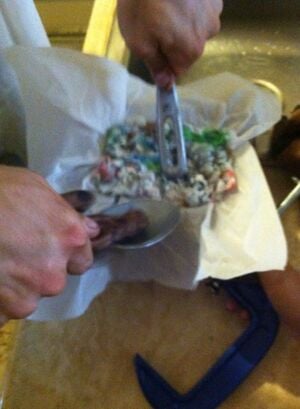
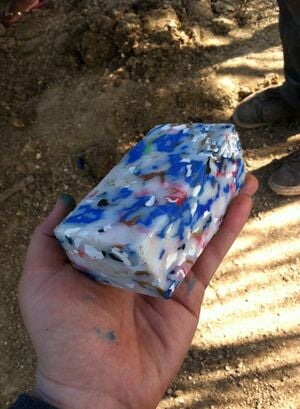
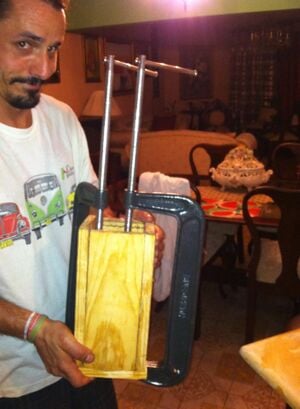
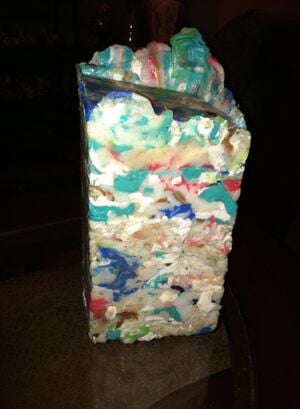
Let the plastic cool for 4 hours, then remove from clamps and mold. If all goes well, you should have a beautiful plastic brick. Note: Some edges may need to be cut with a saw to make clean lines. This is a result of too little pressure applied to the plastic during the cooling period.
Let the plastic cool for 4 hours, then remove from clamps and mold. If all goes well, you should have a beautiful plastic brick. Note: Some edges may need to be cut with a saw to make clean lines. This is a result of too little pressure applied to the plastic during the cooling period.
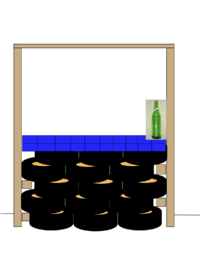
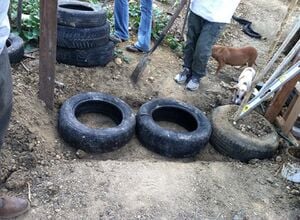
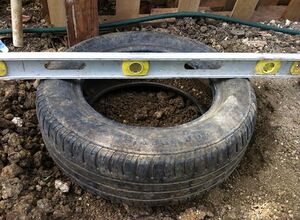
Earthship Bar[edit | edit source]
Materials needed:
- shovel
- used tires
- metal malette
- salvaged rebar/ pvc pipe
- earth (can be any mixture of dirt, sand, clay, etc.)
- level
- earthen plaster: lime, cement, sifter/ sifted sand, water, sawdust
- plastering trowel
- palette wood
- table top: gesso, portland cement, water, cabulla fiber, scrap rebar/metal sticks, scrap billboard material
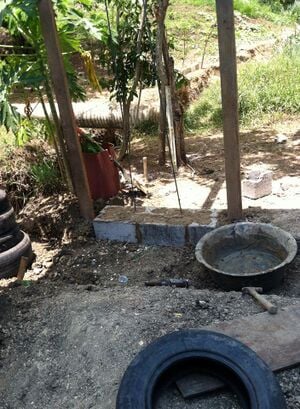
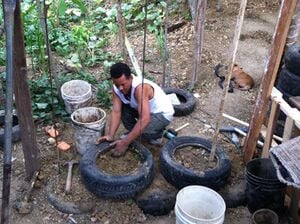
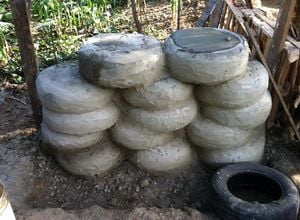
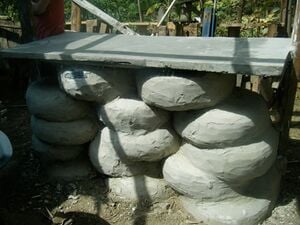
Plaster the tires with sawdust plaster. Ingredients: 22 gallons of sawdust, 2 gallons of lime, 16 and 1/2 gallons of sifted sand, 1 bag of cement, and roughly 20-22 gallons of water. This produces roughly 40 gallons of plaster. (This plaster was created by the Las Malvinas ecoladrillo schoolroom Practivistas team.)
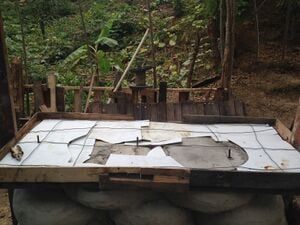
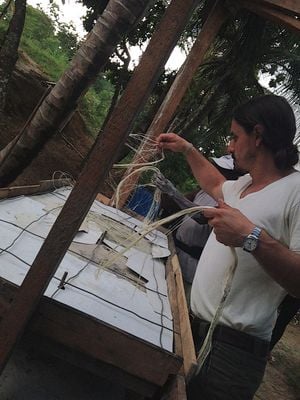
Make a frame out of scrap wood. We used the billboard material so that the gesso would not fall through when we poured it in. To make bar top mixture: add equal parts of portland cement and white gesso powders to a bucket of water. Pile powder onto the water until you see a little island form on top...mix together with hands and once it reaches a thicker texture, quickly pour into the mold, a layer at a time.
Plastic Bottle Ripper[edit | edit source]
Maintenance[edit | edit source]
Schedule[edit | edit source]
Instructions[edit | edit source]
Conclusion[edit | edit source]
Testing Results[edit | edit source]
Glass Bottle Wall
- When the earthen mortar mixture is cracking, add more sand. When the earthen mortar is crumbling, add more clay.
- The earthen mortar mixture should be on the dryer side when applying.
Melting HDPE Plastic #2 in Electric sandwich grill
- Successfully melted thin plastic pancakes
- Plastic pancakes need to be folded while hot and repressed to create clean edges, or have edges cut off after cooled.
- Cook time: ~10 minutes
Melting HDPE #2 Plastic in Large Propane-powered sandwich grill
- Successfully melted thicker, larger plastic pancakes
- Plastic pancakes need additional work to create clean edges
- Cook time: ~15 minutes
Melting HDPE #2 Plastic in Parchment Paper VS Banana Leaf
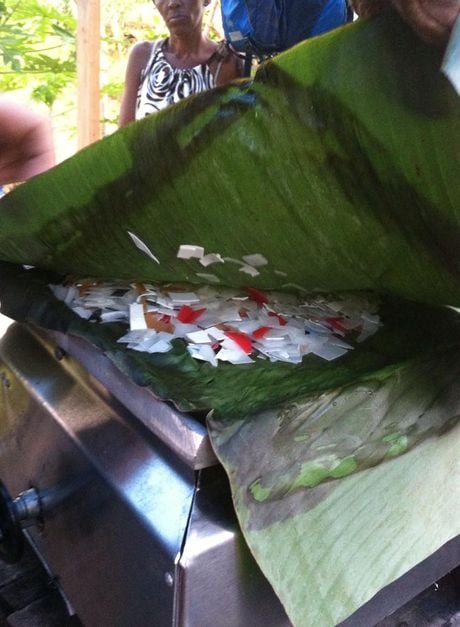
- Parchment paper: Best material for melting plastic in sandwich grills because it does not stick, burn, or leave any impurities behind in the end result.
- Banana Leaf: Successfully melted large plastic pancakes with banana leaf. However, the banana leaf stuck to some parts of the plastic surface (~10%), which takes additional work to remove once cooled.
- Wax paper: Successfully melted one 1 out of 10 attempted thin plastic tiles with wax paper, but it melts, burns, and sticks to the plastic tiles most of the time. We were able to make it work at a very consistent temperature in the electric sandwich grill, but it's not ideal.
Melting HDPE #2 Plastic in Soy Oil on the Stovetop
- Melting in oil kept a consistent temperature, but left the pressed block very oily after it was cooled.
- Plastic pieces that were cut small heated to temperature quicker than re-used previously melted blocks of plastic.
- Cooking time: 15 minutes once oil is up to temperature
- This method seems to have the most potential for reproduction of melted plastic materials because it is efficient, quick, and easy.
- In Arroyo Norte: It would be possible to cook plastic with a propane-powered stove, but I would not suggest this method over an open-fire because it's important to keep a consistent temperature.
Molding HDPE #2 Plastic Bricks
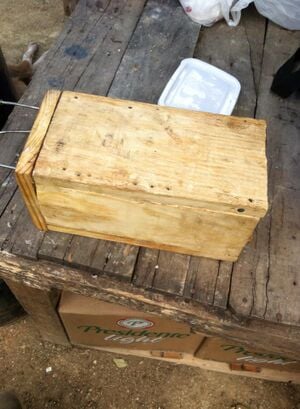
- Successfully molded 2 solid bricks of plastic using a small wooden mold with a removable top, and clamps to keep pressure on the plastic while it cooled.
- Pressure was not enough with 2 clamps, so it had some bumpy edges. More pressure on the cooling brick would make cleaner-looking bricks that don't need to be cut smooth once cooled.
Molding HDPE #2 Plastic Blocks
- Successfully molded 3 large blocks of plastic using a large wooden mold with a removable top.
- The removable top fell into the mold, allowing any amount of plastic to be pressured evenly inside it
- This method can be very efficient for making plastic tiles, all you have to do is get the cooled block on a band saw and cut 20 tiles out of one block of plastic.
- This method has a lot of potential for the next steps of developing furniture for the Arroyo Norte marketplace.
Discussion[edit | edit source]
Lessons Learned[edit | edit source]
Next Steps[edit | edit source]
Glass Bottle Wall
- Plaster over the earthen mortar once the wall is completely dry.
- Mosquito-proof the completed wall. For example: Fill bottles with water and wine corks to seal the moisture and to illuminate the space more.
HDPE Plastic Prototypes
- Energy analysis of melting plastic in oil on the stovetop vs. propane sandwich press vs. electric sandwich press
- Find the most efficient way for community members in Arroyo Norte to melt large amounts of plastic safely (temperature cannot exceed 350 degrees F)
- Make a tall mold out of wood or metal to make table legs out of HDPE molded plastic. Mold must withstand the pressure placed on the cooling plastic.
- Experiment with the pressure used on plastic while it's cooling: does the small surface area really decrease the need for higher pressure (psi) if it's as tall as a table leg?
- Find a way to use reclaimed/repurposed materials from the waste stream for the molds
Troubleshooting[edit | edit source]
Team[edit | edit source]

Brought to you by Team Terrific, Practivistas 2014
References[edit | edit source]
Peer reviewed journal article[edit | edit source]
This work became a peer reviewed journal article:
- Title: An Analysis of Recycling High Density Polyethylene with Limited Resources
- Authors: Isabel Noemi Contreras, Jenna Bader, Patricia DuRant, Lonny Grafman
- DOI: https://doi.org/10.24908/ijsle.v13i2.11621
- Published: Oct 29, 2018

