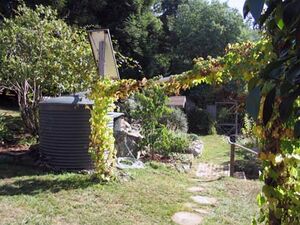
Cal Poly Humboldt's Campus Center for Appropriate Technology (CCAT) was started in 1978 and has been going strong since. With three live in students per year, and 18 student employees, CCAT is a "live in demonstration home" where the students of Cal Poly Humboldt and the local community actively partake in creating and maintaining a home in a sustainable way, by incorporating many aspects of Appropriate Technology.
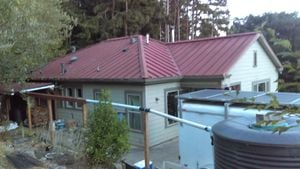
CCAT is in need of a reinstallation of their rainwater catchment system. A system had been installed at the original Buck house, but due to construction and relocation, it was dismantled. With many supplies ready for reuse, and the advantage of hindsight, it is now time to reinstall an efficient and aesthetically pleasing rainwater catchment system. Also, the CCAT house has just recently (January 2009) finished installing a new metal roof that will work wonderfully for a rainwater catchment system.
Please skip ahead to #Update 2014 for the most current content.
What an Opportunity![edit | edit source]
With CCAT striving to be a live-in demonstration of a sustainable home, and being located in coastal Humboldt County, California, it is just waiting for the water flowing out of the downspout to be redirected into a storage tank for later use for watering in the garden, the greenhouse that is being built, and any other needs except for drinking.
Two students from Spring 2008 ENGR 305 began working on the rainwater catchment system, but it was not completed. One student, Lauren, in Spring 2009 ENGR 305 class continued the work on this project. Once the plan was laid out, the complete construction of the system took place. The opportunity to learn about the application and installation of this type of system will be further spread to those who visit CCAT. There, people will be able to learn directly about how the system works through interpretive signs and other literature. As such, this project will benefit not only those who live in CCAT, but anyone who visits the demonstration home, as well as through this site for more information.
This project was then updated again in 2014!
Criteria[edit | edit source]
Aesthetic
- Because CCAT is a demonstration home, the system should look well built and maintained for the public. It must also be have a non-intrusive design, and be out of the way.
Budget
- Initial cost should be reasonable for this type of system, especially since the main tank is already purchased. Hopefully, many materials will be found that are not in use, but can be reused, so as to help keep the expense as low as possible.
Durability
- The system needs to be able to withstand the weight of the water in the storage tank when it is full, and the tank should be secured so it won't blow away when it is empty. Care must be taken to ensure the tank will be stable when it is full and empty. It must be made well so that there will be little maintenance required later on, and it will be able to last a good amount of time for the CCAT house.
Educational Value
- The system must have some educational value for the public. Again because of the CCAT house being an educational demonstration home, the system will have an education poster that explains the system as a whole, and how other community members may pursue their own construction if desired.
Efficiency
- The retained water needs to be easily accessible for daily agricultural use. The tank needs to be sited in such a way that creates the maximum amount of head to decrease the amount of pumping necessary to move the water uphill.
Functional Design
- It has to work. The tank must not leak, everything must work and be able to be maintained easily. The tank must be accessible and out of the way. The filter system must work, and the overflow should be directed to a useful area, while the water stored is able to be accessed easily as well.
Purity of Water
- The first flush system must also work well by rejecting the first amount of rainwater, keeping it free of dust, debris, bugs, and dirt, so that the water is as pure as possible.
CCAT approval
- The rainwater catchment system is designed especially for CCAT's water needs. It is important to make it to help the house and surrounding area, while being able to expand on the system and make changes as needed later on, as they arise.
Design[edit | edit source]
Tank[edit | edit source]
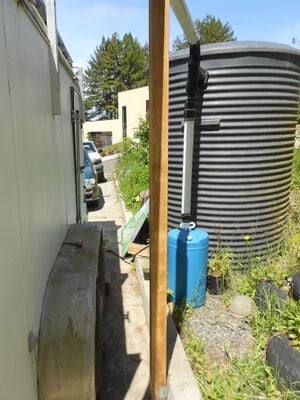
CCAT has a tank already which will be used for this project. It is 7 feet tall, and 5 feet in diameter. This results in about 1500 gallons, which weighs about 12000lbs. when filled. We will need to excavate an area were the tank is to be placed. Originally, we thought of putting a 6ft x 6ft x 8in concrete pad down to support the tank. However, it was decided that for tis project we would not use concrete. Instead, I dug down about 8" in the area where the tank would be placed. Then I compacted the Earth down, put a layer of bricks (approximately 4" thick)on top, and then about 2" of gravel on the top of the bricks to support the tank.
There was a good deal of debate and concern over where the best place for the tanks location would be. It was finally decided that the best location would be outside the main entrance of the CCAT home, near the bike rack, and directly next to the tires. Though this spot is obvious to the public, it is not in the way of any foreseeable future projects, and will attract attention to the project and heighten peoples awareness of rainwater harvesting. The tank is up high, and it will be easy to attach a hose to it, so that access to the water for gardening purposes is very accessible. Th tank does not get any shading in its location, which is often considered a more ideal situation to help prevent heating, and additional leaching of chemicals through the plastic.
First Flush Catchment System[edit | edit source]
After a few different attempts to create a first flush, I found a system that has seemed to work well so far.
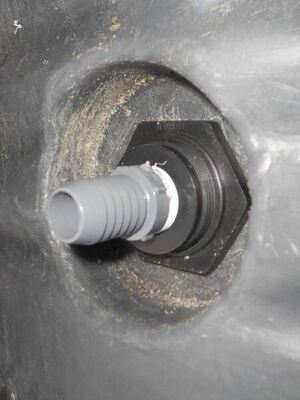
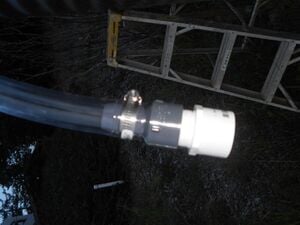
The collected rainwater will be gathered in the roof gutter and then pass through a small leaf catcher that is meant to separate the larger debris from going into the piping. Then the PVC piping will carry the water down towards the tank. Then it will reach the first flush device, where the water will fill a small 15 gallon tank that I purchased at Resale Lumber Products. The water will flow into the small tank until it fills. Then there is a small racquetball that is held up by a small piece of wire to keep it from falling into the tank. When it becomes full, the ball will move up through the clear piping piece. Then there is a ABS piece that converts the piping from 3" to 2" where the ball will fill up this smaller space. The water will then continue to flow and be diverted into the large 1500 gallon tank.
This will allow any smaller leaves, bird droppings, and general sediment that may have built up on the roof to be initially diverted into this flush system, so that the clean rainwater can be stored in the large tank.
To size the amount of water that should be used for a first flush: It is estimated that for every 1000 square feet of collection surface, the first flush should divert a minimum of 10 gallons.(Kinkade- Levario) This is a standard rule of thumb that usually works. For this roof the surface area was approximately 49' X 32', equaling 1568 ft2, so a 15 gallon tank seemed most appropriate.
-
Fig 1: This is the top view of the 15 gallon tank used for first flush
-
Fig 2: 15 gallon tank with hose bib attachment at bottom
-
Fig 3: connection up from tank to piping
-
Fig 4: racquetball in place that will rise as water fills the tank
-
Fig 5: this is the piping that the ball will fill into, then divert to the large tank
-
Fig 6: This is the complete view of the first flush
Delivery System[edit | edit source]
The Delivery system is simple, a length of 3" PVC pipe directed from the Roof Washer to the First Water Catchment System. I used some ABS piping pieces for connectors also(these are the black ones pictured). I put up a 4" X 4" cedar post into the ground next to the cement curb driveway to keep extra support for the piping.
-
Fig 1: This is the cedar post to help support the piping
-
Fig 2: This is part of the process of putting the post into the cement- tightening
-
Fig 3: This is the post put in place into the cement
-
Fig 4: Here you can see the piping coming out from leaf catcher towards tank
Roof Washer[edit | edit source]
The roof washer is mounted to small pieces of wood attached to the side of the housing. I used a small recycled detergent bucket and cut it at an angle, then placed a screen on top of it. To secure the screen I put four small hitch pins into the sides so that it would be possible to remove. This is meant to keep the larger debris out of the system. Then I put in the 3" PVC coming out of it which would bring the water down towards the first flush.
-
Fig 1:This is the original gutter siding that later had a downspout put into it for the water to come out
-
Fig 2:This is the final product
Budget[edit | edit source]
Budget: This is the budget for what was spent on this project.
| Qty | Material Needed | Source | Cost | Total cost | |
|---|---|---|---|---|---|
| 1 | 1500 gallon Tank | CCAT | Already available $0 | $0 | |
| 1 | 20 ft. 3" PVC | Piersons Hardware | Donated $0 | $0 | |
| 1/3 yard | #2 Rock | Wes Green Landscape Materials | $40.00/yard | $13.33 | |
| 1 | 15 gallon bucket | Resale Lumber | $25.00 | $25.00 | |
| 2 ft. | 1/8" Screen filter | Hensel's ACE Hardware | $2.00/ft. | $6.62 | |
| 1 | Hose bib attachment for 15 gallon tank | Resale Lumber Products | $18.90 | $18.90 | |
| 1/2 ft. | Tube Spa Piping | Hensel's ACE Hardware | $4.49/ft. | $2.25 | |
| 1 | Silicone Caulk | Hensel's ACE Hardware | $4.99 | $4.99 | |
| 1 | Plastic Funnel | Hensel's ACE Hardware | $7.49 | $7.49 | |
| 1 | 3" Bulk head fitting | ACE Hardware- Thrifty | $30.50 | $30.50 | |
| 2 | 5x7 tin shingle | Piersons | $.39 | $.78 | |
| 1 | ABS 90 degree elbow | Piersons | $5.75 | $5.75 | |
| 1 | masonry bit | Piersons | $4.99 | $4.99 | |
| 2 | Shelf and Rod bracket | Piersons | $2.99 | $5.98 | |
| 1 | circle cutter | Piersons | $10.99 | $10.99 | |
| 1 | copper coi | Piersons | $2.89 | $2.89 | |
| 1 | no-kink faucet 3/4in Male IPS | Piersons | $5.95 | $5.95 | |
| 1 | PVC bushing | Piersons | $1.49 | $1.49 | |
| 1 | fasteners bolts screws and nuts | Piersons | $1.69 | $1.69 | |
| 1 | ABS 3" adapter | Piersons | $4.19 | $4.19 | |
| 1 | Strong-tie post cap/base | Piersons | $3.34 | $3.34 | |
| 1 | Bushing PVC 1.25M/4FPT | Piersons | $2.79 | $2.79 | |
| 1 | power pro 10x 3 1/2 | Piersons | $4.49 | $4.49 | |
| 1 | ABS knockout closet flange | Piersons | $2.75 | $2.75 | |
| 1 | Front Elbow Galvnz | Piersons | $1.99 | $1.99 | |
| 1 | PVC Cement | Piersons | $3.99 | $3.99 | |
| 1 | ABS 3" cleanout adapter | Piersons | $3.69 | $3.69 | |
| 1 | ABS 90 degree elbow | Piersons | $3.99 | $3.99 | |
| 1 | flexible coupling 3x3 | Piersons | $6.99 | $6.99 | |
| 1 | flexible coupling 3x 1 1/2 | Piersons | $7.49 | $7.49 | |
| 1 | teflon tape | Piersons | $.99 | $.99 | |
| 2 | fasteners bolts screw and nuts | Piersons | $1.69 | $3.38 | |
| 10 | screws | Piersons | $.12 | $1.20 | |
| 10 | screws | Piersons | $.19 | $1.90 | |
| 1 | 4x4 cedar post | Piersons | $29.43 | $29.43 | |
| 1 | ABS coupling | West Coast Plumbing | $2.49 | $2.49 | |
| 1 | ABS sanitary tee | West Coast Plumbing | $7.89 | $7.89 | |
| 3 | ABS coupling 3x2 | West Coast Plumbing | $3.95 | $11.85 | |
| 1 | ABS pipe | West Coast Plumbing | $.79 | $.79 | |
| 1 | ABS pipe | West Coast Plumbing | $1.79 | $1.79 | |
| 2/2 | Hitch pins | Hensels ACE | $.19/.23 | $.84 | |
| 1 | approximate total tax | all stores combined | $19.96 | $19.96 | Total: $281.79 |
Lessons Learned[edit | edit source]
Through out this project I made some unnecessary mistakes and came across issues that wasted time and money, but I guess that is all part of the learning process. To begin with, I had very little experience building and none with rainwater catchment so I found myself second guessing my choices all the way through. The location of the tank was the first obstacle that I encountered, and it was finally decided that it should be put up higher so it could access more locations for the water use. I went through a couple of different designs on the first flush system, and I feel comfortable with the end result of what was shown here, but I had ended up getting some materials in the meantime that went unused. This included extra piping that was donated by Piersons, and later returned, as well as a bucket and funnel that was going to be used for an earlier design version of the the first flush that ended up going to waste. Hopefully it will find a purpose and use in something else in the future! Lonny, my instructor ended up giving me a contact of his- Cody- who proved to be incredibly helpful in both the design and construction. I feel like it was important to have someone else to work with on a project like this, and would recommend others to have another head and pair of hands to help out! Thanks so much for all your help Cody!
Plastic Appropriateness: I used a lot of plastic through this project, which is an unsustainable material, but I could not find anything else that would work as well and was available and within cost.
Aesthetics: Due to time constraints near the end of the project, and my own time management problems, I was not able to make it as aesthetically pleasing as I had originally hoped. I still want to paint the piping and the large catchment tank. Then I would be interested in putting some grape vines or peas along the piping, as the older picture shows from the previous catchment system. I think that would be wonderful and help to make it more pleasing to the eye.
Conclusions[edit | edit source]
I really enjoyed doing this project, even though it was incredibly frustrating at times. However, I feel that the project has a good end result and will work well when the rains start up again next season, providing CCAT with an additional appropriate and sustainable resource for water. I would recommend everyone to look at their own local weather conditions and see if a rainwater catchment system may be appropriate for your needs!
I also want to thank Lonny and Cody for all their help with this project. They were both essential elements to it, and without Cody I would have had a very difficult time making it as sturdy as it turned out! Infinite thanks to you both.
Update October 2013[edit | edit source]
In October of 2013, Two Humboldt State engineering 308 students Dylan and Christian went out to investigate the workings of the CCAT rainwater catchment system. We found the system to be standing in good working order. The first thing you come across when you approach the site is the bright Rainwater catchment explanation board as seen below. It is important for the system to have this example and explanation of how this system works and how the water is used. The images of the board are presented below.
-
260px
-
260px
-
260px
-
260px
-
260px
-
260px
-
260px
TANK SYSTEM
The CCAT system Tank is 7 feet tall with a 5 feet diameter. The total capacity for this tank model is 1500 gallons when full. This is the systems original tank. We spoke with a CCAT resident named Cassandra about the tank and the complete system. Cassandra informed us that the residents at the CCAT house believed that the 1500 gallon tank was actually to small for the system. Cassandra says the reasoning behind the need for a larger tank is because of the large amounts of rainfall in Humboldt County throughout the year. It was suggested that the tank be increased by at least 500 gallons to 2000 gallons when full.
-
220px
-
The Catchment Process
The rainwater flows from the rain gutters that circumference the house. The roof of the house is covered with metal sheets that help the newly fallen rainwater collect in the gutters. This roof is angled to assist in the direction the rainwater will flow. Solar panels are placed over the metal sheets that cover the roof. These solar panels are place at least 3" inches above the metal sheets to allow the rainwater to flow underneath the panels and into the collection gutters.
-
200px
-
200px
-
250px
Screening System
Once the rainwater collects in the gutters it flows at an angle around the circumference of the CCAT house. The gutters are place at an angle to provide the system with the best rainwater flow current when the collection occurs. The rainwater flows to two run off points. The first point is the first flush system over near the tank collection point. The second place is a side outlet for the overflow of water to flow in a seperate gutter and into the CCAT side yard for plant watering. The water leaves the roof gutters and is put through a screening system when it goes through the first flush. The screening system is a metal mesh screen that is responsible for cleaning out any undesirables in the water system such as leaves, pine needles, dirt, bugs, ext. The metal mesh screen is housed in a plastic recycling bucket. The screen system is seen below.
-
260px
-
260px
The First Flush System
Once the water is processed through the screen system it is then filtered across the driveway into the first flush system. The first flush system remains a 15 gallon bucket as originally constructed. The 15 gallon bucket is filled with the first 15 gallons of rainwater that falls and is collected. This allows any dirty water or undesirables that are left after the screening to be discarded before the water is stored in its storage tank. Once the 15 gallon bucket if filled a small ball is filtered up a PVC pipe and the water pressure cuts off the entrance into the first flush 15 gallon tank that is now full. The rainwater then proceeds to its final storage destination in the 1500 gallon holding tank.
-
260px
-
260px
-
260px
System Issues
While this system does work well, Cassandra(CCAT Resident) did explain to us that there is much to be improved on this system. She explained how there are low points in some of the gutters due to the age of the gutters and the amount of rainfall that has been collected within those gutters. In addition she also explained that there is a need for a second run off to a separate tank or a need to have a larger tank with a larger flow system to handle the large amounts of rainwater. The images below are where the lower points are located on the gutter system. Once these are repaired the CCAT house can approach the idea of altering the flow to another tank or acquiring a larger holding tank.
-
260px
-
260px
]]
Update 2014[edit | edit source]
Cal Poly Humboldt's Campus Center for Appropriate Technology (CCAT) was founded in 1978, a student run home maintained and run in a sustainable fashion, by the students of Humboldt State and members of the surrounding community. CCAT incorporates a wide variety of Appropriate Technologies. CCAT located near the redwood forest of Arcata, houses three full time students and employs 18 students part time.
2014 Problem statement[edit | edit source]
CCAT is in need of a more convenient and efficient rainwater catchment system than what is currently in place. Water pressure is also lower than expected. A current system is in place and collects a large amount of water, being used for drip irrigation and is severely under-utilized. The CCAT house has relatively new metal roofs and rain gutters (2009), which can't be altered so improvements must be made to the tank itself, inlets, or outlets.
2014 Project Evaluation Criteria[edit | edit source]
The following criteria will be used to assess the success of this project. These criteria were chosen based on the needs of CCAT as well as the student working to improve the catchment system. The scale (1-10) represents the importance level of meeting the constraint of each listed criteria.
| Criteria | Constraints | Weight (1-10) |
|---|---|---|
| Budget | Project improvements have ample funding. | 1 |
| Educational Aspect | Currently serves as educational with a sign that explains rainwater catchment and its benefits. (sign can be better located) | 4 |
| Maintainability | Must be easy to clean the filter and remove debris, no more than 1 hour of maintenance per month. (Current filter rarely gets cleaned, and a more self cleaning filter would serve well.) | 6 |
| Aesthetics | Changes must be pleasing to the eye and look professional. (Current conditions of piping from gutter, release valve, as well as filtration can be improved upon. | 6 |
| Usability | Must sufficiently water the garden on site, soon to be terraced hill side, and have the ability to be used elsewhere. (with use of hose attachment) High turnover rate in staff means the system directions need to be visibly apparent, or none needed to use. A simple design is key. | 9 |
| Functionality | Successfully captures and stores rainwater, is able to have enough water pressure in order to divert water from tank to a possible uphill location. | 10 |
2014 Literature Review[edit | edit source]
This is a review of the available literature pertinent to the comprehensive rainwater catchment system at CCAT.
Rainwater Catchment basics - Overview[edit | edit source]
Rainwater catchment uses water runoff, often by rooftops, in order to collect and store water for later use. Most widely used in places where water is not centralized. This technique of water catchment uses the water from a surface passing through a downspout to a filtration system. The filtration is usually composed of a strainer or mesh that collects large debris and keeps it from entering the system. The strainer must be cleaned periodically so that it is not clogged. In some larger models the water then is funneled to a first flush system in which debris is dropped out of the water that collects in the tank, this allows finer particulate matter from the system to be purified before entering a holding tank. Once the first flush is full the water is diverted to the main tank where it is kept until use. This tank is equipped with a spout or way to get the water to its intended location for use, as well as an overflow outlet so that the system does not back up. Over time the tank must be maintained and cleaned in order to have a properly working system. Water quality can be tested and is often improved with the use of a bottom bio-layer which can form naturally in the bottom of the tank.[1]
CCAT Rainwater concerns[edit | edit source]
Since the rainwater catchment system is already up and running at CCAT, the problems in focus are those moving forward with the improvement of the rainwater tank. Concerns topping the priority list include allocation of rainwater in the surrounding area of CCAT, gutter method of collection, pressure of water from the tank, and export water valve..[2]
Types of Rainwater Catchment[edit | edit source]
There are multiple types of rainwater catchment systems available, ranging in price and use practicality. The most common types include rainwater barrels, multiple rainwater barrels, and large scale tanks.[3]
Single Barrel Catchment[edit | edit source]
Single barrel catchment is a relatively simple method that utilizes a roof with gutters and under any downspout a single barrel is placed to collect water. The barrel can be designed with a simple top filter to catch any varying level of sizable debris, however this method lacks the luxuries of the larger catchment systems. Unlike other systems, this has no settling tank or first flush for particulate matter to settle out of the stored water. This system has a valve in which water can be gathered from, as well as a overflow spout where excess water can flow freely.,[4]
Multiple Barrel Catchment[edit | edit source]
Multiple barrel catchment is also a relatively simple system in which, like the single barrel catchment, a barrel is placed below a downspout to collect water however multiple barrels, depending on the desired amount of water are connected in a system using PVC piping near the bottom of the barrels. This allows the barrels to fill and drain at the same rate. This system also includes a valve on one or multiple barrels in which a hose or appliance can be attached and diverted to a desired location. This method also can use a filter to catch debris, multiple tanks also act as a settling tank, where one tank collects a majority of particulate matter leaving those further away from initial catch barrel cleaner.[5],
Rainwater Tank with First Flush[edit | edit source]
A large rainwater tank is often used in this system, in which water from a roof is diverted through a basic filtration system. This system usually consists of a mesh filter over a bucket which doubles as a sediment drop out or settling tank. After passing through this tank water heads through piping to a first flush system to further purify the water entering the holding tank. Particulate matter, if any settles here and does not continue to the holding tank. After the first flush is full, the water starts to fill the tank where it is stored until use. This system uses a valve to divert water via hose to its desired location. Water can be turned on and off through a multiple valve system in order to prevent leakage. This system can also use a motor in order to pressurize the water exiting the tank, or rely on the water wanting to exit the tank as pressure.[6],
2014 Construction[edit | edit source]
The construction of an efficient catchment device and transport to the location of the 1500 gal store. This was first done by creating a downspout off of the lowest point on the gutter surrounding CCAT.
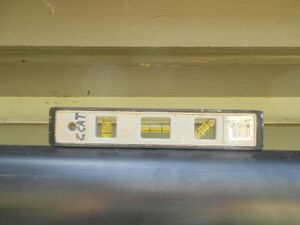
Then a measurement of minimal slope to connect the existing 3"pipe leading to the tank, to the new downspout location, 19' from the current location. The bucket used was measured and then placed <1" below the new downspout to give the angle of 8 degree slope to get maximum water collection potential.
8 degree slope
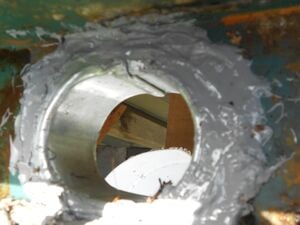
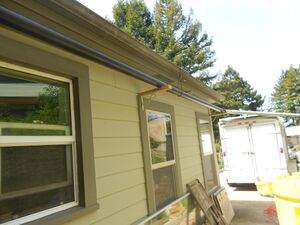
The bucket was retrofitted with a 3.15" hole to hold the new pipe surrounded by a coupling, using a drill bit. The bucket was then measured at a 60 degree angle and cut in order to yield best self cleaning results in the given space. The Hole was fitted with a 3" PVC coupling and then filled with silicone glue and PVC cement to secure and waterproof the new catchment bucket below the downspout. A Distance of 11" from house wall was measured to the center of bottom of gutter, so a 2"x4" was cut to 2, 15" lengths in order to be secured to the decorative L braces, to support the 3" PCV pipe in line with the 8 degree pipe slope. (photo) The 3" PCV pipe was suspended from the gutter in line with the 8 degree slope. The braces were secured to the CCAT wall with 2.5" wood screws, in line to support the 3"PCV pipe at its desired 8 degree angle.
rope is holding pipe at desired angle
The new pipe of 19' was conjoined at 10' using a 3" coupling. This was connected to the old pipe (going to the tank) using a 22 degree angle elbow. The pcv pipes were all joined (at every break) with PVC cement (photo) This was connected to the retrofitted catchment bucket, using PVC cement.(photo) 3" PCV was attached using plumbers tape (metal) to the 2 wood supports leading to the catchment bucket. (photo) The old downspout was removed and then sealed using a recycled piece of metal and gutter glue, cocking.(photo)
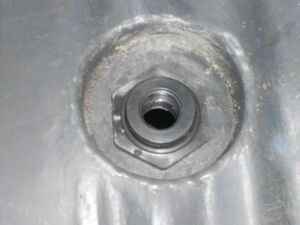
male male adapt
This was then matched other the other side of the 1" spa tubing.
stained 4x4 support
2014 Timeline[edit | edit source]
The following is a table of the tasks and dates the tasks were completed
| Estimated Date | Task | Completed |
|---|---|---|
| 3/20/14 | Measurements taken | 3/20/14 |
| 3/22/14 | Blue prints drafted, system designed | 3/22/14 |
| 3/22/14 | Blueprints approved | 3/25/14 |
| 3/23/14 | Parts priced | 3/26/14 |
| 3/26/14 | Parts bought | 3/28/14 |
| 3/28/14 | construction of outflow complete | 4/5/14 |
| 4/10/14 | wood cut, stained | 4/12/14 |
| 4/10/14 | Bucket catch created | 4/15/14 |
| 4/12/14 | Old system disassembled | 4/19/14 |
| 4/12/14 | New L braces attached to 2x4's and mounted to CCAT wall | 4/19/14 |
| 4/12/14 | New 3" pipe mounted to old system | 4/20/14 |
| 4/12/14 | Bucket catch connected to pipe system | 4/20/14 |
| 4/12/14 | New Downspout put in | 4/20/14 |
| 4/12/14 | Old downspout removed and patched | 4/20/14 |
| 4/12/14 | System tested | 5/2/14 |
| 4/12/14 | System bucket retrofits | 5/3/14 |
2014 Costs[edit | edit source]
The materials needed in table below were bought by money donated by CCAT, the following were items that CCAT already owned and were not necessary to purchase; 2x4 wood piece, 1"x10" wood flat, silicone glue cocking, gutter cocking, wood screws, plumbers tape, sand paper, belt sander, wood and plastic saw, drill driver, Philips screw driver.
| Quantity | Material | Source | Cost ($) | Total ($) |
|---|---|---|---|---|
| 2 | 10'PCV Black 3"pipes | ACE Hardware | 20.00 | 40.00 |
| 1 | 3" 22degree elbow connect | Ace Hardware | 4.00 | 4.00 |
| 2 | 3" coupling | Ace Hardware | 3.50 | 7.00 |
| 4 | Decorative support brace "L's" | Ace Hardware | 8.00 | 32.00 |
| 1 | watertight threaded facet, 1" | Ace Hardware | 9.00 | 9.00 |
| 2 | 1" spa tubing | Ace Hardware | 1.90/ft | 3.80 |
| 1 | threaded tube insert 1" converter PVC | Ace Hardware | 2.50 | 2.50 |
| 1 | 10'x 1" PVC pipe, grey | Ace Hardware | 12.00 | 12.00 |
| 2 | twist tight "O" clamps | Ace Hardware | 2.00 | 4.00 |
| 1 | PVC clear cement 8oz | Ace Hardware | 6.00 | 6.00 |
| 1 | Hensel's clear cedar finish 1Qt | Ace Hardware | 11.50 | 11.50 |
| 1 | role plumbers tape | Ace Hardware | 2.00 | 2.00 |
| 1 | male spa tube connect to female pvc 1" connect | Ace Hardware | 2.50 | 2.50 |
| 1 | 3'x3' 1/4" wire screen | Ace Hardware | 3.00 | 3.00 |
| Total Cost | $139.30 | |||
Operation and maintenance[edit | edit source]
Please see CCAT rainwater catchment system/OM for detailed operation and maintenance instructions.
2014 Conclusion[edit | edit source]
2014 Testing results[edit | edit source]
No leaks were detected in system when rain fell onto CCAT roof and traveled through system.
2014 Discussion[edit | edit source]
Testing results indicated that the slope of the screen was not accurate, adjustment was made and now accumulation of debris seems to be minimal. As rain accumulated in gutter there were no leaks and water was caught by bucket and transported by 3"PCV to storage tank to where it is held until used. Overflow works well, directs water away from tank and kept original 1" hole size.
2014 Lessons learned[edit | edit source]
Allow more time for mistakes to be made, such as varying types of PCV and PVC sized piping depending on if it is designed for plumbing. A project that seems small, may not be. Even if a project seems small, grab someone else to work with, it will help the process go smooth. Start as soon as the projects are given out instead of 3 weeks later.
2014 Next steps[edit | edit source]
This project should be self sustaining for years to come, however spots of the house wall still need to be paint matched, where old L braces were previously located. The gutter patch needs to be textured and paint matched to draw attention from the current color difference. Also to improve flow more head is needed, which is impossible given the current conditions. The attachment of a pump will improve flow rate by roughly 30%.
2014 Team[edit | edit source]
Update September 2018[edit | edit source]
The CCAT rain catchment system on the main house is still fully functional. The roof and gutters need a cleaning and the rest of the system is intact. There are some small leaks on the piping leading to the Storage tank. The pipe leading to the first flush has been replaced with an opaque one to prevent algae growth.
Update September 2019[edit | edit source]
The water is only supplying the plants in the off-raining seasons in Arcata - for the system to be more useful, the water collected should supply water for different uses. For example, the gutter system is only leading to a bucket and has no other use. A possible solution for this would be connecting the system to CCATs outdoor sink.
Another issue that the system is currently facing are leaks. There was one between the filtration system and the conveyance system, and at the connection of the conveyance and the first-flush system. The solution that needs to be implemented is new positioning with proper sealant to fix the leak and make it easier to clean and maintain. CCAT needs to act on this quickly before the rainy season.
The gutters have not been cleaned since 2018 due to the hazardous nature of students going on rooftops when it is raining to clean. A solution for this would be having a trained maintenance professional, CCAT co-director assigned days to do this, or a specialized tool that would allow students to clean the gutters from the ground.
Overall, the rainwater catchment system is currently active and functioning.
-
Leaking first-flush system
-
Gutter leading to bucket
-
Conveyance system
-
Leaking filter
References[edit | edit source]
- ↑ Schiller, E.J. and B. G. Latham 1987. A Comparison of Commonly Used Hydrologic Design Methods for Rainwater Collectors, Water Resources Development, 3..
- ↑ Another example of footnotes.
- ↑ This is an example of a named reference. You can use these named references to repeat citation content throughout the document.
- ↑ Dwayne Taylor, Jonathan. "Rainwater collection and distribution apparatus." United States Patents 1 (1998): 1-3. Print..
- ↑ Scilink. "Rainwater Harvesting." Rainwater Harvesting. N.p., n.d. Web. 7 Feb. 2014. <http://www.kidsfromkanata.ca/files/rainbarrels.html>..
- ↑ "Rainwater Harvesting." Wahaso Water Harvesting Solutions. N.p., n.d. Web. 6 Feb. 2014. <https://web.archive.org/web/20190916075929/http://wahaso.com/rainwater_system.php>..


