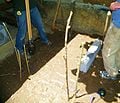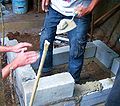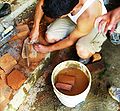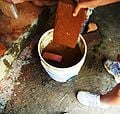
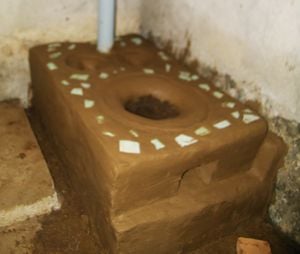
In Mexico, one household in four still cooks with biomass fuel.[1] As of 2008 almost half of the humans in the world used solid fuels like traditional biomass or coal for cooking, heat, and/ or lighting.[2] Complete combustion of these fuels includes mixing fuel with pure oxygen to simply produce CO2, H20, and energy, but outside the laboratory and in the kitchen most combustion is incomplete and byproducts include carbon monoxide, nitrogen oxide, and particulate matter. All these byproducts have adverse health impacts and two million deaths a year are associated with respiratory problems from indoor cooking fires with these traditional fuels in unventilated houses. Children and women are disproportionately affected by indoor smoke, with children making up 44 percent of these deaths, while women make up 60 percent of these deaths among adults.[2]The lack of ventilation and the incomplete combustion of the fuel creates the respiratory problems associated with these deaths.[2]Along with respiratory problems, the indoor smoke can give families eye problems and women often have increased back pain from bending over an open fire. In addition,children get burns from playing around the open fire on the floor, and the heavy labor of firewood collection increases incidence of miscarriage.[3][4]
Project Scope[edit | edit source]
Our project goal is to learn how to build two improved cook stove designs, the Lorena and Patsari, and test how well they improve the health and wealth of the families in the local community and the local environment in which they live and rely on. In our tests we hope to compare the Lorena and Patsari on their ability to reduce the harmful gases in smoke through increased ventilation and increased fuel efficiency. Reducing fuel consumption not only improves the families health, it reduces the demand and pressure on local forests facing deforestation and erosion, it saves the family time on gathering wood, it reduces the CO2 emissions, it reduces the amount of black carbón, and it reduces the non CO2 greenhouse gasses emitted from incomplete combustion.[5] However increasing fuel efficiency alone does not meet all the families needs.[6] The designs and application of the Patsari and Lorena also try to account for the other health problems faced by families by raising the stove up to hip height to reduce back problems, creating a covering to reduce burns, and understanding the multiple uses of the stove and smoke through surveys and consultations with the different communities.
We will not just focus on comparing the design, but we also hope to conduct surveys in households with and without the Lorena to get feedback on what has and has not worked with the stoves in the community of San Cristobal. The feedback on their cookstoves is essential to understanding how to improve the design or dissemination of info to fit the people's needs locally. We will also create educational materials. Two of the stoves to be made are located in Otros Mundos, our directing organization and cultural liaison in San Cristobal, these stoves are demonstration stoves to help Otros Mundos share this information and inspire other organizations and people that visit their location.
While two of the stoves we build will be at Otros Mundos, the third stove to be made will be in the community of San Cristobal. Community members from indigenous pueblos around San Cristobal will teach us how to build the Lorena stove used in their community and in exchange we will give them educational information on the health and ecological impacts of the Patsari, Lorena, and open fire as well as report our test results. Before we arrived the community all ready addressed the problem of indoor air pollution, looked for different solutions, and chose the stoves they wanted and we have been invited to learn how to build and to compare these two improved cookstoves so they might have a better understanding of which stoves they want to disseminate in their community.
Project Team[edit | edit source]
- Carrie Schaden, HSU graduate in Geography with minor in Biomimicry Design
- Eiliana "Eily" Esparza, HSU student in Women's Studies with minor in Spanish
- Sarah Torres, HSU student in Spanish Education
- Leticia Barahona, HSU student in Nursing and Spanish Education
Directors:
- Otros Mundos
- Lonny Grafman, Chiapas Program director and Appropedia creator
Special Assistance by:
- Tirian Mink, HSU Masters Student in Appropriate Technology with masters on Improved Cook Stoves
- Community Members in the pueblos around San Cristobal, Chiapas, who taught us how to build the Lorena, who allowed us into their homes for testing and surveys, and who helped us throughout the project.
Community Visit and Surveys[edit | edit source]
-
Fig 1: Open fire or fogon in use, while improved cook stove goes unused in the background. This might happen due to preference for taste or tradition of open fire or because different cooks in the house might not all know how or even want to cook on the improved stove.
-
Fig 1a: Roof blackened from years of open fire, even with large openings for air circulation between roof and wall smoke rises and then sinks rather than escaping to the outside.
-
Fig 1b: Improved cook stove in use without comal so the dish receives direct heat. In the morning this produces little smoke, but by the afternoon the smoke no longer escapes out the chimney. It rises through the comal opening into the house.
-
Fig 1c: Uncompleted chimney from lack of financial resources after installment from a month before with the Red Cross.
-
Fig 1d: Most families in Majamout purchase their wood rather than collecting it, for this reason it is easier to find income to dedicate to building the stove, since the costs previously used for wood are paid back by the reduced fuel use of the improved stove.
-
Fig 1e: The improved cook stoves are raised off the ground with a base that lifts the comals burners to just under the cooks hip height, reducing back and knee problems associated with open fires.
-
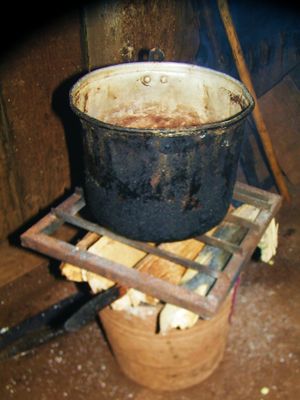
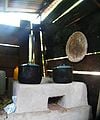
Open cookstove made out of bucket with wood laying across the top of opening and grate laying on the wood. Lots of heat is lost to the air rather then to the pot.
-
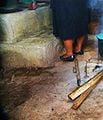
Lady cooking without lids during cooking test. When cooking with lids fuel use is reduced by 40%, a change which can save more fuel then switching to improved cooking stoves.[7]
Survey Results[edit | edit source]
After conducting a few surveys in a community we can conclude that the Lorena improved cook stove improves health and satisfaction for the women who cook with them. These families spend about $200 to $650 for approximately a square meter of wood, the most common kind being "roble" oak. With an open fire this wood is consumed in about a month, but with the improved cook stove the duration is doubled. Women begin cooking at the age of ten and have severe back pain, knee pain, and respiration illnesses, eye irritation, etc due to the amount of smoke an open fire produces. Not only does health improve with the Lorena, but the roof of the house also lasts longer due to the reduction in smoke inside the house. The food tastes the same, one family even thinks the taste is better with the Lorena, and it takes less time to cook their traditional foods like beans, tortilla, corn and some meats. With the improved cook stoves there is a significant decrease in burns, scalds and cuts with children. There is also less soot on the walls, less ash on the floor, and their dishes last longer because they are no longer exposed to an open flame. The chimney of the new stoves is cleaned about once a month but it is a very difficult process. The chimney has a small diameter, therefore children and women with smaller hands have to clean it. Also women usually remove the main Comal in order to boil their water because the back two comals don't heat up as much and when the water boils it spills over ruining the comal. This exposes the families to the smoke once again, making them susceptible to certain illnesses. The improved cook stoves have been proven to be beneficial to these communities but there is definite room for enhancement.
Criteria[edit | edit source]
| Criteria | Weight | Constraints |
|---|---|---|
| cost | 10 | affordable for the family |
| culturally Appropriate Design | 9 | accepted by community as indicated by surveys and communication with community |
| Local labor and Local skills | 9 | must be easily repeatable with local skills and labor |
| Improves Health | 8 | must improve either respiratory, back, eye, or skin problems in comparison to the open fire as indicated by surveys and continued consultations with the community by Otros Mundos |
| maintainability | 8 | less than 1 hours worth of one persons work every month |
| comfortable in the environment | 8 | family comfortable in cold/ hot/ windy weather |
| Durability of Materials | 7 | at least 15 years with maintenance |
| Life Use of Stove | 6 | at least 15 years of use depending on durability, educational dissemination, and adaptability of design |
| level of material locality | 6 | materials within 100 miles |
| reduces fuel use | 5 | reduces fuel use as indicated in our water boiling and controlled cooking tests |
| level of embedded energy of materials | 5 | materials used in construction... |
| Reduces Green House gas effects | 4 | reduces either black carbon, particulate matter, or carbon monoxide in comparison to an open fire |
| educational dissemination | 4 | at least a brochure with pictures, an appropedia page, some instruction on use to the families & signage near the stoves |
Design Differences Between Patsari and Lorena[edit | edit source]
Patsari Cookstove Design[edit | edit source]

- Design elements of Patsari:
Comales are sealed to prevent smoke from entering the living area, the exterior is made of brick in order to lengthen the lifetime, a prefabricated chimney base that allows for easier maintenance, and canals are dug out to redirect hot gases to the secondary burners.[8]
- Desired Results found in other Studies:
Lorena Cookstove Design[edit | edit source]
- Design Elements of Patsari
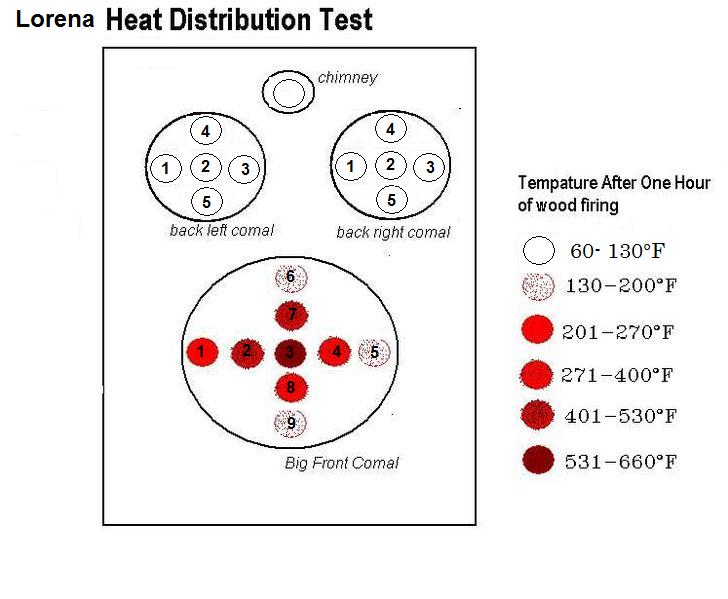
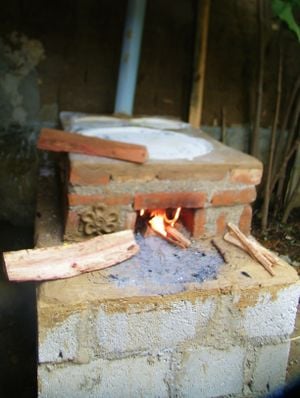
Is made of local materials of clay and sand easily accessible to the population. The stove is made of rammed earth, includes a chimney for ventilation, and sealed comals..[7] In the village of Majamout we found that the front comal is only used for tortillas and that the comal is taken off and a grate placed on when cooking in pots. This increases the amount of smoke in the house depending on the draft of the chimney. Also, canals redirect the heat from the combustion chamber to the back comals. We found in the village of Majamout the secondary burners are not used to cook on, but rather used as warmers. With our heat distribution tests this makes sense given that even after an hour these back comals are 6 times cooler then the front comal.

- Critiscism of Lorena
"The Lorena stove was designed with the mistaken belief that rammed earth would act as insulation; there was a basic misunderstanding of the difference between mass and insulation. Good insulation resists the passage of heat; thermal mass does the opposite, it absorbs heat. Testing has shown that the rammed earth used in the Lorena stove does absorb heat, heat that should have gone into heating the cooking pot." The designers, Aprovecho, now state: "The Lorena has been tested over the years by many researchers and has generally been found to use more firewood than an indoor open fire. The stove has other attributes. Its chimney takes smoke out of the kitchen and it is well liked. It is pretty and a nice addition to the house. It is low cost and can be repaired and even built by the home owner. But, it is not a fuel saving or low emission stove."[9]
This harsh criticism ignores that the rammed earth is a local, easily accessible material, which might be more important in the dissemination and financial feasibility of these stoves for the community.
Materials and Tools[edit | edit source]
- Patsari Stove Materials:
- 20 cinder blocks for base
- 40 bricks (24x12x6cm)for stove
- A brick with two holes 12x24x6cm 8x8x6cm (ea Novaceramic) cut in half for the 2 openings to the back comals
- 5 80 lb bags of sand
- 1 80 lb bag of cement
- 1 40 lb bag of lime
- 3 20 liter buckets of gravel for insulation (sand, broken gravel pieces, etc)
- 1.5 20 liter cans of dirt (fine grind with high clay content of 30-35%)
- 1 Chimney Cap
- 3 Galvanized Pipe 4" diameter and 90 cm long.
Tools Patsari:
- 2 Shovels for digging dirt and sand
- 2 trowels for applying mortar
- sifter with very fine mesh of 1cm for clay
- wheelbarrow for transporting dirt and sand and cement
- recycled wood pieces for building a mold dimensions....
- nails
- hammer
- 1 level
- string
- scissors for cutting galvanized steel (cutting hole in roof for chimney)
- Lorena stove Materials:
- 30 20 liter buckets of dirt (with a clay content of 20-30%)
- 6 2 liter buckets of sand (or less if you have a high sand content in your dirt)
- 5 meters chicken mesh
- 1 meter of wire for making hooks
- 1 bag of cement
- 1 bag of lime
- 3 comals (dimensions.....)
- 2 galvanized tubes for chimney
- A cap for chimney
- recycled wood pieces for 2 temporary frames (base mold inner dimensions.....and stove mold inner dimensions...)
- 1 20 liter bucket for part of combustion chamber and large comal temporary mold
- 2 1.5 liter water bottles (filled with water) for back comal temporary molds
Tools Lorena:
- tamper (can be metal tamper or recycled 4 by 4 wood pieces)
- 2 hand shovels
- 1 large sifter for sand and dirt (2-3 cm wide mesh)
- 2 shovels
- wheel barrow for moving dirt, sand, and cement plaster
- wood platform, tarp, or wheelbarrow for mixing cement plaster
- wire cutters
Cost of materials Bought[edit | edit source]
(in pesos)
- DD Batteries for Humidity Tester: $ 25-47 in pesos
- Comal: $55 pesos
- a sack of clay: $70
- nails: $30
- various bundles of wood at $40 each (prices vary by location bought)
ED: THESE WOULD BE BETTER AS TABLES WITH TOTALS
Building Process for Patsari[edit | edit source]
Preparation and Base[edit | edit source]
-
Fig 1a: The space we started off with
-
Fig 1b: Leveling ground and measuring out area for base
-
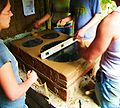
Fig 1c: Building up base from cinder blocks and mortar
-
Fig 1d: Patsari base with fill of ruble, dirt, and sand
Preparation
- Clean Up site:
- Take out vegetation and brush, where stove will be built
- Clean up material's mess where other stove will be built
- If mixing on the ground, clean the terrain, removing grass, so organic matter does no get in building materials
- Level Ground:
- place stakes in ground to dimensions of base, base is 130 cm deep by 80 cm wide by 60 cm tall
- wrap stakes with thin string so that all stakes are connected into a perfect rectangle needed for your dimensions
- use leveler to see if the string is level, adjust as needed
- Build roof
- roof protects stoves from degradation and makes the stoves more comfortable for users
- Building Base:
- Base dimensions 130 cm deep by 80 cm wide by 60 cm tall
- Sift sand for mortar and cement base untill no rocks larger them 1cm are in the mix.
- Mix cement base, ratio: 1/2 shovel full of lime, 1 shovel full of cement, 1 bucketfull of sand (20L), add water as needed.
- Place cinder blocks around perimeter on top of cement base
- Mix Mortar for base, ratio: same as mix for cement base
- spread mortar between cinderblocks and on top
- keep stacking cinderblocks with mortar along perimeter untill reaching 60cm tall
- fill inside with ruble, dirt, or any excess materials that can support the weight of a 200 pound stove
Making Mold and Preparing Bricks[edit | edit source]
-
Fig 1d: Cutting bricks to fit in special nooks
-
Fig 1e: Soaking bricks so bricks don't wick water out of mortar
-
Fig 1e: Building Mold for Stove out of Wood
-
Fig 1f: Wrapping Mold with Wire so that Pressure of Inside Materials does not force apart the mold.
- Building Mold for Stove
- build a wood mold for the stove w/ an inside diameter of 105 deep by 70 wide by 27cm tall, make sure its well leveled and centered
- Adjusting Bricks to Fit Stove Dimensions:
- Lay out bricks to see how many odd sized bricks you have within the dimensions needed for the base given above
- Cut those odd bricks to fit to stoves dimensions, this can be done with a sharp trowel or blade
- Soak bricks¨:
- soak bricks for 1 minute or more, so they do not wick water out of the mortar. Quick drying makes the mortar weaker.
Mortar Mixing, Brick Placement, and Fill[edit | edit source]
-
Fig 1g: Mixing mortar 1 cement:6 dirt/clay:1/2 lime
-
Fig 1a: Laying brick perimeter within wooden mold (inside dimension 105cm long by 27cm tall by 70cm wide) and laying bricks for combustion chamber opening
-
Fig 1b: Lay back side bricks of combustion chamber 40 degrees flaring out
-
Fig 1c: Lay top side bricks to combustion chamber and fill around outside of chamber with insulation materials like sand or ruble.
- Mortar Mixing
- sift more sand for mortar so rocks no larger then 1 cm
- mix mortar with 6 parts sand: 1 part cement: 1/2 part lime (mix as needed)
- Brick Placing Perimeter
- place the first layer of soaked bricks around the perimeter and spread mortar on their sides and bottom before placing them in mold
- place the second layer of bricks around the perimeter of the stove repeating process with mortar, and repeat process untill you achieve the height desired of 27 cm.
- Combustion Chamber Bricks
- combustion chamber inner dimensions 22cm wide by 36 cm long and 12 cm tall. The combustion chamber is the area for fuel and is directly under the first comal.
- to shape the combustion chamber you have to place two bricks laterally 22cm apart from each other and they have to be centered
- place third one parallel to the front 36 cm from the front edge, the height of the combustion chamber is 12 cm tall
- place two more bricks to fill in the combustion chamber, do no put these bricks exactly straight, but instead at an angle towards the opening.
- the second layer of the combustion chamber includes bricks laying flat
- for the very front pieces cut a brick in half (length wise) and another (width wise) then lay the bricks cut width wise on the edges and the bricks cut length wise in the front near the entrance to the chamber
- Stick three more bricks laying down flat face two on the edges and one in the back framing the combustion chamber. The opening of the sombustion chamber will be for the large comal, so that it receives direct heat from the fire.
- Fill:
- fill with the mix of sand and ruble, only on up to the edge outside of the combustion chamber. This fill of sand or rubble acts as insulation preventing the flow of heat out of the sides of our stove. This insulation could increase our combustion efficiency,since insulation around the fire prevents the heat from escaping as rapidly and thus the fire can burn at a higher temperature.[10]
Canals, Chimney Base, Top Mix, and Back Comal Molds[edit | edit source]
-
Fig 1f: Place chimney flue piece on top of sand and ruble
-
Fig 1f: Sifting clay with fine mesh for top of Patsari
-
Fig 1h: Hole for Comal after back comal mold pressed in and taken out ***This is no longer an accurate image. This part of the stove has been repaired to follow design specifications in Patsari Construction Manual (see below)***
-
Fig 1i: Comal Holes shaped around edges so that it slopes out to the edge of the comal increasing surface area to direct heat
- Canal from Combustion Chamber:
- cut the celosia blocks in half width wise so each becomes its own square with a large whole
- Place each half by the back edge of the combustion chamber, the celocia blocks have a hole which acts as a canal for the smoke and heat of the first combustion chamber to the two back combustion chambers.
- the celosia pieces should be placed 2 cm under the level of the mold and should be centered as the picture shows, 18 cms from the side wall.
- Chimney
- place chimney mold base 3-4 cm from back. It is important that the top of the chimney base will rise 2 cm over the level of the mold in order to place on the galvanized steel tubes that make the chimney
- Top Mix
- your top mix will be made of a ratio of 2 buckets of finely sifted clay (1/2 cm mesh): 2 buckets of sand: 1 handful of lime: 1/4bucket of cement.
- fill mix to the top of the tallest bricks or to the level of the mold.
- Back Comals
- grab small metal comale molds with diameter a little less then the 28 cm diamter-comal-top and press into top mix. Press them about 6 cm from the sides and 14 cm from the back. Their form should indent into the mix creating a sloping hole for the back comals.
Connecting Canals, Placing on Comal Tops, Chimney Finish[edit | edit source]
-
Fig 1j:connect Comals by digging canal from big comal to back comals and back comals to the chimney
-
Fig 1k: Place on comal tops
-
Fig 1l: Decorate as wanted
-
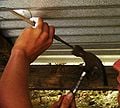
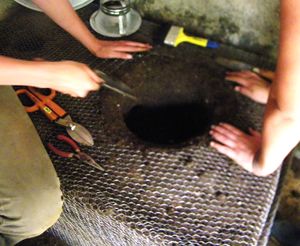
Fig 1e: Penetrating roof to make hole for chimney, using sharp file and hammer
-
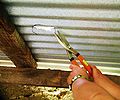
Fig 1e: Cutting hole for chimney
-
Chimney going through roof and hat placed on top to prevent rain from entering
-
Fig 1e: Finished Patsari
- Connecting the Back and Front Comals and Chimney
- to connect the secondary comales to the big comal you need to remove the excess mix out of the holes with a spoon
- you should also connect the back comals to the chimney by removing excess mix out with a spoon
- Placing and Shaping Comal Tops:
- place on front comal top pushing down on comal to mark area where the top will go.
- Lift up the top and shape sides so that their is a steady slope for 4- 5 cm from the top sloping in towards the combustion chamber. This shape will increase the amount of surface area the comal top is exposed to the direct heat of the fire.
- now place on the comal tops and press down so that the tops are sealed on all sides, use extra mix to seal any open areas around comal.
- Chimney
- line up chimney base with where your hole should be in your roof, mark this area.
- puncture and cut hole in chimney. we have a galvanized steal roof, so we punctured it first with a metal bar and hammer, then we used large cutting shears to open the hole.
- attach chimney metal tubes together depending on the height from your roof.
- once through roof, get on top of roof and attach top hat to prevent rain from entering your stove.
- seal the area around your roof with something that can withstand high temptures being emmited from the chimney. We used a mixture of cement, clay and sand similar to the top mix of the stove.
- Test Out your Stove
your stove should now be complete, just give it a test run with some quesadillas.
Repairs and Modifications made August 2010[edit | edit source]
After building the Patsari a mistake was discovered in the design. The primary combustion chamber is connected to the back comales through a canal. The pictures below show both our original design and the corrected design which was completed in August of 2010 by Tirian Mink.
-
This was the way we originally built the stove. However this is incorrect and does not follow the Patsari Construction Manual.
-
This is the correct design. Compared to the picture to the left, one can see that the primary combustion chamber does not split into separate canals for each secondary comal until just before the hollow bricks.
Lorena Building Process[edit | edit source]
Preparation and building Base[edit | edit source]
-
Fig 1f:messy beginnings and materials pile
-
Fig 1fa: the area after it was cleaned
-
Fig 1g: digging dirt from site in the city
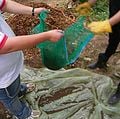
-
Fig 1h: bringing the dirt to our site
-
Fig 1i: Lonny Grafman & student sifting dirt with wire mesh (2-3cm wide) nailed to two by fours
-
Fig 1j:mixing dirt w/ sifted sand
-
Fig 1k:make the wooden mold
-
Fig 1l:wrappin the ends of your mold together with wire
Preparation
- Clean Up site:
- Take out equipment and excess materials stored where stove will be built
- Building Mold and Mixing Dirt for Base:
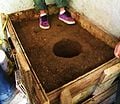
- Collect 4 two-by-fours to build a wooden mold with inside dimensions of 130cm long by 80 cm wide by 30cm tall
- Nail the mold together and wrap the ends of your mold together with metal wire to prevent it from breaking apart from pressure of the filling dirt
- Sift sand and dirt for the mix
- Mix dirt with sifted sand, ratio: 5 bucketfulls of dirt, 1 bucketfull of sand. Have someone with a water bottle with holes on the cap, wet very little of the mix while 1-2 persons are mixing with shovels. Test the mix by binding some into a ball when squeezed in your hand, test by throwing the ball into the dirt pile to see if it holds its form.
Filling and Tamping Base[edit | edit source]
-
Fig 1: a 20 liter bucket acts as the mold for part of the combustion chamber as well as a placement for the largest comal
-
Fig 1a: tamping down the dirt within the mold
-
Fig 1b: Since the mixture does not have much moisture within it its important to tamp down, here we used 5 by 5 thick wood pieces as well as a metal 10 lb tamper.
-
-
-
-
-
- Filling and Tamping the Base
- With the mix start filling in the mold. Each layer being approximately two 20-liter bucks.
- After laying out each layer, uniformally tamp down the mixture with force. This creates a rammed earth stove that is very strong.
- Creating Mold for Estufa
- wooden mold with inner stove dimensions...
- Placing in Comal and Combustion Chamber Molds
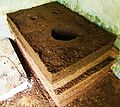
- Before filling the stove mold, place a 20 liter bucket where the large comal will be, 30.5 cm in diameter
- Then place two 1.5 liter water bottles (10 cm interior longitude) as the mold for the back two comales, with a 7.3 cm diameter.
- Fill wooden mold with the same mixture of dirt as the base, packing around the 20 liter bucket and water bottles, repeating steps 1 and 2 of "Filling and Tamping the Base".
- Digging the tunnels:
- Choose where the chimney tubes will be located. Use chimney tube as size indicator and start digging a hole 12cm deep.
- Remove the molds (20 liter bucket and two water bottles).
- Dig a tunnel big enough for your arm to go through connecting the large comal to the small left comal.
- Repeat step 3 for the small right comal.
- Dig tunnel connecting the small left comal to the chimney hole.
- Repeat step 5, connecting the small right comal to the chimney hole.
- Remove the mold from rammed earth.
- In the front of the stove, carve out a square where the combustion chamber will be located (20 cm wide and 15 cm tall). Dig through until reaching the hole of the large comal.
Its recommended that the distance between the base of the comal and the base of the combustion chamber be 20 cm.
Wire Mesh Cover and Hooks[edit | edit source]
-
-
-
Fig 1: Finished hooks
-
Fig 1a: Tapping hooks
-
Fig 1b
-
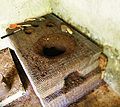
Fig 1c: Sloping holes.
-
Fig 1d: Wire mesh with holes cut out for comales and combustion chamber opening
-
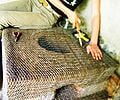
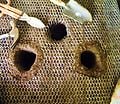
Fig 1e:top is chimney hole with wire mesh bent in to hole. The two bottom are the back comales with a 3cm cut wider then the hole and a sloped edge into the holes in order to give the comal increased surface area exposure to direct heat of combustion.
- Wire Mesh
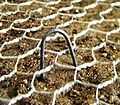
- Measure out exact dimensions of stove then cut out enough wire mesh to wrap over the stove.
- Lay out the wire mesh onto stove in order to give cement plaster a criss-crossing network to key into.
- Hooks
- Make hooks by bending wire and cutting with wire cutters.
- Tap the hooks in to keep wire mesh close to stove surface.
- Cut holes in mesh where the comales, combustion chamber, and chimney will be.
- Make slopes along the holes by cutting out dirt with hand shovels for comales to fit evenly. Comales go over the opening by about 3cm, this slope also helps expose more of the comal to the direct heat from combustion.
Plastering and Chimney Finish[edit | edit source]
- Plaster Mix
- Make a mix of clay cement plaster with 2 parts fine clay:2 parts sand: 1 handful of lime:1/4 of cement. Spoon plaster on trowel.
- Splatter some water onto stove. Clay has a "memory" and if you simply apply the plaster without wetting the other clay/dirt surface your very wet plaster can just peel off.
- Spread clay cement plaster on Lorena moving from bottom up, 2.5cm thick. Start from the bottom up.
- Work your way through the sides then the top surface.
- Place pots on comales and press down to measure the ideal size.
- Let dry for a couple of days.
- Chimney Finish
- Pierce the laminated roof with the ideal size for the galvanized tube to fit.
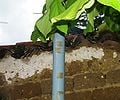
- Connect the galvanized tubes to go through the roof.
- Someone will have to get on the roof in order to make sure the tubes are stable and to place on the chimney cap that prevents rain from entering.
- If there are open spaces around the tubes going through the roof, cover it with cement or clay in order to protect it from rain falling on the stove.
Testing[edit | edit source]
We tested our stoves in order to ensure that the stoves disseminated are the best they can be. In particular the Lorena has received criticism in recent history because other testers have found that the Lorena uses more fuel then the open fire or fogon that it tries to replace.[9]This criticisms ignores that the stoves are still removing more smoke out of the houses and in that case it is up to the communities needs to decide which factors are priority: personal health immediately or fuel reduction or others. Field testing can help us revise designs and find the best performance stove to fit different priorities, but one stove can not meet all priorities, so we hope to find the stove that best meets our criteria.
Testing caveats[edit | edit source]
This project was conducted by undergraduate students and was their first experience building and testing improved biomass cookstoves. The building and testing of the stoves was done as close to specifications as possible, but this should not be considered a formal study. Most notably, when these tests were carried out the Patsari had at least one major deviation from GIRA's design specifications. This was fixed at a later date (see Repairs and Modifications made August 2010) after the testing was complete. Also, a minimum of 3 tests must be done on each stove in order for the data to be considered a representative sample of stove performance. In this case only one test was completed on each stove. Because of these reasons these results should not be considered a valid representation of Patsari performance. Nevertheless, the hope is that they will be useful in demonstrating some of the challenges that can be encountered in the field when a group of well-intentioned, non-professionals, carry out this work in a new environment and within an accelerated schedule.
Collect Data On[edit | edit source]
- water consumed (g)(in mass or weight)
- how many grams of water consumed to get to boiling
- thermal efficiency= (kJ to boil/ kJ used in fuel)
- kJ = kilojoule, is a unit of energy
- Thermal efficiency tells us how much heat is transferred to the pot and how much is lost to radiation through the stove or through the chimney.
- burning rate = mass of fuel consumed/ time of test (g/min).
- The burning rate indicates the amount of fuel used per time in test.
- specific fuel consumption = mass of wood/ mass of water or food (g/g).
- This tells us the amount of wood needed for cooking a certain amount of food or boiling a certain amount of water.
- Turn Down Ratio = high fire power/ low fire power (W/W)
- (W) Watts = a unit of energy.
- The turn down ratio indicates the degree to which power output from the stove can be controlled by the user.
- fire power = (Mass of fuel X Calorific value of fuel)/time of high power phase
- time of high power phase = any time really using it to boil, cook, etc
- (kg X kJ/kg)/seconds = kJ/s =
- remember Power = Energy over Time[11]
- Firepower tells the average power output of the stove (in Watts) during the high-power phase, which is the time when the food or water really starts cooking. The useful firepower is the average rate of energy released from fuel combustion that is transferred to the pot over the duration of the test, but this value is useful for only high power testing.
Tools for Testing[edit | edit source]
- Moisture Meter for measuring moisture in wood. Measuring range 5%-50% in wood and 1.5%-33% in building material, Resolution.1%, and Accuracy +/-3%
- Temperature Measurement Probe, for pipes or odd shaped objects. Range -30C to 105 C (-22F to 221 F), Accuracy +/- 2.2 C (4F), Display Reolution +/-.1C (.1 F)
- Compact Scale, for measuring wood, ashes, water, and food weight. Max 200g.
- Thermometer/Timer, 32 to 482F (0 to 250C), counts to 24 hrs,
Heat distribution test[edit | edit source]
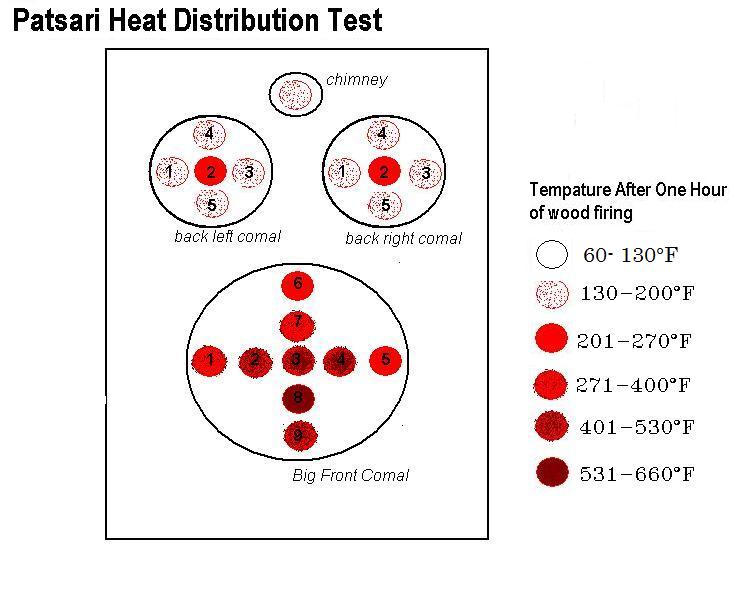
Comparing the Patsari and Lorena. With an increase in the number of pots cooking on a stove at the same time there is an increase in fuel efficiency. For this reason the designers of the Lorena and Patsari created three openings for pots. However, we found some of the women in San Cristobal seem to use the back comals of the Lorena just as warmers, rather then for actual cooking. Other surveiors have found that the reason some women do not use the back comals for actual cooking is that the women notice that the back comals do not heat up hot enough. At other times the women complain that the front comal gets too hot and burns the tortillas.[12] Understanding the distribution of heat is an important factor in how the stove can be utilized by the cook and in the overall fuel efficiency of the stove.
Patsari Heat Distribution[edit | edit source]
Big Comal
- 309°F 2. 444°F 3.585°F 4.525°F 5. 256°F 6. 263°F 7.399°F 8. 612°F 9. 429°F
Left Back Comal
- 163°F 2.204°F 3.146°F 4.143°F 5.182°F
Right Back Comal
- 147°F 2.2 17°F 3. 192°F 4. 178°F 5.192°F
Lorena Heat Distribution[edit | edit source]
Big Comal
- 215°F 2. 516°F 3.574°F 4.304°F 5.141°F 6.144°F 7.496°F 8.335°F 9.112°F
Left Back Comal
- 86°F 2.88°F 3.87°F 4.86°F 5.87°F
Right Back Comal
- 88°F 2.87°F 3. 80°F 4. 86°F 5.80°F
The Controlled Cooking Test[edit | edit source]
The controlled cooking test tries to cook a local cuisine with help from a local cook to find the amount of fuel consumption, the length of time needed to cook one meal, and the actual emissions when a the stove is in use. Controlled variables in the tests include: the same cook, the same meal, and a similar amount of food; and the same room - with the same room size, in order to better isolate the difference in the stoves alone. During the test the cooks are observed in order to identify any troubles they have and to ensure that the stove is well designed for use by cooks. The pots used should be the ones the cook commonly uses and the fuel used should be the same fuel that is most commonly used in the community. The fuel is preweighed before the cooking, then again after. The ingredients should be weighed prior to giving to the cook and the meal will be weighed before drained after finished cooking. One test = 3 meals on traditional stove + 3 meals on alternative stove with same cook and same food. A CCT series = 3 different cooks each with 6 meals amounting to 18 meals total.[13]
-
weigh the fuel before the meal
-
weigh the food and subtract the weight of the pots before the meal
-
let the cook cook the way she wants. Hear she preferred not to put lids on pots and she put lime on the comales, we found in our water boiling test this lime acted as insulation between the pots and the heat source, slowing the cooking time and fuel efficiency. This is important information for how the cooks use the stove, allow the cook to cook how she wants.
-
weigh out the remaining food not used after the meal
-
weigh the remaining fuel
Patsari Controlled Cook Test[edit | edit source]
Test #1
- wood consumed = 5653g *time = 3 hours 56 minutes for cooking traditional meal of beans and eggs and tortillas with cheese
- food consumed = 900g *water consumed = 4469g
- burning rate = 5653g/ 236 minutes = 23.95 g of fuel/min
- specific fuel consumption of water = 5653g/ 4469g = 1.26 g wood/ g water
- specific fuel consumption of food = 5653g/900g = 6.28 g wood/ g food
- fire power = 5.653kg x 18,916 kJ/kg/ 3330 seconds = 32.11 kW
Lorena Controlled Cook Test[edit | edit source]
Test#1 using a comal on la Lorena
- wood consumed = 4933g *time = 4 hours 23 minutes for cooking traditional meal of beans and eggs and tortillas with cheese
- food consumed = 900g *water consumed = 3230g
- burning rate = 4933g/ 263 min= 18.76 g/min
- specific fuel consumption of water = 4933g/ 3230g = 1.53g wood/ g of water
- specific fuel consumption of food = 4933g/ 900g = 5.48g water/ g of water
- fire power = 4.933kg * 18,916 kJ/kg/ 3330 seconds = 28.02 kJ/sec or 28.02 kW
- burning rate = 4933g/ 263 min= 18.76 g/min
Conclusions of the Controlled Cooking Test[edit | edit source]
We found for the same amount and same type of food the Patsari cooked the food 27 minutes faster. Though the Patsari cooked the food faster, it consumed more fuel. In comparison the Lorena took much longer to cook the same amount of food, but it consumed less fuel. While the Patsari used 23.95g of fuel per a minute the Lorena only used 18.76g per minute. In our surveys none of the women said yes to our question about whether they wanted a stove that could save them time on cooking. Though shorter cooking time would maybe allow them to do other things other studies have shown that women enjoy the time to cook or gather wood as a time to be with other women.= In this case the Lorena saves 5.2g of fuel per minute more then the Patsari, which is a savings of 1245.6g of fuel for an average 4 hr meal.
To save on costs our cook was our director at Otros Mundos. During testing our cook was very busy and did not stay by the stoves, but left for up to twenty minutes or more this may have led to extended cooking times that would not normally happen in the communities. In the community in San Cristobal women stay near the stove for a large portion of the time cooking and daughters or sisters help with other chores while one to three women watch the fire and the cooking. Our cook was too busy to watch the fire and asked that we take care of the fire. Our participation in watching and stoking the fire might of interfered with the results as the women in the community might stoke the fire much differently then ourselves and they may know how to be much more efficient at using fuel then ourselves.
These tests should be continued with a women who has the time to dedicate to the testing and future testers should not help or interfere with the fire or help or interfere with cooking, these interferences change the results of how the stove is actually used in the community and gives us data on how testers use the stove, not how community members use the stove.
Future testing should include 3 tests of the Lorena with comales, 3 tests of the Lorena without comales, and 3 tests of the Patsari.
The Water Boiling Test[edit | edit source]
The Water Boiling test measures the high boiling power and the low simmering power to compare stoves performance of a standard task and to find which stove can most effectively combust the fuel and transfer the heat into the cooking vessel. It can not test field performance, since that varies by local foods and cooks, but it can test the stove design's ability to perform a standard task. Fuel with different composition and moisture level may behave differently. Materials needed: 5L pot, electronic scale (10-15kg capacity, 1-2g resolution), thermometer, wood, water, and tools for removing charcoal. Tests: bring 5L to boil on a stove starting cold, bring 5L to boil on a stove starting hot, continue into simmer for 45 min @ 3 degrees below boiling; between each record the time, mass of fuel, mass of water in pot, mass of charcoal remaining. With help from a WBT spreadsheet online for free you can calculate the time to boil, fire power, and thermal efficiency of each stove. Testing emissions can be done using a hood and measuring the concentration and flow rate leaving the hood, or by having a test kitchen and by measuring levels of indoor air pollution (IAP).[14]
Lorena Water Boiling[edit | edit source]
Feedstock: 6,828g roble wood, 13.94% avg moisture, avg dimensions 37.5 cm long by 2.4 cm wide by 3.1 cm diameter
Test 1: Cold start
- Water boiling after 26 minutes, boil at 201F
- wood consumed= 720g
- Burning rate= 16g/min
- Thermal effinciency = 14%
Test 2: Hot Start
- Water boiling after 13 minutes, boil at 201F
- Wood consumed=479
- Burning rate= 17g/min
- Thermal effinciency = 34%
Test 3: Simmering for 45 minutes
- Wood consumed= 830g
- Burning rate= 7g/min
- Thermal effinciency = 18%
Patsari Water boiling[edit | edit source]
Feedstock: 6,828g roble wood, 13.94% avg moisture, avg dimensions 37.5 cm long by 2.4 cm wide by 3.1 cm diameter
Test 1: Cold start
- Water boiling after 21 minutes, boil at 201F
- wood consumed= 1002g
- Burning rate= 26g/min
- Thermal effinciency = 39%
Test 2: Hot Start
- Water boiling after 13 minutes, boil at 201F
- Wood consumed=479g
- Burning rate= 27g/min
- Thermal effinciency = 36%
Test 3: Simmering for 45 minutes
- Wood consumed= 400g
- Burning rate= 9g/min
- Thermal effinciency = 10%
Overall Test Outcomes[edit | edit source]
For the Heat Distribution Test we found that after one hour of heating the Patsari maintains higher temperatures over a larger portion of the stove. Both stoves reached similar tempatrues of around 574 to 585°F at their hotest point in the center of the front comal. However the Patsari distributed its heat to hotter temperatures around the edges of the comal which is great for tortilla making and cooking multiple things on the comal. The Patsari also distributed its heat the back comals to a larger degree with a 60°F difference between the Patsari and Lorena´s back comals. The Lorena´s back comal only reached an average of 85.5°F, this might explain why women in the community do not cook anything on the back comales, but instead use them as warmers.
From the controlled cooking test we found for the same amount and same type of food the Patsari cooked the food 27 minutes faster. Though the Patsari cooked the food faster, it consumed more fuel. In this case the Lorena saves 5.2g of fuel per minute more then the Patsari, which is a savings of 1245.6g of fuel for an average 4 hr meal.
The reason that the Patsari cooks the food faster, but use more fuel might be because the Patsari distributes the heat over a larger surface of the comals and distributes more heat to the back comales making a larger surface for effective cooking, but maybe taking more fuel to distribute that heat to a larger surface area.
It also might be that the wood in the Patsari is being burned faster because in the Patsari the fuel is placed in the combustion chamber right at the edge of the air supply. In comparsion the Lorena´s fuel is started in the center of the big comal less then a foot away from the entrance to the combustion chamber. The greater distance from the air supply in the Lorena might have made it so that it was not burning as fast and could not cook as fast. The Lorena needed near constant fanning to keep the fire going and this might be because the fire was started in the center of the big comal. In the village women often remove the comal and start the fire in the center of the comal, we tried to start the fire in the center of the comal as well, but we put the comal lid on. In the village this comal is usually left off unless cooking tortillas.
Hopefully other tests will compare the Lorena as used in the community (without comal lid and with fire in the center big comal) with the Lorena as meant to be used by the designers (with comal lid on and fire in the combustion chamber). This comparison may show that the burning rate is increased and cooking time reduced as used in the community when the comal lids are removed and the fire started in the center. Removing the comals allows smoke to enter the house, but during our tests we found that the Lorena made a lot more smoke then in the houses where women had open comals. This might be due to the fact that fires with high availability of oxygen burn at high temperatures and with smaller amounts of smoke produced. In that case the priority might be increasing the oxgen supply to the Lorena rather then sealing off the comal.
Conclusion[edit | edit source]
While the Patsari has been shown in other studies to be more fuel efficient and durable, the success of the Lorenas popularity might rest not in its fuel efficiency, but in its cost effectiveness, replication by local labor and knowledge, use of local materials, and increased ventilation of smoke. The Lorena has a history of being very popular and many have been made. Field testing can tell us what design performs the best, but it cannot explain why a particular stove is more accepted by a community. The success of a stove is not in the design alone. Maybe the success of the Lorena is not in its fuel reduction or reduced cooking time, but in the fact that it is made of mostly local and cheap materials and is thus more accessible to a wider range of people.
Things to Do Different Next Time[edit | edit source]
Surveys:
- If possible have a different translator for surveys with different families or explain to translator the importance of not "begging the question". Our translator was giving the same exact answer for certain questions and we found out that he was asking some of our questions in ways that suggested the "correct" answer to the women.
Testing:
Water Boiling:
- Put lids on the pots when doing the water boiling tests. Pots can reduce the fuel consumption by about 40%.[7]
- Remove any obstructions like lime from the comales before the water boiling tests, unless you want to test lime's insulative ability, or unless you want to test how the stoves are used by some women in the field.
- Buy enough wood before hand to complete water boiling series, so that you isolate stove differences not fuel differences.
Controlled Cooking Test:
- Make sure your cook has enough time to complete a cooking series, which includes at least three meals from the same cook for one stove and at least two stoves for a comparison. If the meal takes 3 hrs this is 3 hrs x 3 meals x 2 stoves = 18 hours at least.
Next steps[edit | edit source]
Surveys:
Before installment of more stoves in the community, Otros Mundos should conduct surveys of those women without the stove and then again a month after they receive the stove. Continuing these surveys is an important part in finding out if the community is seeing some benefit from the stoves and if the stove design needs some adjustment or if the educational dissemination needs improvement.
Testing:
- Controlled cooking Test: The controlled cooking test requires at least three meals from the same cook for one stove and at least two stoves for a comparison. We were only able to complete one meal on the Patsari and one meal on the Lorena with the same cook. We hope that Otros Mundos is able to finish the rest of the series with two more meals on the Patsari and two more meals on the Lorena with the same cook.
- Kitchen Performance Test: We were not able to perform the Kitchen Performance Tests (KPT) due to time constraints within the community, but we hope that Otros Mundos is able to perform these tests with their continued work with the community. The KPT requires a weeks worth of access to measuring the wood and food of a family in the community.
- Water Boiling Test:
Educational Dissemination:
Our picture brochures for the community should be passed out to community members wanting information on the stoves. Further modification to the brochures should take place after input from community members on the coherence and understanding of the information takes place.
See also[edit | edit source]
- Improved cook stoves
- GIRA,Grupo Interdisciplinario de Tecnologia Rural Apropiada a nonprofit in Mexico, who created the designs for the Patsari for this project.
- Aprovecho Research Center
References[edit | edit source]
- ↑ I. Romieu, H. Riojas-Rodriguez, A. T. Marron-Mares, A. Schilmann, R. Perez-Padilla, O. Masera, "Improved Biomass Stove Intervention in Rural Mexico: Impact on the Respiratory Health of Women" Am. J. Respir. Crit. Care Med. 2009;180:649-656 [1]
- ↑ 2.0 2.1 2.2 Rasmussen, Erin. Energy Access in Developing Countries, 29 June 2010 [2] This reports on an article by Doug Barnes of the World Bank with statistics drawn from the WHO United Nations Report.
- ↑ Household Energy Network
- ↑ Environmental health: bridging the gaps p. 157-162
- ↑ Todd Milo Johnson,Claudio Alatorre,Zayra Romo,Feng Liu; "Low-Carbon Development for Mexico" [3]<
- ↑ http://web.archive.org/web/20110527114921/http://rael.berkeley.edu/sites/default/files/old-site-files/1997/Kammen-Dove-Mundane-Science-1997.pdf
- ↑ 7.0 7.1 7.2 http://www.peprimer.com/stove.html#SECTION5
- ↑ 8.0 8.1 8.2 Technologies for Conservation and Development "Patsari Stove" [4]
- ↑ 9.0 9.1 LRWorld Lingo,"Biomass cook stove", http://www.worldlingo.com/ma/enwiki/en/Biomass_cook_stove
- ↑ CCAT rocket stove discusses using insulation to get the fire burning at a higher temperature. Using sand and rubble is questionable as insulation given their relatively high thermal masses. Airspaces and the low thermal conductivity of sand[5] lend some amount of insulation from these materials.
- ↑ Mink, Tirian. Lecture at Chiapas Appropriate Technology Program directed by Lonny Grafman. Wednesday, July 14, 10:00-1:00.
- ↑ Tirian Mink, June 21, 2010, Appropriate Technology Program with Cal Poly Humboldt
- ↑ MacCarty, Nordica; "The Controlled Cooking Test", Aprovecho Research Center, [6]
- ↑ MacCarty, Nordica; "The Water Boiling Test", Aprovecho Research Center, [7]




![Lady cooking without lids during cooking test. When cooking with lids fuel use is reduced by 40%, a change which can save more fuel then switching to improved cooking stoves.[7]](/w/images/thumb/9/9d/100_1312.JPG/120px-100_1312.JPG)

