
Locally Delicious solar dehydrator for kids with adult supervision

| Type | Solar dehydrator |
|---|---|
| Authors | Team Fujis and Fugees David Ullrich Dylan Kahle Jake Lodeen Matt Bruder |
| Location | Arcata, California |
| Status | Deployed |
| Years |
Our design team, Fujis and Fugees, consists of four Cal Poly Humboldt engineering students. For our Engineering 215 class in Spring 2011 we were given the assignment of designing a solar powered food dehydrator which could be replicated at home by kids with the help of an adult. As a part of our assignment we worked closely with the group Locally Delicious. Our final design will be integrated into Locally Delicious's upcoming cookbook along with instructions on how to build our solar dehydrator. In the following page you can view our documented design process. If you would like to build our project, check out the Tear The Roof Off Solar Dehydrator Instructions page. Testing proved that our final design is effective at dehydrating food. On average our dehydrator was able to completely dehydrate sliced apples in 18 hours of sun exposure. Our design met and exceeded the criteria developed by our client and our group. But you don't have to take our word for it, feel free to build it for yourself!
Objective
[edit | edit source]The objective of our project is to design a simple, yet effective, solar dehydrator. Our model will have an efficient design and will be easily replicated by a child with the assistance of an adult. We hope that by designing this solar dehydrator we help children learn about solar energy and healthy food choices.
Criteria
[edit | edit source]The following table is a sortable list of our design criteria, which were developed by both our design group and our client, Locally Delicious.
| Criteria | Weight | Constraints |
|---|---|---|
| Cost | 9 | Less than $100 |
| Educational Value | 8 | Teach about measurements, solar radiation, solar dehydration, as well as healthy eating, at a 4th to 8th grade level |
| Reproducibility | 9 | Minimal tool usage, easily obtainable materials |
| Maintenance | 6 | Less than 30 minutes of maintenance required per usage |
| Durability | 7 | Must last at least 12 uses |
| Safety | 10 | Should not exceed 200 degrees Fahrenheit, also must be structurally sound |
| Functional | 10 | Must be able to adequately dehydrate fruits and vegetables |
| Portability | 5 | Must be movable by two or less people |
Design
[edit | edit source]
Our design incorporates a simple but effective model which requires very little materials to construct, yet is very efficient for dehydrating a small to moderate amount of food. Our design is 2'x3'x4" and is built on a plywood base, with a 2"x4" frame, corrugated roofing, removable nylon mesh food screens framed in 1/2"x1", with a clear acrylic glass cover held in place by L-brackets, and vent holes on the top and bottom to promote air flow. This model is simple to build and the materials are easily found at your local hardware store, or recycled material can be used to reduce costs. The adjustable angle of inclination allows for maximum sunlight capture throughout the year, for data on the angle of inclination of the sun in your particular area, check out this Calculator.
Cost
[edit | edit source]The following table is a list of the materials used to build our project and their relative retail cost. In our project we used recycled wood and corrugated roofing which brought the cost of our project down significantly.
| Quantity | Material | Source | Cost ($) | Total ($) |
|---|---|---|---|---|
| 2 | 2"x4"x8' Boards | Ace | 6.99 | 13.98 |
| 2 | 1"x1"x4' Framing | Ace | 3.44 | 6.88 |
| 1 | 1/2"x4'x4' Plywood | Ace | 12.55 | 12.55 |
| 1 | Corrugated Roofing Sheet | Scrapyard | 5.99 | 5.99 |
| 1 | 3'x6' Nylon Mesh | Jo-Ann's Fabrics | 7.28 | 7.28 |
| 1 | 2'x4' Clear Acrylic | Ace | 28.99 | 28.99 |
| 8 | Sheet Metal Screws | Ace | .11 | .88 |
| 16 | Wood Screws | Ace | .08 | 1.28 |
| 8 | Washers | Ace | .09 | .72 |
| 1 (Box) | L-Brackets | Ace | 3.79 | 3.79 |
| Total Cost | $82.34 | |||
Instructions
[edit | edit source]
For this project you will need the following tools:
- Saw (handsaw or power saw)
- Tin Snips or Grinder (to cut metal roofing)
- Drill (with drill bit and phillips head bit)
- Acrylic Cutter (specially made to cut acrylic)
- Scissors
Follow the following general steps:
- Cut 2' tall x 3' wide plywood base.
- Cut two 36" long lengths of 2"x4".
- Cut two 21" long lengths of 2"x4".
- Attach the 2"x4" frame (so that the 21" long segments rest on the inside of the 36" long segments) by pre-drilling holes and then securing with wood screws.
- Attach the plywood base to the 2"x4" frame with wood screws. (no need to pre-drill)
- Cut a piece of corrugated metal roofing so that it fits on the inside of the 2"x4" frame, this should be 21" tall x 33" wide. (make sure orientation of corrugated metal is such that the channels run up and down the dehydrator)
- Attach the corrugated roofing by securing self tapping sheet metal screws through the channels of the dehydrator and into the plywood.
- Cut two 21" long lengths of 1"x1/2" wood. (1"x1" may be used)
- Cut two 30" long lengths of 1"x1/2" wood.
- Attach the 1"x1/2" frame (so that the 30" long lengths rest on the inside of the 21" long segments, creating a 21" tall x 32" wide frame) by pre-drilling and then securing with wood screws.
- Cut a sheet of nylon mesh which will adequately cover the 1"x1/2" frame.
- Attach nylon mesh to frame using wood screws with washers (for best results start at one corner and stretch material as you attach the rest with screws)
- Cut a 24" tall x 36" wide sheet of clear acrylic using your acrylic cutter. (Acrylic can also be found in pre-cut 24"x36" sheets depending on where you purchase, this option is much easier if you can find it)
- Attach L brackets to the top of the frame as to hold the acrylic cover in place, while allowing it to still slide out of one side. (we suggest attaching two L brackets on the bottom side of the frame and one on each side, therefore allowing the acrylic to slide off via the top) (refer to picture)
- Drill 1" vent holes in the bottom of the dehydrator while making sure holes line up with the troughs of the corrugated metal roofing. (The quantity of vent holes may vary depending on your environment, if you plan on using this dehydrator in an area which gets very hot, then we suggest adding more vent holes. While if you plan on using this in a colder climate you can add less vent holes, however we suggest no less than three)
- Drill 1" vent holes in the top of the dehydrator along the same troughs as the holes in the bottom of the dehydrator. (Again the quantity may vary)
- Place sliced fruit in dehydrator and adjust angle of inclination so that dehydrator receives maximum sun.
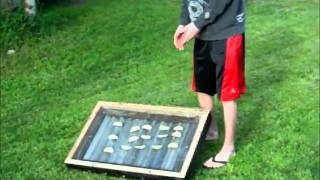
Video
[edit | edit source]Here is a video showing our design group and our solar dehydrator in action.
See also
[edit | edit source]| Authors | |
|---|---|
| License | CC-BY-SA-3.0 |
| Organizations | Cal Poly Humboldt |
| Cite as | Dylan, Dave-o-riginal (2011–2025). "Locally Delicious solar dehydrator for kids with adult supervision". Appropedia. Retrieved July 23, 2026. |