
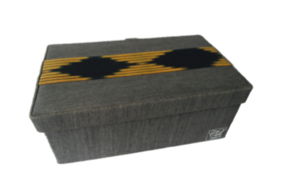
Practical Action/Compost bin/ko

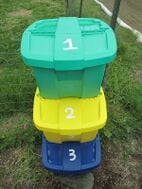
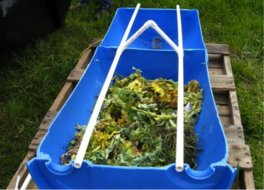
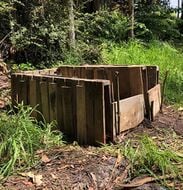
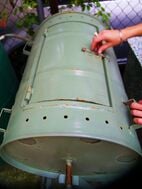
빈 퇴비화는 다른 퇴비화 시스템에서 경험했던 문제를 극복한 가정용 퇴비화 시스템의 가장 인기 있고 발전된 버전입니다. 가정용 퇴비화에 사용할 수 있는 용기에는 다양한 유형이 있으며 일반적으로 크기는 200~300L입니다. 이는 시멘트/콘크리트, 플라스틱, 금속 등과 같은 다양한 재료로 만들어졌습니다. 퇴비통을 사용하면 독립형 파일보다 퇴비 재료를 더 많이 쌓을 수 있고 바닥 공간을 더 잘 활용할 수 있습니다. 쓰레기통은 또한 날씨 문제를 제거하고 냄새 문제를 줄이며 더 나은 온도 제어 기능을 제공할 수 있습니다. 현재 대부분의 쓰레기통은 도시 경관에도 적합하도록 설계되었습니다.
앞에서 언급한 바와 같이 퇴비통은 고형 폐기물 처리 문제가 대두되고 있는 도시 지역에서 인기가 높으므로 퇴비통 사용에 대해 지역 사회에 적절한 지침을 제공하는 것이 중요합니다. 시민들에게 퇴비통을 대중화하는 데에는 일부 기술적, 관리적 문제가 주요 제약이 되어온 것으로 확인되었습니다.
내용물
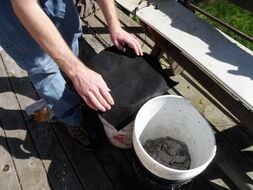
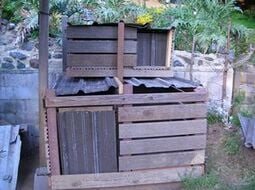
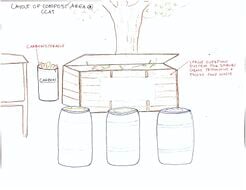
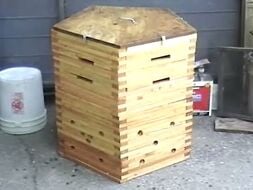
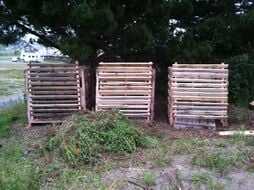
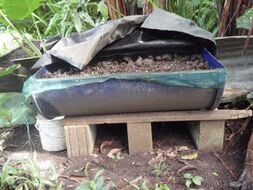
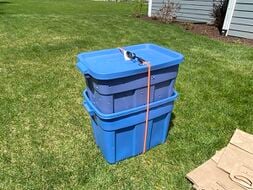
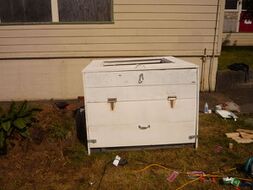
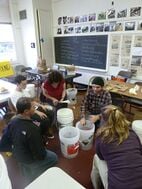
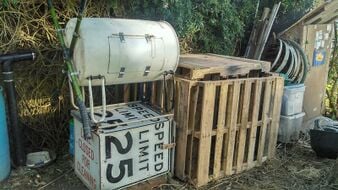
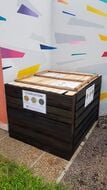
DIY 퇴비통 아이디어
퇴비통을 만들거나 만드는 방법을 보여주는 모든 Appropedia 원본 프로젝트는 다음과 같습니다 . 페이지를 만들고 프로젝트 데이터 상자 의 "인스턴스" 매개변수에 "퇴비통"을 추가하여 자유롭게 추가하세요 .


고려사항
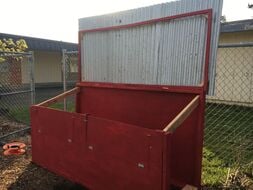
용기 설계는 쉬운 관리 방법으로 퇴비화 과정을 촉진해야 합니다. 따라서 표준 빈 설계는 다음 사항에 중점을 두어야 합니다.
- 쉬운 운송 및 설치:
- 통풍이 잘됨(통의 모든 부분에 충분한 통풍 - 통기 구멍 직경 - < 1cm)
- 과도한 수분 배출(다공성 바닥 패드)
- 주로 비, 바람 등 외부 환경으로부터 보호합니다(적절한 덮개 또는 뚜껑).
- 내부 온도 유지(통 및 시공에 사용되는 자재의 치수)
- 폐기물 추가 및 혼합이 용이함 (적당한 높이, 취급 용이한 뚜껑)
- 퇴비제거 용이 (퇴비제거 도어의 크기 및 개수)
- 쥐, 개까마귀 등 해충을 멀리합니다.
내구성
관리 관행으로서 퇴비화에 적합한 재료를 선택하는 데 더 많은 주의를 기울여야 합니다. 대부분의 시스템에서 생분해성 물질의 98%는 큰 문제 없이 퇴비화될 수 있습니다. 그러나 도시 지역에서는 공간 제한이 있기 때문에 퇴비화 과정에서 어떤 형태의 오작동이라도 주변 환경 문제로 이어질 수 있습니다. 오작동은 주로 분해되지 않는 물질을 퇴비통에 추가할 때 발생합니다. (1 번 테이블)
퇴비통을 사용하는 방법
1. 쓰레기통의 올바른 위치
쓰레기통은 부엌에서 편리한 거리(5~15m)를 지닌 정원의 적절한 장소에 위치해야 합니다. 이 장소는 우기 동안 물이 고이는 곳이 아니어야 하며 안정적인 설치를 위해서는 좋은 지하실이 필요합니다. 지하실은 과잉 물이 배수될 수 있어야 하며 토양 미생물, 지렁이 등이 들어갈 수 있어야 합니다. 쥐나 기타 해충이 쓰레기통에 들어가지 않도록 하는 것이 중요합니다. 고온에서 더 나은 퇴비화(열성 퇴비화)를 가능하게 하려면 통을 햇볕이 잘 드는 곳에 두는 것이 가장 좋습니다.
2. 퇴비화 및 유지관리를 위한 재료 추가
- 주방 폐기물과 건조된 정원 폐기물을 대체하는 층으로 쓰레기통을 가정용 유기 폐기물로 채웁니다. 무기물(폴리에틸렌, 플라스틱, 유리, 금속) 또는 코코넛 껍질, 코코넛 껍질, 바나나 줄기 등과 같은 천천히 분해되는 물질을 추가하지 마십시오.(표:1)
- 일부 잔가지와 가지는 퇴비화 과정을 가속화하기 위해 더 작은 조각으로 잘게 썰 수 있습니다.
- 고기 찌꺼기, 생선, 유제품, 기름기가 많은 제품 등 문제가 있는 물질을 쓰레기통에 넣지 마십시오(해충이 유인될 수 있음). 위의 폐기물 중 적은 양을 쓰레기통 중앙에 묻어 해충 유인과 오작동을 최소화할 수 있습니다. 또한 퇴비화 과정을 최적화하려면 우수한 모니터링 메커니즘이 필요합니다.
- 퇴비화를 활성화하려면 최소한의 양의 물질이 필요하므로 퇴비통이 최소한 3/4 정도 채워져야 과정이 제대로 진행됩니다.
- 습기가 없으면 퇴비화가 일어날 수 없으므로 물을 약간 뿌려 통에 있는 건조한 물질을 적시십시오. 수분이 너무 많으면 불쾌한 냄새를 유발할 수 있는 혐기성 조건이 생성됩니다(촉촉하지만 쓰레기통에서 물을 짜내면 안 됨).
- 미생물의 최적 성장을 위해서는 균형 기질이 필요합니다. 하나의 물질만으로는 퇴비화에 적합한 기질이 아닐 수 있으며, 다양한 성분이 풍부한 다른 기질을 혼합하여 극복할 수 있습니다(예: 건조한 정원 쓰레기와 부엌 쓰레기). 부엌 쓰레기만으로도 파리 번식에 좋은 기질을 제공하며 건조한 정원 쓰레기를 얇게 덮어서 최소화할 수 있습니다.
- 때때로 퇴비 재료를 혼합하거나 '뒤집는' 것은 공기를 공급하여 퇴비 재료를 더 빨리 분해하는 데 도움이 됩니다(그리고 불쾌한 냄새도 방지합니다). 퇴비는 적어도 일주일에 한 번은 뒤집어주어야 합니다.
- 활성 퇴비화 단계의 미생물은 많은 열을 발생시킵니다. 따라서 용기 중앙의 온도는 60°C 이상에 도달할 수 있습니다. 이 열은 잡초의 씨앗과 병원균을 죽이고 물질을 분해하는 데 도움이 되므로 바람직합니다. 퇴비통을 햇빛이 잘 드는 곳에 놓으면 내부 퇴비가 더 빨리 가열되고 분해되는 데 도움이 됩니다.
- 퇴비통의 뚜껑은 해충이 들어오지 못하도록 단단히 고정되어야 합니다. 개미나 바퀴벌레와 같은 해충이 퇴비통에 들어가면 퇴비통의 물질이 너무 건조하다는 것을 나타냅니다.
| 포함할 자료 | 제외할 재료 |
|---|---|
| 야채/주방 쓰레기, 정원 다듬기, 잔디 깎기 나뭇잎, 마른 잎(짚), 잔가지 및 잘게 썬 가지, 음식 쓰레기: 빵, 빵 등, 달걀 껍질 농장 동물 배설물(예: 소, 양, 염소, 가금류), 과일 쓰레기, 나무재 | 비생분해성 폐기물: 폴리에틸렌, 플라스틱, 유리, 금속 등 인간 배설물, 애완동물 똥(예: 개, 고양이), 유제품, 병든 식물, 생선, 고기 찌꺼기 및 뼈, 코코넛 껍질, 코코넛 껍질, 콤바 등과 같은 천천히 분해되는 물질 지방/식용유, 배터리, 전구, 전자 부품, 화학 물질 등의 위험 물질 |
| 문제 | 가능한 원인들 | 해결책 |
|---|---|---|
| 쓰레기통에 있는 물질이 분해되지 않거나 전혀 가열되지 않습니다. | 질소 부족 산소 부족 수분 부족 | 거름, 잔디 깎기, 음식 찌꺼기 등 질소가 풍부한 공급원이 충분한지 확인하세요. 통 안의 재료를 섞어서 숨을 쉬게 하세요. 통에 약간의 물을 추가하고 퇴비화 과정에 충분한 수분이 있는지 확인하십시오. |
| 헝클어진 나뭇잎이나 잔디 깎은 부분은 분해되지 않습니다. | 통풍이 잘 안됨 수분이 부족함. | 동일한 재료의 두꺼운 층을 추가하지 마십시오. 하나의 기질만을 사용하는 것은 미생물에 대한 균형 영양분을 제공하지 않습니다. 예. 나뭇잎, 종이, 잔디 스크랩. 따라서 이러한 물질을 분쇄하여 다른 물질과 혼합하면 쉽고 빠르게 퇴비화하는 데 도움이 됩니다. 레이어를 분리하고 통에 있는 재료를 섞으세요. |
| 썩은 버터, 식초, 썩은 달걀 냄새 같은 냄새가 납니다. | 산소가 충분하지 않거나, 통이 너무 젖어 있거나, 압축되어 있습니다. | 통이 숨을 쉴 수 있도록 통기를 섞으세요. 과도한 수분을 흡수하기 위해 짚, 건초 또는 나뭇잎과 같은 건조 물질을 추가하십시오. 불쾌한 냄새가 나면 마른 재료를 넣고 잘 섞으세요. |
| 해충 문제(파리 유충) | 육류, 유제품 등 부적절한 재료 통이 너무 젖음 통기 불량 | 건조한 재료나 재를 첨가하여 수분을 조절하십시오. 쓰레기통을 햇볕이 잘 드는 곳에 두십시오. 열은 파리 유충, 잡초 씨앗 및 기타 병원균을 파괴하는 데 도움이 됩니다. 통풍이 충분히 되는 파리 방지 폐쇄형 쓰레기통으로 전환하세요. |
| 암모니아 같은 냄새. | 탄소가 충분하지 않습니다. | 마른 나뭇잎, 짚, 건초, 잘게 썬 종이 등과 같은 갈색 재료를 추가합니다. |
| 설치류, 파리 또는 기타 동물(쥐, 까마귀, 개 등)을 유인합니다. | 부적절한 재료(고기, 기름, 뼈 등), 신선한 음식과 같은 재료가 쓰레기통 표면에 너무 가깝습니다. | 퇴비통(대규모)에 부적절한 재료를 넣지 마십시오. 설치류 방지 금고로 전환하세요. |
| 곤충, 노래기, 민달팽이 등을 유인합니다. | 이는 퇴비화 과정에서 정상적인 현상이며 자연 분해 과정의 일부입니다. | 때로는 문제가 되기도 합니다. 바퀴벌레, 민달팽이, 거미와 같은 가정용 해충을 멀리할 수 있는 적절한 용기 디자인을 사용하십시오. |
| 장점 | 단점 |
|---|---|
| 외부 기상 조건을 제거하므로 관리 관행이 쉽습니다. 안전한 쓰레기통 설계로 인해 동물/해충 유인이 최소화됩니다. 주변 환경의 위생 상태를 개선합니다. 정원에서 공간을 덜 차지합니다. 이 장치는 이동식이며 정원의 어느 위치에나 배치할 수 있습니다. 미학적으로 보기 좋습니다. | 높은 구매 비용(Rs. 1000/- ~ 2500/-). 부적절하거나 열악한 디자인은 문제를 일으키므로 쓰레기통 사용자를 낙담시킬 수 있습니다. 적절한 관리가 필요합니다(적절한 수분 수준이 유지되지 않으면 불쾌한 냄새가 나고 해충 문제가 발생합니다). 일부 잘못된 설계는 토양 미생물과 지렁이가 분해 과정에 기여하는 것을 중단시킵니다. |
퇴비 수집은 쓰레기통을 시작한 후 2~3개월 후에 시작할 수 있습니다. 퇴비화에 소요되는 시간은 용기에 추가된 재료와 따르는 유지 관리 관행에 따라 다릅니다. 제거된 퇴비는 숙성을 위해 외부(1~2주)에 쌓아야 합니다. 이는 퇴비의 식물독성 화합물을 감소시킵니다. 균일한 제품을 얻기 위해 이 퇴비를 4mm 메쉬를 통해 보냅니다. 대형 입자는 추가 분해를 위해 쓰레기통으로 다시 보내질 수 있습니다.