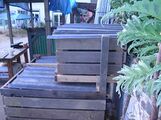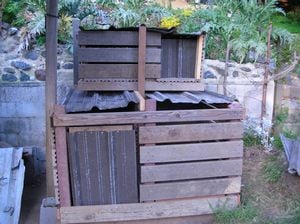
Compost is a mixture of decaying organic materials (plants) that is used for to fertilize and condition land. Compost can be anything from a pile of sticks and brush to food scrap bins using worms to digest organic materials (vermiculture). The main purpose of compost is to recycle food and garden wastes in to fertile soil.
Nature recycles the Essentials of life[edit | edit source]
As plants grow, huge amounts of organic materials are spread across landscapes in the form of leaves, needles, branches, and other leafy matter. These "dead" materials are broken down by an armada of bacteria, fungi, insects, birds and animals to produce topsoil. All of these "composters" recycle important plant nutrients by consuming plant material and excreting a more broken down form. This is natures fertilizer recycling nitrogen and other nutrients back in to the soil profile to be absorbed by next seasons growth. This process is very slow adding just inches of soil every thousand years.
How does this do anything for me?[edit | edit source]
The very same bacteria and fungi from nature can break down your kitchen scraps and grass clippings and create nutrient rich soil. As these microbes break down your wastes they generate huge amounts of heat that speed up the breakdown process. In most of nature, soil development is a multi-year process, but warm compost piles can break down huge amounts of material in just a few months!
Why does CCAT want a Composting system?[edit | edit source]
CCAT has had several composting bins throughout the years. All of the other systems had at least one of the following four problems: broken down due to age, was taken apart during the multi-year moving process, was not efficient, or was too accessible to rodents. I attempted to fix all of these problems by designing a more permanent system out of non-biodegradable materials. More on the design below...
There are many benefits that come from Composting:
- Eliminates yard and food scraps from the waste stream. According to the EPA, 23% of our current waste stream is yard/food material.
- Breaks down large materials in a shorter period of time than natural decomposition, i.e. branches
- Compost can be used to amend CCAT soils to increase agricultural yields, improve the physical and chemical properties, increase soil stability (prevents erosion), and increasing topsoil quantity and health.
- Breaks down weed seeds and certain pathogens with high temperatures. "cleans the soil"
- Promotes microbial growth, the main factor in breaking down rock materials in to a size usable as plant nutrients. Encourages earthworm production important ecosystem engineers.
- Soil loss, decreased nutrient availability and lower microbial populations are all very important environmental issues that are of major concern. If every person were to take their organic materials from the waste stream and return it to the soil through composting, all three of these issues could be significantly reduced in severity.
Description of Project[edit | edit source]
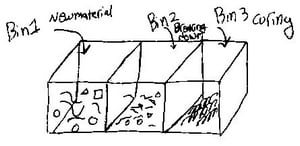
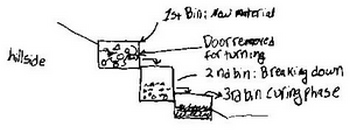
This comprehensive composting system will be a system that decomposes kitchen and yard wastes. The compost bins should hold a large amount of material, be easy to maintain, aesthetically pleasing and be appropriate for the space and users. A three-tiered system will allow for multiple phases of compost to be "curing" simultaneously. Finished compost material will be used to amend CCATs present and future garden soils. Ideally, the system will be maintained year round. Compost can work year round especially in milder climates such as Coastal California.
Background Information[edit | edit source]
Types of Composting Systems[edit | edit source]
There are many ways to build a compost pile. As long as each design fits the needs of the users, almost any design can be an efficient composting system. Below are a few of the shapes, sizes and purposes of different composting bins.
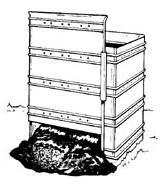 |
Single Bin- A stationary bin where new material is applied to the top of the bin and processed compost is removed from the bottom or left to further decompose. |
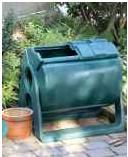 |
Compost Tumbler- Many systems are available that use a round cylinder to house the compost. Rotating the barrel is effectively turning the compost. These bins are very efficient for small amounts of material and for the user who wants a minimal amount of work to manage their compost. |
 |
Block Bin- Concrete blocks or bricks can be used to build a makeshift container. Not suitable for kitchen wastes as not secure from rodent access- this system would need additional barriers such as chicken wire. |
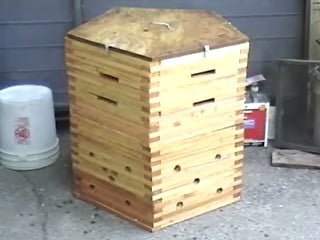 |
Vermiculture - Using worms to process organic material is a very exciting sector of composting. Red wrigglers are a very fast way of processing huge amounts of material. Worms are sensitive to waterlogged compost and high acidity- so citrus is a not able to be processed in this system. Worm castings, a by-product of the worms consuming food, can be used as a great soil amendment rich in nitrogen and other nutrients. To see more information on the worm bin pictured here, check out CCAT's Vermicomposting Bin |
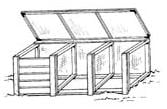 |
Multi-stage bins- Several cells contain compost in different stages of decomposition. This system is the most forgiving (almost any material can go in the bins) and of conventional systems-meaning not vermiculture- is able to process the most compost in the shortest time. |
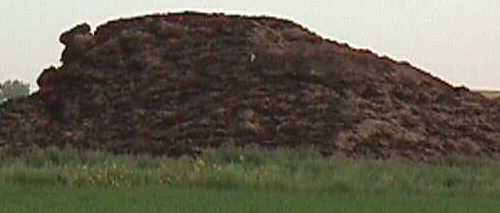 |
Classic Pile- The easiest and no-expense method of composting. Follows the same principles but without a surrounding structure. The pile method is a rodents dream if food wastes are used. Usually piles are used for woody material and brush- because this method does not usually include food wastes (a major source of high energy for microbes) they don't tend to get as hot and therefore have a slower decomposition rate. |
Advantages of Compost Farming[edit | edit source]
- General fertility of the soil is increased
- Mechanical structure is improved- clay soils looser, sandy soils more cohesive
- Ease of cultivation-reduces effort in farming due to improved soil quality
- Increases water holding capacity
- Prevents hardening of soil- a major cause of soil erosion
- Earthworms multiply- artificial fertilizers kill worms, provide pores/increased breakdown
- Increases Microbial populations- Fungi and bacteria extend plant root matrices, increased nutrient uptake
- Increases topsoil layer- builds rich medium for roots
- Darkens color of soil- absorbs heat more readily, increases plant/microbe growth
- Compost kills weed seeds- nutrient robbing weeds are kept to a minimum
- Pest/Disease prevention- Healthy plants don't attract as many bugs
- Humus counteracts toxicity- Salt and Aluminum is decreased in potency
Factors in Composting[edit | edit source]
The key elements to building nutrient rich compost are organic materials, proper moisture and aeration. Other factors such as particle size, climate, and time also affect compost.
Organic Materials[edit | edit source]
Creating healthy compost requires that you feed the organisms good food in healthy proportions. The little beasties that do our dirty work of chewing up the material like almost anything that is made of plant matter. Kitchen rinds, veggie leftovers, husks, even rotten plants are all delicacies. Maintaining the proper nutrient balance is also important for creating balanced compost. Adding grass clippings, kitchen wastes or manure supplies nitrogen and little carbon while sticks, hay, and leaves provide almost exclusively carbon. Avoid substances such as dairy products and meats. These wastes create odor problems and can attract flies and other rodents.
Moisture Content[edit | edit source]
Composting microorganisms need a decent amount of water to survive. Desiccation (drying out) damages the microbial populations and the overall effectiveness of your compost pile. Saturating the pile decreases the amount of oxygen available to microbes causing the material to sit and rot as opposed to breaking down. Many materials that can be added to a compost pile contain moisture but often times it's not enough. Rainfall will affect this factor so monitor the soil around your pile for excessive moisture. Cover the pile with a tarp, lid etc. to prevent too much water from entering the compost pile. A good moisture content will not drip any water from a handful of compost just resting but will if you squeeze the material; like a sponge. But you don't want to add water to compost until the saturation point, the microbes will pull plenty of moisture out of the composting material. If you live in a dry climate, occasional waterings may be needed to prevent the piles from drying out too much.
Process of Composting[edit | edit source]
- Choose a method of composting that fits the needs of the users.
- Create the housing, whether it's chicken wire cylinders or a large scale system. I would suggest spending a little more time to create quality housing- poor housing can break mid-process and repairing bins during the decomposition process can be nasty job.
- Devise rodent proofing method if using potential food sources ie food scraps
- Start piling materials!
- As you start to accumulate more material the temperature of your pile will increase. COMPOST CAN REACH VERY HOT TEMPERATURES. It is possible and has happened many times that workers or gardeners get burned managing compost. This temperature increase is normal and should be seen as a sign of a compost pile working effectively. However it is also possible to make a compost pile too hot. A normal temperature pile is hot enough to destroy weeds, small seeds, and pathogens. The ideal temperature range is between 150-170F or 65-75 C and should be measured with a long thermometer. Although it is rare, compost piles can catch fire spontaneously if they are continually too hot. See the table below for troubleshooting problems with a compost pile.
- Eventually the temperature will start to decrease indicating that the microbes have digested a good amount of the material. You many notice that there still appears to be whole chunks of food scraps or garden refuse. This is common as the outside of the pile- which is in contact with the most air- is kept cooler and therefore experiences slower decomposition.
- Turn the compost pile by shifting material around enough to fully cover all undigested material. The larger a pile gets the more heat tends to be generated but small piles can still get hot. Piles can be turned several times if needed.
- Finished compost should look like dark colored dirt- the color of high quality potting soil.
- Spread the compost love amongst your plants!!! Compost is most often used as an amendment to other soils but can be used alone.
Beneficial Composting Materials[edit | edit source]
- Coffee grounds and filters (great nitrogen)
- Cotton rags (if your pile gets hot)
- Dryer and vacuum cleaner lint
- Eggshells
- Fireplace ashes
- Fruits and vegetables
- Grass clippings
- Hair and fur
- Hay and straw
- Houseplants
- Leaves
- Nut shells
- Sawdust
- Shredded newspaper
- Tea bags
- Wood chips
- Yard trimmings
Harmful Composting Materials[edit | edit source]
- Glossy paper- all papers containing glues, paints, oils etc. should not be used
- Black walnut tree leaves or twigs -Releases substances that might be harmful to plants
- Coal or charcoal ash
- Dairy products (e.g., butter, egg yolks, milk, sour cream, yogurt)- Create odor problems and attract pests such as rodents and flies
- Diseased or insect-ridden plants
- Fats, grease, lard, or oils- Create odor problems and attract pests such as rats and flies
- Meat or fish bones and scraps- Create odor problems and attract pests such as rodents and flies
- Pet wastes (e.g., dog or cat feces, soiled cat litter)- Might contain parasites, bacteria, germs, pathogens, and viruses harmful to humans
- Yard trimmings treated with chemical pesticides- Might kill beneficial composting organisms
If your Compost pile isn't working right...[edit | edit source]
| Problem | Solutions |
|---|---|
| Compost is not working- no digestion apparent | Check internal temp, if 150-170F digestion is occurring on inside, wait until internal temp drops and turn pile, if temperature is not high enough, add more food scraps and increase pile size. |
| Compost is smelly | Stinky compost usually signifies anaerobic decomposition (or breaking down without oxygen). Check the moisture content, if it's too wet add dry material like straw. |
| Compost is too hot- temps above 180F | The microbes are working too well! This high temperature signifies too much nitrogen or high energy foods. Try adding more dry brush and less kitchen scraps. Also turn the pile to release a lot of heat. If this is consistently a problem, try reducing the size of your piles- they hold less heat than large piles |
Criteria[edit | edit source]
- Easy Upkeep- Composting requires periodic turning and maintenance. The design and location should make it easy to use the compost system
- Esthetically pleasing- Composting is an important Appropriate Technology and should be presented in a manner that will appeal to everyone
- Durable Design- Compost incorporates moisture, heat, and microbial action. These factors combine to break down materials, including you compost bins, in a short time. The bins must be made of materials that will endure the composting process as well as external environment conditions.
- Security- Compost piles can be potential food sources for rodents. The design of the bins must prevent rodent access while maximizing airflow
- Flux Capacity (Thanks Doc!)- CCAT experiences huge variation in the amount of material produced by the grounds depending on whether school is in session or not. The bins must be designed to accommodate a large variation in amounts of matter.
Design[edit | edit source]
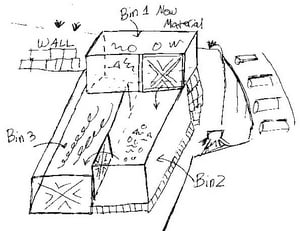
I proposed several designs to CCAT that I felt would be appropriate. With a little guidance I determined that CCAT needed a large system able to process a lot of garden material that was easy to use. I have included all of the designs I drafted. Not all of the designs were meant for CCAT per se but are viable designs that have been used by many a gardener. The designs are presented in order from easiest and cheapest to build to most involved and costly. However the management time for each system varies as does the functioning purpose. For example, simple chicken wire bins are simple and cheap to construct but can be visually displeasing and cumbersome to turn the piles. On the other hand, a three tiered vertical system takes a lot of time and money to construct but the management process takes a fraction of the time.
Construction[edit | edit source]
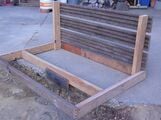
- First I selected a site for the compost bins. A three celled system takes up quite a bit of space so I decided to build up instead of out.
- Next I took a pre-assembled floor(by a fellow CCATer) made of Trex.
- Third I built a base frame to guide the vertical posts that will hold the sides of the bins. I decided to use recycled wood for the frames of the entire bin. This was to eliminate some of the torsion that Trex can experience under pressure.
- I took two six foot Trex posts and sat them in concrete blocks.I then filled the extra space around the post with gravel. The Post wedged itself in to the block adding weight, stability and translating the weight all the way to the cement pad the bins are resting on.
-
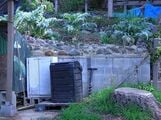
Site before construction
-
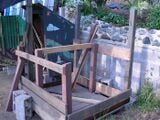
Building the base and wood frame
-
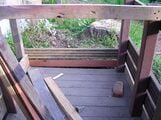
Floor of bottom cells
-
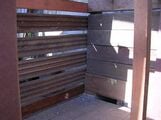
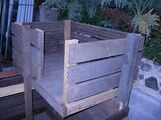
One inch gaps to provide lots of air flow
- Building up the sides, I left about 1 inch gaps in between the Trex boards- this is for airflow
- Now I had one really big square bin that needed to be divided in to two cells. I used concrete blocks and another floor of Trex to raise the floor of the second tier about a foot above the final Tier.
- I began to build the first cell separately so I wasn't building a box four feet in the air. Again I began with a wood frame for the base, added Trex boards for the bottom, and built up the sides leaving one inch between boards.
- After completing cell one, I placed it on top of the other two cells.
-
Cell one being built separately
-
Cell one in place
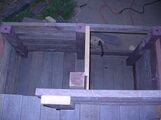
- I added a vertical cross beam that secures all three boxes to each other.
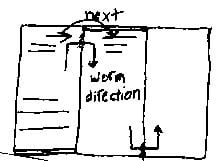
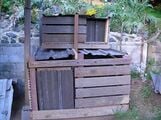
- Next I cut tin roofs and doors for each of the cells. Roofing is important to keep the incessant precipitation out of the compost. The doors make it easier to turn a pile from one cell in to the next.
-
Top view of all three cells
-
Completed Bins!!! Front view
-
Completed Bins!!! Side view
Cost Table[edit | edit source]
| Material | Cost/unit | Total cost |
|---|---|---|
| Trex | 2.09 /ft | None-recycled from CCAT stores, around $300 new |
| Concrete blocks | ~ $1/ea | none-recycled |
| Corrugated Tin | .50c/lb | $40 |
Discussion[edit | edit source]
When reexamining my criteria of easy upkeep, esthetically pleasing, durable design, security, and capacity variablity I found this project to be a success. One of the major goals of this project was to make composting easy for CCAT. Turning compost can be a significant sink of time unless the design makes the process easier. Tiering the design almost on top of each successive cell minimized the square footage of the bins while maintaining ease of turning. The aesthetics of the project, while not exactly as I imagined, are up to par for the time frame.
Another key aspect of final design was the material. Trex, a recycled plastic-wood composite can withstand high temperatures and continuous moisture, an ideal combination for compost bins. Trex is commonly available throughout the United States. Rodents have been an issue of major consideration for CCAT and many another gardener. Mice and rats are especially adept at finding homes inside compost piles or bins. The three tiered design makes many sides inaccessible to rodents but makes other areas more accessible. For example, the areas around the roofs and doors for the bins need to be adjusted in order to increase security.
Variability in compost capacity was one idea that became a design criteria. During the summer months, CCAT has a much lower organic material output as school is not in session. The bins need to be able to accommodate the output at the peak of use (during the school year) while maintaining an appropriate paced decomposition process at minimum inputs (during the summer).
Helpful hints to make composting easier
- Quantify compost quantity per time- I had no idea how much material CCAT would be producing throughout each season. This varies on kitchen wastes and garden refuse both factors which can dramatically shift depending on growing season and whether school is in session. Design the bins around your material. Don't forget you may have years with more organic material than others so a slightly bigger design couldn't hurt.
- Optimize for Input sources and Output users- Who are the input users (kitchen users and gardeners) and how easy is it for each of these groups to access the piles. Are the piles easy to access from the kitchen? Also who is the output user- is the pile in a place that makes transferring heavy soil easy?
- DON'T use corrugated tin- it is difficult to cut to size and has sharp edges. Corrugated plastic would achieve the same effect with less weight and fewer cut fingers...
Overall, the whole process was a success. This project was created almost entirely with recycled materials from CCAT. The three bin system is sturdy enough to have someone standing on any of the three levels. Unfortunately, the compost system is so large that it will take about six months before efficiency testing can be done. Repairs should be very easy as almost all sides of the bins are exposed to air.
References[edit | edit source]
The Complete Book of Composting, J.I. Rodale Editor-in-Chief, Rodale Books Inc. Emmaus, Pennsylvania. 1971.-- Very complete book, available at Cal Poly Humboldt Library
Compost Microorganisms, Nancy Trautmann and Elaina Olynciw, Cornell University Science and Engineering, http://web.archive.org/web/20090701041749/http://www.css.cornell.edu:80/compost/microorg.html
The Good Life, Helen and Scott Nearing, Schocken.1990-- Chronicles of 1920 Appropriate Technology scientists living their dream
Building for Self- Sufficiency, Robin Clarke, Universe Books, New York. 1977
A great website provided by the EPA http://web.archive.org/web/20080227052838/http://www.epa.gov/epaoswer/non-hw/composting/index.htm
