The Campus Center for Appropriate Technology (CCAT) at Cal Poly Humboldt in Arcata, California is completely remodeling the inside of their building. When all of the construction is finished the entire interior of the house will need to be painted. As an ENGR 305 project, Spring 2007, Andrea Lanctot and Jill Anderson have decided to make all the interior paints from scratch using safe natural ingredients.
The project has four main goals. The first is to research natural paint ingredients, recipes, and techniques. The second is to make several of the recipes and test the paints for color, durability, and texture. The third is to choose paints from the tests for the new CCAT house and apply them to the interior. The last goal is to test the final application with the test of time.
Research[edit | edit source]
See natural paint basics for background research on ingredients, types and advantages/disadvantages of natural paint.
Testing[edit | edit source]
Testing Materials
To test the paints, we needed as close to a replica of the CCAT interior walls as possible. We contacted local construction sites to try and find intact walls that had been removed but crews had thrown materials outside and due to rain, pieces were unusable. Our next tactic was to purchase drywall and mud the walls to produce a mock texturing. We purchased one piece from a hardware store and was able to buy a second piece from the Arcata Recycling Center.
-
Breaking drywall
-
Mudding drywall
-
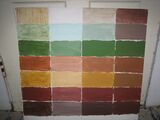
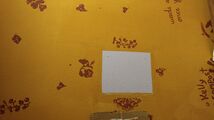
Test boards with texturing
Paint Choice[edit | edit source]
Next we had to decide what paints to test. We made a list of the following possible paints we could try: Flour, Quark and Lime, Quark and Borax, Casein Powder and Lime, Casein Powder and Borax, Quark and Oil Glaze, Egg, and Soy whey.
Several factors whittled the list down. CCAT had voiced concern of using lime paint. Lime paint is extremely strong, durable, and water resistant but is also highly caustic and dangerous to handle. Some paint recipes called for lime putty which is made by slaking lime for several months, this was not feasible. We chose to cut out lime paints and use the alternative ingredient which is borax. Borax is is easily accessible, it can be found at the grocery store or hardware store, and is much safer.
Casein powder was not available locally. We called dairies, grocery stores, craft stores, cheese makers, and yogurt/ice cream makers and could not find it. Casein powder could be ordered online but we decided to make our paint of only locally available ingredients. We tried using powdered milk but it did not work, and decided to make the quark paint instead of the casein powder paint.
We were given a bucket of soy whey from the local tofu shop. The whey is a waste product from making tofu. We tried substituting the whey into both the flour paint recipe and quark recipe. The whey was very grainy and broken down into the mixture but did not form a binder.
Quark and Borax paint, Flour paint, Egg paint, and Quark and Oil Glaze were the four paints we extensively tested.
Testing Begins[edit | edit source]
Flour
Flour paint was the first paint to be made. Flour paint is a simple recipe and procedure but can be varied dramatically. First, the thickness of the paint can be altered by the wheat paste, amount of clay, and amount of filler. Second, virtually any clay can be substituted into the recipe. We tested four different clays. Local clay that we hand sifted and three fine screened clays from the pottery supply store. The three bought clays where super white, EPK, and red clay. Different flour and different fillers can also be used and will produce different results. We chose to use unbleached flour bought from the bulk bins at Wildberries supermarket. We also chose to use mica as our filler because it is cheap and is said to add a light reflective quality to the paint.
-
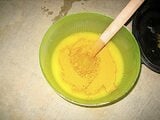
Testing first batch of flour paint
-
Mixing paints and testing color gradients
-
Flour test board Humboldt clay, white, EPK, red, from left to right
Screening Clay
CCAT was able to give us some local clay that they were going to use for making cob. To use this clay for our paint, we had to first screen it. The first day of screening was very difficult. We tried screening the clay with large screens that CCAT owned. We screened the clay over a bucket and found the bucket to be too small. We tried screening the clay over a trash can cover which helped capture more of the screened clay. The screens were in bad shape so we tried restapling the ends but ran out of staples. The clay was also too wet. We decide to dry the clay and come back and screen it.
After the clay dried we used our handy kitchen strainers that we had been using for the milk curds. This went much quicker and was much easier. We found out later, during a cob workshop, that drying the clay can change the consistency. The store bought clay was very soft and somewhat sticky while the dried screened clay was harder and more sandy. The clay did not mix well into the paint and would tend to drop to the bottom. Although using this clay was not ideal it was local and it gave the painted surface a natural texture.
-
Screening the clay over a bucket
-
Screening the clay over trashcan cover
-
Large clay chunks being screened out
-
Drying clay
-
Screening dried clay
-
Using kitchen strainer
-
Screened vs before screening
-
Finely screened clay
Quark and Oil Glaze
Quark and oil glaze can be used to seal flour paint. After making a small batch we sealed the top part of each test square to compare glazed and unglazed. The glazed flour paint was much brighter in color.
Quark and Borax
Our first batch of Quark and Borax paint (a.k.a. milk paint) was exciting because it produced such a different consistency, texture, and look than the flour paint. The milk paint dried into a harder, glossier surface, and was water repellent. The pigments added to the flour paint were also much more pastel in the milk paint
Egg
The first time we tested egg paint we followed the recipe exactly and were unhappy with the results. The pigment was slaked in water and then used in the recipe which calls for linseed oil, water, pigment and egg yolk. The pigment just seemed to stick together, like little bubbles of pigment suspended in the mixture. This is not an unexpected result if you think about it because oil is hydrophobic (or afraid of water) so it will not mix with water. That is unless you have an emulsifier, like soap, which can react with both oil and water-bridging the chemical gap. However, egg yolk is an emulsifier. What we hadn't realized is that the ratio of the oil to water to egg yolk had to be just right. What we were seeing was a water-in-oil emulsion that was only partially complete. There was too much water in the paint.
The second time we tried to make egg paint we used unslaked (powdered) pigment. By not adding the extra water used to slake the pigment we achieved the correct oil to water to egg yolk ratio. The pigment mixed well into the paint.
Egg paint gives a solid deep color. The biggest drawback is that the batches are small and the linseed oil gives it a strong smell. We decided not to use egg paint as a wall cover, but as decorative paint instead.
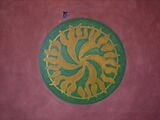
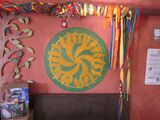
Egg Paint can also be made using just yoke and pigment. This paint is rich in color and shiney. We went with this paint for the logo.
-
Separate yolk from whites
-
Add pigment
-
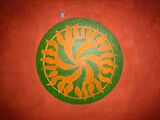
Egg paint logo
Pigments
The yellow (Iron Oxide), red (Iron Oxide), and green (Chrome Oxides) pigments we used were mineral oxides ground down into a finely powdered form. By adding more or less of a pigment we achieved different tints of each color. We also combined pigments to achieve different colors for example we mixed red and yellow to make orange.
The brown was the color of clay without pigment. By using different clays we achieved different versions of brown.
We used powdered titanium dioxide and super white clay to achieve bright white.
We tried to make blue pigment out of boiled down blueberry juice. After removing the boiled down juice from the heat, the juice began to harden and was difficult to work with. Our experimental blue pigment required at least 100 times as much pigment added to the paint as the mineral oxide pigments did and ended up looking more gray than blue. We wanted to try to make this pigment because the store bought blue pigment was expensive and it was not 100% natural. In the end we decided to use the store bought blue pigment because we did not have enough time to experiment with other possibilities.
Milk Paint
See Curdled milk paint recipe.
Battle of the Curds[edit | edit source]
Trying to make the quark for the milk paint was the most trying. The recipe said to pour non-fat milk in a bowl with lemon juice and leave in a warm place, but what they do not state is the temperature required to curdle the milk. Our process consisted of 5 gallon buckets with milk and lemon juice placed on the floor vent of Andrea's heater. The results of this process were never the same. After one night, one bucket could have curds while the others did not. Sometimes curding took more than one night, sometimes the milk never curded. Buckets were tried on the heater and near the heater. Some times the curds where hard, some times soft, some times too soft. Some times the left over liquid was clear and didn't smell, other times the liquid was brown and smelled slightly. Inconsistency in the curding process was most likely due to varying heat temperatures.Heat will produce faster curds but hardens the curds. Milk can be warmed and the lemon or lime juice (fresh lemons are more acid) added while stirring.
Flour Paint[edit | edit source]
See Flour paint recipe.
Flour Paint Issues[edit | edit source]
One of the issues we found is that flour paint is thick. The viscosity of the paint makes it difficult to apply with rollers and paintbrushes. In fact flour paint can be damaging to rollers and paintbrushes if it is not cleaned immediately because the flour and water parts act like glue. Not only is flour paint hard on rollers and brushes but these tools tend to give uneven coats. Using rollers would leave the wall looking streaked and the brushes seam to wipe away as much paint as they applied.
Another issue we had was with the clay. We decided to use local river clay. We sifted the clay to separate the large granules from the small. We still ended up having larger sand sized granules in the clay, so we chose to leave them in for texture. While the sandy clay gave a great texture we found it difficult to apply. The sand granules would bunch up where we first began appling the flour paint and as we spread the paint around the wall there would be less and less sand.
Due to these issues we experimented with a few paint application techniques. We really liked the way the wall looked after we used a sponge to paint with. We found that with sponge painting we could avoid the uneven application of the sand granules in the paint. We could control the evenness of the color better as well. There is one major drawback to this technique: time. Sponge painting a wall takes a lot more time than using a roller. We choose a hybrid approach. First we used the roller to cover a large space then we used the sponge to even out the tone and placement of sand granules.
Plan for CCAT Interior[edit | edit source]
Compost Room[edit | edit source]
The compost room will be a demonstration room. The main display is the composting toilet system. The walls in this room will be subject to water and bacteria, so the paint that we use has to be water resistant and anti-bacterial; both are qualities found in milk paint. We choose to paint the walls green because we thought it was an appropriate color for a room dedicated to compost.
Making the Compost Room Paint[edit | edit source]
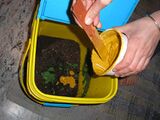
The paint made for the compost room was our first large batch of milk paint. We calculated how many quarts of milk we needed by the book estimate of 18 ounces of quark per quart. Unfortunately when we opened the buckets and strained the curds we were seriously short. We ended up with half the amount of quark we needed. We decided to make half a batch of paint, water it down slightly, and use this as a primer for the room.
This first large batch of curds did not make a very good creamy consistency. Some of the curds would not mix completely because they were slightly hard. This left small bits of hard curd in the paint.
The second batch of curds came out much better. They were soft and mixed completely into a thick creamy texture. The quark for the second batch came out well but once the entire recipe was complete, the paint seemed way too thin. For milk paint, it is recommended to add more filler (whitening) to the mixture to thicken the paint if needed. We added two extra cups of whitening to thicken the paint and this seemed to help. Unfortunately, after the paint was applied and had dried we noticed white residue streaks in spots where the paint had been applied too thickly and the finish seemed more matte or chalky.
Lessons Learned[edit | edit source]
The compost room taught us valuable lessons for the next room. One, we believe the hard curds are from leaving the buckets near or on the heater for too long. The heat essentially cooks the curds and makes them hard. Also, recipes for quark state to use skim milk OR non-fat milk. The non-fat milk produces better results. Two, adding chalk to thicken the paint produces a much different finish/color and can leave chalk residue on the walls. Three, this added chalk seemed to degrade the durability and water repellance of the paint.
Downstairs Bathroom[edit | edit source]
The downstairs bathroom is a public facility that will also be subject to water and bacteria. Milk paint has antibacterial and water resistant properties, this makes bathrooms the perfect candidate for milk paint. We decided to paint this room blue because we did a little research on the psychological effects of colors, and found that blue is really good at making people feel relaxed. Blue also nicely complements the stained concrete floors.
-
Bathroom before painting
-
First roll of paint
-
Rolling
Making the Bathroom Paint[edit | edit source]
Armed with the lessons from the compost room, the bathroom paint was a success. When making the recipe, We decided to cut down the water in the borax mixture because it was during this process that the prior batch had become too thin. We used 2/3 of the hot water. We also slightly decreased the whitening portion by one cup to insure no white streaks or decreased water repellance.
Office[edit | edit source]
The office is not expected to be subjected to an excessive amount of moisture and/or bacteria so we felt that it would be safe to use flour paint. We suggested painting this room red because according to our research on the psychological effects of colors red stimulates conversation. However, the CCAT codirectors decided to go with a light yellow. They decided light yellow because it is hoped that the color will be similar to the color of the future cob wall.
Making the Office Paint[edit | edit source]
We needed to test out the flour paint to see how much it covered. We made a single batch, got it to the color we wanted, and began painting on a wall that we knew was going to be knocked down for the cob wall. We found that one batch covered 72.25 square feet. We also used this wall to perfect our painting technique. (See flour paint issues above for more information). We did not like the look of rolling the paint on so we decided to sponge the paint on in a circlar motion. By using the sponge, we had more control of the paint and were able to spread the clay particles around and make a textured look.
Once we determined square footage coverage we proceeded to make the batch for the entire office. This was our first large batch of flour paint. We multiplied the recipe six times and found some issues due to this multiplication. First, it took longer to make. Second, mistakes were easier to make and more detrimental due to the increase amount of resources at stake. Third, we also multiplied the amount of pigment to be used and found that it wasn't enough. We added a third (1/3) more pigment to the batch and the color was still not bright enough.
-
Testing square footage
-
Coverage and look of rolling
-
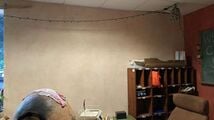
Office before painting
-
Sponging first coat
-
Sponging second coat
-
Finished Office
Lessons Learned[edit | edit source]
When making paint its better to make more than you need. This is because it is nearly impossible to match a previous color, even with meticulous recording. Excess natural paint can be refridgerated for a few days and is compostable.
Utility Room[edit | edit source]
The utility room is not expected to be subjected to an excessive amount of moisture and/or bacteria so we felt that it would be safe to use flour paint. We collaborated with the CCAT Co-Directors and decided to do this room in an orange color.
Making the Utility Room Paint[edit | edit source]
Orange was a difficult color because two pigments have to be mixed to make it. Also when it was added to the flour paint (with yellow undertones) the color was distorted. The utility room ended up being an orangy-brown color.
Application of the utility room flour paint was also a challenge. Although the CCAT Co-Directors really liked the technique we used in the Office, they said that they would prefer a different technique in the utility room. They said this because the color of the office and utility room ended up being similar. The technique that we ended up using in the utility room was just using the rollers (and sponges for the corners). We decided to work with the streakiness of the roller application by trying to control the streaks. This gave a soft effect that was slightly different than the office technique.
-
Trying to make orange
-
Unfinished Utility Room
-
Painting begins
-
The first coat
-
Applying the second coat
-
Almost done
Gallery/Classroom[edit | edit source]
This room is the largest in lower part of the CCAT house. It is the first room people see and is the room they will spend the most time in. Choosing colors for this room is very important, because these colors help set the mood for the downstairs. We discussed the colors for this room with the CCAT Co-Directors more than any other. We realized that we should have started painting in this room because color decisions were more difficult to coordinate now that the other rooms were finished. We finally decided on red, as an accent color on two opposite walls, and beige, on the other two walls. In our research on the psychological effects of color we found that red is a conversation stimulant. We chose to combine it with a subtle color like beige because we felt that having such a large room be all red would make it seem dark, and oppressive.
We chose to use flour paint because the gallery/classroom will not be subject to excessive amounts of water.
Making the Gallery/Classroom Paint[edit | edit source]
Making the gallery/classroom paint was not any different than making the flour paint for other rooms. The only real difference was that we used this room as an oppurtunity to teach our class how to make and use flour paint. We had our class paint one red wall and one beige wall. In the gallery/classroom we choose to do a rubbing application technique. We would wet a large sponge and rub the paint into the wall, avoiding any pattern or harsh lines. We planned on doing a different technique on top of it but decided that we liked it the way that it was.
-
Close up of dirty gallery/classroom walls we had to clean
-
Testing techniques and complimentary colors for the gallery/classroom
-
Up close application techniques
-
Sponging the gallery
-
First coat of paint in the gallery/classroom
-
Drawing a circle for the CCAT logo using a pencil, string, and a pin
-
Tracing the circle for the CCAT logo with paint
-
First finished gallery/classroom wall
-
Second coat on tan wall
-
Final look
-
Batch of white paint
-
Prep for logo
-
Using projector
-
Tracing logo
-
Applying yellow egg paint
-
Applying green egg paint
-
Detail
-
Back wall
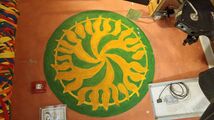
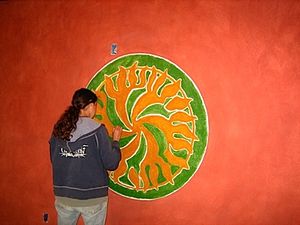
After doing the first coat of paint on the first wall we decided that we wanted to do a mural of the CCAT logo on that wall. After deciding the center and radius of the CCAT logo's outer circle we made a gigantic compass out of a pencil, string, push pin and a steady hand. After placing the circle we painted it white, because we determined that egg paint shows up better on white as opposed to red. Next we had a transparency made with the CCAT logo on it. Using a rented projector we projected the image on to the wall and gently traced it with a pencil. Then we made yellow and green Egg paint and filled in the CCAT logo.
Time[edit | edit source]
This project took a tremendous amount of time.
It started with research. It took a while to find information on natural paints. There are not many books or web-pages with detailed instructions. The biggest resource was The Natural Paint Book. During this research time we also had to measure rooms, determine square footage, and develope a budget. This first portion of the project took a few weeks. Estimated student work hours-25hrs.
The second portion of this project was testing. Testing requires lots of time and patience. Even after intitial testing was finished, we were always testing recipes and techniques. The first few times at making paint was very slow and tedious because we had to keep referring back to the book and the steps. Testing colors took even longer. We had to separate paint and mix small mini batches with pigments. Estimated student work hours-40hrs.
The third portion of the project was surface preparation and making large batches of paint. Preparation involved sweeping, moving items out of the way, cleaning walls, taping, and laying ground clothes. Making large batches of paint obviously took longer then the test batches. We had to calculate recipe coverage and room square footage to multiply recipes accurately. Making large batches of curds was much harder and took a lot longer. Making large batches of flour paint required several pans or small batches made one at a time till you made the required amount. Estimated student work hours- forever. Weekends, before class, after class, between class.
The fourth portion was application. This was the most fun (when everything was going right). Rolling was the quickest application but did not leave the best finish. Sponging looked the best but took a long time. Estimated student work hours- maybe around 50hrs?
Total time- an entire semester with part of every weekend devoted to some aspect of the painting project.
Total estimation-200hrs
Cost[edit | edit source]
Budget[edit | edit source]
To see a copy of our preliminary budget go here.
In the preliminary budget we estimated that we would need between $572.29 and $883.17. We factored in two coats worth of paint, testing, incidence, and materials. We also had not decided on what kinds of paint we would use and had to make estimates. The cost decreased because we only ended up painting the bottom story of the house and we got most of the painting materials donated.
Materials[edit | edit source]
We were able to get all of our painting tools donated or borrowed except for sponges, tape, and cheesecloth. We had to pay out of pocket for the ingredients but we were reimbursed by CCAT.
Most of our supplies were bought at Phoenix Ceramics Supply. Materials are not strictly price per pound, the larger the quantity the cheaper the price.
| Qty | Material | Cost |
|---|---|---|
| Flour Paint | ||
| 8.63 lbs | Unbleached Flour | $5.60 |
| _lbs | Humboldt Clay | Free |
| 10lbs | EPK Clay | $4.50 |
| 1lbs | Red Clay | $2.25 |
| 1lbs | Super White Clay | $2.25 |
| 5lbs | Mica | $8.50 |
| Flour Paint Subtotal | $23.10 | |
| Milk Paint | ||
| 20gal | Humboldt Creamery Milk | $90.00 |
| 50lbs | Chalk | $8.80 |
| 3 lbs | Borax | $4.25 |
| 5 | Lemon Juice | $3.44 |
| 1 | Lemon | $0.59 |
| Milk Paint Subtotal | $107.08 | |
| Egg Paint | ||
| 6 pack | Eggs | $1.89 |
| 1 qt | Linseed Oil | $7.99 |
| Egg Paint Subtotal | $9.88 | |
| Pigments | ||
| 1 lb | Red Pigment | $3.75 |
| 1 lb | Yellow Pigment | $3.80 |
| 1 lb | Green Pigment | $10.25 |
| 1 lb | Brown Pigment | free |
| 1lb | Titanium Dioxide | $5.75 |
| Pigments Subtotal | $23.55 | |
| Painting Supplies | ||
| 14 | Brushes | free |
| 2 | Dust Mask | $1.58 |
| 10 | Roller Handles | free |
| 8 | Roller covers | free |
| 8 | Roller pans | free |
| 8 | Drop cloths | free |
| 5 | 5-gallon buckets | free |
| 5 | Rags | free |
| 3 | Sandpaper | free |
| 1 | Roller extender pole | free |
| 5 | Tape | $35.00 |
| 2 | Sponges | $8.00 |
| Containers | free | |
| Pots | free | |
| Whisk | free | |
| Electric Beater | free | |
| Measuring spoons | free | |
| 2 | Large mixing bowl | free |
| 2 | Kitchen Strainers | free |
| 2 | Cheesecloth | $5.30 |
| 1 | CCAT logo transparency | $2.13 |
| Painting Materials Subtotal | $52.01 | |
| Testing Materials | ||
| 2 | Drywall | $15.88 |
| 2 | Mud | $7.98 |
| 0.86 lb | Dry Milk Powder | $3.69 |
| 2.5 gal | Soy whey | free |
| Testing Materials Subtotal | $27.55 | |
| Total | $243.17 |
Maintenance[edit | edit source]
This cost will be determined by the test of time. Hopefully we planned well enough that it will not be an issue.
How "Appropriate" was this project[edit | edit source]
- Cost
- We were able to paint the downstairs for approximately $250. A store bought gallon of natural paint is approximately $90. Store bought paint for the same cost would have only covered the large gallery/classroom.
- Waste/Reused/Recycled
- We reused brushes, rollers, etc that had already been used. We were able to compost leftover paint and paint ingredients. Although we had to buy tape we reused it over and over as we moved rooms. We used old sheets as drop clothes. We reused butter, yogurt, and to go containers for pigments and testing. We got larger buckets from the Tofu Shop and the Arcata Recycling Center (ACRC).
-
Reusing tape
-
Applying reused tape
-
Composting old paint into bucket from ACRC
- Health
- The natural paint on the walls does not emit harmful VOCs and allows the walls to breath.
- Available
- Natural paint is relatively easy to make and affordable. Flour costs about 60 cents a lb and clay can be harvested from the ground. There are enough variations in the paint recipes that anyone should be able to make natural paint from local ingredients.
- Local
- We bought all our materials from local stores and chose as many local products as possible.
Conclusions[edit | edit source]
Making milk paint was our least favorite of this project. Trying to curd the milk was difficult and it takes a long time to strain all the curds properly. Application of milk paint rolled on easy but the appearance was not pleasing to us. This paint is hard to work with.
Flour paint is relatively easy to make and cost effective. Application is a little more difficult depending on type of clay and consistency of mixture. All in all this paint is easy to work with.
There are many other recipes and techniques. We would have loved to try them all but there was not enough time. Hopefully now that we have some experience we can continue to experiment with natural paint and finishes.
We wish there would have been more time for artistic touches such as stenciling, free hand murals and designs but now there is a canvas for more students to add to our project.
-
300px
-
300px
That's it[edit | edit source]
Natural paints require testing and patience. One must not expect that the paint will look, feel, smell, or apply like "regular paint". After all the hard work.......Natural Paint can't be beat. The walls look natural, warming, and inviting. You can sit back and appreciate the hard work and know exactly what materials are in your house.
We are proud of this project and the work we did. We hope this project will help others be able to make and use natural paints.
Please feel free to contact us with questions.
Thanks Jill and Andrea:)
October 2013 Update[edit | edit source]
In October 2013, two ENGR 308 students revisited the natural paint project to assess how well it has kept up. The building interior has not been re-painted since the original project, so it was an excellent opportunity to see how well each paint has performed over six years.
- Milk Paint
- The Milk Paint that was used in the downstairs bathroom has kept up incredibly well. The color was slightly faded, but there were no streaks or blotches.
- Egg Paint
- The Egg Paint that was used in the CCAT Mural has also kept up very well. Again, the color was faded but otherwise in excellent condition.
- Flour Paint
- The Flour Paint that was used in the Office, Gallery, and Utility Room has kept up well, but has apparent flaws. The main problem with the flour paint was its water soluble nature. When plants were kept on a window sill, water caused the flour paint to streak and leave water stains. A CCAT resident also said that they had to take extra care when cleaning the walls for fear that the paint would simply come off. Additionally, the paint may have flaked in some spots; it was apparent that push pins were responsible for some paint damage, but some spots may have flaked off.
-
Milk Paint in Public Restroom
-
Milk Paint in Public Restroom
-
Egg Paint Mural
-
Flour Paint in Gallery, streaking from water damage
-
Flour Paint in Utility Room, paint most likely damaged from general use
-
Flour Paint in Office, paint chipped away from wall damage
October 2016 Update[edit | edit source]
On October 2016, another Update was conducted
Milk Paint The Milk Paint was repainted. Since the 2013 update mentioned nothing it was post 2013. Egg Paint The Egg Paint is still a vibrant color. Flour Paint The Flour Paint other than physical bumps or scratches discoloration is only minimal.
-
Milk Paint difference in Public Restroom
-
Flour Paint
-
CCAT decal Egg Paint


