
Flock House Biopod
.JPG)
| Type | Solar dehydrator |
|---|---|
| Authors | Leabeth Sarah Morton Jonathan Josh O'Rourke Team Biopod |
| Status | |
| Years | 2011 |
| Made | Yes |
| Replicated | No |
| Cost | USD 339.93 |

This page represents "Team Biopod," the solar dehydration group for Flock House. This group has been brought together through the Cal Poly Humboldt class, Engineering 215 - Introduction to Design, taught by Lonny Grafman.
Background
[edit | edit source]
The client is Flock House, which is founded by a New York City based artist named Mary Mattingly. The Flock House is a living system that is designed to be sustainable and mobile while providing a way to teach and inspire people. The Flock House will be traveling throughout New York City during the summer of 2012. For more information on Flock House go to: http://www.flockhouse.org/
Objective and Criteria
[edit | edit source]Team Biopod was given the task of constructing two solar dehydrators; a small educational unit and a larger main unit each with its own objective. A table of the criteria and their descriptions are given for each unit. Weights, from 1 - 10 ten being high, were given to each criteria based on how important that criteria was with respect to the individual design.
Main unit
[edit | edit source]Objective
[edit | edit source]The objective of the main unit is to provide enough dehydrated food to significantly contribute to the sustenance of the two individuals who will be living in the pod during the summer of 2012.
Criteria
[edit | edit source]| Criteria | Weight | Descriptions |
|---|---|---|
| Portability | 8 | The dehydrator must be lightweight such that it does not to exceed 50lbs. |
| Cost | 4 | The final cost of both the main dehydrator and the educational dehydrator must be under 375 dollars. |
| Durability | 8 | The dehydrator must be able to withstand continuous outside exposure and daily use for the summer months in New York City. |
| Aesthetics | 8 | The dehydrator must fit into the artistic design of the Flock House. |
| Functionality | 10 | The dehydrator needs to be able to effectively dry enough food for two people whose diet depends mainly on dehydrated food. The dry time is within 2-4 days (depending on weather conditions). |
| Ease of Use | 6 | Trained Flock House occupants can use and operate the dehydrator. |
| Educational Value | 3 | The dehydrator should serve as an easy to see and understand example of solar drying to visitors to the Flock House. |
| Safety | 9 | The dehydrator cannot pose a threat to the trained users of the dehydrator. |
| Reproducibility | 4 | The dehydrator should be able to be reproduced by a skilled worker. |
Educational Unit
[edit | edit source]Objective
[edit | edit source]The objective of the educational unit is to design a fun, innovative and hands on way to teach communities about solar dehydration.
Criteria
[edit | edit source]| Criteria | Weight | Description |
|---|---|---|
| Portability | 10 | The dehydrator must be lightweight and capable of being carried by a child of approximately five years old. |
| Cost | 4 | The final cost of the dehydrator must be under $375 when combined with cost of the main unit. |
| Durability | 8 | The dehydrator must be able to withstand continuous handling, and must be able to withstand regular use by children with adult supervision. |
| Aesthetics | 8 | The dehydrator must be put together nicely and must contribute to the fun aspect of the unit. The dehydrator must fit into the artistic design of the Flock House. |
| Functionality | 5 | The dehydrator needs to be able to dry small amounts food effectively in 2-4 days (depending on weather conditions). |
| Ease of Use | 9 | Children with adult supervision should be able to use the dehydrator. |
| Educational Value | 10 | The dehydrator is able to teach users the process of solar food dehydration. The dehydrator should raise awareness of solar dehydration and sustainable living practices. |
| Safety | 10 | The dehydrator cannot pose a threat to the people and children using it. |
| Reproducibility | 4 | The dehydrator should be able to be reproduced easily by a skilled worker. |
| Level of Entertainment | 10 | The dehydrator must have a high level of entertainment value that is able to gain the interest of visitors. |
Description of Final Design
[edit | edit source]Main Unit
[edit | edit source]The main solar dehydrating unit is made from a pine box with dimensions of 12"X49"X24" with a wall depth of 0.5". There is an acrylic plexiglass face with a bottom opening door. There are 2 dehydrating screens for the food to dehydrate on. There are also two vents on opposite sides, with one vent on the bottom near the door and the other vent near the top of the plexiglass window.
Educational Unit
[edit | edit source]The educational unit is made from the frame of an old baby carrier. The front of the backpack unit is covered with a clear polypropylene plastic for sun collection. Inside the backpack unit is a tray made of mesh that acts as the food shelf, the tray is angled within the unit so it collects more of the sun's energy.
Costs
[edit | edit source]The following tables show the cost in materials broken down into the main solar dehydration unit "Window Shopper" and the educational unit "Back Me Up."
Main Unit
[edit | edit source]The table below breaks down the cost of each material used to build the Window Shopper Solar dehydrating unit.
| Material | Quantity | Cost Per Item ($) | Total ($) |
|---|---|---|---|
| Fiberglass Food Tray | 2 | 17.00 | 36.47 |
| Spray Varnish | 1 | 10.99 | 10.99 |
| All Purpose Glue | 1 | 4.79 | 4.79 |
| White Caulk | 1 | 2.51 | 2.51 |
| Acrylic 24"X48" | 1 | 24.29 | 24.29 |
| Plywood Pine 1/2"X2'X4' | 1 | 26.99 | 26.99 |
| Plywood Solid 1/4"X2'X4' | 1 | 14.39 | 14.39 |
| Wood Glue | 1 | 3.14 | 3.14 |
| Screen Fiber | 1 | 5.99 | 5.99 |
| Molding Square | 5 | 5.99 | 29.95 |
| Wood Screws | 15 | 0.15 | 2.25 |
| Insulation | 1 | 0.00 | 0.00 |
| Spray Varnish | 1 | 9.89 | 9.89 |
| Chrome Duct Tape | 1 | 5.99 | 5.99 |
| Corner Brace | 1 | 3.99 | 3.99 |
| Undereave Vent | 4 | 2.49 | 9.96 |
| Hinge Broad | 2 | 7.49 | 14.98 |
| Panel Nail 1" | 1 | 3.79 | 3.79 |
| Screws | 20 | 0.12 | 2.40 |
| Galvanized Staples | 1 | 1.49 | 1.49 |
| White Thermometer | 1 | 3.14 | 3.14 |
| Chest Hinge | 1 | 6.74 | 6.74 |
| Screw | 20 | 0.10 | 2.00 |
| Rope Loop | 2 | 1.16 | 2.32 |
| Bolt Eye | 2 | 0.75 | 1.50 |
| Screen Fiber | 2 | 5.39 | 10.78 |
| Turn Buckle | 2 | 2.24 | 4.48 |
| Subtotal | $261.92 | ||
Educational Unit
[edit | edit source]The table below breaks down the cost of each material used to build the Back Me Up Solar dehydrating unit.
| Material | Quantity | Cost per Item ($) | Total ($) |
|---|---|---|---|
| Flat Slotted Steel | 1 | 7.99 | 7.99 |
| Canvas Fabric | 2 (yd) | 6.21 | 6.21 |
| Velcro | 1 | 5.97 | 5.79 |
| Molding Square | 2 | 5.99 | 11.98 |
| Bug Mesh | 0.5 (yd) | 10.90 | 5.45 |
| Thread | 1 | 0.0 | 0.0 |
| Screws | 10 | 0.09 | 0.90 |
| Chrome duct tape | 1 | 5.99 | 5.99 |
| Metal Backpack Frame | 1 | 3.00 | 3.00 |
| Insulate Reflect (16"X25') | 1 | 18.99 | 18.99 |
| Subtotal | 78.01 | ||
| Total for Main and Educational Unit | $339.93 | ||
Design Costs
[edit | edit source]Design cost is measured in hours. The total hours spent on the creation of the dehydrating units for the Flock House are 320 with the total being broken into respective segments as shown in the Figure.

Testing Results
[edit | edit source]Testing is in progress.
Main Unit
[edit | edit source]Educational Unit
[edit | edit source]Maintenance
[edit | edit source]Main Unit
[edit | edit source]The Window Shopper will be shipped to New York so that Flock House will be able to begin the integration into the Flock Houses pod.
The table below breaks down the maintenance of the Window Shopper Solar dehydrating unit.
| Task | Time(min) | Frequency |
|---|---|---|
| Clean screens where food is placed | 15 | After every use |
| Wipe down Plexiglas face | 15 | After every use |
| Wipe down reflective insulation | 10 | Twice a month |
| Total Monthly Maintenance | 2.3 hours | |
Educational Unit
[edit | edit source]The Back Me Up portable solar dehydrating unit will be shipped to New York so that Flock House will be able to use this unit to help teach communities about solar dehydration.
| Task | Time(min) | Frequency |
|---|---|---|
| Clean screens where food is placed | 10 | After every use |
| Wipe down plastic face of the backpack | 10 | After every use |
| Wipe down reflective insulation | 5 | Twice a month |
| Total Monthly Maintenance | 1.5 hours | |
How to build
[edit | edit source]The following steps shows how we built our 2 units.
Main Unit
[edit | edit source]Tools required for the construction of The Window Shopper unit:
- Power Drill
- Circular Saw Attachment
- Wood Saw
- Wood Glue
Materials needed:
- Pine Wood
- Weather sealing
- Reflective Insulating Material
- Acrylic Plexiglas
- L-brackets
- Hinges
- Screws
- Reflective Duct Tape
- Prefabricated Screens
- Aluminum Screening
- Wooden Dowels
Note: All materials must be non-toxic and produced no toxic off gassing at temperatures up to 140 degrees Fahrenheit.

Build the basic dehydrator box using wood glue and screws. Ours is 12"X49"X24". For use at home, any type of wood will do, but for our purposes we used pine due to weight constraints. (Photo by Leabeth Peterson)

Install the insulation material. We used a highly reflective material to help propagate solar reflectivity within the dehydrating box. The other major benefit for this type of insulation is that its water proof, thus adding longevity to the life of the solar dehydrating unit. To attach the insulation to the inside wall you can use construction grade staples or small screws, which this model uses. (Photo by Leabeth Peterson)

Install the mounts inside the dehydrating box so that screens can be easily inserted and removed. Because this unit is bottom-opening, we used door hinges and "L" brackets. On one side install a total of four L brackets 1/3 the distance from center to help insure the dehydrating screens will not sag over prolonged use. One the opposite side install the door hinges to mirror the L brackets. Make sure the hinges are perpendicular to the dehydrating wall. (Photo by Leabeth Peterson)
.JPG)
Take a circular saw attachment and drill two holes into each opposing short side of the unit. The holes should be staggered, one set towards the bottom of the unit and one set towards the top, in order to provide maximum air circulation when in use. (Photo by Leabeth Peterson)

Use reflective tape to cover any screws or staples that may have been used with the installation of the insulation, L brackets, and the hinges. Used silicone to seal the edges of the insulation at the top and bottom of the dehydrating box. (Photo by Leabeth Peterson)
.JPG)
Make sure the holes are lined with reflective duct tape like the rest of the unit. Screw in Aluminum vents on each short side. (Photo by Leabeth Peterson)

Install the glazed plexiglass to the top of the dehydrating box. Be sure to pre-drill the plexiglass because a screw will make the plexiglass crack. Underneath and around the edges of the glazed plexiglass use silicone to make the face air tight up against the dehydrating box. (Photo by Leabeth Peterson)
.JPG)
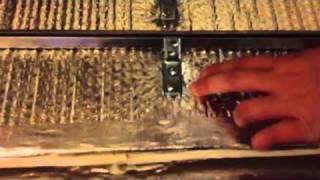
Make the bottom access door. Put the reflective insulation on the door with adhesive and then then use the duct tape once again to seal edges. Use staples to keep aluminum screening in place before wrapping the wooden dowels. After wrapping one piece of wood, screw it in to the door. Stretch the Aluminum screening as tightly as possible, and roll the screening around wood again, and screw down second side. You want the screening to be about 2-3 inches away from the edge of the door. (Photo by Leabeth Peterson)
.JPG)
Now you can connect the door and the main box. Put hinges on one side, and on the other place some sort of bolt or connection device that allows for easy tightening. We used hooks that latch and tighten as you turn them. (Photo by Leabeth Peterson)
.JPG)
Once the box and door are sealed and insulated, you can then line weather stripping between the door and the box and connect the two. The door should swing open providing for easy bottom access. (Photo by Leabeth Peterson)
Once all the steps are completed, you will then have a solar dehydrating unit. (Photo by Leabeth Peterson)
Educational Unit
[edit | edit source]Tools required for the construction of the Back Me Up unit:
- Scissors
- Screw Driver
- Sewing Needle
- Sewing Pins
- Sewing Machine (Needle can be used in lieu of a machine)
Note: The instructions assume the use of a sewing machine.
Materials needed:
- Waterproof Canvas
- Netting/Screening Material
- Pre-drilling Screws
- Reflective Insulating Material
- Thread
- Sticky ¾" Velcro
- Clear Plastic
Note: All materials must be non-toxic and produced no toxic off-gassing at temperatures of up to 140 degrees Fahrenheit.

Acquire a backpack frame. Add extra supports on the bottom of the frame to guarantee there is adequate support for the unit to rest. Measure the distance from the back of the unit to the front. Then, using metal shears, cut two piece of slotted steal to the specified length. Using pre-drilling screws attach the two pieces of slotted metal to the back and the front of the frame. One screw on each side should be adequate to hold the steel supports in place.

Measure the height, width, and length of the frame. Once the measurements are gathered, using a flat surface, measure and cut square sections of waterproof canvas and the insulation for the back of the backpack. Make sure to cut at least an extra 1½" to 2" from the actual measured length and width. This allows space for the seams and any adjustments that may be needed. Once the back material is cut from the canvas and the insulation, line the two pieces up and, using sewing pins inserted within ¼" of the outer edge, attach the pieces together along all four edges. Make sure that the two materials are taut to each other and there is no or minimal sagging or wrinkles.

Using the sewing machine, sew the two pieces together along the outer edges about ½" to 1" in from the outer edge. After the pieces are sewn together remove all pins. Follow this procedure for the bottom and two sides of the backpack. At the end you should have four pieces, a back a bottom and the two sides.

Line up the back and the bottom pieces along what is to be their seam. Place them flat against each other so that the canvas faces are touching each other and the insulation is facing out. Pin the bottom and back together along the seam about ¼" from the outside. Sew the two pieces together along the outer edge about ½" from the outside edge. Remove the pins.

Line up one of the sides to the back of the unit along their seam edge. Place them flat against each other so that the canvas faces are touching each other and the insulation is facing out. Makes sure the side extends ¾" past the seam from the back and the bottom, this makes for a nicer seam between the sides and the bottom pieces. Pin the back and side together along the seam about ¼" from the edge. Using the sewing machine sew the two pieces together along the outer edge about ½" from the outside edge. Repeat this process with the other side panel. Pin the sides to the bottom along the seam about ¼" from the edge. Using the sewing machine sew the two pieces together along the outer edge about ½" from the outside edge. Repeat this process with the other side panel. Makes sure to sew them so that the canvas pieces are again touching and the insulation is faced out.

Once everything is sewn, insert into the frame to makes sure it fits snugly. If it is to large, measure in ¼" from the where the back meets the sides and the sides meet the bottom and resew the seam. Continue this until the insert fits. Trim the seams to desired length.

Trim both sides to prevent excess shadowing of the interior. Measure out desired dimensions to be removed that best fit the frame used. Mark on the insulation the areas that are going to be removed. Once marked pin the insulation to the canvas a ¼" to the inside of the trim mark. Using scissors cut off the excess material. Use the sewing machine and sew ½"seam along the pins. Remove the pins.

The front face consists of two vents at the bottom and the top and a Velcro door. The vents at the top and the bottom can be 1" to 4" tall, depending on the venting desired, by the width of the backpack. Cut the screening material 1 ½" longer than the width of the backpack. Cut a piece of plastic the exact width of the backpack and ¼" longer than the screen height. Center the plastic on the screening and line along one length edge. Pin in place about ¼" from the lined up edge and sew the two pieces together using ½" seam. Remove the pins. Repeat steps for the other vent.

Measure the remaining distance to cover the face of the backpack and add 5". Cut out a piece of plastic that size by the width of the backpack. Cut a 4" wide piece of clear plastic. Cut a piece of clear plastic the desired size of the door, make sure to consider that it must be large enough to insert and remove the drying tray. Line up the plastic on sewn to the vent and the door along the width side. Sew the door to B on the left hand edge. Pin and sew the B to the other vent. Overlap the two lengths ¾", the width of the Velcro. Hand sew the two pieces along the left hand side where they meet (door opens to the left) right along the edge. Measure the remaining distance necessary then cut that distance from the remaining plastic seen at A. Cut a 2" piece of plastic by 2" longer than the door. Align with the right hand side of A and B overlapping each by 1". Sew into place. You should now have one continuous face. Now attach the sticky Velcro to the door seams. Pin and sew the face on the backpack

Finished backpack.
Authors
[edit | edit source]Josh O'Rourke | Jonathan Roldan | Sarah Morton | Leabeth Mae Peterson
| Authors | |
|---|---|
| License | CC-BY-SA-3.0 |
| Organizations | Flock House, Cal Poly Humboldt |
| Cite as | Jo787, Sarah Morton, Leabethmae88 (2011–2025). "Flock House Biopod". Appropedia. Retrieved July 14, 2026. |