
NREMT Skillset/Blood Pressure Palpation
| Subskill of | Vital Signs Assessment Circulation |
|---|---|
| Subskills | Brachial Pulse Palpation Pulse Points and Palpation Radial Pulse Palpation |
| Acting roles | EMR EMT emergency medical responder emergency medical technician paramedic |
| Pathologies | congenital |
| Body systems | circulatory system |
| Body parts | arm(s) upper extremities |
The palpated method can be used if you do not have a stethoscope, the environment is to noisy to hear using a stethoscope, or you want to quickly obtain a baseline BP on a critical patient during the primary assessment. The palpated method will only give you the systolic blood pressure (SBP). You would document your palpated BP as 110/p.
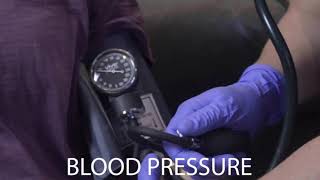
- Select the correctly sized cuff. The cuff should wrap 1 to 1.5 times around the arm, and take up 2/3 the distance from the elbow to the armpit. Too large a cuff may give you artificially low readings, and too small a cuff can read high.
- The BP cuff should be placed directly on the skin on an uninjured arm (i.e. do not put it over clothes or proximal to an injury). Sliding a loose fitting t-shirt up so that the skin is exposed is fine. However, try not to roll tight fitting or bulky shirts up over the bicep. If you are unable to roll clothing up, have the patient remove their clothing if awake and responsive, or cut the clothing off in an unstable patient situation.
- Wrap the cuff around the patient's upper arm so that the line marked "artery" is roughly over the brachial artery, located towards the medial aspect of the antecubital fossa (i.e. the crook on the inside of their elbow). The placement does not have to be exact nor do you actually need to identify this artery by palpation.
- Turn the valve on the pumping bulb clockwise (may be counter clockwise in some cuffs) until it no longer moves. Caution should be taken to not force the valve in the open or closed position as it can become stuck. This is the position which allows air to enter and remain in the bladder.
- Place your finger tips on the radial pulse. Pump up the BP cuff paying close attention to the pulse. Once you feel the pulse go away, pump the BP cuff 20 to 30 above the number.
- Now slowly deflate the blood pressure cuff (i.e. a few mm Hg per second) by turning the valve in a counter-clockwise direction while feeling over the radial artery and watching the pressure gauge. The first pulse your fingers feel is the return of blood through the no longer completely occluded radial artery. The needle on the manometer (gauge) at this moment is the SBP. Note, although the needle may oscillate prior to this time, it is the feel of blood flow that indicates the SBP.
- Once you have that number you can open up the valve and let the remaining air out of the cuff.
In a field setting it's common to obtain the palpated BP (only systolic reading) first and it is documented as systolic pressure/P to indicate palpated (i.e. 110/P). When you obtain your auscultated BP, pump up the cuff 20 to 30 mmHg above the palpated reading.
| Patient | Systolic (mmHg) |
|---|---|
| Adult Male | 100 + age up to 40 |
| Adult female | 90 + age up to 40 |
| Adolescent | 90 and above |
| Child (1-10 yrs) | 80 + (2 x age) +/- 10 |
| Infant (1-12 mo) | 70 and above |
To investigate the mechanism behind the different ways of obtaining a blood pressure, look at the Physiology of Blood Pressure. This may help with troubleshooting if you are having trouble obtaining an palpated blood pressure on a patient or want more information as to how automated blood pressure machines get their results.
| Authors | GSTC |
|---|---|
| License | CC-BY-SA-4.0 |
| Cite as | GSTC (2020–2026). "NREMT Skillset/Blood Pressure Palpation". Appropedia. Retrieved July 14, 2026. |