A bike is a very useful mode of transportation that many people in first-world countries take for granted. There has been a goal set to create a cheap bike using primarily 3D printed parts. This bike pedal is a good prototype for what the possibilities are for this project. This pedal is fully 3D printed and clips together around a bar/axle. The goal is that this pedal would be easy to switch out and allows for rotation around the axle but not in other directions. This is still a rough prototype and would need more work to be implemented fully onto the bike.
Possible additions to bike pedal:
Add screw attachment at the end of the axle
Develop more secure clips (these were tough to model and print)
1. After downloading all.stl files from Youmagine, begin by printing two halves of the pedal with the orientation shown. Ensure there is enough support. Print time: 3 hrs 18 mins each half at 70 mm/s
2. Print six clips with the orientation shown. Print time: 1 min each at 70 mm/s
3. Print one axle with the orientation shown (for smoothest surfaces). Print time: 38 mins at 70 mm/s
4. Place all six clips and the axle on one half of the pedal as shown.
5. Place second half of pedal on top as shown.
6. Apply force to snap clips into place. The final product is as shown. Assembly should take a total of no more than 2 minutes.


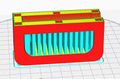 1. After downloading all.stl files from Youmagine, begin by printing two halves of the pedal with the orientation shown. Ensure there is enough support. Print time: 3 hrs 18 mins each half at 70 mm/s
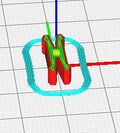 2. Print six clips with the orientation shown. Print time: 1 min each at 70 mm/s
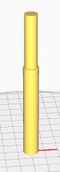 3. Print one axle with the orientation shown (for smoothest surfaces). Print time: 38 mins at 70 mm/s
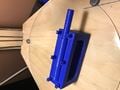 4. Place all six clips and the axle on one half of the pedal as shown.
 5. Place second half of pedal on top as shown.
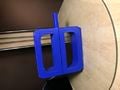 6. Apply force to snap clips into place. The final product is as shown. Assembly should take a total of no more than 2 minutes.


