
3-D printed weld bead geometry characterization


Welding beads can vary greatly in size and shape depending on welding technique and parameters. It can be desirable, in certain cases [1], for a weld bead to be a certain shape.
This is a process for characterizing the geometry of a weld bead. It aims to measure different properties of a weld bead, and use a performance metric to represent the quality of a weld bead. This allows quantitative measurement and analysis of welding techniques and parameters.
The software used in this process is ImageJ, an open source scientific image processing package. ImageJ is available on Windows, Mac, and Linux.
Performance Metric
[edit | edit source]In order to quantify "performance", an equation is used.
![]()
Where:
| Metric | Description |
|---|---|
| Area | Area of the bounding rectangle of the bead |
| Bx Area | The area of the bead |
| Widthmid | The width of the bead at the substrate level |
| Width | The width of the bead at its widest point |
| AR | The aspect ratio of the bead - the ratio between horizontal and vertical measurements of the bead |
| Angleavg | The average of the wetting angles of the bead |
This formula uses ratios of measurements to determine a score of "squareness". The goal is to minimize the score.
In the case of a perfectly square bead, the bounding area would be the same as the bead area, the middle width would be the same as the substrate width, the aspect ratio would be 1, and the average angle would be 90 degrees. Thus, a perfectly square bead would have a score of zero.
Measurement Process
[edit | edit source]Preparation
[edit | edit source]- Measure a known dimension of the sample - the substrate thickness is usually a good choice.
- Scan the samples to 600 dpi into a TIFF file.
- In ImageJ, open the sample TIFF File.
- Using the line tool
 , select the known dimension.
- In the Analyze Menu, select Set Scale, and input the known distance - for example, 6 mm, or 0.25 in. Ensure the unit of length is set to the known measurement. By doing this, ImageJ can convert pixel lengths into actual physical lengths using a conversion factor.
 |
 |
Bead Shape Measurement
[edit | edit source]- In the Analyze Menu, select Set Measurements. Check the following boxes: Area, Centroid, Perimeter, Bounding Rectangle, Fit Ellipse, Shape Descriptors, and Feret's Diameter, then press OK.
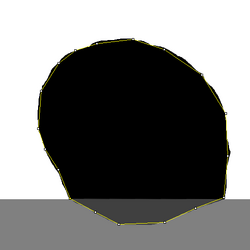
Weld Bead Polygonal Measurement - Zoom the window to the area of the bead and select the Polygon Selections tool
 . Select the shape of the bead, including the portion penetrated in the substrate.
 - In the Analyze menu, select Measure, or press Ctrl+M (Cmd+M on Mac). This will perform the specified measurements on the bead.
- Repeat steps 1-3 for the rest of the sample beads in the welding path.
- In the Results Window, under the File menu, select Save, or press Ctrl+S (Cmd+S on Mac). Save the file with a descriptive filename.
- Repeat steps 1-5, but when measuring the bead shape, do not include the portion penetrated into the substrate.
- Measure the bead width at its widest point. Note this down somewhere.

Wetting Angle Measurement
[edit | edit source]- Using the Angle Tool
 , zoom in on the bead, where it meets the substrate. Select a point on the substrate away from the bead, the point where the bead meets the substrate, and a point tangent to the bead away from the substrate. In the main ImageJ window, record the Angle Measurement in a notebook or spreadsheet.
 - Follow the same procedure to measure the angle on the opposite side of the bead.
- Repeat steps 1-2 for the rest of the beads, recording the angles appropriately in a notebook or spreadsheet.
 |
 |
Analysis Process
[edit | edit source]The data gathered using ImageJ can be collated into a spreadsheet in order to perform scoring using cell formulas.
Using software like Libreoffice Calc or Microsoft Excel, create a spreadsheet, and open the results files. For each bead, insert the data as follows:
| Data | Source file & cell | Description |
|---|---|---|
| Width | Measured manually | The width at the widest portion |
| Height | Measurements file from "Bead Shape Measurements", step 6, under the column "Height" | The height of the bead bounding rectangle (including substrate penetration) |
| Bx_Area | Measurements file from "Bead Shape Measurements", step 6, under the column "Area" | The area of the bead itself (including substrate penetration) |
| Width_Mid | Measurements file from "Bead Shape Measurements", step 6, under the column "Width" | The width of the bead bounding rectangle |
| Angle1 | Measured manually | The left-side wetting angle of the bead |
| Angle2 | Measured manually | The right-side wetting angle of the bead |
| AR | Measurements file from "Bead Shape Measurements", step 5, under the column "AR" | The aspect ratio of the bead (ratio of width to height) |
These should be placed in a spreadsheet with each bead as its own row. Then, the scoring cell can be inserted. Here is an example score calculation formula for LibreOffice Calc. This will work if the data is formatted in the order of the table above in columns B through H with the formula in column I.
=ABS(((B10*C10)/D10) - 1) + ABS((B10/E10) - 1) + ABS(H10 - 1) + ABS((AVERAGE(F10,G10)/90) - 1)
This process can be repeated for all of the weld beads that need to be processed.
| Authors | |
|---|---|
| License | CC-BY-SA-3.0 |
| Cite as | Apboerma (2016–2026). "3-D printed weld bead geometry characterization". Appropedia. Retrieved July 11, 2026. |