Fionaconnor (talk | contribs) No edit summary |
Sophivorus (talk | contribs) m (Text replacement - "| instance-of = " to "| type = ") |
||
| (80 intermediate revisions by 11 users not shown) | |||
| Line 1: | Line 1: | ||
{{ | {{Solar menu}} | ||
[[File:Cs-sfd-Dehydrator-cilantro.jpg|thumb]] | |||
{{Project data | |||
| authors = User:Lonny, Christopher Stadler | |||
| years = 2006 | |||
| made = Yes | |||
| | | replicated = No | ||
| | | cost = USD 33.1 | ||
| status = Prototyped | |||
|made=Yes | | type = Solar dehydrator | ||
| | | uses = development, agriculture, cooking | ||
| | | location = Arcata, California | ||
| | |||
| | |||
| | |||
| | |||
}} | }} | ||
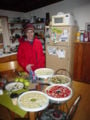
[[Image:Cs-sfd-Banana-man.jpg|thumb|Banana Man]] | |||
Food dehydration is both a desirable and [[appropriate technology]] for many reasons which include increasing the shelf-life of food without having to use refrigeration, and reducing product size which can maximize storage space. Also, the process of dehydration is used to enhance foodstuffs directly (e.g. jerky, fruit leather) and indirectly (e.g. spices). | |||
[[ | |||
The main principle behind food dehydration is simple: to remove an ample quantity, or the majority (depending on the desired product), of water content from food products. Since the water content of foods is high, 80-95% in many fruits/vegetables and 75% or less in meats, the product weighs much less, and its volume is reduced. Also, without water, the food becomes an unfavorable medium for the growth of bacteria or fungi. If dehydrated when ripe, determined from a nutritional standpoint, the maximum quantity of nutrients can be preserved. | |||
Food dehydration has traditionally been done by simply laying food out in the sun to dry, climate/weather permitting. With the right food, in the right conditions, there may be little need to improve upon this simple setup. However, there are a handful of reasons people have sought other ways to dehydrate their food. Some practical reasons include avoiding the risk of exposing the food to animals which could take and eat the food, or insects which may want to lay eggs in it. A more scientific reason would be to avoid nutrient degradation that would occur from prolonged exposure to the sunlight. In addition, there exists the potential of wrongly interpreting/predicting the weather and having spoilage from rain or lack of sun. | |||
To answers these concerns, the modern food dehydrator is designed to produce hot air and distribute it equally inside a light-less chamber or cabinet. Included in this design is the control of the air's temperature and the duration of hot air distribution. As a result, many modern food dehydrators rely on electricity, rather than the Sun, to create and distribute hot air in a uniform and uninterrupted fashion. | |||
== The Plan == | |||
The idea of creating a hybrid solar food dehydrator, that also adhered to as many of the principles of modern food dehydration as possible sounded excellent to me. The potential of using this old system in new ways can save both power and materials. The original goal was to produce a solar dehydrator that had an upfront cost similar to a conventional dehydrator, but used less industrialized materials in addition to harnessing the sun's energy, which reduces the energy impact associated with conventional food dehydration (discussed later). | |||
The idea of creating a hybrid solar food dehydrator, that also adhered to as many of the principles of modern food dehydration as possible sounded excellent to me. | |||
Could I construct something that would do this with the limited knowledge I have about solar design? | Could I construct something that would do this with the limited knowledge I have about solar design? These designs on the Internet ([https://web.archive.org/web/20110308024557/http://www.thefarm.org:80/charities/i4at/surv/soldehyd.htm http://web.archive.org/web/20110308024557/http://www.thefarm.org:80/charities/i4at/surv/soldehyd.htm] -- broken link?) gave me confidence that I could... | ||
== Food Dehydration == | == Food Dehydration == | ||
=== | === Food Preparation === | ||
===Using the Electric Food Dehydrator=== | While the actual process of dehydrating food is hands-free, some minor preparation is (usually) recommended. Also, when dehydrating meat, curing is the last step. | ||
====Fruits and Veggies==== | |||
# Cut into Pieces of Reasonable Thickness: 3/8-1/2" | |||
# Acidifying or Adding Sugar to Fruit: In order to preserve vitamin content and avoid browning fruits such as apples. Lemon juice, which contains citric acid, may be applied to the fruit's exposed surfaces. However, most fruits don't require this. | |||
# Blanching Vegetables: To make re-hydration easier, vegetables that have hard cell structures are blanched so that they are slightly softened. Vegetables that may need this treatment include: beans, broccoli, carrots, cauliflower, celery, and peas. | |||
# Curing Meat: In order to kill any potential bacteria left in the meat after dehydration, the meat is cured by placing it in a warm oven (160 F) for 1 hour. | |||
=== Electric Food Dehydrator === | |||
To serve as a control and as a reliable counterpart for comparison, a conventional electric food dehydrator was obtained and used. It pros and cons were evaluated from experience. | |||
'''Pros:''' | |||
* Reliable | |||
* Easy to use | |||
'''Cons:''' | |||
* High Electricity Demand (350W-1000W or more)/High Operating Cost | |||
* Impractically expensive for a small farm to consider using | |||
* Small loads are also unreasonable at this operating cost, for anyone | |||
=== Using the Electric Food Dehydrator === | |||
==== Fruits and Veggies ==== | |||
<center> | |||
<gallery> | |||
File:Cs-sfd-Loaded-fruit-trays.jpg|thumb|270px|left|Fully (Fruit) Loaded Dehydrator Trays | |||
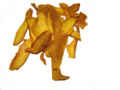
File:Cs-sfd-Bananas.jpg|thumb|346px|left|Dehydrated Bananas | |||
File:Cs-engr305-sfd-apples.jpg|thumb|346px|left|Dehydrated Apples | |||
</gallery></center> | |||
<center> | |||
<gallery> | |||
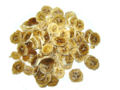
File:Cs-sfd-Mangoes.jpg|thumb|346px|left|Dehydrated Mangoes | |||
File:Cs-sfd-Strawberries.jpg|thumb|346px|left|Dehydrated Strawberries | |||
File:Cs-sfd-Veggie-soup-mix.jpg|thumb|346px|left|Dehydrated Veggie Soup Mix | |||
</gallery></center> | |||
==== Meat ==== | |||
<center> | |||
<gallery> | |||
File:Cs-sfd-Meat-marinade.jpg|thumb|345px|left|Marinating Grass-Fed Organic Beef | |||
File:Cs-sfd-Jerky-on-dehydrator.jpg|thumb|345px|left|Fully (Jerky) Loaded Dehydrator | |||
File:Cs-sfd-Jerky.jpg|thumb|345px|left|Grass-Fed Organic Beef Jerky | |||
</gallery></center> | |||
== Design Considerations == | == Design Considerations == | ||
===Temperature, Airflow, and Drying Time=== | |||
A “low heat of a minimum of 120<sup>o</sup> F to a maximum of 185<sup>o</sup> F" is the recommended range of air temperature with which most foods are conventionally dehydrated with success. | === Temperature, Airflow, and Drying Time === | ||
A “low heat of a minimum of 120<sup>o</sup> F to a maximum of 185<sup>o</sup> F" is the recommended range of air temperature with which most foods are conventionally dehydrated with success. Airflow around the product being dehydrated is required, but does not have to be forced. That is, passive airflow proves not only sufficient, but sometimes better than forced-air flow because it has a tendency to dry the outside much faster than the inside, causing “crusting”. (Wheeler, 15) Different foods have different moisture contents, and therefore different drying times. Also, different appliances or drying systems, because they vary in airflow, temperature, and overall design efficacy, will vary in drying rate. | |||
The goal is two fold in supplying the correct air temperature: | The goal is two fold in supplying the correct air temperature: | ||
===Angle of Incidence=== | # Have the temperature low enough such that cooking or crusting of the food is avoided, removing moisture evenly, and mineral/vitamin content is not degraded to a significant extent. | ||
# Have the temperature high enough to inactivate the enzymes that lead to fermentation or spoilage. | |||
=== Angle of Incidence === | |||
The most important aspect of design in the solar dehydrator was to maximize the energy captured from the Sun, especially given the climate we are in which averages the equivalent of 4 hours of full sunlight per day in the Summer here in Arcata, CA. The angle of incidence is first principle to adhere to when aiming to capture as much incoming solar radiation as possible. It describes the angle that the Sun's light is penetrating the Earth at. A 90 degree angle is the highest angle of incidence and represents the angle at which the most energy can be captured from the Sun. The solar equator is the line around the Earth where the Sun penetrates at a 90 degree angle. Because of the angle of incidence, the equator receives the greatest amount of light energy from the Sun. | The most important aspect of design in the solar dehydrator was to maximize the energy captured from the Sun, especially given the climate we are in which averages the equivalent of 4 hours of full sunlight per day in the Summer here in Arcata, CA. The angle of incidence is first principle to adhere to when aiming to capture as much incoming solar radiation as possible. It describes the angle that the Sun's light is penetrating the Earth at. A 90 degree angle is the highest angle of incidence and represents the angle at which the most energy can be captured from the Sun. The solar equator is the line around the Earth where the Sun penetrates at a 90 degree angle. Because of the angle of incidence, the equator receives the greatest amount of light energy from the Sun. | ||
Wishing to emulate this effect, the proper angle to tilt the solar collector is roughly equivalent to your degrees latitude (ignoring seasonal variance). | Wishing to emulate this effect, the proper angle to tilt the solar collector is roughly equivalent to your degrees latitude (ignoring seasonal variance). | ||
===Insulation=== | === Insulation === | ||
The only significant difference between my design and the design it was modeled after is the addition of insulation. | |||
The only significant difference between my design and the design it was modeled after is the addition of insulation. The bottom and sides of the solar collector, as well as the sides of the solar food dehydrator were insulated by a 1 cm gap that was stuffed with organic cotton. Since the primary mechanism of the solar food dehydrator was to facilitate the flow of heat through the unit, I wanted heat loss to the outside environment to be at a minimum. | |||
== Materials == | == Materials == | ||
<center> | |||
{| | {| | ||
|- valign="top" | |- valign="top" | ||
! Table 1. Solar Food Dehydrator (Materials) Cost | |||
{| | |||
! Quantity | {| class="wikitable" | ||
! Quantity | |||
! Materials | |||
! Source | |||
! Cost $ | |||
! Total: | |||
|- | |- | ||
| 2 | | 2 | ||
| organic, black construction paper | |||
| Solutions | |||
| 0.22 | |||
| 0.44 | |||
|- | |- | ||
| 1 | | 1 | ||
| insulation: organic cotton balls | |||
| Solutions | |||
| 3.95 | |||
| 3.95 | |||
|- | |- | ||
| 1 | | 1 | ||
| plastic wrap | |||
| Murphy's | |||
| 1.99 | |||
| 1.99 | |||
|- | |- | ||
| 2 | | 2 | ||
| foamcore | |||
| Staple's | |||
| 7.50 | |||
| 15.00 | |||
|- | |- | ||
| 1 | | 1 | ||
| pack of cheese cloth | |||
| Ace Hardware | |||
| 1.79 | |||
| 1.79 | |||
|- | |- | ||
| 1 | | 1 | ||
| container of glue | |||
| Ace Hardware | |||
| 4.99 | |||
| 4.99 | |||
|- | |- | ||
| 1 | | 1 | ||
| box of wire brads | |||
| Ace Hardware | |||
| 2.95 | |||
| 2.95 | |||
|- | |- | ||
| 1 | | 1 | ||
| roll of tape | |||
| Ace Hardware | |||
| 1.99 | |||
| 1.99 | |||
|- | |- | ||
| 2 | | 2 | ||
| cardboard boxes | |||
| basement | |||
| FREE | |||
| 0.00 | |||
|- | |- | ||
| || | | | ||
| | |||
| | |||
! Total Cost= | |||
| 33.10 | |||
|} | |} | ||
{| | ! Table 2. Electric Food Dehydrator Cost | ||
! Quantity | |||
{| class="wikitable" | |||
! Quantity | |||
! Materials | |||
! Source | |||
! Cost $ | |||
! Total: | |||
|- | |- | ||
| 1 | | 1 | ||
| electric food dehydrator, 350W | |||
| Ace Hardware | |||
| 39.99 | |||
| 39.99 | |||
|- | |- | ||
| || | | | ||
| | |||
| | |||
! Total Cost= | |||
| 39.99 | |||
|} | |} | ||
|} | |} | ||
</center> | |||
== Design Sketches == | |||
The design from the Internet was adapted to fit the materials I had. Also depicted is the sketch that inspired the interlocking mechanism that allowed me to insulate the solar collector and solar food dehydrator. | |||
The design from the Internet was adapted to fit the materials I had. | |||
<center> | |||
<gallery> | |||
File:Cs-sfd-Sketch-dehydrator.jpg|thumb|406px|left|Sketch of Dehydrator Design | |||
File:Cs-sfd-Sketch-materials.jpg|thumb|318px|left|Sketch of Materials Plan | |||
File:Cs-sfd-Sketch-interlocking.jpg|thumb|368px|left|Sketch of Interlocking Grooves | |||
</gallery></center> | |||
== Construction == | == Construction == | ||
Here are some pictures of the actual construction process. All the pieces had to be cut to size, then grooves were cut into each piece as it was added to the other pieces. Wire brads were set in place to connect the pieces, then tape was used to seal all the edges. Finally, finishing touches were added such as adding the plastic wrap to the solar collector and pinning cheese cloth inside the solar food dehydrator. | |||
<center> | |||
<gallery> | |||
File:Cs-sfd-Cutting-precisely.jpg|thumb|345px|left|Cutting Precisely... | |||
File:Cs-sfd-Pieces.jpg|thumb|370px|left|Pile of Pieces | |||
File:Cs-sfd-Solar-collector-beginning.jpg|thumb|345px|left|Solar Collector: Base | |||
</gallery></center> | |||
<center> | |||
<gallery> | |||
File:Cs-sfd-Solar-collector-insulation.jpg|thumb|345px|left|Solar Collector: Insulation | |||
File:Cs-sfd-Solar-collector-f_uncovered.jpg|thumb|345px|left|Solar Collector: Pre-Plastic Wrap | |||
File:Cs-sfd-Solar-collector-covering.jpg|thumb|345px|left|Solar Collector: Post-Plastic Wrap | |||
</gallery></center> | |||
== Testing == | == Testing == | ||
[[ | After determining that I would most likely have problems dehydrating fruits and vegetables, I put my dehydrator to use on some items of minute mass: herbs. Pictured is some cilantro drying by the window. The dehydrator has a lid (not pictured) that covers 95% of the top while in operation, leaving 5% open near the back edge to allow for passive airflow. | ||
[[File:Cs-sfd-Dehydrator-cilantro.jpg|Cilantro in the Solar Food Dehydrator|center]] | |||
== Results == | == Results == | ||
===Tables=== | |||
=== Tables === | |||
<center> | |||
{| | {| | ||
|- valign="top" | |- valign="top" | ||
! Table 3. Solar Food Dehydrator Efficacy Data | |||
{| | |||
! Trial | {| class="wikitable" | ||
! Trial | |||
! % Collector Exposed | |||
! Ambient Temperature (<sup>o</sup>F) | |||
! Dehydrator Temperature (<sup>o</sup> F) | |||
|- | |- | ||
| 1 | | 1 | ||
| 85 | |||
| 75 | |||
| 90 | |||
|- | |- | ||
| 2 | | 2 | ||
| 50 | |||
| 70 | |||
| 78 | |||
|} | |} | ||
|- | |- | ||
{| | ! Table 4. Electric Food Dehydrator Drying Times | ||
! Food | |||
{| class="wikitable" | |||
! Food | |||
! Time (hours) | |||
|- | |- | ||
| apples | | apples | ||
| 5-9 | |||
|- | |- | ||
| bananas | | bananas | ||
| 7-12 | |||
|- | |- | ||
| garlic | | garlic | ||
| 10-14 | |||
|- | |- | ||
| meat (beef jerky) | | meat (beef jerky) | ||
| 4-15 | |||
|} | |} | ||
|} | |} | ||
===Other Important Data Gathered=== | </center> | ||
=== Other Important Data Gathered === | |||
Electric Food Dehydrator Running Temperature: | Electric Food Dehydrator Running Temperature: '''142<sup>o</sup> F''' | ||
Solar Collector Area: | Solar Collector Area: '''160.1 in<sup>2</sup>''' | ||
Solar Food Dehydrator Volume: '''596.1 in<sup>3</sup>''' | Solar Food Dehydrator Volume: '''596.1 in<sup>3</sup>''' | ||
Arcata Daily Solar Equivalence: | Arcata Daily Solar Equivalence: '''4 hours full sun''' | ||
== Mathematical Inquiry == | == Mathematical Inquiry == | ||
Determining how big the solar collector should have been required extrapolating the collected data. | |||
Determining how big the solar collector should have been required extrapolating the collected data. First, I figured out how many degrees the temperature inside the dehydrator would have been raised had 100% of the solar collector been receiving light. This gave a maximum range for the solar collector's area. Then, using the previously determined answers, the total surface area required to achieve a desired temperature of 140<sup>o</sup> F (comparable to the electric food dehydrator) was calculated. | |||
---- | ---- | ||
''Step 1.'' Determining Maximum Increase in Temperature From Solar Collector: | ''Step 1.'' Determining Maximum Increase in Temperature From Solar Collector: | ||
'''<nowiki>[ ( Dehydrator Temperature - Ambient Temperature ) / % Collector Exposed, as decimal ]</nowiki>''' | '''<nowiki>[ ( Dehydrator Temperature - Ambient Temperature ) / % Collector Exposed, as decimal ]</nowiki>''' | ||
Trial 1 Maximum: '''17.65<sup>o</sup> F''' | Trial 1 Maximum: '''17.65<sup>o</sup> F''' | ||
| Line 216: | Line 319: | ||
---- | ---- | ||
''Step 2.'' Determining Surface Area Required to Achieve Desired Temperature with Fixed Dehydrator Volume of 596.1 in<sup>3</sup>: | ''Step 2.'' Determining Surface Area Required to Achieve Desired Temperature with Fixed Dehydrator Volume of 596.1 in<sup>3</sup>: | ||
'''<nowiki>Surface Area * [ ( Desired Temperature - Ambient Temperature ) / Maximum Increase in Temperature From 160.1 in^2 Solar Collector ]</nowiki>''' | '''<nowiki>Surface Area * [ ( Desired Temperature - Ambient Temperature ) / Maximum Increase in Temperature From 160.1 in^2 Solar Collector ]</nowiki>''' | ||
Surface Area Required to Achieve 140<sup>o</sup> F: | Surface Area Required to Achieve 140<sup>o</sup> F: '''589.6-700.4 in<sup>2</sup>''' | ||
== Anticipated Drying Times in Arcata, CA == | == Anticipated Drying Times in Arcata, CA == | ||
The calculations are as follows: | Using 4 hours of full sunlight as the daily solar equivalence, the [[#Results|drying times above]] were recalculated for the solar food dehydrator, both with its current and ideal solar collector sizes. To do this, the ideal size of the solar collector was approximated at being 3 2/3X the size of the original. | ||
The calculations are as follows: | |||
'''Days in Ideal Solar Food Dehydrator = [ Hours Drying Time / ( Day / Daily Solar Equivalence ) ]''' | '''Days in Ideal Solar Food Dehydrator = [ Hours Drying Time / (Day / Daily Solar Equivalence) ]''' | ||
'''Days in Current Solar Dehydrator = [ Days in Ideal Solar Food Dehydrator / ( 1 / (X Current Surface Area) ) ]''' | '''Days in Current Solar Dehydrator = [ Days in Ideal Solar Food Dehydrator / (1 / (X Current Surface Area)) ]''' | ||
* --- | |||
{| | {| | ||
|- valign="top" | |- valign="top" | ||
! Table 5. Ideal Solar Food Dehydrator Drying Times | |||
{| | |||
! Food | {| class="wikitable" | ||
! Food | |||
! Time (days) | |||
|- | |- | ||
| apples | | apples | ||
| 1.25-2.25 | |||
|- | |- | ||
| bananas | | bananas | ||
| 1.75-3 | |||
|- | |- | ||
| garlic | | garlic | ||
| 2.5-3.5 | |||
|- | |- | ||
| meat (beef jerky) | | meat (beef jerky) | ||
| 1-3.75** | |||
|} | |} | ||
{| | ! Table 6. Current Solar Food Dehydrator Drying Times | ||
! Food | |||
{| class="wikitable" | |||
! Food | |||
! Time (days) | |||
|- | |- | ||
| apples | | apples | ||
| 4.58-8.25** | |||
|- | |- | ||
| bananas | | bananas | ||
| 6.41-11** | |||
|- | |- | ||
| garlic | | garlic | ||
| 9.17-12.83 | |||
|- | |- | ||
| meat (beef jerky) | | meat (beef jerky) | ||
| 3.67-13.75** | |||
|} | |} | ||
|} | |} | ||
''<nowiki>**</nowiki>Note: | ''<nowiki>**</nowiki>Note: These drying times are so long, the food is likely to go bad.'' | ||
== Recommendations == | == Recommendations == | ||
{| | {| | ||
! | ! | ||
! Design Aspect | |||
! How to Improve | |||
|- | |- | ||
! Dimensions/Engineering | |||
| | | | ||
* Solar Collector Surface Area/Dehydrator Volume Ratio: 160.1 in<sup>2</sup>/596.1 in<sup>3</sup>, (1:4) | |||
* Passive Air Flow | |||
* Design From: [https://web.archive.org/web/20110308024557/http://www.thefarm.org:80/charities/i4at/surv/soldehyd.htm Solar Food Dehydrator] | |||
| | |||
* Solar Collector Surface Area/Dehydrator Volume Ratio: 589.6-700.4 in<sup>2</sup>/596.1 in<sup>3</sup>, (1:1 or greater) | * Solar Collector Surface Area/Dehydrator Volume Ratio: 589.6-700.4 in<sup>2</sup>/596.1 in<sup>3</sup>, (1:1 or greater) | ||
* Active Air Flow (With Solar Powered Fan) | * Active Air Flow (With Solar Powered Fan) | ||
* Design From: [http://www.thefoodguys.com/solarfooddryers.htm Solar Food Dryers] | * Design From: [http://www.thefoodguys.com/solarfooddryers.htm Solar Food Dryers] | ||
|- | |- | ||
! Materials | |||
| | |||
* Not Durable (Indoor Use Only) | * Not Durable (Indoor Use Only) | ||
* Foamcore/Cardboard, Plastic Wrap | * Foamcore/Cardboard, Plastic Wrap | ||
| | |||
| | |||
* Durable (Design for Outdoor Use) | * Durable (Design for Outdoor Use) | ||
* Wood/Natural Media, Plexi-glass | * Wood/Natural Media, Plexi-glass | ||
|- | |- | ||
! Method | |||
| | |||
* Small Size (~1/4 Size of Conventional Dehydrator Tray) | * Small Size (~1/4 Size of Conventional Dehydrator Tray) | ||
* Dehydrating Food Purchased From the Grocery Store (expensive, available dried already) | * Dehydrating Food Purchased From the Grocery Store (expensive, available dried already) | ||
* Harnessed Springtime Solar Energy | * Harnessed Springtime Solar Energy | ||
| | | | ||
* Larger Size (Equal To, or Greater Than Conventional Dehydrator Capacity) | * Larger Size (Equal To, or Greater Than Conventional Dehydrator Capacity) | ||
* Dehydrating Food/Excess Produce From a Small Farm or Garden | * Dehydrating Food/Excess Produce From a Small Farm or Garden | ||
* Ideally Harnessing Summer Solar Energy (Maximum Exposure) | * Ideally Harnessing Summer Solar Energy (Maximum Exposure) | ||
|} | |} | ||
== Considerations == | == Considerations == | ||
'''If you Go Solar...''' | '''If you Go Solar...''' | ||
One thing I didn't mention already that should be considered should anyone be looking to build their own solar food dehydrator after looking at this page, is how messy it can be, or rather, what kind of mess the food you're dehydrating can leave in your dehydrator. | One thing I didn't mention already that should be considered should anyone be looking to build their own solar food dehydrator after looking at this page, is how messy it can be, or rather, what kind of mess the food you're dehydrating can leave in your dehydrator. If you haven't dehydrated food before, you might not know this. The point here is that whatever gets dirty, you need to be able to clean. Removable/Reusable or Single-use components should be part of the system (i.e. Single-use cheescloth and plate, or removable wire rack and tray). | ||
'''If you Go Electric...''' | '''If you Go Electric...''' | ||
From what I experienced, the 350W, cheaper, less energy-intensive electric dehydrator I chose to use would be quite sufficient for the average home user. | From what I experienced, the 350W, cheaper, less energy-intensive electric dehydrator I chose to use would be quite sufficient for the average home user. The 1000W model looked nice, and came with a temperature adjustment, but generally accomplishes the same ends through more energy-intensive means. Also, buying a timer for the dehydrator is a good way to take control over your energy usage and drying precision. | ||
== More Pictures == | == More Pictures == | ||
< | <center> | ||
<gallery> | |||
File:Cs-sfd-Food-scraps.jpg|thumb|345px|left|Mmm... Food Scraps! | |||
File:Cs-sfd-Products-and-results.jpg|thumb|270px|left|Products/More Loaded Trays | |||
</gallery></center> | |||
== Resources == | == Resources == | ||
===Books=== | |||
=== Books === | |||
* Fodor, Eben V. "The Solar Food Dryer: How to Make and Use Your Own Low-Cost, High Performance, Sun-Powered Food Dehydrator," 2006. New Society Publishers. | * Fodor, Eben V. "The Solar Food Dryer: How to Make and Use Your Own Low-Cost, High Performance, Sun-Powered Food Dehydrator," 2006. New Society Publishers. | ||
* Nichols, Naomi. “Food Drying At Home,” 1978. | * Nichols, Naomi. “Food Drying At Home,” 1978. David & Charles (Publishers) Limited. | ||
* Wheeler, emme. “Home Food Dehydration, The Hows, What and Why,” 1974. | * Wheeler, emme. “Home Food Dehydration, The Hows, What and Why,” 1974. Seattle, Washington. | ||
===Useful Links=== | === Useful Links === | ||
* [http://www.thefarm.org/charities/i4at/surv/soldehyd.htm Solar Food Dehydrator] | |||
* [https://web.archive.org/web/20110308024557/http://www.thefarm.org:80/charities/i4at/surv/soldehyd.htm Solar Food Dehydrator] | |||
* [http://www.thefoodguys.com/solarfooddryers.htm Solar Food Dryers] | * [http://www.thefoodguys.com/solarfooddryers.htm Solar Food Dryers] | ||
* [http://www.organicdownunder.com/solar_dryer.htm Make a Solar Drier] | * [https://web.archive.org/web/20160411050641/http://www.organicdownunder.com/solar_dryer.htm Make a Solar Drier] | ||
* [http:// | * [https://web.archive.org/web/20090721130040/http://pathtofreedom.com:80/pathproject/offthegrid/solarfooddryer.shtml Projects: Drying Foods With the Sun] | ||
* [http://www.backwoodshome.com/articles/shaffer58.html Food Drying] | * [https://web.archive.org/web/20150923181405/http://www.backwoodshome.com/articles/shaffer58.html Food Drying] | ||
* [http://www.epsea.org/dry.html El Paso Solar Energy Association: | * [http://www.epsea.org:80/dry.html El Paso Solar Energy Association: Solar Food Drying] | ||
* [http://solarcooking.org/dryingreview.htm A Review of Solar Food Drying] | * [http://solarcooking.org/dryingreview.htm A Review of Solar Food Drying] | ||
* [http://www.eere.energy.gov/buildings/info/documents/pdfs/29236.pdf U.S. Department of Energy. “Passive Solar Design Technology Factsheet,”] | * [http://www.eere.energy.gov/buildings/info/documents/pdfs/29236.pdf U.S. Department of Energy. “Passive Solar Design Technology Factsheet,”] | ||
Here are 3 other, nice passive solar models: [ | Here are 3 other, nice passive solar models: [https://www.youtube.com/watch?v=oVTcnCuX2Qc Three Solar Food Dehydrators] | ||
== Credits == | == Credits == | ||
{| | {| | ||
| Christopher Stadler | | Christopher Stadler | ||
|- | |- | ||
| Humboldt | | Cal Poly Humboldt | ||
|- | |- | ||
| cjs36[[Image:atsymbol.png]]humboldt[[Image:dot.png]]edu | | cjs36[[Image:atsymbol.png]]humboldt[[Image:dot.png]]edu | ||
|} | |} | ||
{{Solar | {{Page data | ||
| part-of = Engr305 Appropriate Technology | |||
| keywords = dried fruit, food dehydrator, jerky, preservation, Cardboard, Solar dehydrating | |||
| sdg = SDG02 Zero hunger, SDG07 Affordable and clean energy, SDG08 Decent work and economic growth, SDG12 Responsible consumption and production | |||
| published = 2006 | |||
| organizations = Cal Poly Humboldt | |||
| license = CC-BY-SA-3.0 | |||
| language = en | |||
}} | |||
[[Category:Solar dehydrating]] | [[Category:Solar dehydrating]] | ||
Latest revision as of 17:00, 18 June 2024


Food dehydration is both a desirable and appropriate technology for many reasons which include increasing the shelf-life of food without having to use refrigeration, and reducing product size which can maximize storage space. Also, the process of dehydration is used to enhance foodstuffs directly (e.g. jerky, fruit leather) and indirectly (e.g. spices).
The main principle behind food dehydration is simple: to remove an ample quantity, or the majority (depending on the desired product), of water content from food products. Since the water content of foods is high, 80-95% in many fruits/vegetables and 75% or less in meats, the product weighs much less, and its volume is reduced. Also, without water, the food becomes an unfavorable medium for the growth of bacteria or fungi. If dehydrated when ripe, determined from a nutritional standpoint, the maximum quantity of nutrients can be preserved.
Food dehydration has traditionally been done by simply laying food out in the sun to dry, climate/weather permitting. With the right food, in the right conditions, there may be little need to improve upon this simple setup. However, there are a handful of reasons people have sought other ways to dehydrate their food. Some practical reasons include avoiding the risk of exposing the food to animals which could take and eat the food, or insects which may want to lay eggs in it. A more scientific reason would be to avoid nutrient degradation that would occur from prolonged exposure to the sunlight. In addition, there exists the potential of wrongly interpreting/predicting the weather and having spoilage from rain or lack of sun.
To answers these concerns, the modern food dehydrator is designed to produce hot air and distribute it equally inside a light-less chamber or cabinet. Included in this design is the control of the air's temperature and the duration of hot air distribution. As a result, many modern food dehydrators rely on electricity, rather than the Sun, to create and distribute hot air in a uniform and uninterrupted fashion.
The Plan[edit | edit source]
The idea of creating a hybrid solar food dehydrator, that also adhered to as many of the principles of modern food dehydration as possible sounded excellent to me. The potential of using this old system in new ways can save both power and materials. The original goal was to produce a solar dehydrator that had an upfront cost similar to a conventional dehydrator, but used less industrialized materials in addition to harnessing the sun's energy, which reduces the energy impact associated with conventional food dehydration (discussed later).
Could I construct something that would do this with the limited knowledge I have about solar design? These designs on the Internet (http://web.archive.org/web/20110308024557/http://www.thefarm.org:80/charities/i4at/surv/soldehyd.htm -- broken link?) gave me confidence that I could...
Food Dehydration[edit | edit source]
Food Preparation[edit | edit source]
While the actual process of dehydrating food is hands-free, some minor preparation is (usually) recommended. Also, when dehydrating meat, curing is the last step.
- Cut into Pieces of Reasonable Thickness: 3/8-1/2"
- Acidifying or Adding Sugar to Fruit: In order to preserve vitamin content and avoid browning fruits such as apples. Lemon juice, which contains citric acid, may be applied to the fruit's exposed surfaces. However, most fruits don't require this.
- Blanching Vegetables: To make re-hydration easier, vegetables that have hard cell structures are blanched so that they are slightly softened. Vegetables that may need this treatment include: beans, broccoli, carrots, cauliflower, celery, and peas.
- Curing Meat: In order to kill any potential bacteria left in the meat after dehydration, the meat is cured by placing it in a warm oven (160 F) for 1 hour.
Electric Food Dehydrator[edit | edit source]
To serve as a control and as a reliable counterpart for comparison, a conventional electric food dehydrator was obtained and used. It pros and cons were evaluated from experience. Pros:
- Reliable
- Easy to use
Cons:
- High Electricity Demand (350W-1000W or more)/High Operating Cost
- Impractically expensive for a small farm to consider using
- Small loads are also unreasonable at this operating cost, for anyone
Using the Electric Food Dehydrator[edit | edit source]
Fruits and Veggies[edit | edit source]
-
Fully (Fruit) Loaded Dehydrator Trays
-
Dehydrated Bananas
-
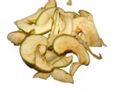
Dehydrated Apples


-
Dehydrated Mangoes
-
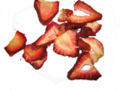
Dehydrated Strawberries
-
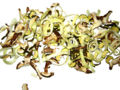
Dehydrated Veggie Soup Mix


Meat[edit | edit source]
-
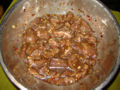
Marinating Grass-Fed Organic Beef
-
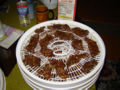
Fully (Jerky) Loaded Dehydrator
-
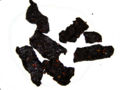
Grass-Fed Organic Beef Jerky


Design Considerations[edit | edit source]
Temperature, Airflow, and Drying Time[edit | edit source]
A “low heat of a minimum of 120o F to a maximum of 185o F" is the recommended range of air temperature with which most foods are conventionally dehydrated with success. Airflow around the product being dehydrated is required, but does not have to be forced. That is, passive airflow proves not only sufficient, but sometimes better than forced-air flow because it has a tendency to dry the outside much faster than the inside, causing “crusting”. (Wheeler, 15) Different foods have different moisture contents, and therefore different drying times. Also, different appliances or drying systems, because they vary in airflow, temperature, and overall design efficacy, will vary in drying rate.
The goal is two fold in supplying the correct air temperature:
- Have the temperature low enough such that cooking or crusting of the food is avoided, removing moisture evenly, and mineral/vitamin content is not degraded to a significant extent.
- Have the temperature high enough to inactivate the enzymes that lead to fermentation or spoilage.
Angle of Incidence[edit | edit source]
The most important aspect of design in the solar dehydrator was to maximize the energy captured from the Sun, especially given the climate we are in which averages the equivalent of 4 hours of full sunlight per day in the Summer here in Arcata, CA. The angle of incidence is first principle to adhere to when aiming to capture as much incoming solar radiation as possible. It describes the angle that the Sun's light is penetrating the Earth at. A 90 degree angle is the highest angle of incidence and represents the angle at which the most energy can be captured from the Sun. The solar equator is the line around the Earth where the Sun penetrates at a 90 degree angle. Because of the angle of incidence, the equator receives the greatest amount of light energy from the Sun. Wishing to emulate this effect, the proper angle to tilt the solar collector is roughly equivalent to your degrees latitude (ignoring seasonal variance).
Insulation[edit | edit source]
The only significant difference between my design and the design it was modeled after is the addition of insulation. The bottom and sides of the solar collector, as well as the sides of the solar food dehydrator were insulated by a 1 cm gap that was stuffed with organic cotton. Since the primary mechanism of the solar food dehydrator was to facilitate the flow of heat through the unit, I wanted heat loss to the outside environment to be at a minimum.
Materials[edit | edit source]
Table 1. Solar Food Dehydrator (Materials) Cost
|
Table 2. Electric Food Dehydrator Cost
|
|---|
Design Sketches[edit | edit source]
The design from the Internet was adapted to fit the materials I had. Also depicted is the sketch that inspired the interlocking mechanism that allowed me to insulate the solar collector and solar food dehydrator.
-
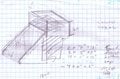
Sketch of Dehydrator Design
-
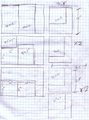
Sketch of Materials Plan
-
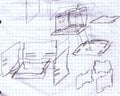
Sketch of Interlocking Grooves


Construction[edit | edit source]
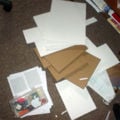
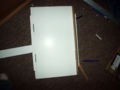
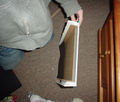
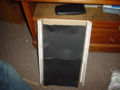
Here are some pictures of the actual construction process. All the pieces had to be cut to size, then grooves were cut into each piece as it was added to the other pieces. Wire brads were set in place to connect the pieces, then tape was used to seal all the edges. Finally, finishing touches were added such as adding the plastic wrap to the solar collector and pinning cheese cloth inside the solar food dehydrator.
-

Cutting Precisely...
-
Pile of Pieces
-
Solar Collector: Base


-
Solar Collector: Insulation
-
Solar Collector: Pre-Plastic Wrap
-

Solar Collector: Post-Plastic Wrap


Testing[edit | edit source]
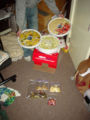
After determining that I would most likely have problems dehydrating fruits and vegetables, I put my dehydrator to use on some items of minute mass: herbs. Pictured is some cilantro drying by the window. The dehydrator has a lid (not pictured) that covers 95% of the top while in operation, leaving 5% open near the back edge to allow for passive airflow.
Results[edit | edit source]
Tables[edit | edit source]
Table 3. Solar Food Dehydrator Efficacy Data
| ||||||||||||
|---|---|---|---|---|---|---|---|---|---|---|---|---|
Table 4. Electric Food Dehydrator Drying Times
|
Other Important Data Gathered[edit | edit source]
Electric Food Dehydrator Running Temperature: 142o F
Solar Collector Area: 160.1 in2
Solar Food Dehydrator Volume: 596.1 in3
Arcata Daily Solar Equivalence: 4 hours full sun
Mathematical Inquiry[edit | edit source]
Determining how big the solar collector should have been required extrapolating the collected data. First, I figured out how many degrees the temperature inside the dehydrator would have been raised had 100% of the solar collector been receiving light. This gave a maximum range for the solar collector's area. Then, using the previously determined answers, the total surface area required to achieve a desired temperature of 140o F (comparable to the electric food dehydrator) was calculated.
Step 1. Determining Maximum Increase in Temperature From Solar Collector:
[ ( Dehydrator Temperature - Ambient Temperature ) / % Collector Exposed, as decimal ]
Trial 1 Maximum: 17.65o F
Trial 2 Maximum: 16.00o F, Maximum Range: 16-17.65o F
Step 2. Determining Surface Area Required to Achieve Desired Temperature with Fixed Dehydrator Volume of 596.1 in3:
Surface Area * [ ( Desired Temperature - Ambient Temperature ) / Maximum Increase in Temperature From 160.1 in^2 Solar Collector ]
Surface Area Required to Achieve 140o F: 589.6-700.4 in2
Anticipated Drying Times in Arcata, CA[edit | edit source]
Using 4 hours of full sunlight as the daily solar equivalence, the drying times above were recalculated for the solar food dehydrator, both with its current and ideal solar collector sizes. To do this, the ideal size of the solar collector was approximated at being 3 2/3X the size of the original.
The calculations are as follows:
Days in Ideal Solar Food Dehydrator = [ Hours Drying Time / (Day / Daily Solar Equivalence) ]
Days in Current Solar Dehydrator = [ Days in Ideal Solar Food Dehydrator / (1 / (X Current Surface Area)) ]
- ---
Table 5. Ideal Solar Food Dehydrator Drying Times
|
Table 6. Current Solar Food Dehydrator Drying Times
|
|---|
**Note: These drying times are so long, the food is likely to go bad.
Recommendations[edit | edit source]
| Design Aspect | How to Improve | |
|---|---|---|
| Dimensions/Engineering |
|
|
| Materials |
|
|
| Method |
|
|
Considerations[edit | edit source]
If you Go Solar... One thing I didn't mention already that should be considered should anyone be looking to build their own solar food dehydrator after looking at this page, is how messy it can be, or rather, what kind of mess the food you're dehydrating can leave in your dehydrator. If you haven't dehydrated food before, you might not know this. The point here is that whatever gets dirty, you need to be able to clean. Removable/Reusable or Single-use components should be part of the system (i.e. Single-use cheescloth and plate, or removable wire rack and tray).
If you Go Electric... From what I experienced, the 350W, cheaper, less energy-intensive electric dehydrator I chose to use would be quite sufficient for the average home user. The 1000W model looked nice, and came with a temperature adjustment, but generally accomplishes the same ends through more energy-intensive means. Also, buying a timer for the dehydrator is a good way to take control over your energy usage and drying precision.
More Pictures[edit | edit source]
-

Mmm... Food Scraps!
-
Products/More Loaded Trays


Resources[edit | edit source]
Books[edit | edit source]
- Fodor, Eben V. "The Solar Food Dryer: How to Make and Use Your Own Low-Cost, High Performance, Sun-Powered Food Dehydrator," 2006. New Society Publishers.
- Nichols, Naomi. “Food Drying At Home,” 1978. David & Charles (Publishers) Limited.
- Wheeler, emme. “Home Food Dehydration, The Hows, What and Why,” 1974. Seattle, Washington.
Useful Links[edit | edit source]
- Solar Food Dehydrator
- Solar Food Dryers
- Make a Solar Drier
- Projects: Drying Foods With the Sun
- Food Drying
- El Paso Solar Energy Association: Solar Food Drying
- A Review of Solar Food Drying
- U.S. Department of Energy. “Passive Solar Design Technology Factsheet,”
Here are 3 other, nice passive solar models: Three Solar Food Dehydrators
Credits[edit | edit source]
| Christopher Stadler |
| Cal Poly Humboldt |
| cjs36 |