The purpose of this page is to describe a residential greywater system in Humboldt County, CA. Figure 1 shows the greywater system, which is an open pond treatment style. The system contains a fat and oil separator, a gravel marsh, and a small pond. This system was installed in April of 2009 and is still in a testing phase, though the system has been in use for several months. The information on this page comes from an interview with the owner of the house.[1]
System Components[edit | edit source]
House Plumbing[edit | edit source]
In order to treat the house's greywater, the house plumbing needed to be retro fitted to allow for a greywater treatment system. The sources of greywater that are collected and treated in this system include the shower, the bathroom sink, and the dish washing machine. These separate greywater sources had to be piped to one main drain that exits the house from a single point in the back of the house. The plumbing changes were done by a local plumber. Because the house was built about 2 ½ feet above ground level, there is enough room to set the oil separator above ground and still underneath the main drainage pipe.
 |
Fat and Oil Separation[edit | edit source]
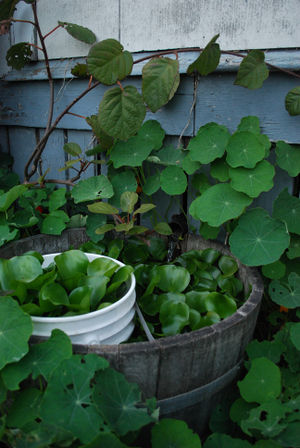
Figure 3 shows the fats and oil separator that is the first place the greywater from the house drains to. For this system, the separator is made from half of a wooden barrel and a five gallon plastic bucket with the bottom cut off, as seen in Figure 3. The greywater, which contains waste such as fats, oils, and other particles, will flow into the wood barrel. The fat and oil will float on top of the water and the larger particles will sink to the bottom. The water will then flow through the bottom of the five gallon bucket leaving the floating fat and oil in the wooden barrel. The drain to the gravel marsh is located inside the five gallon bucket and will determine the water height in the separator. Whenever the water level is above the drain pipe, water flows out of the bucket and into the gravel marsh. The drain has a screen covering the opening so that the pipe will not get clogged with plant roots. The separator needs to be cleaned out periodically, about every three months, to remove the waste that accumulates inside the wood barrel. After leaving the separator, the greywater travels through a pipe to the gravel marsh.
Gravel Marsh[edit | edit source]
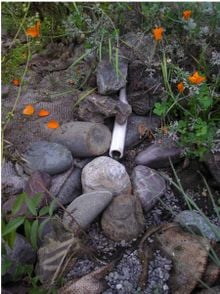
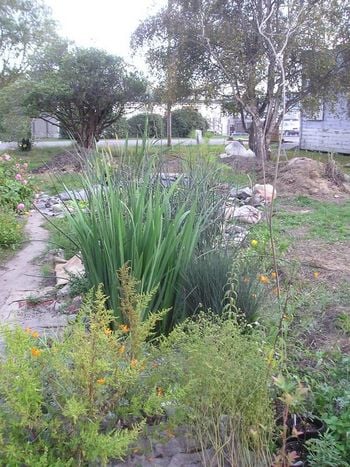
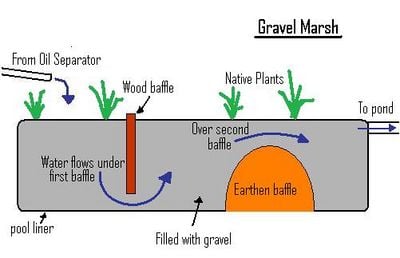
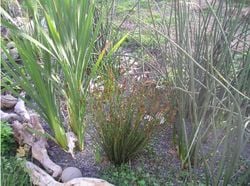
After the fats and oils have been separated from the greywater, the next stage in the greywater treatment is the gravel marsh. The water enters the gravel marsh from the buried PVC pipe shown in Figure 4. In the gravel marsh; bacteria digest and breakdown various substances, harmful bacteria, and nutrients in the water, thus treating the water. Plants in the gravel marsh also absorb nutrients from the water. The gravel marsh, shown in Figure 5, is constructed as a trench measuring approximately 12 feet long, by 2 ½ feet wide and 3 feet deep. A pool liner makes the gravel marsh impermeable, insuring that untreated water stays in the system and does not contaminate the surrounding soil. Gravel is used to fill the marsh in order to slowing down the water flow and increasing surface area for useful bacteria to grow on. Burlap sacks with large rocks are used to cover the exposed pool liner so that the plastic will be protected from UV radiation. Figure 6 shows the two baffles that help mix the water in the gravel marsh. The first baffle is an old plank of redwood stuck in the gravel to divert the water toward the bottom of the gravel marsh. The second baffle is made from earth and diverts water back to the surface. This baffle also protects a buried water pipe that was discovered during the digging of the trench. After water passes through the gravel marsh, the water flows through a pipe to the pond.
Pond[edit | edit source]
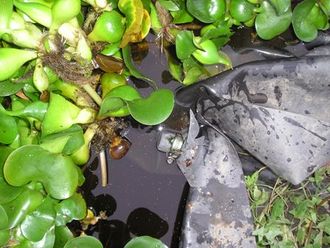
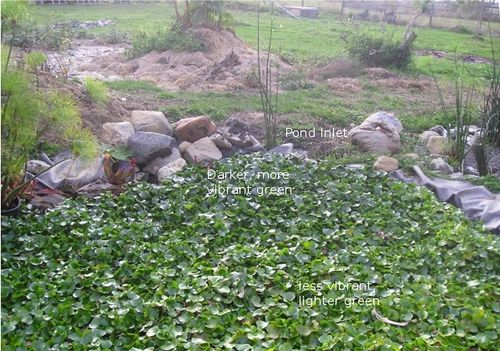
The final stage in the greywater treatment is the main pond. The pond is roughly 10ft in diameter and about 4ft deep. The bottom of the pond is lined with pool liner to make the pond impermeable. The top of the pond is covered with water hyacinths that feed on the nitrogen in the water. The inlet pipe, shown in Figure 7, has a screen over the opening to prevent the plants from growing in the pipe and clogging it. To avoid back flow of the pond water back to the gravel marsh, the inlet pipe is set about a half inch higher than the pond level. The water hyacinths are a more vibrant green near the inlet pipe and the green slightly fades further from the inlet pipe as the plants absorb the nitrogen. This color change is slightly visible in Figure 8.
The pond has become a small ecosystem and has begun to attract frogs, birds, and other small insects. The water in the pond does create potential mosquito problems, however no increase in mosquitoes has been noticed by the residents.
Remaining Tasks[edit | edit source]
There are two remaining tasks in the Bottoms greywater system, an overflow system and water quality testing. The overflow system that will be used for the Bottoms greywater system is a leech marsh. The leech marsh will collect the excess water that overflows the main pond where the water will leech into the soil. Since the water from the main pond is the cleanest water throughout the system, the leech marsh will not contaminate the soil. Water quality tests need to be done throughout the system to test the system's effectiveness at killing bacteria and removing nutrients from the greywater.
Cost[edit | edit source]
| Table 1: Cost of Retrofit | |
|---|---|
| Item | Cost |
| Pool liner | $400 |
| Gravel | $160 |
| Hardware | $50 |
| Labor | no cost (provided by friends) |
| Total Cost | $610 |
Greywater Laws[edit | edit source]
When designing a greywater system, there are many regulations[2] regarding greywater in California that need to be followed. The bottoms greywater system does not conform to all of these regulations. In California, it is not permitted to have human contact with the untreated greywater possible, which for generally means that all parts of the greywater system need to be below the surface or in a tank to prevent human contact.[3]
Additional Resources[edit | edit source]
The Bottoms wildlife pond greywater marsh
- Similar page with more in depth look of the treatment of the greywater
CCAT greywater marsh (current)
- Greywater system that was created by CCAT
- Problems the CCAT greywater marsh faced
References[edit | edit source]
- ↑ Personal interview,October 23, 2009 (The owner of this greywater treatment system wishes to remain anonymous.)
- ↑ http://www.oasisdesign.net/greywater/law/california/currentcode/#code
- ↑ http://www.greywater.com/
