This paragraph will appear in search results and previews for this page. Write a brief introductory text with information such as a description of your project, when was it designed and built, your motivation to solve the problem, the intended users. This will explain your project to someone who has never heard of it before.
Background[edit | edit source]
Describe the background of the project. Make sure to cover who, what, why, when and where. You will want to write in word (to have a local copy and help with grammar) and then copy it into the edit window on Appropedia. You will want a 'before' (or a contextual) image to help set the context of the background. Note that any images uploaded to Appropedia must be free to share and uniquely named (just use your team or project name as the start to the file name for ease and compliance).

Problem statement[edit | edit source]
Start your project objective statement in the format, "The objective of this project is to...". Consider what will change once your solution is built and running. You will edit this throughout your project to fine tune it.
Criteria[edit | edit source]
Include a brief but specific introduction to the criteria and then include a table with constraints and weights (0-10 highest). For example, the following Table 1 might be your criteria for selecting chocolate to purchase.
| Criteria | Constraint | Weight (1-10) |
|---|---|---|
| Cost | Less than $4 per ounce | 10 |
| Level of darkness | More than 65% cacao | 10 |
| Flavor | Tastes better than hersheys | 9 |
| Level of social/environmental justice | Meets or exceeds fair trade and organic standards | 5 |
Literature Review[edit | edit source]
Introduce the literature review briefly and then use heading and subheadings for topics. This should focus on information… NO PLAGIARISM! Make sure to see assignments on Canvas.[1]
This sections will probably have many subsections as shown below. If it is quite long, you can move it to subpage by clicking this link. Below is an example of subsections.
Composting basics[edit | edit source]
Paragraph on the basics.[2]
Composting concerns[edit | edit source]
Short paragraph on the concerns.[3]
Types of composting[edit | edit source]
Short introduction to types of composting.[4]
Type 1[edit | edit source]
Type 1 composting is a system that utilizes..... Make sure to include description,[5] advantages and disadvantages, and/or have a comparison matrix.
Type 2[edit | edit source]
Type 2 composting is a system that utilizes..... Make sure to include description, advantages and disadvantages, and/or have a comparison matrix.[4]
Type 3[edit | edit source]
Type 3 composting is a system that utilizes..... Make sure to include description, advantages and disadvantages, and/or have a comparison matrix.
Designing interpretive materials[edit | edit source]
According to ______ interpretive materials for composting should include....
Prototyping[edit | edit source]
Show examples of the prototyping process including what you learned. Make sure to include at least one prototype for function and at least one prototype for desire. A great way to communicate your design your process (and to earn extra points!) is to show your early drawings (by hand and digital), failed attempts and photos of tools, materials and your team (or your hands) as you build this prototype.
-
Prototype of agricultural school area made from bottle caps and clothes pins. We learned that the trees would need to be further apart for teaching in the future.
-
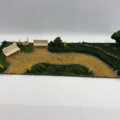
Miniature prototype of Six Rivers School hangout area. We learned that the clients and students loved the look and wanted more native landscaping and flowers.
-
Prototype of rainwater catchment system for Loleta Elementary made from pipe cleaners, cardboard, and paper. We learned that the client preferred a large rainwater catchment tank from this.
-
Prototype bench made for Zane Middle School made from 2x4s. We learned that the hinge mechanism was too dangerous for the students to use.
Construction[edit | edit source]
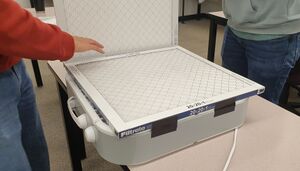
A very complete description of how the final project is built. This large section should have lots of pictures. Use the Help:Images#Galleries and probably Template:Steps (e.g. 215_DIY_solar_power_box_fan_air_filter#Building_Instructions).
- Sample gallery
-
Sample caption text.
-
More sample caption text. This would look better with different images.:)
-
Even more sample caption text.
Video instructions[edit | edit source]
A good way to display a process is by making a video explaining your process. See Template:Video for information on how to add and annotate videos.
Annotations to navigate the video:
- 0:10 Birdie coming in
- 0:16 Birdie is watching you
- 1:19 Imma head out
- 1:30 Bye
Steps[edit | edit source]
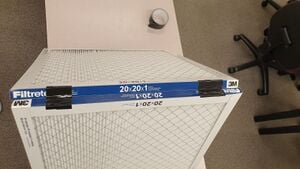
Place the fan face-down (such that the portion that blows air is face down) on a flat surface. Align the bottom edge of one filter with the bottom edge of the fan and the side edge of the filter with the right side of the fan. Place two temporary pieces of tape down to keep the filter in place, but that are removable if necessary. Lift this filter up and repeat the process with the second filter, aligning the bottom with the bottom of the fan and the side with the left side of the fan
Timeline[edit | edit source]
Introduce the timeline with a short text and include a table of the timeline. See Help:Table examples for reference on how to display tables.
Bill of materials[edit | edit source]
Description of costs, donations, the fact that this is just proposed, etc. For a simple cost table, see Help:Table examples#Cost Table and Template:Cost table for two nice formats.
| Item | Amount | Cost per unit | Total |
|---|---|---|---|
| Things — Get at the thing store | 3 | USD 5.75 | USD 17.25 |
| Another thing — 3' x 2', yellow | 1 | USD 150.00 | USD 150.00 |
| Grand total | USD 167.25EUR 143.84 <br />GBP 122.09 <br />CAD 207.39 <br />MXN 3,487.16 <br />INR 12,518.66 <br /> | ||
Operation[edit | edit source]
This is how to operate. It should have a brief introduction and very useful images with labels. Also it may work best for your project to use the step by step how to template {{How to}}. See #Troubleshooting for an example.
Maintenance[edit | edit source]
Introduce this maintenance section.
Schedule[edit | edit source]
This is when to maintain what. Please keep the format the same as it populates the kiosk in CCAT.
- Daily
- A daily task
- A daily task
- Weekly
- a weekly task
- a weekly task
- Monthly
- a monthly task
- a monthly task
- Yearly
- a yearly task
- a yearly task
- Every __ years
- task
- task
Instructions[edit | edit source]
This is a plan to maintain your project. The step by step how to template {{Steps}} is most likely the best way to display a process, which will look like this:
Conclusion[edit | edit source]
Testing results[edit | edit source]
Describe the testing results.
Discussion[edit | edit source]
Discuss the testing results.
Lessons learned[edit | edit source]
Discuss lessons were learned during this project and what you would do different next time.
Next steps[edit | edit source]
Discuss any next steps for the project as it goes on into the future.
Troubleshooting[edit | edit source]
This is only how to troubleshoot basic operation. For complex issues, the solution might just say something like contact ________. It should be a table in this format:
| Problem | Suggestion |
|---|---|
| Example issue | Example solution or suggestion |
| Does not turn on | Make sure it is plugged in |
| Another issue | Etc. |
Team[edit | edit source]
Introduce team and semester in the following format:
- Lonny Grafman
- Emilio Velis
- One bullet for each team member.
References[edit | edit source]
- ↑ For example at 305 literature review template you will see the recommendation to use Help:Footnotes.
- ↑ This is an example of footnotes.
- ↑ Another example of footnotes.
- ↑ 4.0 4.1 This is an example of a named reference. You can use these named references to repeat citation content throughout the document.
- ↑ This is a third example of a plain footnote.

