Template documentationedit documentation
Use this template to create a single step in a list of steps.
Usage[edit source]
Basic[edit source]
{{Step
| number = 1
| title = Do this.
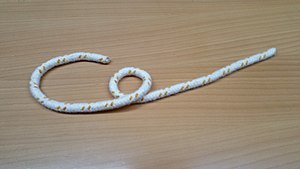
| image = Barb. Palstek AL1.jpg
}}

{{Step
| number = 2
| title = Do that.
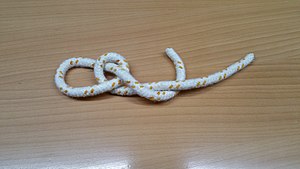
| image = Barb. Palstek AL2.jpg
}}
Advanced[edit source]
{{Step
| number = 1
| title = Cut out apron main body material.
| text = Cut a 28” x 36” rectangle out of the body material. Fold the rectangle in half so that it measures 14”x36”. Next, cut out the curved section for the arms according to the the image and dimensions of your choosing for smaller or larger users. Then, cut a small arc for the curve along the top of the apron. Please refer to the first 6 minutes of this video for more information. This is the template that we ended up using. https://www.youtube.com/watch?v=2gIaUchSUuI&t=316
}}
{{Step
| number = 2
| title = Cut out pockets
| text = 2. A paper or cardboard template may be used to experiment with different pocket shapes, sizes, and locations. Cut out pockets. It is is important to factor in 1/2” extra all the way around the perimeter of each piece for hemming. For STEMwear, our pocket size cut-outs were:
}}
{{Step
| number = 3
| title = Trim & hem.
| text = 3. Based on the desired length, trim the apron. We trimmed x inches off ours for a mid-thigh length on most users. Once you have all of your material cut to size it is time to hem. The body of the apron can be hemmed all the way around at once. Fold and crease a 1/2” margin around the perimeter. If you are more comfortable, you can use pins to hold it in place. We found that the thick waxed canvas would crease and stay put while we hemmed. For the pockets, only the openings should be hemmed at this point. The sides that will be attached to the apron will be hemmed as they are attached.
}}
{{Step
| number = 4
| title = Pocket Placement.
| text = 4. Determine placement of the pockets. We placed our upper hand sleeve pocket centered x inches from the top. The main sweatshirt pocket is centered x inches below that. The multi-purpose loop is located slightly above and to the right of the sweatshirt pocket. The large side pocket is a few inches below that. The opposing hip pocket should be placed where it can be comfortably reached. Note, any embroidery or vinyl that will be attached to the pockets should be completed before the pockets are attached to the apron body.
}}
{{Step
| number = 5
| title = Attach the pockets.
| text = Remember to back-stitch at the beginning and end of every stitch line. For layered pocket, make sure to think through which pieces should be attached first. For example, our layered chest pocket required the pencil pocket to be partially sewn to the phone pocket, then the phone pocket sewn to the hand-sleeve pocket, then the remaining edge of the pencil pocket sewn, and finally the hand-sleeve sewn to the body.
}}
{{Step
| number = 6
| title = Trim & seal.
| text = 6. Trim excess thread from each stitch line and then use a thread sealer to singe the loose fiber to prevent the thread from unraveling.
}}
{{Step
| number = 7
| title = Grommets
| text = 7. Install four grommets. Two grommets should be placed at the top corners where the shoulder straps will attach. The other two grommets should be placed at the corners of the sweeping arm line to receive the straps.
}}
{{Step
| number = 8
| title = Attach straps to body
| text = Using the 1 inch webbing, feed it through the upper grommets, fold it over itself by 2 inches and then sew to secure.
}}
{{Step
| number = 9
| title = Cross brace
| text = 9. Create the cross-webbing brace for the back by cutting two 4x4 inch squares of canvas and sewing the perimeter. Orientating the square like a diamond, cut four diagonal slits for the straps to feed through. Sew around the slits to prevent fraying. Feed the straps through the brace and then through the lower grommets. Finally, feed the webbing through the buckle to on each side. Test fit the apron and trim excess webbing, leaving enough for adjustability based on different sized users. Thread seal the ends of the webbing.
}}
{{Step
| number = 10
| title = Use & enjoy your STEMwear
}}
3
See also[edit source]
Use this template to create a single step in a list of steps.
| Parameter | Description | Type | Status | |
|---|---|---|---|---|
| Number | number 1 | Step number.
| Number | suggested |
| Title | title 2 | Short text describing the step.
| String | suggested |
| Text | text | Longer text describing the step. | Content | optional |
| Image | image | Image illustrating the step.
| File | suggested |
| Caption | caption | Brief text describing the image.
| String | suggested |


