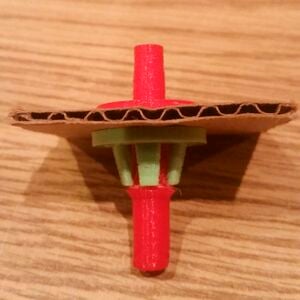
For this OSAT Project a design challenge was done for Field Ready, which makes humanitarian supplies in the field. The reason this design challenge was created was to replace a poorly designed connector for an air hose on a nebuliser. The current fitting often snaps off under normal use and requires a significant amount of effort every several days to re-glue the undersized fitting back on.
The main two improvements to this product as made by this project are that it has a larger diameter going through the plastic casing of the nebuliser, which was desired, and that it has clamping force on the casing to hold the fitting more steady. One of the design requests was to create threads on the fitting that could be used with a nut to clamp down on the plastic casing, but from experience, 3D printed threads do not offer significant clamping force.
-
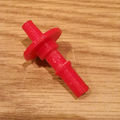
Nebuliser Fitting, Rear View
-
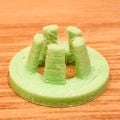
Nebuliser Quick-Connector
-
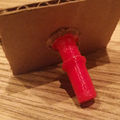
Placing fitting through "Casing" material
-
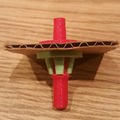
Fully assembled Quick-Connect over Fitting
Bill of Materials[edit | edit source]
1.75mm PLA or ABS. Glue stick for adhesion. Design Files found at[1]
Tools[edit | edit source]
- MOST Delta RepRap or other 3D printer
- Razor Blade for part removal from glass build plate
- Pliers to remove support material
Skills/Knowledge[edit | edit source]
- Ability to run and calibrate printer for dimensionally accurate prints
Technical Specifications and Assembly Instructions[edit | edit source]
Print Directions[edit | edit source]
There are two printable STLs in the Youmagine set. One is the fitting, and the other is the quick-connect. One of each is needed to replace a current setup.
Layer Height[edit | edit source]
Layer height does not play a large factor in the printing of these parts. Both parts need to be printed at a higher temperature than normal to encourage inter-layer bonding.
Speed[edit | edit source]
To print these parts I used 80mm/sec, though on the Athena printer I was using this is not a particularly fast speed.
Temperature[edit | edit source]
This project was printed at 212 degrees Celcius, which is the temperature I have found to be optimal with Hatchbox PLA.
Fill[edit | edit source]
Because neither part is particularly hollow, each part is mostly solid plastic anyway. For the couple of spots that allow infill, 20% was used because the parts remained strong at that default setting.
Support Material[edit | edit source]
Support material is required to print the fitting. It has proven to be a pain to remove, but there is no other efficient way to print this part.
Removing Support Structure[edit | edit source]
- Using pliers, twist the support material off of the fitting. All support material must be removed.
Print Time[edit | edit source]
The total print time for this project as printed was about 20 minutes, with new quick-connects being an additional 7 minutes each.
Time estimate to replace old part with new[edit | edit source]
The time required to replace the current design with this new design should be under 10 minutes per nebuliser, including the removal of the casing to access the old fitting.
Cost savings[edit | edit source]
Both parts require a total of 5 grams of material, which in total costs about $0.11. Similar connectors are about $5 from the internet, but the real value of this part is that it is hard to find where it is needed, so in an area with Field Ready, people that need this fitting can have it in a short amount of time. This reflects a $4.89 savings or about a 98% cost savings.
Notes[edit | edit source]
- ↑ Here is a link to the youmagine with all of the design files: https://www.youmagine.com/designs/field-ready-design-nebuliser-connector
