Quee Rearing Parts.png
FA info icon.svg Angle down icon.svg Project data
Authors Stephen Krease
Completed 2016
Made Yes
Replicated No
Cost USD 0.92
Instance of beekeeping
OKH Manifest Download

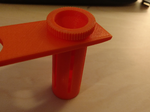
Monetary and supply aid efforts to third work countries offer a temporary solution to permanent problems. In an effort to provide a sustainable means of income and food, I turned to a now common hobby, beekeeping. Beekeeping provides a source of food to the owner as well as a product which they can sell as a means of income. The difficulty in this hobby is that it is difficult to find the proper resources for a reasonable price. One of those essential resources is a queen rearing kit which allows the owner to properly breed more queeens to maintain their hive. This kit goes for upwards of $150 online in the US and is even more unobtainable in third-world countries. The goal of this project is to create an open source queen rearing kit to enable those who cannot afford it to start beekeeping.The design must be easy to print and match standard dimensions of beekeeping hives.

Beekeeping Queen Rearing Assembly.png

Bill of Materials[edit | edit source]

  1. Total five parts made in FreeCAD. Total 42 grams of filament
    1. Cell Holder
    2. Larvae Cup Top
    3. Larvae Cup Bottom
    4. Queen Cage
    5. Cell Rack
  2. All files posted at: | Youmagine Link

Tools needed[edit | edit source]

  1. MOST Delta RepRap or similar RepRap 3-D printer

Skills and knowledge needed[edit | edit source]

Technical Specifications and Assembly Instructions[edit | edit source]

  1. Printing Instructions:
    1. Print Speed: 30 mm/S
    2. Fill Density: 20%
    3. Layer Height:.16 mm
    4. Support Type: Everywhere
    5. Platform Adhesion Type: None
  2. Print time: 4 Hours, 5 Minutes
  3. Assembly Instructions:
    1. Place Larvae Cup Top into any faux honeycomb with the cup facing up.
    2. After the Queen has laid the royal larvae in the cup, place the Larvae Cup Top into the Cell Holder at the ribbed end.
    3. Place Larvae Cup Bottom onto Larvae Cup Top (Hold together with beeswax). Cell Holder.png
    4. Place Queen Cage over full assembly, locking on the rib of the Cell Holder (Hold together with beeswax).
    5. Place entire assembly onto rack and mount in keeping box. AssemblyBee.png
    6. Assembly time: 2 minutes
  • See tutorials posted above in Skills and Knowledge for tutorials on assembly and use.

Common Problems and Solutions[edit | edit source]

  • Careful removing Cell Rack from glass bed. If possible, use a heated bed or carefully remove piece with an exacto-knife.
  • A few pieces are quite small, make sure your printer has a high enough resolution.
  • Use Beeswax to glue together any loose components

Cost savings[edit | edit source]

  1. Total Material Amount: 42 grams
  2. Estimated Cost: ~ $0.92 depending on filament price
  3. Commercial Cost: $85 | Jenter Kit
    1. Only available in bulk
  4. Total Savings: ~$84.08

References[edit | edit source]

FA info icon.svg Angle down icon.svg Page data
Keywords 3d printing, beekeeping, queen rearing kit, plastic
SDG SDG09 Industry innovation and infrastructure, SDG15 Life on land
Authors Stephen Krease
License CC-BY-SA-3.0
Organizations MTU, Michigan_Tech's_Open_Sustainability_Technology_Lab, MY4777
Language English (en)
Related 0 subpages, 4 pages link here
Impact 698 page views
Created December 2, 2016 by Stephen Krease
Modified January 29, 2024 by Felipe Schenone
Cookies help us deliver our services. By using our services, you agree to our use of cookies.