
Preload:Medical knowledge page
| Subskills | A list of links to skill pages O2 Tank Assembly Some other expanded skill |
|---|---|
| Equipment | Links to equipment pages Oxygen tank with regulator Use "Edit Source" to edit lists |
- Review: An uploaded pdf example.
- Then work through the exercises on this external link: content
- Then test your knowledge with this quiz
This is the introduction paragraph that will appear as a summary in searches within Appropedia and other spaces such as Google searches. We recommend around 50 words for brevity. The content in this section will appear above the auto-generated table of contents. The pre-load for a Medical Knowledge page does not include video that is at the top of the page. Use the Medical Skills pre-load for a page including video.
Description
[edit | edit source]This page contains a large amount of pre-loaded content to guide you through the creation of your page. You will want to remove all of the explanation content and replace it with your own content as this page now has the name you have assigned to it. It does, however, contain a lot of examples to guide you while you are replacing it with your own content.
You can edit most of the material in this main body portion of the page using the visual editor, but first, there are some "Edit Source" edits you should make on your newly created page:
- The banner at the top is autoloaded as part of creating the page. It shows up at the very top as {{GSTC notice}} when you use "Edit Source". Replace the generic GSTC banner with your own.
- You will also want to edit the "Part of" section to refer to the top level module page that this is part of so that users can easily navigate back to the main content
- If you want to indicate the number of required weeks, you can edit that as well, otherwise remove the entire string and it won't show up as a side bar.
Content
[edit | edit source]There are lots of ways to display and organize content in addition to descriptions. In this example, we use subheadings to group the examples under the heading so they show up in the table of contents at the top in an organized fashion.
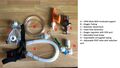
Images
[edit | edit source]
Inserting images using the visual editor will by default place them on the right hand side at the level of the text where you inserted, which may or may not be what you want. This is an example of what that default looks like. For help on uploading, managing and formatting images see Help:Images.
Quizzes
[edit | edit source]There are many ways to integrate self-administered quizzes into the content. Try using our quiz builder and put links to them anywhere you would like. (Take this quiz builder out of your module, it is just here for convenience)
Equipment Lists
[edit | edit source]Lists of equipment necessary for practicing and mastering the skill, including knowledge or skill pages describing the simulators and how to create them are essential for the student. Once created, their names can be added to the sidebars for easy access. You can use the page preload for creating your equipment pages.
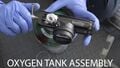
Galleries
[edit | edit source]One of the ways to format images is to create a gallery of several single images in line. Galleries can be used to show a more compact procedure or a list of descriptive images
-
 1. This is a good way to show a list of steps if many are needed.
 -
 2. You can check more information about galleries on Appropedia's help documentation. MediaWiki has even more information at mw:Help:Images#Rendering a gallery of images.
 -
 3. This is a third caption.


Links to other material
[edit | edit source]Not all of the content you want to display necessarily fits into the Appropedia format easily, or is best in a single page. You can add many different kids of links to other content including:
- Internal links to other Appropedia content (try adding [[double square brackets]] to add an internal link to your or other content): CPAP (Continuous Positive Airway Pressure) Administration
- Links to any content on an outside website (using [single square brackets]): Example to integrate content from any other website
- The special case of links to Wikipedia content for expanded definitions: Wikipedia:Continuous positive airway pressure.
- And links timestamps in the video: Click this example.
Check this cheatsheet with the most useful wikitext markup.
Replacing the Banner
[edit | edit source]The banner at the top is autoloaded as part of creating the page. It shows up as {{GSTC notice}} at the very top. Use "Edit Source" to replace the generic GSTC banner with your own.
Editing the Side bars
[edit | edit source]The side bars are generated and displayed from the source code for the page. They are key places where things like the self assessment tasks, equipment lists and navigation help are organized in a consistent way from page to page.
Because of the way they are constructed, the side bars require editing with the "Edit Source" option, and don't always handle in-line links to other pages as intuitively as the main body content - there are examples in this preload of how to do common kinds of link in those sections that you can see when you look at this page with the "Edit Source" option, but not every kind of link will work.
If the side bar structures are too restrictive for how you want to handle self assessment or equipment lists, that content can always be included in the main body.
| Authors | |
|---|---|
| License | CC-BY-SA-4.0 |
| Cite as | "Preload:Medical knowledge page". Appropedia. 2021–2025. Retrieved July 15, 2026. |