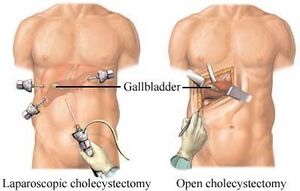
We chose the Laparoscopic Cholecystectomy (LC) surgery, and we focus on the most crucial aspect of the procedure, i.e., the dissection of the calot's triangle. We chose this particular procedure as there can be substantial variations in the anatomy as well as pathological challenges when performing dissection in this area. The inflammation of the gallbladder begins in the calot's triangle, infundibulum and the duct, usually when a stone gets impacted. Furthermore, along with the numerous blood vessels in the vicinity, the common bile duct is closely situated to the cystic duct.
Novice surgeons tend to assume the anatomy to be similar in all cases. However, this is not the case as there can be pathological changes caused by the thickening of tissues, congestion, and inflammation over the calot's triangle. A mistake made during these crucial steps could lead to a permanent disability. This could be either due to the damage to the hepatic artery causing liver necrosis, damage to the bile duct leading to stenosis, or leakage of bile causing peritonitis.
Therefore, a thorough understanding of the anatomy, pathology, decision making corresponding to the type of dissection, identifying the particular areas of the infundibulum, the cystic duct, and the cystic artery branches - are all very critical to perform a safe LC. We take this opportunity to empower surgeons and teach them to perform the surgery step-by-step and to eventually master this crucial surgical technique.
Impact of training[edit | edit source]
Surgeons are now performing most abdominal surgeries via Laparoscopy rather than open surgeries, and the advantages of which are immense. The discomfort and pain following a LC is less than 10% than that of an open Cholecystectomy. The blood-loss is roughly 5-10 ml in most laparoscopic surgeries when compared to 5-10 times more in an open surgery. The recovery is rapid; hospitalization is required only for 24 hrs in most instances. It is also a boon for the labour class in developing countries who depend on their daily earnings, as they can get back to work within a week after surgery.
LC has also been the first-ever surgery for surgeons to perform and learn the skills of Laparoscopy. Once they are skilled enough to perform this surgery, they can start performing various other abdominal surgeries via Laparoscopy. This would also be an occasion to train the entire team, which includes the OT technicians, nurses, assisting surgeons, and the anesthesiologists helping all of them gain adequate knowledge about Laparoscopy
Laparoscopic Cholecystectomy[edit | edit source]
Introduction[edit | edit source]
A laparoscopic cholecystectomy is a surgical procedure to remove the gallbladder. It ensures the following benefits:
- Minimal pain
- Minimal bleeding
- Faster recovery
- Reduced hospitalisation
- Early return to work
- Less chances of infection
- Better cosmesis
Laparoscopic cholecystectomy has brought in a paradigm shift in the approach of treatment of patients with symptomatic gall stones. This is one of the most common operations being performed by most general surgeons today.
Training in laparoscopic surgery has a steep learning curve. Learning to perform laparoscopic cholecystectomy has become the first step to progress towards training and performing many other laparoscopic surgeries.
Challenges with Laparoscopic cholecystectomy Surgery[edit | edit source]
| Challenges | Reasons |
|---|---|
| Lack of depth perception | Performing surgery in a 3D environment while visualising it on a 2D monitor. |
| Paradoxical movement | Fulcrum fixed to the abdominal wall |
| Motor Movement | Difficulties in hand-eye co-ordination as the monitor and patient are placed in different directions. |
| Limited movement of instruments | Devices are introduced through the same points (where ports are raised) throughout the surgery. There is only 50 freedom of movement. Surgeons often feel it is challenging to move their "wrist joint" due to limited movement area. |
| Limited force feedback | Due to lack of touch sensation throughout the surgery, surgeons often complain of a true to life feeling. |
| Limited scope of achieving hemostasis | |
| Challenges of Organ Retrieval | Presence of small ports. |
| Ambidexterity Skill Requirement | Limited points of entry of instruments into the body. |
Surgical Training Using Simulations[edit | edit source]
- We have created a platform for surgeons and surgical residents to learn the Laparoscopic Cholecystectomy procedure.
- Image
- We chose the Laparoscopic Cholecystectomy (LC) surgery, and we focus on the most crucial aspect of the procedure, i.e., the dissection of the calot's triangle.
- We chose this particular procedure as there can be substantial variations in the anatomy as well as pathological challenges when performing dissection in this area.
- The inflammation of the gallbladder begins in the calot's triangle, infundibulum and the duct, usually when a stone gets impacted. Furthermore, along with the numerous blood vessels in the vicinity, the common bile duct is closely situated to the cystic duct.
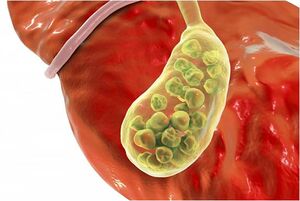
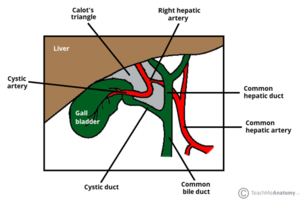
Common Misconceptions[edit | edit source]
Novice surgeons tend to assume the anatomy to be similar in all cases. However, this is not the case as there can be pathological changes caused by the thickening of tissues, congestion, and inflammation over the calot's triangle. A mistake made during these crucial steps could lead to a permanent disability. This could be either due to the damage to the hepatic artery causing liver necrosis, damage to the bile duct leading to stenosis, or leakage of bile causing peritonitis.
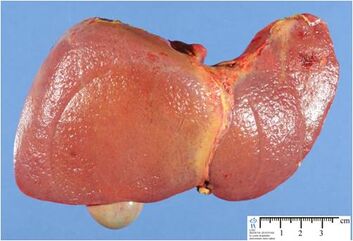
Therefore, a thorough understanding of the anatomy, pathology, decision making corresponding to the type of dissection, identifying the particular areas of the infundibulum, the cystic duct, and the cystic artery branches - are all very critical to perform a safe LC. We take this opportunity to empower surgeons and teach them to perform the surgery step-by-step and to eventually master this crucial surgical technique.
Impact of Training[edit | edit source]
- LC has been the first ever surgery for surgeons to perform and learn the skills of Laparoscopy. Once they are skilled enough to perform this surgery, they can start performing various other abdominal surgeries via Laparoscopy. This would also be an occasion to train the entire team, which includes:
- OT technicians
- Nurses
- Assisting surgeons, and the Anesthesiologists
- This ensures that all involved will gain adequate knowledge about Laparoscopy.
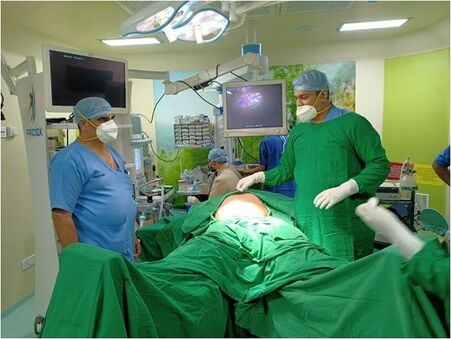
Basic Principles and Techniques of Laparoscopic Procedures[edit | edit source]
Laparoscopic surgery is the fastest growing specialty in the last decade. Like Laparoscopy, no other technique has gained so much popularity. The development has advanced in a short period across surgical specialties and super-specialties.
Prerequisites[edit | edit source]
- The safe performance of Laparoscopic Cholecystectomy demands that certain basic principles are observed meticulously. While adopting a new technique “The Principle of learning to walk before one can run” must be kept in mind.
- To make the procedure safer and to avoid complications, you must:
- Plan the selection of cases and appropriate surgery.
- Screen for morbidity and mortality indications.
- The procedure should be explained to the patient and relatives and proper consent for Laparoscopic/Open surgical procedure should be taken.
Surgery Requirements[edit | edit source]
- For a Laparoscopic procedure, the operating room must be of adequate size. It must be fitted with all necessary electrical connections preferably through voltage stabilizer or UPS for better performance of the equipment. The equipment trolley and two instrument trolleys should be easy to move about in the operating area.
- Before starting the procedure and putting the patient on the operating table, the adjustability and movements of the table i.e. head up & head down tilt, as well as lateral and lithotomic tilts must be checked. Preferably there should be a radiolucent table-top.
- All equipment and instruments must be well maintained and in working order, they should be checked before beginning each procedure. The surgeon himself or a trained nurse must have the basic knowledge of maintenance and trouble shooting during the procedure, if instrument fails, and should clean the instruments themselves for longevity of the instruments.
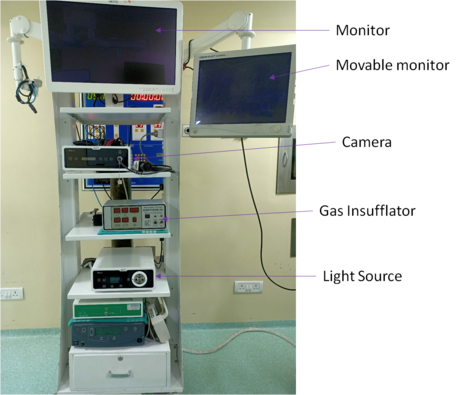
- Preferably, the equipment trolley must be made with 5-6 shelves to accommodate all equipment i.e. T.V. Monitor, CCD Camera unit, VCR, light source, Co2 insufflators, suction-irrigation unit. This way it occupies less floor space in the operating room.
- Open surgery set should be kept ready on a separate trolley so in case of an emergency, conversion to open surgery is easily done without losing much time.
- Any surgical procedure is a team effort but laparoscopic procedure demands more teamwork. There must be a regular team (for better co-ordination and good results) including – Assistant Surgeons, O.T. Nurse, Circulating Nurse and Technician. All involved should have a complete knowledge of laparoscopic principles and instruments.
- In the near future a time may come when it will be possible to perform almost any surgical procedure by minimally invasive surgery but it is mandatory that a surgeon is exceptionally trained for open surgery as well.
- Bladder and bowel must be empty for good visibility and to avoid injury to structures. For upper abdominal surgery, N. G. tube should be passed to keep the stomach empty, if the patient has passed urine before coming to operating room, then catheterization is not necessary.
- To avoid slipping of the patient in the presence of excess tilt, strapping of the patient to the table is advised.
- Most convenient position for the patient is supine
- Some surgeons prefer to regularly apply crepe bandages to the legs to prevent D.V.T.
- General anesthesia with endotracheal intubation and controlled positive pressure ventilation is a must for most of the laparoscopic procedures, to ensure good relaxation.
- Before starting the procedure, all connections are made and checked. Gas and suction-irrigation tubes, camera, light-source and diathermy cables are checked. Two diathermy cables may be required depending upon “Male” or “Female” connections on the instruments. Bipolar diathermy is safer than monopolar diathermy. To cover the camera cable a sterile plastic cover or cloth sheath can be used.
- Heparinized solution can be kept in a tray for keeping the used instruments so that blood clots do not block and damage the instruments.
Methods of Initial Entry[edit | edit source]
There are two methods for initial entry:
Closed Method[edit | edit source]
In this method, a 1-1.5cm skin and subcutaneous deep incision is made (linea alba or rectus sheath should not be incised) and through this the Veress needle for pneumoperitoneum and primary trocar are inserted.
Closed Method[edit | edit source]
- This is also known as the Hasson method.
- Here, a larger 2-2.5cms incision is made through all layers.
- Introduction of Veress needle is not required for pneuomoperitoneum and a special blunt trocar is used.
- A purse-string suture is applied through all the layers and tied over the cannula.
- Some surgeons regularly prefer this technique to the blind technique (closed method).
Steps Following Initial Entry: Closed Method[edit | edit source]
- After the incision the abdominal wall below, the umbilicus is lifted in the mid line by the surgeon or on both sides by surgeon and assistant.
- Abdominal swab may be used for proper grip.
- This gives little safety i.e. the umbilicus is lifted up from the great vessels.
- The Veress needle must be checked for its patency before inserting.
- The Veress needle is held between the thumb and three fingers and little finger rests on abdominal wall as support and guide. It should be angled and pointed towards the pelvis.
- As the needle pierces the linea alba and peritoneum the hub moves to resting place. At this stage side to side movements must be free.
To further test the position of the needle:
- Push some saline and it should go without any resistance
- Aspiration should not show any gas, blood, intestinal contents or injected saline.
- The syringe is removed and then saline drop test is performed, the abdominal wall is lifted up & the drop will be sucked in due to negative pressure in the peritoneal cavity. This shows that the needle is in.
- The final confirmation is after the insufflation of abdomen with CO2. The gas tube is connected and insufflation is started with a flow rate of 1-2ltr per/min.
The intraperitoneal presence of the needle can be confirmed by the following:
a) On electronic insufflators indicator. (Golder rule of 5)
b) Steady flow of gas.
c) Low pressure in the peritoneal cavity.
d) Symmetrical distension of abdomen.
e) Increasing resonance on percussion over the subphrenic area.
f) Increasing resistance by the anesthetist.
- Intra abdominal pressure should be kept between 12-14mm of Hg. Some surgeons use gasless laparoscopy where a special instrument called laparolift is used.
First or Primary Trocar[edit | edit source]
(Video link)
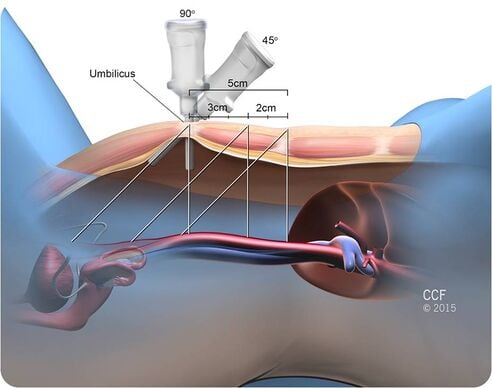
Open Laparoscopy[edit | edit source]
- One of the great inventions in the history of laparoscopy has been the invention of the Veress needle. Introduction of a needle into the peritoneal cavity to insufflate gas, which was considered to be a risky procedure was made ‘safe’ by this spring loaded needle. Complications decreased and perhaps laparoscopy became much more popular after this invention.
- But is this needle really so safe as to use it without any complications al all?
- Review of literature in the 70s and 80s shows that almost 70 to 80% of all complications of laparoscopy are related to the introduction of the Veress needle or the primary trocar into the abdominal cavity.
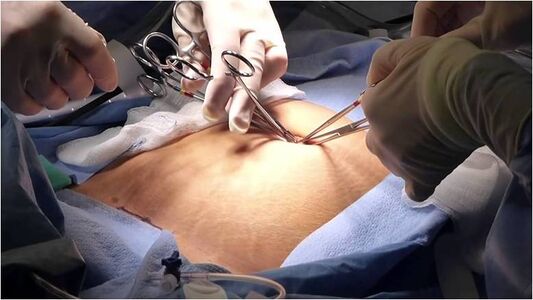
- In fact there has been a continual improvisation in the type of trocars that have been used for the first blind entry, but they have all proved to be either associated with enough complications or have been an expensive proposition.
- Almost two decades ago Harith Hasson in U.S.A., described open laparoscopy, which actually meant opening the peritoneum and visually introducing a blunt trocar-canula into the abdomen. Several specialists transformed their procedure to ‘Hasson’s technique’, but several more remain faithful to the Veress needle. It is surprising that though Hasson himself is a gynaecologist, more surgeons all over the world use open laparoscopy and gynaecologists have somehow remained averse to it.

- Most gynaecologists, over the last decade or so have remained experts in laparoscopy in our country, thanks to the thousands of laparoscopic sterilizations they have had to perform. The scenario is fast changing. With more and more specialists and centers coming up, the exposure each one gets is being minimised. We have patients coming for repeat surgeries more often today. With the advent of video-laparoscopy there is hardly any gynaecological surgery that needs a laparotomy. The risk of adhesions in repeat surgeries tilts the balance against the blind introduction of the Veress needle or the trocar. With increase inflammatory conditions, we need not have adhesions only in patients with previous surgeries but also in ‘so-called normal’ individuals. The answer to safe practice of laparoscopy is certainly open laparoscopy and this is becoming more and more obvious.
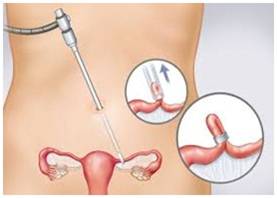
• Open laparoscopy means introduction of the trocar into the peritoneal cavity after dissection and incision of the peritoneum and visualization of the abdominal cavity. This technique prevents 3 blind procedures:
- Introduction of Veress needle
- Insufflation of Carbon dioxide gas through the needle.
- Introduction of the trocar
• It is only after these three blind procedures that we introduce a telescope and are able to ensure whether there was any damage done or not.
• The procedure of open laparoscopy can be made easy by having a few small but very useful instruments as a set with our laparoscopic instruments. These include:
a. small sized Allis (4 inch length),
b. straight artery forceps,
c. mosquito forceps and a pair of small right angled retractors.
- We generally use Ethibond or P.D.S. suture material, as this can be conveniently used to close the fascial defect at the end of the surgery.
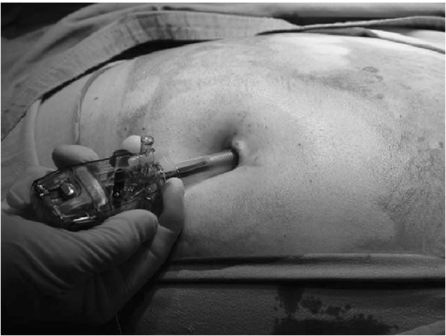
Open Laparoscopy Procedure[edit | edit source]
- A subumbilical incision is taken by stretching the abdominal skin downwards, so that the incision actually becomes intra-umbilical to give a better cosmetic scar.
- This is a curved incision of 1½ to 2 cms. length, a longer incision is taken in an obese patient.
- The upper skin flap is grasped with the small Allis forceps and retracted upwards, and the lower flap is retracted down using a small retractor.
- The subcutaneous tissue is dissected from the umbilicus and the rectus sheath.
- The rectus sheath is grasped with another Allis forceps in the midline and two stay sutures are taken, on either side.
- With traction, on the stay sutures; a vertical incision is made in the rectus sheath.
- A mosquito forceps is used to separate the rectus muscles, and the peritoneum is grasped and held up in two mosquito forceps.
- A very small incision is made in the peritoneum and after making sure that no other tissue is being injured, this incision is increased and a blunt trocar-cannula is introduced to prevent any gas leak.
- Carbon dioxide gas insufflation is then started. This can be done more rapidly and time lost during dissection is made up.
- It is also possible to take a purse-string suture around the peritoneal incision instead of the stay sutures, and tie it around the introduced trocar.
- At the end of the surgery, fascial closure is facilitated by the fact that: a. The rectus sheath was dissected much earlier b. And because the incision tends to be slightly bigger.
- Cosmetic results have been almost the same as that with the use of Veress needle and sharp trocar, though the incision is about ½ cm bigger.
- It is important to note that whatever the experience of the surgeon may be, the safety of blind introduction of the Veress needle and the trocar cannot be ensured as much as with open laparoscopy.
Advantages and disadvantages of the Open Method[edit | edit source]
| Advantages | Disadvantages |
|---|---|
| Avoid risk of injury to viscera and vessels in difficult cases and in presence of adhesions. | Larger incision is required. |
| More time is required for initial entry or if there is gas leak during surgery. | |
| Occurrence of Gas leak and surgical emphysema, if peritoneum is not included in the purse-string suture. |
Basic Principles and Techniques of Laparoscopic Procedures[edit | edit source]
a) First or primary trocar is a blind port and should be done with all possible precautions.
- It must be gripped properly; the index finger should be extended along the shaft towards the tip and the hub of the trocar.
- Infraumbilical abdominal wall is lifted for the Veress needle and the trocar is pushed in with slow rotating movements, with constant pressure with the palm.
- A sudden loss of resistance indicates entry into the peritoneal cavity, which is confirmed by hissing sound of escaping gas.
b) The telescope is now inserted and gas tube is connected. All procedures begin with a detailed examination of peritoneal cavity.
c) Disposable or safety trocars are also available in which, as soon as resistance is gone or entered in the peritoneal cavity, the sharp tip of trocar will go inside.
d) Now special trocars are also available where first entry is done under direct vision. The trocar tip is made up of a transparent material and it accommodates the telescope so that the tissue can be entered under vision.
e) Irrespective of the type of veress needle and trocars that are used, all the safety measures must be followed.
Additional or Secondary Ports[edit | edit source]
All secondary or additional ports are inserted under vision i.e. the area must be free from adhesions and must ensure that no important structure comes in the way. By transilluminating the abdominal wall from inside, injury to any veins can be avoided while making incisions or pushing trocars. Site of each port should be far enough to ensure that the instruments will have free movement.

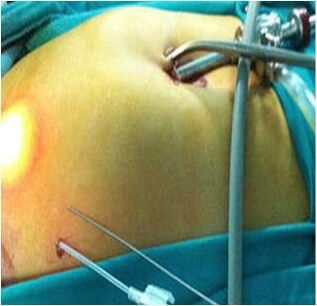
- After white balancing, the telescope is inserted in the peritoneal cavity, being it is cold; condensation may occur on the tip and cause blurred vision.
- You can prevent this by pre-warming the telescope in hot saline or by applying anti-fog, savlon or povidone iodine solution.
- Drop of the blood on the value of the cannula should be wiped. If the blood is smeared over the tip of the telescope, you can be gently wiped against the liver. If the vision is still not clear, the telescope should be removed and cleaned and rewarmed, or a drop of anti-fog solution should be applied. If blurred vision persists then check the focusing, monitor and camera for any fault.
- The visibility is better when a 30o telescope is used.
- Gentle handling of the tissue is must at all times to avoid injury and post operative adhesions. Because of the long handles of instruments, tissue perception is not as good as in open surgery.
- In laparoscopic surgery it is very important that the surgeon must be able to recognize anatomical landmarks in the peritoneal cavity.
- Diathermy must be used very carefully. Tissue must never be cut or cauterized unless seen clearly and the non-insulated part of the instrument must be in the field of vision. It should not touch any metallic cannula or other instruments. Bipolar cautery is a always better option.
- Before starting a procedure independently a surgeon must be trained well in laparoscopic surgery and must work with a trained team. He must be able to decide when to abandon the procedure for open surgery.
- During any surgical procedure it is essential to be able to prevent or control bleeding meticulously. In laparoscopic surgery there is often less bleeding because of:
a. Due to the use of warm irrigation solution.
b. View of target tissue is better.
c. Proper identification and dissection of vessels is possible.
d. Intra-abdominal pressure is higher than venous pressure.
- Ultracision and Lasers are used in laparoscopic surgery.
- Different type of ligatures and sutures and knots (intra and extra corporeal knotting) are used for viscera, vessels and repairs.
- Various types of clips and staplers are used for different procedures.
- Hydro dissection can be used.
- Peritoneal lavage should be done to remove blood, fibrin and debris, to avoid adhesion formation.
- Removal of tissue from the peritoneal cavity should be done under vision and if the tissue is big, the incision may be enlarged. To avoid infection or implantation of ports:
a. Endobags should be used when:
- Cystic lesions are aspirated and removed.
- Solid organs cut in pieces and removed in endobags.
- Removal of all instruments and ports must be under direct vision.
- Suturing of all incisions are done with delayed absorbable or non-absorbable sutures, including the linea alba.
Port Placement in Laparoscopy[edit | edit source]
In laparoscopy, we routinely use five and ten mm ports, of these:
- The first to insert is called the primary or the camera port.
- The secondary ports vary in number depending on the type of surgery.
An accessory secondary port may be required if the case is difficult in order to retract bowel or other viscera to enable visualization and proper identification of the anatomy.
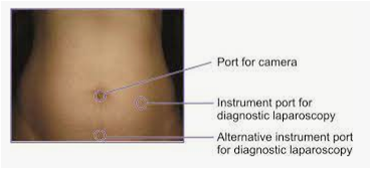
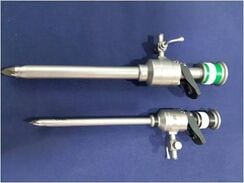
- For all practical purposes, the primary port hovers around the umbilicus, as it marks the centre of the peritoneal cavity and all structures can be well focused and reached from this spot.
- All the layers of the fascia converge at the umbilicus and the distance between the skin and the anterior peritoneum is leased here.
- But for anatomical reasons, e.g. in a patient with umbilical hernia, the primary port can’t be placed around the umbilicus. Secondly, if there are scars in the vicinity of the umbilicus due to previous surgeries, the primary port is placed at alternate points; the most common being the Palmer’s Point.
- Other points which can be used for the introduction of the primary port are the right hypochondrium, suprapubic region and rarely the right iliac fossa. Now, all that we have discussed stands well when we are dealing with an intraperitoneal organ. And more or less a sort of standardization is reached while deciding ports for surgery on an intraperitoneal organ.
- Some organs can be approached both intraperitoneally as well as extraperitoneally, so do some surgeries. So, in these cases the ports are placed in the respective intraperitioneal or extraperitoneal spaces. Now standardization for placing these ports has not been achieved and placement of these ports mainly depends on individual preferences and there is not much choice as these spaces are limited, and are not huge like the peritoneal cavity.
- Considering an organ, e.g. adrenal gland, which can be approached both intraperitoneally and retroperitoneally, the decision is made based on the disease involving it. E.g. for phaeochromocytoma, it is intraperitoneal, or if the gland is large or if it is suspected to be malignant, then also the intra peritoneal source is taken. In other cases, retroperitoneal route is preferred.
- Another example is the inguinal hernia, which can be approached both, by the intra and extraperitoneal routes. Of course the choice is made based on factors like the type of hernia, previous surgery, etc.
Advantages and Disadvantages with the Retroperitoneal Approach[edit | edit source]
| Advantages | Disadvantages |
|---|---|
| Peritoneal cavity is not entered so there are not chances of formation of postoperative adhesions at a later date. | Less space is available to perform the surgery. |
| There is no risk of contamination of the peritoneal cavity by the contests of the urinary tract. | There are few landmarks in the retroperitoneum. More experience and longer learning curve is needed for this approach. |
| There is less risk of injury to the intraperitoneal organs. | There are reports that suggest that there is greater absorption of CO2 by this route and a higher incidence of pneumothorax or pneumomediastinum. |
| There is no need for retraction of intra-abdominal visceras. | This space is sometimes obliterated in patients with inflammatory pathologies like pyelonephritis. |
| There is no ileus in the postoperative period and hence faster convalescence, as there is no need to mobilize the gut to expose the urinary tract. | Large tumour mass does not allow its free manipulation. |
| No need to change the position of the patient after creating pneumperitoneum like in nephrectomy. | |
| As most organs are retroperitoneal, access to the site of lesion is direct. | |
| Less trocar punctures are needed as there is less requirements for retraction. | |
| It is safe even in patents with history of previous intraperitoneal surgeries. | |
| Less incidence of bowel herniation than with transperitoneal approach. |
Advantages and Disadvantages with the Transperitoneal Approach[edit | edit source]
| Advantages | Disadvantages |
|---|---|
| More space is available to perform the surgery. | Chances of formation of intra-abdominal adhesions at a latter date. |
| The anatomical landmarks are easy to identify and therefore shorter learning curve. | Contamination of the peritoneal cavity by ruinous contents. |
| Large tumour masses are easy to manipulate in the large peritoneal space. | Risk of injury to intraperitoneal organs. |
| Requires longer operative time. | |
| Risk increases in patients with previous history of intraperitoneal surgery. | |
| More chances of bowel herniation than with the retroperitoneal approach. |
Given below are the types of ports we generally encounter in laparoscopic cholecystectomy.[edit | edit source]
- Primary port :
- It is 10 mm in length and the mode of entry is subumbilical /transumbilical.
- Secondary port 1: It has the following features:
- It is 5 mm in length and point of entry is subcostal in the anterior axillary line
- It is 5 mm in length and point of entry is subcostal in the mid clavicular line
- It is 10 mm in line and point of entry is in the epigastric region, to the right of the falciform ligament.
- Secondary port 2:-
- It is 7 mm or 10 mm in length and point of entry is the right iliac fossa.
- It can also be 5mm in length and point of entry is the left iliac fossa.
- Accessory port:
- It is 5 mm or 10 mm in length and point of entry is 3 to 4 cm above and to the left of the umbilicus.
- The point of entry can also be subumbilical.
Patient Selection And Preparation For Surgery[edit | edit source]
Preparation for laparoscopic surgery includes the following:
- Patient selection
- Patient information
- Preparation of the theater
- Training of all theater staff
- Preparation and positioning of the patient
Patient Selection[edit | edit source]
When first starting laparoscopic surgery it is wise to confine yourself to those cases without features indicative of increased technical difficulty.
For laparoscopic cholecystectomy:
- Choose thin patients,
- Patients with functional gall bladders
- Patients with normal liver function tests.
Patient Information[edit | edit source]
Avoid patients who present with the following characteristics until you have gained sufficient experience.[edit | edit source]
| Clinical Criteria | Ultrasound/Radiological Criteria |
|---|---|
| Stocky male patients | Gall bladder wall thickness > 4.0 mm |
| Morbid obesity | Non-contracting gall bladder (US) |
| Previous upper abdominal surgery | Stone load: Packed gall bladder, large calcified stones (US) |
| Cirrhosis and hepatomegaly | Non-functioning gall bladder (XR) |
| Inflammatory mass in right hypochondrium (acute) | |
| Previous severe acute cholecystectomy | |
| Previous percutaneous stone extraction / MTBE dissolution |
- It is very important that all patients undergoing laparoscopic surgery understand that you cannot guarantee to perform their operation laparoscopically , but only by the safest method for them at the time of surgery. You also have to inform them:
- That they will have several small incisions.
- That even though the incisions are small, all operations have associated risks.
- That they may experience post operative shoulder tip pain.
- That they may have to stay in the hospital longer than expected, if there are complications.
- The consequences of an open surgery, should it become necessary.
Theater And Staff Preparation[edit | edit source]
- The theater must naturally be able to supply the relevant equipment and instruments for the procedure. In addition, appropriate instruments should be immediately available to cope with emergency complications such as major bleeding.
- Spare bulbs for the light source and a spare gas cylinder should be available. This type of surgery places great reliance on technology. If you can begin your laparoscopic experience in a theater where everyone is familiar with their part in the proceedings, it will be to your advantage.
Preparation Of The Patient[edit | edit source]
- It is critical to ensure that the patient is thoroughly prepared prior to any procedure. Here, you must ensure the availability of:
- Anti-embolic stockings
- Atropine with the premedication
- Prophylactic antibiotics.
- A standard anesthesia with appropriate monitoring
- A urinary catheter is inserted for the duration of the procedure
- A nasogastric tube is used to deflate the stomach
- Also note that, the patient is placed supine (the North American approach). As the patient will be tipped during the procedure, appropriate measures to ensure their safety are instituted.
Guidelines for Setting Up a Laparoscopic Unit[edit | edit source]
Laparoscope[edit | edit source]
The laparoscope has become a basic equipment that a surgeon has to use for the diagnosis and treatment of his patients. It has become mandatory today to perform certain procedures like cholecystectomy using laparoscopy. Hence every hospital where general surgery is being performed needs to set up a laparoscopic unit. The following are some important points to be considered for the selection of equipment and for setting up of the operation theater.
Camera[edit | edit source]
Laparoscopic surgery is today performed using video imaging. The camera, which transmits the image from the telescope to the monitor, is called a C.C.D. (Charge-Coupled Device) Camera. This could be either an analogue or (preferably) a digital camera. They come either as one-chip or three-chip cameras, the latter uses separate chips to identify and analyse the three basic colours (red, blue and green) individually. Hence the colour definition of the image is better in a three-chip camera.
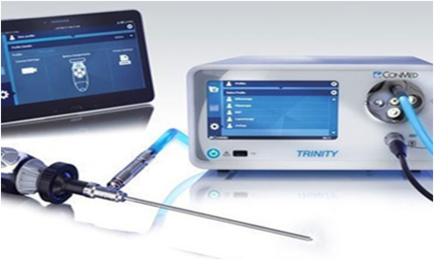
The other points to be noted while selecting the camera are:
- Resolution: The image is divided into small squares called pixels and each of these squares are defined separately by the C.C.D. camera. The greater the resolution (the number of pixels), the better is the image definition. Most cameras provide more than 250,000 to 380,000 pixels of resolution.
- Minimum Illumination: This is a factor, which defines the minimum light that is required for the camera to pick up images. The lesser the value the better it is. This becomes more pertinent while operating in a bloody field or in the extra-peritoneal region, where light is not reflected back by the glistening surface of the peritoneum.
- White Balancing: This is a feature that is a must in all the CCD cameras being used in laparoscopic surgery. The colour of the light being used (e.g. The yellow colour of a halogen light or the blue colour of the xenon light source) is subtracted from the image when a white object is being focused upon and the white balance switch is pressed.
- Automatic Adjustments and Controls: There may be additional features in various permutations and combinations in different cameras, such as automatic gain control (it helps in brightening dark images), digital zoom, corrections of individual colours, recording facility, various output signals, etc.
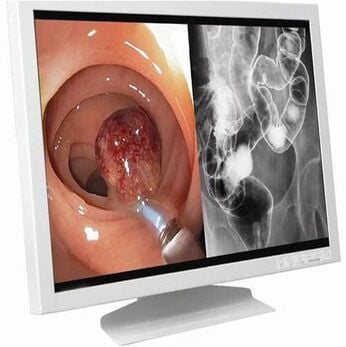
Laparoscopy Monitor[edit | edit source]
The camera is attached to the monitor and ultimately the resolution of the picture displayed is dependent on the resolution of the monitor as well as that of the camera. Most consumer-grade monitors or televisions have 350 lines of horizontal resolution. As far as laparoscopy is concerned, monitors that gives more than 700 horizontal lines are preferred.
Electronic Gas Insufflator[edit | edit source]
The basic function of the gas insufflators is to maintain the pressure in the abdomen at the set pressure, by insufflating gas into the abdomen. There are two kinds of gas insufflators, manual and electronic (high flow). The manual insufflators gives a flow rate of 1 Litre/min and a high flow provides 3 Litres/min. The internal drum in the machine needs to be filled up manually every time it is empty. An electronic insufflator gives a much higher flow rate of up to 30Litres/minute and is much more convenient to use in major surgeries and in instances where suction is frequently required. The gas either flows interruptedly or continuously based on the technology used in that particular make of the insufflators.
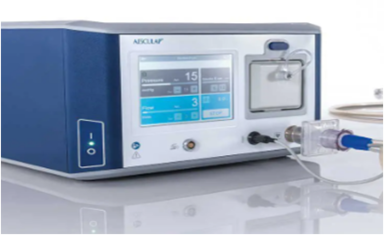
Certain special features that may be included in the electronic gas insufflators are:
- Automatic desufflation: When the intra-abdominal pressure rises beyond the set pressure, the gas in the abdomen is automatically desufflated.
- Incubated gas: The gas is heated and delivered at a set temperature through the tubing to the abdominal cavity. This helps in preventing fogging of lens during the surgery and also in avoiding hypothermia in cases where lot of gas is used.
- Sterilized gas: This may be beneficial where medical grade gases are not available
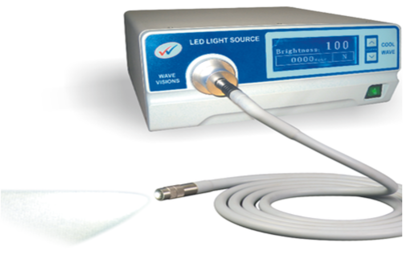
Light Source[edit | edit source]
The three different cold light sources that are used in laparoscopy are halogen, halide and xenon. Each of these lights have their inherent colour temperatures and hence do not have an identical brightness.
- The xenon light is light blue in colour and is the brightest of all.
- The halide is a white light
- The halogen light is yellow in colour. It has the lowest brightness of the three, but is commonly used, as it is the most cost-effective option.
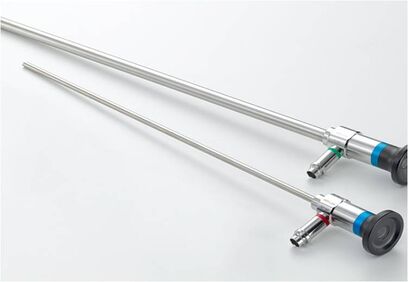
Telescope[edit | edit source]
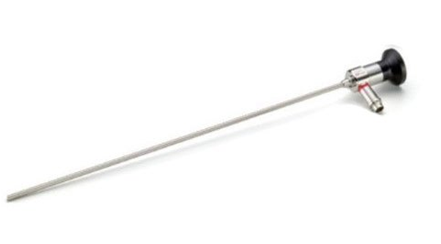
The rigid telescope used for laparoscopy comes with the following features:
- It has a combination of a set of central rod lens and a peripheral rim of fiber optic light bundles. This may be of 10 or 5 mm diameter.
- The angle of viewing may be 0 or 30 degrees for most standard procedures.
- Special features that may be found in different telescopes include wide angle, correction of peripheral distortion and the option of autoclaving.
Guidelines for Operating Room Setup[edit | edit source]
Introduction
The introduction of the laparoscope into the surgeon’s basic armamentarium has resulted in the need for more sophistication and greater planning to set up a laparoscopic operating suite. Proper designing ensures greater ease of personnel movement, decreases clutter, improves ergonomics, maintains the sterile field, and facilitates the use of advanced imaging and display devices (4). This also ensures that the basic components are in place and functioning (3).
Given here are some basic guidelines you have to keep in mind while setting up a laparoscopic operating suite.
- The usual requirements for a good operation theater are necessary and not elaborated here.
- Operating Room Size has to be adequate for the easy placement of equipment and to make necessary changes according to the surgeon’s requirements. It should also facilitate free movement of the OT personnel.
- In a large room the operating table is to be positioned normally and in a smaller room the operating table can be placed diagonally.
- Doors and Windows should be opacified to prevent unwanted light.
- Cables should run the shortest possible distance, not to be left dangling and hinder movement of OT personnel.
- Multiple electrical points should be available on the equipment trolley. Multiple plug points are to be provided around the room so that when the trolley is moved around, the electric cable from the trolley to the wall is maintained at the shortest distance. It is preferable to isolate the electrosurgical unit from other equipment to avoid electrical disturbances.
- Proper earthing has to be provided and there should be an uninterrupted power supply with adequate power back up. It is also necessary to use voltage stabilizers and surge suppressors to avoid inadvertent damage to sensitive electronic equipment.
- Laparoscopic equipment is generally housed in a cart-on -wheels to facilitate its movement around the operation table. Optimal height of the equipment trolley is 5 feet. The equipment is ideally arranged as shown in the figure.
- Two full CO2 cylinders, one of which will be on standby.
10.The operating team may be more comfortable standing on footstools, to compensate for the increased height due to usage of long instruments. These footstools have to be broad enough to accommodate the surgeon and the foot peddles.
11.Use a footboard and extra safety straps for large patients.
12.A dedicated team is the primary requirement and it ensures better coordination, decreases operating time, improves patient care, and decreases cost to the patient and institution. (7)
13.Preparation for conversion to open surgery is necessary for every case being taken up for laparoscopy.(15)
14.Surgeon should preferably come to the OT sufficiently early in order to the facilitate correct placement of equipment and to ascertain that all instruments necessary are available and functioning.
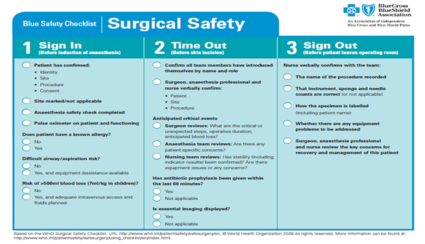
15.A checklist is mandatory to ensure the availability and proper functioning of all equipment and instruments at the beginning of the day. It also prevents unnecessary delays during surgery and anesthetization.


An example for standard check-list for any surgery is as follows[edit | edit source]
- Anesthesia Equipment: Check for gases and anaesthetic agents.
- Electrically/Manually controlled operating table: Check the table lift and tilt mechanism.
- Video monitor(s): Check if they are properly connected to camera/recorder.
- Camera: Check the functioning checked on the monitor.
- Recorder: Check if the VCR is connected properly. Ensure Video tape is in place for documentation.
- Gas Insufflator: Check if the cylinders full, ensure that there is no leakage and that the settings are proper.
- Light source: Check if both bulbs are illuminating
- Suction irrigator: Check the full volume of irrigation fluid in the container.
- Electrosurgical unit with grounding pad equipped with current monitoring system: Check functionality and settings.
- Ultrasonically activated scissors or other energy sources: Check functionality and settings.
- Check for C. Arm X-ray unit for specialized procedures.
- Check the instruments placed on the instrument trolley.
- Check for No 11 & No 15 scalpel blade with BP Handle.
- Check for Verres Needle and Hassan’s cannula
- Check for Tubings and Cables (Gas Insuffalator tube, Fiberoptic cable, diathermy and other energy source cables, irrigation and suction tubings).
- Check for Laparoscopic instruments needed for the particular surgery.
- Check for A set curved hemostats.
- Check for Small Langenbachs/Catspaw retractors
- Check the Trocars & Cannulas
- Check for a complete laparotomy set
- Check for a set of vascular clamps, needles holders and fine suture materials.
- Check if the patient is shifted to the theater after all equipments are positioned optimally.
- Ensure that the monitor is positioned at the eye level.
- Check if the existing setup needs any alteration.
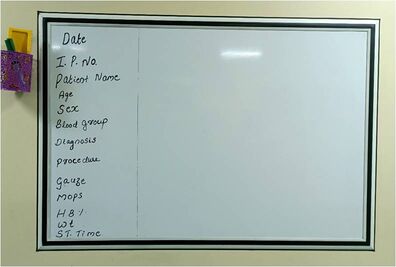
Principles of Laparoscopic Organ Retrieval[edit | edit source]
Advances in laparoscopic techniques have allowed detachment of almost any intra abdominal organs from their original sites.
Small specimens can be removed easily via the trocar. Any specimen larger than the diameter of the conventionally used trocar can however, prove difficult to remove and needs a special method for its removal.
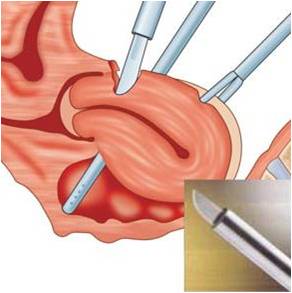
There are several techniques to remove specimens. Removal methods depend on the:
- Size and location of the specimen.
- Nature of specimen whether it is infected, malignant, chorionic tissue, endometriotic or dermoid.
In all these situations an endobag is used for removal.
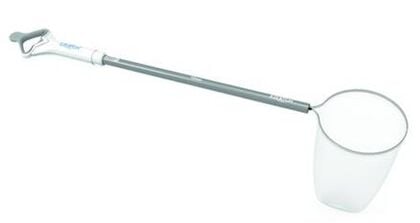
Removal of large volumes of tissue from the abdomen can be the most time consuming and frustrating part of the operation. Sometimes it may be more difficult than the operation itself.
- Ideally the site selected for specimen removal should be along the path of least resistance that produces the least pain, prevents contamination, and provides the best cosmesis.
- If a specimen cannot be removed from the abdominal cavity immediately after it has been resected, it must be secured in a position that will permit ready identification and retrieval later.
Ex: Ut-vesical pouch or POD is an endobag or against abdomen wall with a suture.
Routes for Removal[edit | edit source]
Several potential routes for removal of abdominal and pelvic specimens are listed in this Table and will be considered individually here.
| Routes for Removal of Abdominal and Pelvic Specimens |
|---|
| Port Sites |
| Separate Abdominal Wall Incisions |
| Transanal (If Colon resection is performed) |
| Transvaginal (via culpotomy incision) |
Removal of Small Specimens[edit | edit source]
They can be removed directly through an appropriate cannula (Usually 10mm or larger) with or without a reducing sleeve.
- Use a toothed grasper to secure the specimen as it is retrieved under direct laparoscopic visualization and control.
- Open the valve mechanism of the cannula to allow the specimen to pass through unimpeded, if a reducing sleeve is not used.
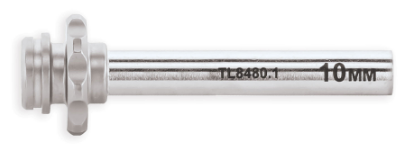
Removal of Specimens at the port site[edit | edit source]
- Reduce the size of the specimen while it is still within the peritoneal cavity:
a) Remove contents of hollow structures (fluid stones) or cut up solid structures.
b) This technique permits removal without enlarging the incision.
c) The major disadvantages with this procedure include the risk of losing portions of the specimen and contamination of the peritoneal cavity.
d) This method may be appropriate for the removal of specimens such as lymph node packets and benign solid tumors of moderate size.
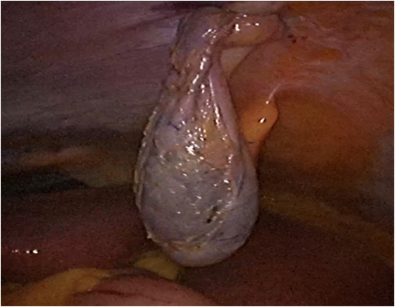
- Exchange the existing cannula for a larger cannula at the port site (20-40mm), by placing it over a blunt probe with a tapered introducer. This method protects the wound from direct contact with the specimen. A major disadvantage is that the specialized cannulae are not always available. This method is sometimes used for removal of specimens such as an inflamed appendix, gallbladder, fallopian tube, and ovary.
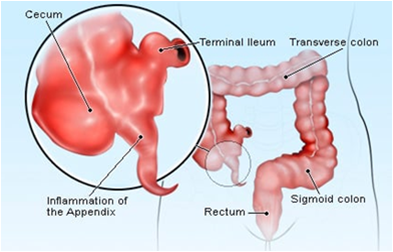
- Exteriorize portions of the specimen and then remove the contents so that the specimen can be pulled through the port site.
a) This is most commonly used for removal of the gallbladder following laparoscopic cholecystectomy.
b) Hold the specimen firmly against the end of the cannula as both are pulled out together under laparoscopic visualization.
c) Grasp a portion of the gallbladder outside of the abdomen with clamps and open the gallbladder.
d) Aspirate fluid, and remove stones (Fragmenting them if necessary) with stone forceps or ring forceps.
e) This technique avoids enlarging the incision and requires no special equipment .
f) However, it risks wound contamination and is tedious if the stones are many or large in size.

- Enlarge the incision at a port site. This is perhaps the simplest, most commonly used method in many circumstances. It works particularly well at umbilical or other midline port sites since only a single fascial layer requires division.
a) Either stretch the fascia or elevate it with a right-angled clamp and divide it with scissors or a scalpel. Perform this maneuver under direct laparoscopic visual control, with the specimen held in a relaxed manner (not taut against the abdominal wall) to avoid punctuating the specimen.
b) This is frequently the best method of removing a large, stone-filled gallbladder. This is also the typical method for removing larger organs such as the colon and spleen.
c) The length of incision in these cases varies but usually only in several centimeters.
d) When the port site incision is not midline, use a muscle spreading technique to avoid dividing abdominal wall musculature.
Retrieval Bags and Related Procedures[edit | edit source]
Retrieval bags are commercially manufactured. Retrieval devices are disposable, expensive, and not freely available.
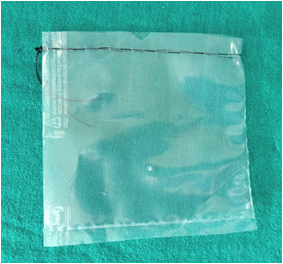
Retrieval Devices[edit | edit source]
Following are the routinely used retrieval devices:
• Olympus keymed- 5 mm, 15mm, 20mm tubes.
• Extraction bags-Storz-Germany
• Lap Sac-Cook UK
• Endo catch-Autosuture
- Use of a specimen retrieval bag minimizes the risk of contamination and specimen loss.
- This is particularly important when the specimen may be infected, malignant friable or leaking or chorionic tissue or endometriotic tissue.
- The important features to consider in selecting a retrieval bag are its strength, size, aperture, maneuverability, ease of deployment and retrieval, and porosity.
- Bags are typically made of polyuretherine and are preferred for removing larger specimens that must be fragmented in the bag, such as the spleen or kidney.
Bag insertion[edit | edit source]
Tightly roll the bag and insert it through the cannula.
Bag deployment[edit | edit source]
- Pull the bag gently out of the cannula site to unroll it.
- Grasp the edges of the bag and open the mouth by pulling in opposite directions.
- A third instrument may be necessary to help in opening the bag.
Specimen entrapment[edit | edit source]
- This is the most difficult step, particularly for large organs.
- Hold the mouth of the bag open with graspers, advance the grasper holding the specimen all the way to the deep end of the bag.
- The specimen should enter the bag, and the entire specimen must fit within the bag prior to closure.
Bag closure[edit | edit source]
- Commercial bags are equipped with a draw string that must be tightened.
- Close the small plastic bags with a preformed endoscopic ligature.
Bag extraction[edit | edit source]
- Under constant visual control, withdraw the bag and cannula through the abdomen wall as a unit.
- Small bags come out through 10 to 12mm port.
- The big bag and the contained specimen are removed by either enlarging the port or by reducing the specimen size by removing portions or fragments.
- Resist the temptation to pull your hand and use caution to avoid punching or tearing the bag.
In our institution, we use condoms or sterile plastic bags as endobags. These endobags are beneficial, as they are:
• Economical
• Easily available
• Electronically tested
• Easy to introduce through the 10mm port
• Easy to put the specimens
• Easy extraction
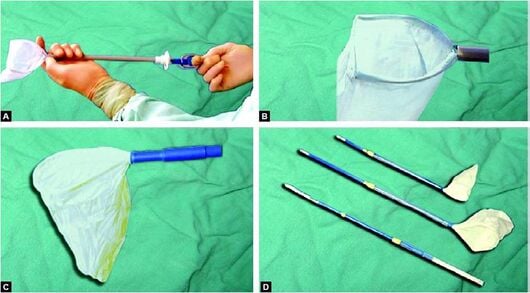
Complications Associated with Organ Retrieval[edit | edit source]
We routinely encounter the following types of complications with organ retrieval:
Incisional Hernia[edit | edit source]
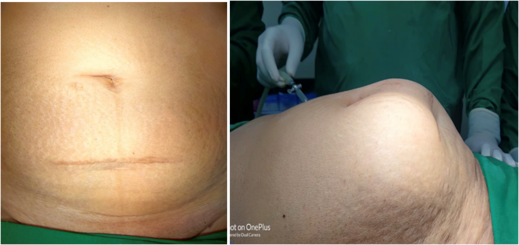
Risks increase with the size of incision, even if attempts are made to close the facial defect. This is more common with laterally placed ports.
Posterior Colpotomy[edit | edit source]
Organ retrieval with this approach can lead to:
- Infection
- Dyspareunia
- Adhesion formation
- Rectal injuries
- Ureteric Injury
Spillage[edit | edit source]
- The following spillage related complications can occur during organ retrieval:
- Complications from residual trophoblastic tissue.
- Endometriosis can implant in the abdomen wall and scar the endometrium.
- Dissimination of malignant cells.
- Fecal contamination can occur during appendicectomy.
- Spillage of contents of a mucinous cyst adenoma may cause Psuedo myxoma peritonei.
- Chemical peritonitis and granuloma formation with intestinal obstruction have been reported after laparoscopic surgery for Dermoid cyst of ovary.
Loss of Specimens in the abdominal cavity[edit | edit source]
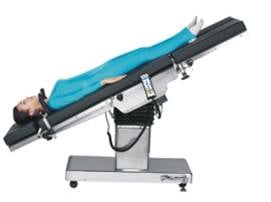
- It may be possible to recover the lost specimens by filling the upper abdomen with saline and keeping patient in the Trendelenburg position. This is followed by reversing the position with aspiration in the cul de sac.
Vascular injury[edit | edit source]
A high probability of vascular injury is observed when enlarging the port site.
Condoms[edit | edit source]
The potential risks while using condoms as retrieval bags include:
- Questionable asepsis,
- Latex anaphylaxis
- Splitting and fragmentation of the condom
Conclusion[edit | edit source]
With patience and ingenuity, the specimens generated by operative laparoscopy can be removed without resorting to enlarged incisions. This is achieved through the port sites or through culdotomy, by using easily available condoms or plastic bags.
Complications of Laparoscopic Surgery[edit | edit source]
Laparoscopic surgery has become the gold standard in the management of many diseases, especially gall stones. Experience and advancement of the technique has allowed the procedures to be performed in difficult cases. We have also come to understand that laparoscopic procedures are accompanied by a number of complications. The severity and frequency of these complications can be reduced by paying careful attention to technique. The proper preparation of the patient and judicious use of conversions to laparotomy will reduce these complications.
Good Practices[edit | edit source]
- Patients should be well informed of the advantages and potential disadvantages of the laparoscopic procedure.
- They must understand that the procedure is not a magic trick but is a major surgery performed with video guidance.
- Fasting for at least 8 hr. before surgery is the rule.
- Insertion of a urinary catheter empties and protects the bladder and is important if the Veress needle technique is used to establish pneumoperitoneum.
- The catheter is rarely needed, however, it is needed if the open method of peritoneal access is performed.
Achieving Pneumoperitoneum[edit | edit source]
- This step in the performance of laparoscopic surgery often seems trivial, but is extremely crucial for the success and safety of the entire procedure.
- Carelessness or poor judgment at this point in the method can result in severe injury to the patient.
- Use of the Veress needle to create pneumoperitoneum is a safe and time tested technique.
- The operator must ensure that the “pops” of the various layers of the abdominal wall are felt, that no fluid is aspirated as the needle enters the abdomen, and that a drop of water placed into the needle’s barrel falls into the needle.
- After attaching the gas lines to the needle, pressures should be very low, indicating no resistance to flow (I recommend the “Golden Rule of 5” - the initial intra-abdominal pressure being less than 5 mm of Hg and the rate of gas insufflation being more than 0.5 Lit/min).
- If pressures are high, one should consider a second insertion at another site to localize and repair the first needle puncture injury (if any), or one should proceed to laparotomy.
- Severe injuries to viscera and great vessels have occurred because of thrusting the needle deep into the abdomen.
- Any evidence of puncture of a major vessel should prompt laparotomy to allow inspection and repair of the vessel if necessary.
- An easy solution might seem to be the direct cut down by the Hassan method into the abdomen at the umbilicus. It is not, however, without potential pitfalls.
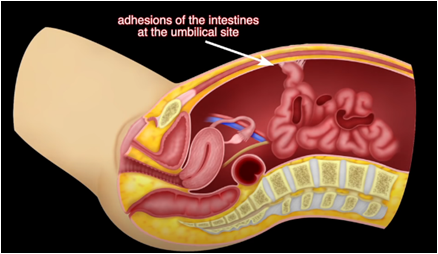
- Bowel may be injured when the abdomen is entered, and injury may go unrecognized causing later peritonitis and sepsis. It is crucial that the bowel beneath the site be inspected on introduction of the telescope, and before removal of the telescope, the site be inspected from another port.
Types Of Complications[edit | edit source]
[edit | edit source]
- One-third of deaths associated with minor laparoscopic procedures such as sterilization are secondary to complications of anesthesia. Among the potential complications of all general anesthetics are hypoventilation, esophageal intubations, gastroesophageal reflux, bronchospasm, hypotension, narcotic overdose, cardiac arrhythmias, and cardiac arrest.
- Laparoscopy, when performed with CO2 or nitrous oxide (N20) insufflation induces change in several parameters of cardiopulmonary function, such as reduced pO2, O2saturation, tidal volume and minute ventilation, and an increased respiratory rate. The use of intraperitoneal CO2 as a distension medium is associated with an increase in pCO2 and a decrease in pH. Elevation of the diaphragm may be associated with basilar atelectasis, a resultant right-to-left shunt and a ventilation perfusion mismatch.
Carbon Dioxide Embolus[edit | edit source]
- CO2 is the most widely used peritoneal distension medium.
- Most CO2 micro-emboli are absorbed, usually by the splanchnic vascular system, quickly and without incident.
Diagnosis[edit | edit source]
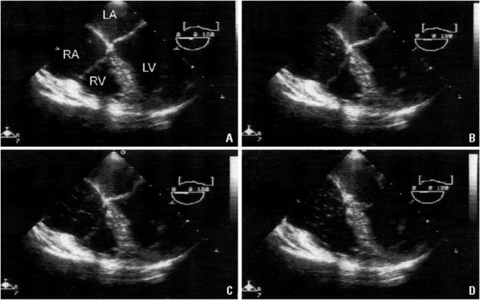
- The presenting signs of CO2 embolus include sudden, otherwise unexplained hypotension, cardiac arrhythmia, cyanosis, and development of a classic “mill wheel” heart murmur.
- Other clinical sequelae include increased tidal CO2, findings consistent with pulmonary edema, and pulmonary hypertension, resulting in right-sided heart failure
Risk Reduction[edit | edit source]
- A number of steps may be taken to reduce the risk of CO2 embolus.
- It is important to ensure that blood is not emanating from the needle before the distending gas is introduced.
- Operating with the intraperitoneal pressure always less than 20mm Hg also reduces the risk of CO2embolus.
- In most instances, except for the initial placement of trocars in an insufflated peritoneum, the surgeon should be able to function comfortably with the intraperitoneal pressure at 8-12 mm Hg.
- The risk of CO2embolus is further inhibited by the meticulous maintenance of hemostasis, because open venous channels are a portal of entry for gas into the systemic circulation.
- Another option that should virtually eliminate the incidence of CO2 or other gas emboli is the use of “gasless” or “apneumic” laparoscopy, in which extra-or intraperitoneal lifting mechanisms are used to create a working space for the surgeon. Such devices have yet to gain wide acceptance.
Management[edit | edit source]
- When CO2 embolus is suspected or diagnosed, the operating room team must act quickly.
- The surgeon must immediately decompress the peritoneal cavity and place the patient’s head below the level of the right atrium, in the Durant, or left lateral decubitus position.
- Immediate establishment of a large-bore central venous line may allow aspiration of gas from the heart.
- If the findings are non-specific, other causes of cardiovascular collapse should be considered.
Cardiovascular Complications[edit | edit source]
- Hypercarbia and the resulting acidemia are the principle reasons for the relatively frequent development of cardiac arrhythmias during laparoscopic surgery.
- The anesthesiologist must be careful to select agents that limit the risk of cardiac arrhythmia. Operating with intraperitoneal pressures less than 12 mm Hg may reduce the incidence of hypercarbia-associated arrhythmias.
- Although during laparoscopy the most common cause of low blood pressure is hemorrhage, hypotension can also occur secondary to excessive intraperitoneal pressure and result in decreased venous return, which causes decreased cardiac output.
- This undesirable result may be potentiated if the patient is volume depleted.
Gastric Reflux[edit | edit source]
- Gastric regurgitation and aspiration are complications potentiated by laparoscopic surgery, especially when the patient is in Trendenlenburg position.
- The surgeon can contribute to aspiration prophylaxis by operating at the lowest necessary intraperitoneal pressure.
- Patient should be taken out of the Trendenlenburg position before being extubated
Haemorrhage[edit | edit source]
Great Vessel Injury[edit | edit source]
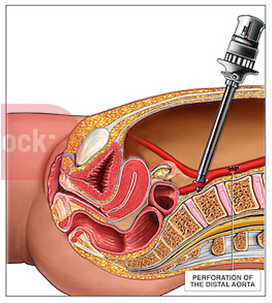
- The most dangerous hemorrhagic complications of entry are from injury to the great vessels, including the aorta and vena cava and the common iliac vessels and their branches, the internal and eternal iliac arteries and veins.
- Trauma most often occurs secondary to insertion of an insufflation needle, but catastrophic results may occur from the tip of sharp trocar inserted with closed technique.
Diagnosis[edit | edit source]
- Most often the problem manifests as profound hypotension with or without the appearance of a significant volume of blood within the peritoneal cavity.
- Frequently, bleeding is contained in the retroperitoneal space, which usually delays diagnosis. Consequently, the patient may develop hypovolemic shock in the recovery room, secondary to the unrecognized laceration of a great vessel.
- To avoid this problem it is important to evaluate the course of each great vessel before completing the procedure.
Risk Reduction[edit | edit source]
- The incidence of large vessel trauma can be minimized in several ways:
- Use of “open laparoscopy” for the initial port has been suggested as one way to entirely avoid the issue of great vessel injury, secondary to insufflation needles and trocars.
- Although the incidence of injury to great vessels may be reduced, injuries to the aorta and vena cava have been incurred, probably because of reduced exposure during open laparoscopy.
- Insufflation needles and the trocar should be kept sharp or should be disposable.
- The spring-loaded obturator of the insufflation needle should be checked to ensure that the sliding mechanism is functioning normally.
- Many disposable trocar-cannula systems are constructed with safety mechanism that covers or retracts the trocar after passage through the fascia and peritoneum.
- However, no current data demonstrate that these devices reduce the incidence of major vessel injury.
Management[edit | edit source]
- Blood withdrawn from the insufflation needle should be left in place while immediate preparations are made to obtain blood products and perform laparotomy.
- If the diagnosis of hemoperitoneum is made at initial visualization of the peritoneal cavity, a grasping instrument may be used, if possible, to temporarily occlude the vessel.
- Although significant injury is unlikely to be repaired by laparoscopically directed technique, if temporary hemostasis can be obtained and the laceration visualized, some localized lesions can be repaired with suture under laparoscopic guidance.
- However, only experienced, technically adept surgeons should make such an attempt, while using their best judgement.
Abdominal Wall Vessel Injury[edit | edit source]
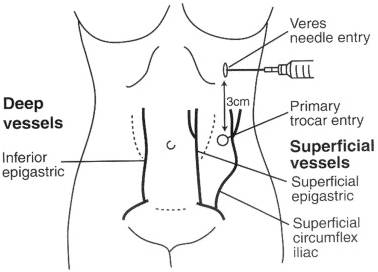
- By far the most commonly injured abdominal wall vessels are the superficial inferior epigastric vessels as they branch from the femoral artery and course cephalad in each lower quadrant.
- These vessels are invariably damaged by the initial passage of an ancillary trocar or by a wider device introduced later in the procedure.
- The problem may be recognized immediately by observation of blood dripping along the cannula or out through the incision.
- However, it is not uncommon for the cannula to obstruct bleeding until withdrawal at the end of the procedure.
Diagnosis[edit | edit source]
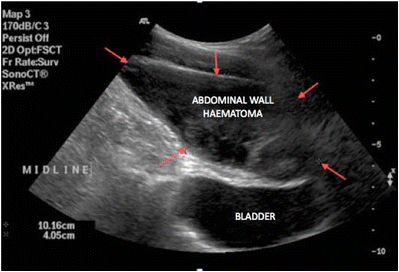
- The Injury can be diagnosed by visualization of blood dripping down the cannula, by the post operative appearance of shock, abdominal wall discoloration, or a hematoma located near to the incision.
- In some instances blood may track to a more distant site and present as pararectal or vulvar mass. Delayed diagnosis may be prevented at the end of the operation by laparoscopic evaluation of each peritoneal incision after removal of the cannula.
Risk Reduction[edit | edit source]
- Transillumination of the abdominal wall from within the peritoneal cavity usually provides identification of the superficial inferior epigastric vessels.
- However, the deep inferior epigastric vessels cannot be identified this way because of their location deep inside the rectus sheath.
- At the pubic crest, the deep inferior epigastric vessels begin their course cephalad between the medially located medial umbilical ligament and the more laterally positioned exit point of the round ligament.
- The trocar should be inserted medial or lateral to the vessels, if they are visualized. If the vessels cannot be seen, and it is necessary to position the trocar laterally, the trocar should be inserted 3-4 cm lateral to the median umbilical ligament.
- Too lateral an insertion endangers the deep circumflex epigastric artery.
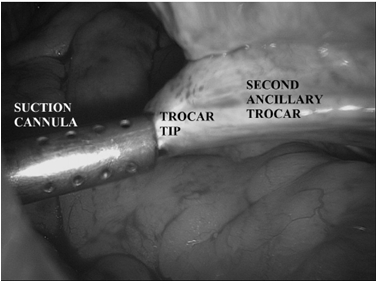
A common mistake is to fashion the skin incision appropriately, but then direct the trocar medially through the abdominal wall, which injures the vessels. Another factor that my contribute to the risk of injury is use of large-diameter trocars and cannula. Consequently, it behooves the surgeon to use the smallest cannula necessary for performance of the procedure.
Management[edit | edit source]
- Superficial inferior epigastric artery lacerations usually respond to expectant management.
- Rotation of the cannula to a position in which compression is possible, is also helpful.
- Rarely is a suture necessary. For the ligation of lacerated deep inferior epigastric vessels, it is found that the use of a modified, straight ligature carrier is most useful.
- After removal of the trocar and cannula, the ligature carrier is used to advance a suture laterally and inferiorly, under laparoscopic guidance. The suture is held in place by grasping forceps.
- The ligature carrier is removed and subsequently passed through the incision again, this time without a suture, medial and inferior to the lacerated vessels.
- The suture is threaded into the carrier from within the peritoneal cavity then externalized and tied. For small incisions (narrower than the diameter of the surgeon’s finger), the knot may be tightened with a laparoscopic knot manipulator. The most obvious method is placement of large, through-and-through mattress sutures, usually removed after about 48 hrs.
Intraperitoneal Vessel Injury[edit | edit source]
As with any intraperitoneal surgical procedure, hemorrhage may occur from injury to vessels encountered in the course of the surgical dissection.
Risk Reduction:
- During dissection, vessels should be identified and occluded before division, a task made simpler by the magnification afforded by the laparoscope.
- Electrosurgical coagulation, if used, should be applied in the appropriate waveform and power density long enough to allow sufficient tissue desiccation.
- Clips should be of a size appropriate for the vessel, and they must be applied in a secure fashion with an adequate pedicle of tissue.
Management[edit | edit source]
- Transected vessels should be secured immediately. Arteries larger than 3mm in diameter are less reliably occluded with desiccation than are arteries less than 3mm.
- If bipolar electrosurgical desiccation is used to maintain or achieve hemostasis, a serial ammeter is useful to demonstrate the end point of energy application.
- Blind clamping followed by electrosurgical desiccation must be avoided, even with bipolar instruments, especially when the location is less than 1 cm from ureter or bowel.
- When a vessel is in this location, securing it with a clip is usually preferable.
Gastrointestinal Complications[edit | edit source]
Insufflation Needle Injuries[edit | edit source]
- It is one of the commonly encountered gastrointestinal complications.
- Needle entry into the stomach occurs in the presence of gastric distension or when adhesions bind the stomach to the abdominal wall.
- Mechanical entry into large or small bowel may occur in any instance, but is up to 10 times more common when laparoscopy is performed on patients with previous intraperitoneal inflammation or abdominal surgery.
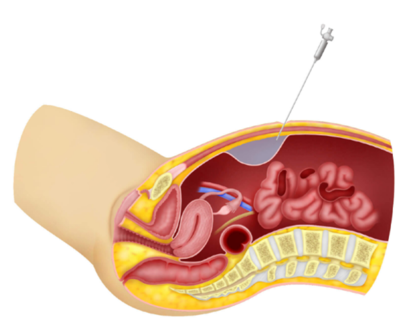
Diagnosis[edit | edit source]
- Recognizing gastric entry by the insufflation needle may follow identification of signs of extra peritoneal entry, such as increased filling pressure, asymmetric distension of the peritoneal cavity, or the aspiration of gastric particulate matter through the lumen of the needle.
- However, the hollow capacious nature of the stomach may allow the initial insufflation pressure to remain normal. Recognition of bowel entry usually follows observation of the signs described for gastric injury, with, in the case of colonic entry, the addition of feculent odor.
Management[edit | edit source]
- The management of any trauma to the gastrointestinal tract partially depends on the nature of the injury and on the organ(s) involved.
- In general, insufflation needle punctures that have not caused a defect significantly larger than their diameter may be handled expectantly.
- Large defects should be repaired or resected by laparoscopic or laparotomy-based techniques according to the skill of the surgeon and the extent of the lesion
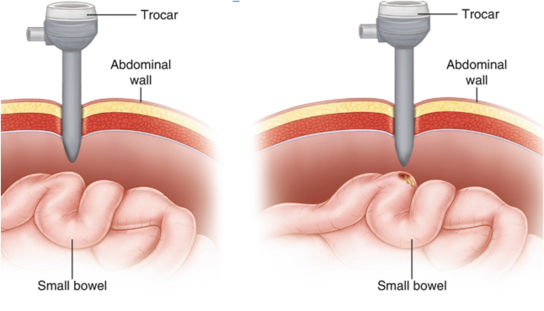
Trocar Injuries[edit | edit source]
Damage caused by sharp trocar penetration is usually more serious than injury from a needle. Most often, injury is created by the primary trocar because of its blind insertion.
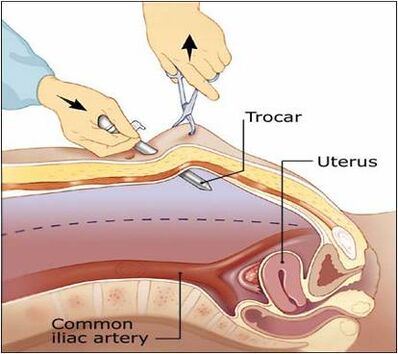
Diagnosis[edit | edit source]
- When a primary trocar inserted with closed technique penetrates the bowel, the diagnosis is usually made when the surgeon visualizes a mucosal lining after the laparoscope is inserted.
- If large bowel has been entered, a feculent odor maybe noted. However, in some instances, the injury may not be recognized immediately because the cannula may not remain in place or may pass through the lumen and out on the other side of the viscus.
- Such injuries usually occur when a loop of bowel is adherent to the anterior abdominal wall near the entry point. Consequently, at the end of the procedure one should directly view the removal of the primary cannula, either through the device itself or via an ancillary port.
- Unfortunately, the lesion may go unrecognized until it presents post operatively with peritonitis, abscess enterocutaneous fistula, or death.
Risk Reduction[edit | edit source]
- Trocar injury to the stomach is generally eliminated with liberal use of oral or nasogastric decompression.
- Bowel injuries usually occur when the intestine is adherent to the abdominal wall under the site of trocar insertion.
- Consequently, preoperative mechanical bowel preparation should be used for high-risk patients to facilitate repair of colonic injury without the need to perform a laparotomy/colostomy.
- Despite the widespread use of disposable cannula insertion systems with retractable trocars or safety sheaths, injury to bowel or other structures may occur.
- Many surgeons routinely use open laparoscopy, but bowel entry may still occur.
- An alternative approach, especially when one enters an abdomen with previous laparotomy scars, is left upper quadrant insertion, preferably with an insufflation needle especially designed to allow passage of a narrow laparoscope.
- This approach allows direct visualization of the abdominal wall under the umbilicus or other planned sites of insertion and may facilitate dissection of underlying adhesions.
Management:
- Trocar injuries to the gastrointestinal tract almost always require repair.
- If one can ascertain that the injury is isolated and if the surgeon is experienced, the lesion may be repaired with appropriate suture by laparoscopic guidance.
- Extensive lesions may require resection and reanastomosis, which can be performed with laparoscopic direction but usually requires laparotomy.
- If the injury is to sigmoid colon, primary repair may be attempted if the bowel has been mechanically prepared preoperatively. If uncertainty exists regarding the extent of injury, laparotomy is always indicated.
Dissection And Thermal Injury[edit | edit source]
Diagnosis[edit | edit source]
- Any amount of dissected bowel should be carefully examined during the dissection because comprehensive “running” of the bowel near the end of the procedure is far more difficult under laparoscopic guidance.
- Thermal injury to bowel may be more difficult to diagnose intraoperatively, particularly if the injury was created with electrical or laser energy, a feature that makes careful adherence to safety protocols imperative.
- Even if thermal injury is recognized, estimating the extent of the damage visually is difficult because the zone of desiccation may exceed the area of visual damage. An understanding of the differing impacts of various types of electrical current is essential to estimate the extent of injury.
- In some instances, diagnosis is delayed until the patient develops peritonitis and fever, which usually occurs a few days after the procedure but occasionally does not happen for several weeks.
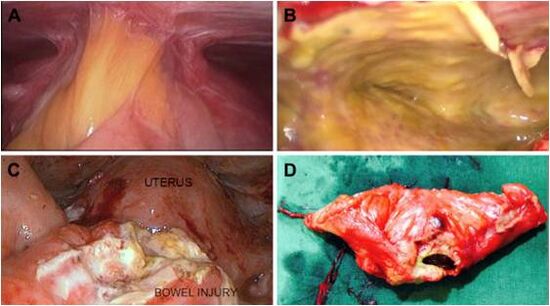
Risk Reduction[edit | edit source]
- When one is dissecting, adequate exposure of the operative field must be accomplished frequently with the retraction and counter traction provided by a competent assistant.
- Dissection close to bowel should be performed mechanically with sharp scissors, not with electrical or laser energy sources.
- Occlusion of blood vessels near to bowel is accomplished with clips, or bipolar current, provided that an adequate margin of tissue exists.
- Regardless, if the difficulty of the dissection makes the surgeon uncomfortable, alternative methods of hemostasis should be used.
- If other methods are not feasible, one should seek the aid of a more experienced colleague, abandon the procedure or convert to an open procedure.
Management[edit | edit source]
- Thermal injury may be handled expectantly, if, in the estimation of the surgeon, the lesion is superficial and confirmed.
- Estimating the degree of tissue injury is possible if one knows the nature of the current and other parameters, such as the wattage, current density, and duration of contact with tissue.
Soft Tissue Emphysema[edit | edit source]
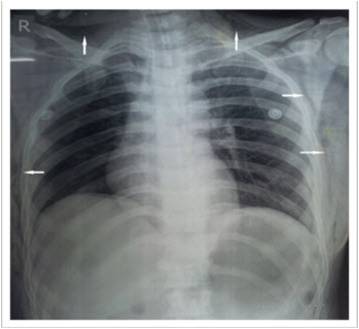
- Subcutaneous emphysema most commonly results from preperitoneal placement of an insufflation needle or leakage of CO2 around the cannula sites, the latter frequently because of excessive intraperitoneal pressure.
- Although the condition is usually mild and limited to the abdominal wall, it can become extensive, involving the extremities, the neck, and the mediastinum.
- Another relatively common location for emphysema is the omentum or mesentery. Subcutaneous emphysema may be readily identified by the palpation of crepitus in the abdominal wall; if it extends along the contiguous fascial planes to the neck, it can be visualized directly.
- This finding can be a reflection of the development of mediastinal emphysema, which, if severe, may lead to pneumothorax and cardiovascular collapse.
Risk Reduction[edit | edit source]
- Proper positioning of an insufflation needle reduces the risk of subcutaneous emphysema.
- No single test absolutely predicts intraperitoneal placement. A variety of tests such as aspiration, creation of preinstillation negative pressure, and maintenance of low insufflation pressure with symmetrical distension of the abdominal wall, should be used.
- Pre-inflation negative pressure can be demonstrated by aspirating a drop of water placed on the open end of the insufflation needle, followed by elevation of the anterior abdominal wall.
- A more quantitative demonstration is to elevate the abdominal wall after the tubing is connected to the needle, the result should be a low or negative intraperitoneal pressure (-1 to –4mm Hg).
- Insufflation should be initiated at a low flow rate (1 L/min) until the surgeon has confidence that proper placement has been achieved.
- Loss of liver dullness should occur when about 1500 ml of gas has entered the peritoneal cavity. The distension should be symmetrical and the measured intraperitoneal pressure should be below 10mmHg, sometimes slightly higher in patients.
- If, at any time, the surgeon feels that the needle is not located intraperitoneally, it should be withdrawn and reinserted.
- After the peritoneal cavity has been insufflated with an adequate volume of gas, the primary trocar is introduced.
- Then the laparoscope is introduced, and if the cannula is satisfactorily located, the tubing is attached to the appropriate port.
- Subcutaneous emphysema may evolve despite intraperitoneal placement of the trocars, an even that can be avoided by maintaining low intraperitoneal pressure below 15mm Hg (preferably near 10 mmHg) after placement of the desired cannula.
- Other approaches that may reduce the chance of developing subcutaneous emphysema are use of open laparoscopy and the abdominal wall lifting systems that render gas unnecessary.
Management[edit | edit source]
- If the surgeon finds that the initial insufflation has occurred extraperitoneally, several options exist. Removing the laparoscope and repeating the insufflation is possible, but using this method is more difficult because of the new configuration of the anterior peritoneum.
- Options include open laparoscopy or the use of an alternate site such as the left upper quadrant.
- One attractive approach is to direct insertion of the insufflation needle visually after leaving the laparoscope in the expanded preperitoneal space.
- For mild cases of subcutaneous emphysema, no specific intra-or postoperative therapy is required because the findings quickly resolve after evacuation of the pneumoperitoneum.
- When the extravasation extends to involve the neck, terminating the procedure is usually preferable because pneumomediastinum, pneumothorax, hypercarbia, and cardiovascular collapse may result.
Incisional Hernia And Wound Dehiscence[edit | edit source]
- Reports seem to indicate that defects that are 10mm or larger in diameter are particularly vulnerable, albeit no incision is immune to the risk of herniation.
- Another important factor contributing to risk may be the use of cannula anchoring devices that increase the diameter of the incision, sometimes as much as 3mm.
- Dehiscence of a laparoscopic wound may be irrelevant unless bowel or other intraperitoneal tissue herniates into and through the defect.
- One of the more sinister complications, involving only a portion of the bowel wall, is Richter’s hernia, which is somewhat more difficult to diagnose and may result in perforation, peritonitis, and death.
- The most common defect appears immediately postoperatively when bowel or omentum passes through the unopposed or inadequately repaired incision.
- Many defects probably remain asymptomatic, but late presentation may occur if bowel or omentum has become trapped.
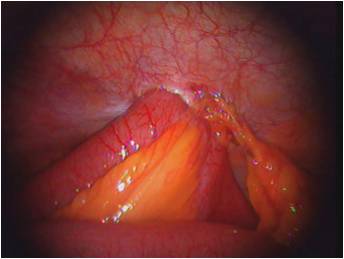
Risk Reduction[edit | edit source]
- Whenever possible, the smallest diameter cannula should be used; hernia has been reported in conjunction with the use of 5mm trocars.
- The Z-track insertion method offsets skin and fascial incisions, which potentially reduces the incidence of hernia.
- Another approach is to remove all ancillary cannula under direct vision to ensure that bowel is not drawn into the incision.
- Insertion of an obturator (or a laparoscope) into the cannula may also prevent suction from drawing bowel or omentum, into the incision.
- Incisions 10mm or larger in diameter should undergo facial closure under laparoscopic direction to prevent incorporation of bowel. This may be accomplished by using a 5mm or smaller diameter laparoscope through one of the smaller cannula.
- A narrow diameter, three-quarter round needle facilitates closure, as does use of a laparoscopic ligature carrier.
Management[edit | edit source]
Management of laparoscopic incisional defects depends on the timing of the presentation, the presence or absence of entrapped bowel, and the condition of the bowel.
Laparoscopy During Pregnancy[edit | edit source]
Initially pregnancy was considered an absolute contraindication to laparoscopic surgery. Recent clinical reports have demonstrated the feasibility, advantages and potential safety of laparoscopic surgery in the pregnant patient. However, concerns about effects of carbon dioxide pneumoperitoneum on mother and fetus persist, resulting in controversy and concern.
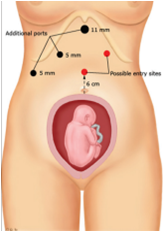
There are two new considerations and challenging complexities to the issue.
- The altered physiology of the pregnancy condition that may change the biologic response to carbon dioxide pneumoperitoneum and position extremes.
- The effects on the foetus which maintain the physiology distinct from that of adults. Laparoscopic surgery can cause foetal acidosis and hypoperfusion.
Timing of Laparoscopic Surgery for a Pregnant Patient[edit | edit source]
- The safest time to operate on the pregnant patient is during 2nd trimester because risks of teratogenesis, miscarriage and preterm delivery are lowest.
- The incidence of spontaneous abortion is highest in the 1st trimester that is 12%, decreasing to 0% by the 3rd. During the 2nd trimester there is 5 to 8% chance of preterm labour and premature delivery, which increases to 30% in the 3rd trimester.
- Finally, the gravid uterus is not yet large enough to abscure the operative field as in the case during the 3rd trimester.
Advantages and Disadvantages of Laparoscopy on a Pregnant Patient[edit | edit source]
| Advantages and Feasibility | Disadvantages and Concerns |
|---|---|
| Decreased pain, earlier return of gastrointestinal function, earlier ambulation, decreased hospital stay and faster return to routine activity. | Increased intra-abdominal pressure leading to decreased inferior venacaval return, resulting in decreased cardiac output. |
| Decreased rate of premature delivery due to decreased uterine manipulation. | Maternal hypotension or hypoxia causing foetal demise. |
| Decreased foetal depression secondary to decreased narcotic usage | Increased intra-abdominal pressure seen with a pneumoperitoneum could lead to decreased uterine blood flow and increased intrauterine pressure. Both of which could result in foetal hypoxia. |
| Lower rate incisional hernia | Respiratory Acidosis in both mother and foetus due to absorption of Carbon Dioxide across the peritoneum. Fetal acidosis could be potentiated by the decreased venacaval return age. |
Biliary tract disease in Pregnant Patients[edit | edit source]
- Gallstones are present in 12% of all pregnancies and cholecystectomy is performed in 3 to 8 out of 10,000 pregnancies.
- An uncomplicated open cholecystectomy in pregnant patient should be accompanied by a 0% maternal mortality, 5% foetal loss and 7% preterm labour.
- Complications such as gallstone pancreatitis or acute cholecystitis will increase maternal mortality to 15% and foetal demise to 60%.
- Patients with uncomplicated biliary colic should be treated medically with non-fat diets and pain medications until after delivery.
- Patients who present in the 1st trimester of pregnancy with crescendo biliary colic or persistent vomiting should be medically managed if possible until they are in the 2nd trimester.
- Pregnant patient in the 2nd trimester who present with the above complications of biliary tract disease will need operative treatment during the 2nd trimester after appropriate resuscitation.
- Patients with these complications who present in the 3rd trimester of pregnancy should be treated conservatively until after delivery if possible or at least until a gestational age of 28-30 weeks in order to maximize foetal viability.
Guidelines to perform Laparoscopy in Pregnant Patients[edit | edit source]
The following practices should be followed when performing laparoscopic surgery in the pregnant to minimize adverse effects on the fetus or mother. More information is given in the SAGES Guidelines for Laparoscopic Surgery During Pregnancy.
Always ensure that you:
- Place the patient in the left lateral decubitus position with open surgery to prevent uterine compression of the inferior vena cava. Minimizing the degree of reverse Trendelenburg position may also further reduce possible uterine compression of the vena cava.
- Use an antiembolic device to prevent deep venous thrombosis. Stasis of blood in the lower extremities is common in pregnancy. Levels of fibrinogen and factors VII and XII are increased during pregnancy leading to an increased risk of thromboembolic events. These changes, coupled with the decreased venous return seen with increased intra-abdominal pressure and the reverse Trendelenburg position used during laparoscopic surgery, significantly increase the risk of deep venous thrombosis.
- Follow an open Hasson technique for gaining access to the abdominal cavity as it is safer than a closed percutaneous puncture. Several authors have inserted a Verres needle in the right upper quadrant without complications, but the potential for puncture of the uterus or intestine still exists, especially with increasing gestational age.
- Maintain the intra-abdominal pressure as low as possible while still achieving adequate visualization. A pressure of less than 12-15 mm Hg should be used until concerns about the effects of high intra-abdominal pressure on the foetus are answered.
- Continuously monitor maternal end tidal C02 and maintain it between 25-30 mm by changing the minute ventilation. Promptly correcting any evidence of maternal respiratory acidosis is critical as the fetus is typically slightly more acidic than the mother
- Use continuous intraoperative fetal monitoring. If fetal distress is noted, release the pneumoperitoneum immediately. Monitoring should be used even if the fetus is not viable, as the desufflation may reverse fetal distress, preventing serious problems. Transabdominal ultrasound fetal monitoring may not be effective because the establishment of the pneumoperitoneum may decrease fetal heart tones, so intravaginal ultrasound may be necessary for intraoperative monitoring.
- Protect the fetus if intraoperative cholangiography is to be performed.
- Minimize operative time. Several studies have demonstrated a correlation between the duration of a carbon dioxide pneumoperitoneum and an increase in PaC02.
- Should not administer Tocolytic agents prophylactically unless there is evidence of uterine irritability or contractions.
Trocar placement for Laparoscopy in Pregnant Patients[edit | edit source]
Biliary tract disease[edit | edit source]
Place a Hasson trocar above the umbilicus. Place the remaining ports under direct visualization in the usual locations.
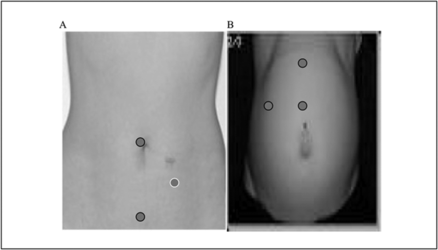
Conclusion[edit | edit source]
In conclusion, animal studies indicate that a carbon dioxide pneumoperitoneum causes fetal acidosis, which may not be corrected by changes in maternal respiratory status. These intraoperative findings do not appear to have any long-term adverse effects on the fetus. The pregnant patient clearly benefits from laparoscopic surgery and should be offered this option as long as the above guidelines are followed.
Proper Maintenance of Instruments[edit | edit source]
Introduction[edit | edit source]
Instruments represent a significant material asset within the overall investment of a hospital. The practical experience mentioned here is combined with a description of fundamental relationships and is intended to help preserve the functional capability and value of the instruments over many years through correct care and maintenance. The recommended measures must be implemented in compliance with the hygiene requirements.
Given here are the instructions for the preparation of steel, elastic rubber and plastic instruments as well as for the surgical motor line:
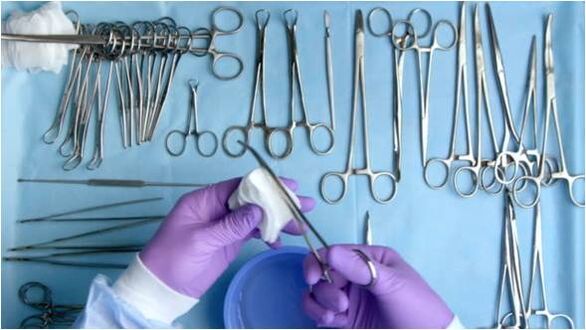
- Detailed information is given regarding the type of steel used for instruments, the required quality of water and further recommendations for the proper handling of instruments.
- The requirements for the various types of steel are based on national and international standards (DIN and ISO) with special consideration for the specific functional characteristics and demands for the use of surgical instruments.
- When inquiring about the meaning of terms like “high-grade steel” or “stainless steel” very often the assumption is that high-grade steel is an indestructible, extremely resistant material. Even in hospitals, numerous users expect that instruments of high-grade steel have to be everlasting. They are surprised if they are told, or find out for themselves, that even high-grade steel can be susceptible to many different kinds of mechanical, thermal or chemical attacks.
- Understanding the material and its characteristics, together with knowledge regarding correct handling, will result in achieving trouble-free, long-lasting use of high-grade steel instruments.
- Only a very limited number of stainless steel types can satisfy the requirements asked for by the user of surgical instruments. Due to their special alloy, high-grade steels used for surgical instruments are characterised by the fact that they form specific passive layers as a protection against corrosion. These protective layers can, however, be damaged by external influences which will harm the instruments.
- Only to a limited extent are high-grade steels resistant to the attack of aggressive waters, e.g. water with high chloride content. In particular, chloride ions can cause pitting or even stress corrosion cracking.
- Instruments for microsurgery and laparoscopy require careful preparation. These instruments are very delicate and have extremely fine elements for operating reasons. Therefore they are extremely sensitive to improper mechanical strain when in use, preparation or transportation. It has also been proved that in most cases, damage can be traced back to mechanical influences. Such damage is irreparable.
- Components which do not have to be sterilized, such as columns, foot switches, cables etc. are not discussed here. Special instructions for the preparation and treatment of MIS-instruments, flexible and rigid endoscopes are also given.
- The working group for hospital hygiene recommends. “In the interest of patience safety, the hygienic requirements for endoscopic surgery should be the same as in conventional surgery. Thoroughly cleaned and sterile instruments are allowed for use in endoscopic surgery. This assures that an important part of quality assurance requirements are met”.
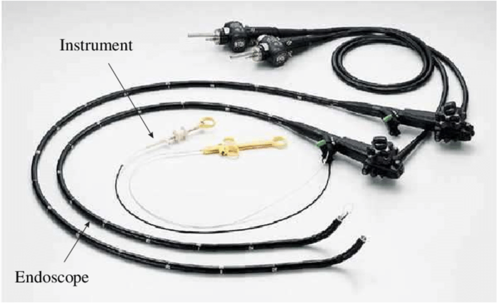
- MIS-instruments, which are used with pressure (gas insufflation) during an operation, soil heavily. Therefore they need special attention for cleaning. Either they can be dismantled or they can be rinsed through a channel.
- Endoscopes are precision instruments for observation of an illuminated preformed body cavity or body opening (e.g. bladder, intestine, abdominal cavity, bronchi, joint cavities, vessels). As a result of the various endoscope designs, different materials are used for their production, the different characteristics of which must be taken into consideration.
Maintenance of Instruments[edit | edit source]
It involves the following processes:
- Meticulous cleaning
- Decontamination
- Disinfection
- Sterilisation
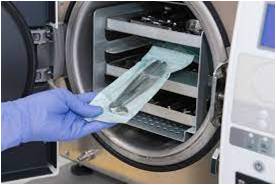
Cleaning[edit | edit source]
It is defined as the removal of visible dirt, soil, organic matter or other foreign material. It is removal rather than killing of microorganisms. This may be accomplished with:
- Water
- Mechanical action
- Detergents
- Enzymatic products
Importance of Cleaning[edit | edit source]
- It renders disinfection or sterilization effective.
- It brings about a 4 log reduction in contaminating organisms.
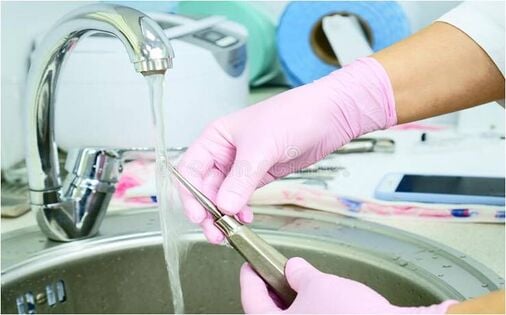
Decontamination[edit | edit source]
It is defined as a process that is both physical, chemical or either, to remove or reduce contamination from infectious organisms or other harmful substances.
Cleaning and decontamination may be:
- Manual
- Automatic Washer/Decontaminator (it is safer, but is not easily available, and cannot be used for some instruments)
Enzymatic Products are Catalysts that enhance or loosen dried or hard to remove debris Usually added to water or cleaning solutions.
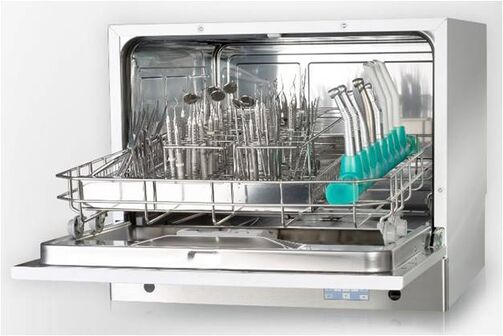
Preparation for Disinfection and Cleaning[edit | edit source]
Disinfection of soiled instruments not only helps to preserve the instruments themselves, but also serves to protect those personnel responsible for their transportation and cleaning.
The guidelines of the Robert-Koch-Institute state: “Wherever possible, instruments should be disinfected and cleaned immediately after use. Any soil left to dry will make eventual cleaning much more difficult and could result in damage to the instruments. If necessary, instruments should be taken apart, allowing the disinfectant to cover all surfaces".
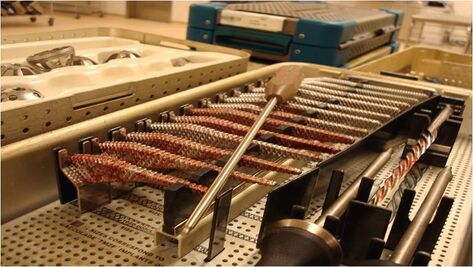
Criteria for Selection of a Cleaner/Detergent[edit | edit source]
- The Detergent should facilitate loosening of debris and not damage the instruments. For instruments, enzymatic cleaners are preferred.
- The Detergent used should rinse completely without leaving residues.
- A Detergent with pH<7 is preferred for inorganic debris such as urine, hard water scale.
- A Detergent with pH>7 is preferred for organic debris such as blood, faeces, etc.
- Always Follow manufacturer’s instructions at all times.
In addition to using the right detergent/cleaner, the personnel involved should wear proper protective attire while cleaning. They must:
- Use Scrub suits under a moisture impervious gown.
- Always wear masks and goggles/full face shield for protection from splashes or aerosolization.
- Wear Heavy duty long cuffed gloves.
- Isolate the cleaning area from rest of the operating room.
Other precautions you have to keep in mind are as follows:
- Topical antimicrobials intended for skin antisepsis are not to be used. For disinfection of the instruments, you can use either moist heat or chemical disinfection. Moist heat is preferable, provided the instruments are suitable for treatment in this manner. Unused instruments have to be prepared in the same way as used instruments; therefore those instruments have to be opened or dismantled.
- Occasionally, corrosive caustic agents and medicines (e.g., silver nitrate, iodine preparations, albotyl and mercury components) are used in operations and for medical treatment. You have to remove the remnants of these substances.
- Under no circumstances must instruments be stored in physiological saline solution as prolonged contact causes pitting and rust.
- Undue “dropping” can cause damage to the instrument. Hard metal tips on scissors may be chipped or small, delicate clamps can be deformed. In order to avoid this, you must carefully handle and deposit the instruments after use.
- To avoid encrustation and corrosion, return in dry condition to CSSD. There the instruments must immediately be subject to machine treatment. Even small amounts of fluids (e.g. dishes with physiological saline solution) should be avoided on the goods for return.
- For treatment in CSSD, deposit the instruments on suitable trays, e.g. perforated sterilizing trays. For effective cleaning, hinged instruments have to be opened (Eg. scissors, clamps, gouge forceps).
- For return in wet condition to CSSD, instruments have to be immersed in a combined disinfecting and cleaning agent. Therefore use only non-corrosive agents in prescribed concentrations. Remember that water alone is not sufficient. Instruments should never be left overnight without cleaning, as the risk of causing permanent damage increases with the length of time between use and preparation
- Handles and cables for HF-surgery have to be prepared like surgical instruments.
- Dismantled tubing sets for cooling liquid and spray nozzles have to be rinsed immediately with water from the rinsing bottle and checked for leakage.
- MIS-instruments and rigid endoscopes have to be dismantled according to the manufacturer’s instructions. This equipment has to be placed in special containers designed for them.
- Dried residues are crucial, especially for operative endoscopy, because of the difficulty of removal in small lumens and may lead to dysfunction of the links. Therefore these instruments have to be processed immediately after use.
- It is recommended to use a 3% solution of hydrogen peroxide for rinsing the HF-instruments, to remove the coagulated tissues that may form during longer operations.
- Instruments should be transported in special containers or retaining devices to avoid damage.
Manual Disinfecting and Cleaning[edit | edit source]
Always use fresh disinfecting and cleaning solutions every day. The following problems may occur due to using the same solution for too long:
- Risk of corrosion due to soiling.
- Risk of corrosion due to increasing dirt concentrations.
- Decrease of disinfecting effect due to excessive dirt concentration.
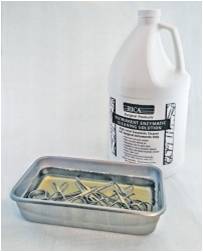
- Instruments with a narrow lumen (tubings, cannulae) or with cavities are generally difficult to prepare. You must therefore take care that the passages are free and that the insides are completely in contact with the solution.
- Water on the surfaces of elastic instruments made of rubber or plastic may cause white spots to appear, which can only be removed by drying.
- If after manual cleaning, instruments are chemically disinfected instead of being sterilized, you must use a separate disinfectant.
- The instruments must then be rinsed thoroughly with sterile demineralised water and dried immediately.
- MIS-instruments and rigid endoscopes have cavities and channels which are difficult to clean. Careful preparation of these instruments requires:
- Removing the seals/washers
- Opening the stopcocks
- Dismantling according to the manufacturer’s instructions
- Always use brushes with plastic bristles, cleaning guns or clean soft cloths to avoid damage from unsuitable cleaning accessories. Drying with compressed air is very gentle and effective, and therefore it is the preferred method of drying.
- When immersing the endoscope into the cleaning and disinfection solutions, make sure that all air bubbles escape from the cavities by moving the instrument, or by holding it in an inclined position, thus ensuring the complete wetting of the surface.
- MIS-instruments and rigid endoscopes with encrustation, which could not be removed through intensive cleaning (e.g. brushing, ultrasonic treatment) have to be discarded because it is not possible to ensure the functioning of the device.
- In the presence of increased chloride concentrations in water, pitting can occur on the instruments. Such corrosion can be avoided by using alkaline products during the cleaning phase and demineralized water for the final rinsing.
- The inflowing water for the cleaning phase should be cold prior to beginning the main cleaning phase. Warm water, especially with temperatures above 45oC, will lead to coagulation of proteins and therefore lead to cleaning problems.
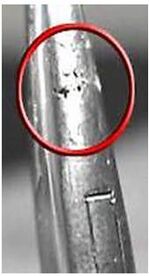
With machine cleaning, you have to pay special attention to the following[edit | edit source]
- Trays and machine must be correctly loaded.
- Hinged instruments have to be opened, thus guaranteeing thorough cleaning at the joints.
- Do not overload the perforated trays, so that all instruments can be well rinsed.
- Place large and bulky instruments properly on the trays thus avoiding “shadows” on other instruments.
- A thorough internal flow has to be guaranteed with instruments having long, narrow cavities (tubing, cannulae, breathing systems). Use special inserts with rinsing-devices ,which are designed for such instruments.
- Place the instruments depending on their mechanical construction in such a way that they do not damage each other.
- If the drying of the machine is not sufficient then you must dry the instruments manually.
- MIS-instruments and rigid endoscopes have to be dismantled for machine preparation according to the manufacturer’s instructions. Seals/washers have to be removed and stopcocks should be opened.
- Machine preparation should be done only if recommended by the manufacturer. In order to avoid damage, you must secure the parts safely. The machine must thoroughly flush inside any instrument lumen.
Ultrasonic treatment[edit | edit source]
Ultrasonic treatment is particularly suitable for cleaning instruments of high-grade steel. Delicate instruments (microsurgical instruments, dental instruments) can be carefully and thoroughly cleaned. Powerful machines for ultrasonic treatment are able to remove encrustation in inaccessible places.
Remember that, Ultrasonic treatment is used for:
- Effective mechanical help for the manual cleaning processes.
- Pre-treatment of instruments with encrustation that is dried, before machine cleaning and disinfection.
- Special designed component parts for tunnel washers, which can be ordered optionally.
In order to achieve optimum efficiency of the ultrasonic treatment, you must always[edit | edit source]
- Fill the bath following the instructions by the manufacturer.
- Add a suitable cleaning agent or a combined cleaning and disinfecting agent.
- Make sure that the concentration, temperature and time of sonication recommended by the manufacture are correctly maintained, when using disinfecting and cleaning agents.
- Fill the bath with warm water because temperatures over 40oC promote degassing and cleaning.
Additional precautions to be taken while performing Ultrasonic Treatment[edit | edit source]
- After ultrasonic treatment, the instruments have to be thoroughly rinsed either manually or by machine. Rinsing has to be performed with clear water of at least potable water quality, or with demineralized water in order to avoid water spots.
- Ensure that the instruments are thoroughly dried.
- To avoid damage, micro-surgical instruments have to be deposited on special racks.
- Ultrasonic treatment is only allowed for those parts of MIS-instruments or rigid endoscopes which are suitable for this procedure according to the manufacturer’s instructions (e.g. no optical systems).
- MIS-instruments and rigid endoscopes with coagulated encrustations caused by using HF-treatment that could not be removed through intensive cleaning, have to be discarded because it is not possible to ensure the functionality.
- Elastic instruments are not suitable for ultrasonic treatment as ultrasonic waves have no effect on elastic surfaces.
- Functional parts of the breathing system cannot be treated in an ultrasonic bath.
Care and maintenance[edit | edit source]
You must always bear in mind that:
- Instruments with joints or ratchets have to be treated with a suitable autoclavable lubricating agent during the cleaning process.
- These lubricating agents prevent the friction of metal on metal and preserve smooth function of the instruments thus avoiding corrosion by friction. Furthermore, constant use of such agents prevents “sticking” of the hinged parts.
- The lubricating agents can either be applied manually or during the final rinsing in the machine.

MIS-instruments and rigid endoscopes contain different materials like plastic or rubber that may be affected by the lubricant. In general, lubricating agents applied (by machine or manually) to optics, seals and current-carrying parts can lead to massive troubles and dysfunction and therefore should not be done. This includes instrument milk.
Joints, threads, sliding surfaces and non-maintenance-free stopcocks may have to be treated with a special oil or special grease, according to the manufacturer’s instructions.
Only silicon oils and grease-free gels should be used as lubricants, as advised by the manufacturer. Agents containing vaseline or paraffin cause swelling or softening of rubber parts.
Inspection[edit | edit source]
- Each surgical instrument is designed for a specific purpose. Inspection has to be carried out to ensure that they still function as they should. If you have doubts, a reliable manufacturer can advise you on suitable inspection methods.
- After each round of cleaning, the instruments have to be macroscopically clean, i.e. free of visible protein remnants and other contamination.
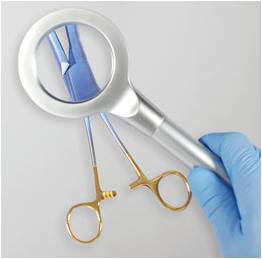
- Worn out or damaged instruments should be removed for repair or replacement. Corroded instruments should be discarded immediately as these can cause contact corrosion even on a perfect surgical instrument.
- Fine and delicate instruments are inspected under the magnifying glass. In order to avoid damage during transportation, place the instruments in specially designed racks or use special holding devices to prevent them from slipping.
Stain Inspection[edit | edit source]
Stains on instruments are due to improper preparation. Because stains are usually found during inspection, the reasons are discussed here. Stains can be due to:
- Insufficient mechanical or manual cleaning.
- Unsuitable cleaning, disinfecting and care agents.
- Failure to observe the dosage instructions for cleaning, disinfecting or care agents.
- Residues of cleaning and disinfecting agents due to insufficient rinsing.
- Poor water quality.
- Water-soluble residues e.g. washing agent in textile cloths for wrapping,
- Residues in the sterilising steam (exceeding the index for contaminants in steam)
- Remnants of medications, marking pens or chemo-indicators.
- Procedural faults e.g. not cleaning brand new surgical instruments prior to sterilisation.
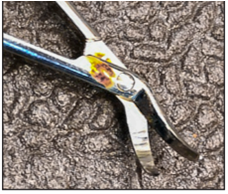
Additional Inspection Parameters[edit | edit source]
- The perfect function of MIS-instruments and rigid endoscopes can be ensured only through an intensive functional inspection. All dismantled instruments have to be assembled together following the instructions of the manufacturer prior to functional inspection.
- Instruments with encrustation of coagulation on working parts, which still exist in spite of cleaning, have to undergo a special manual treatment as described. If this does not help, you must discard the instruments, endoscopes and accessories and replace them with new ones.
- To avoid damage to optical systems, clean them carefully with a cotton swab moistened with alcohol. If this does not remove clouding on the optics, you must return the part to the manufacturer for inspection. Damage can be avoided by using wooden or plastic handled applicators; metal is not suitable.
- Light-carrier in telescopes and fiber optic cables have to be checked for optical fiber breaks. To do this, take one end of the fiber optic cable, hold it against the light and look into the other end. Little black spots indicate breaks in the fibers. A large number of breaks reduce the light output. Such fiber optics as well as endoscopes with surface damage and surface deformation, should be sent for repair.
Inspection of Elastic Instruments[edit | edit source]
Elastic instruments have to be inspected according to their function and range of use. The most important criteria are:
- Bellows have to be undamaged and airtight.
- Filling system of the bellows must not show any leakage.
- Lumina of catheters and probes have to be free.
- Connections have to meet functional safety.
- There should be no change of design, e.g. radius of curvature of tracheal tubes.
- Elastic instruments with faults or damage have to be replaced.
Frequent problems you will encounter with elastic instruments are:
- Detachment (blister forming)
- Cracked surface
- Sticky surface
- Hardening
- Porous surface
- Discolouration
To prevent premature failure, ensure that that elastic instruments are stored in a dry place without being kinked or overstretched
Disinfection[edit | edit source]
Disinfection: It is a process that eliminates many or all pathogenic microorganisms with the exception of bacterial spores from inanimate objects and surfaces.
Sterilization: It is a process that destroys all microbial life.
Factors affecting disinfections are[edit | edit source]
- Previous cleaning of objects.
- Type and level of microbial contamination.
- Concentration and exposure time to germicide.
- Physical configurations of the object [E.g., contains crevices, hinges and bureaus].
- Temperature and pH of disinfecting process.
Susceptibility of microbes to disinfectants in decreasing order[edit | edit source]
- Bacterial spores
- (Bacillus subtilis, Clostridium)
- Mycobacterium
- (Mycobacterium Tuberculosis)
- Non-Lipid or small viruses
- (Poliovirus, Rhinovirus)
- Fungi (Cryptosporidium, candida)
- Vegetative Bacteria
- (Staphycocus, Pseudomonas, eterococi, MRSA,
- Lipid or medium sized viruses
- (Hepatitis B, HCV, HIV, HS, CMV, RSV)
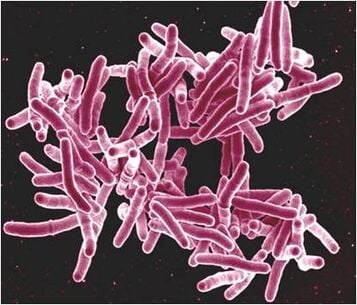
Classification of Patient care Items[edit | edit source]
Patient Care Items are classified using the Spaulding classification (1968). The classification is based on the:
- Nature of items.
- Manner in which items are used
- Degree of risk of infection
Critical items[edit | edit source]
Items can be classified as critical,
- If they have a high risk of causing infection if contaminated.
- If they enter sterile tissue or vascular systems or have blood flowing through them.
- If their sterilisation is required.
Examples include surgical instruments like:
- Implants
- Needles
- Endoscope accessories
- Catheters - Vascular\ Urinary
- Laparoscopes
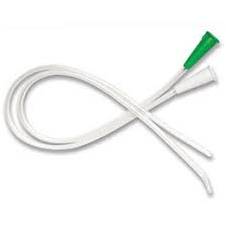
Semi-critical Items[edit | edit source]
Items can be classified as semi-critical,
- If they come in contact with mucous membranes and non-intact skin
- If they minimally receive high level disinfection (HLD ), and may also be sterilised
Some semi critical items such as Hydrotherapy tanks thermometers require only intermediate level disinfection.
Examples include Endotracheal tubes, Endoscopes, Bronchoscopes, Laryngoscopes, respiratory and reusable anaesthesia equipment, diallers, transducers, thermometer, hydrotherapy tanks.
Non-critical items[edit | edit source]
Items can be classified as non –critical if they come in contact with intact skin and may receive intermediate or low level disinfection.
Examples include Stethoscopes, blood pressure tourniquet cuffs, Echo leads, bed pans linens environmental surfaces as table tops, beside stands, furniture floors, etc.
Levels Of Disinfection[edit | edit source]
- High Level Disinfection
- Intermediate Level Disinfection
- Low Level Disinfection
High Level Disinfection (HLD)[edit | edit source]
- This level of disinfection has the following features:
- This eliminates all microorganisms except large population of bacterial spores.
This is achieved by immersing for a specified period in a chemical agent
a) Disinfectant
b) Sterilant
- Some high level disinfectants with prolonged contact act as a sterilant.
- Thermal HLD is accomplished with pasteurisation.
Intermediate Level Disinfection (ILD)[edit | edit source]
In this level of disinfection, it:
- Inactivates vegetative bacteria including micro bacteria, most viruses, fungi but not spores
- Is used for semi critical items.
- Is achieved by immersing in specified chemical agent or by surface disinfection with Low-level disinfectant.
- Used on Non-critical items.
- Kills vegetative bacterial and some viruses and fungi but not tubercle bacilli.
- Is accomplished by surface cleaning or by washing with specific chemical agents.
Exposure time and Chemicals used for various levels of Disinfection[edit | edit source]
| High Level Disinfection | Intermediate Level Disinfection | Low Level Disinfection | |
|---|---|---|---|
| Exposure Time | > 20 minutes, 12 minutes for cidex OPA | < 10 minutes | < 10 minutes |
| Chemicals Used | 2% - 3.4% Gluteraldehyde | Ethyl or isopropyl / alcohol (70% - 90%) | Ethyl or isopropyl / alcohol |
| 0.08% - Peroxyacetic acid and 1% Hydrogen Peroxide | Phenolic germicidal detergent solution | Phenolic germicidal detergent solution | |
| 7.5% hydrogen peroxide / 0.85% phosphoric acid | Iodophor germicidal detergent solution | Iodophor germicidal detergent solution | |
| 0.95% Gluteraldehyde / 1.64% phenol / phonate | Sodium hypo chloride (5.25% house hold bleach) 1:50 dilution | Sodium hypo chloride (5.25% base hold bleach) 1:500 dilution (100 ppm) | |
| 0.2% perantic acid (stasis 20) | Quaternary Ammonium germicidal solution (disinfectant, not antiseptic concentration) | ||
| 0.55% Orthophthaldehyde (Cider OPA as HLD only) | |||
| Damand – Release chlorine dioxide (limited use) |
Disinfectants for HBV: Following chemicals are used as disinfectants for HBV[edit | edit source]
- 2% Glutaradehyde + 0.55% orthophthalaldehyde
- Iodophor (80 ppm)
- 70% Isopropyl alcohol
- 80% Ethyl alcohol
- 0.3% Hydrogen peroxide
- Sodium hypochlorite 1:100 dilution
Disinfectants for HIV: Following chemicals are used as disinfectants for HBV[edit | edit source]
- 2% Glutaradehyde : 0.5% orthophthalaldehyde
- 0.3% Hydrogen peroxide
- 50% Ethyl alcohol
- Phenolics
- Sodium hypochlorite 1:100 dilution
Chemical High Level Disinfection[edit | edit source]
An important variant for HLD is contact time. If contact time of 10 hours is used, a disinfectant may be used as sterilant.
Factors influencing Chemical HLD include[edit | edit source]
- Organic load present on items to be disinfected
- Type and level of microbial contamination
- Precleaning, rinsing, and drying of items
- Active ingredient of chemical agent
- Concentration of chemical agent
- Physical Configuration of the items (eg crevices, lumens)
- Exposure time of chemical agent
- Temperature and pH of the chemical agent
- Hardness of water
- Presence of surfactant
Immersion Recommendations for Chemical HLD[edit | edit source]
- Items should be completely immersed.
- Lumens should be flushed with germicide.
- Recommended immersion time ranges from 12-45 minutes.
- For HLD in 2% activated Gluteraldehyde, a minimum 20 minutes immersion at 68 F (20`C),is recommended when used on meticulously cleaned instruments.
Vapour exposure for Chemical HLD[edit | edit source]
When using chemicals for HLD, it is critical to maintain personnel safety.
- Always ensure there is protective apparel for the personnel.
- Vapours are toxic therefore having covered containers and maintaining ventilation is necessary
- The Permissible exposure limit for the vapours is 0.2 ppm per exposure.
Pasteurisation[edit | edit source]
Pasteurisation may be used as means for thermal HLD. It is suitable for the HLD of some anaesthesia equipment, respiratory therapy equipment and other semicritical equipment.
During Pasteurisation :
- All items to be disinfected are exposed to a hot water bath, heated to 160`-180` F, for a minimum of 30 minutes.
- It kills all microorganisms with the exception of spores.
- Commonly used disinfectants for Pasteurisation are 2% Gluteraldehyde and Formaldehyde.
Gluteraldehyde 2% solution[edit | edit source]
- It is widely used and is easily available.
- It has a pH of 7.5 – 8.5.
- Its shelf life after activation is 14 days. Using a surfactant may increase its shelf life.
- Different contact times are needed depending on the type of microbes.
- 10 minutes – kills gram +ve, gram-ve bacteria and viruses.
- 4 hours – Ensures sterilisation by destroying resistant spores.
- Protective gloves are needed by the personnel to prevent allergies.
- 2% Gluteraldehyde does not damage lensed equipment.
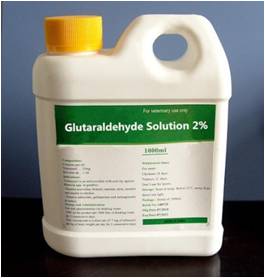
Formaldehyde[edit | edit source]
It shows broad spectrum antimicrobial action only under specified Exposure time and Concentration.
At atmospheric pressure and a temperature of 50`C, it has limited spermicidal action.
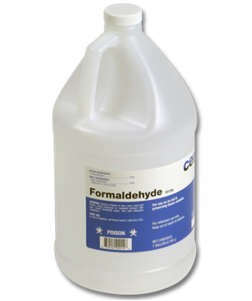
Boiling Water[edit | edit source]
It is an effective disinfectant.
- It kills:
- Vegetative bacteria including M tuberculosis
- Some viruses (including HBV and HIV)
- Some spores
- It requires a specifically designed water boiler.
- Boiler requires a hinged lid.
- It also requires an adjustable perforated tray.
Sterilisation[edit | edit source]
- It is defined as the complete destruction of microbes including the resistant spores.
- Sterilisation conditions as well as units have to be in conformity with valid quality standards (EN-or DIN-standard).
- Follow the sterilisation instructions of the manufacturer.
- Sterilisation of accessories, as well as sterilising packings, have to meet the requirements of both the instruments as well as the sterilising method used.
- Remember that sterilisation and sterility are absolute terms.
- Sterlisation is measured as a probability of sterility – Sterility Assured Level (SAL).
- Defined as Log 10 number of probability of survival or a single SAL of 6, indicates a one in a million probability of a spore or microorganism’s survival.
Sterilisation can be of two types:
a) Physical: Here, dry and moist heat in a gravity/prevacuum container is used.
b) Chemical: Here, chemicals like Ethylene Oxide, Gas Plasma, Hydrogen Peroxide are used.
Note that pre-cleaning is also a prerequisite for sterilisation as it is for disinfection.
Autoclaving[edit | edit source]
- Normally, autoclaving is performed with saturated steam at 134o C.
- For articles with reduced thermal-stability a temperature of 121oC can be used at a longer time.
- The sterilisation procedure has to be standardised for the goods to be sterilised.
- Sterilising packings have to meet the valid standards with regard to quality and application of the packings.
- They also have to be applicable to the procedure selected.
- •Steam used for sterilisation has to be free from any contamination and should neither impede the process nor damage the steriliser or the goods to be sterilised. In order to guarantee this, the limits for the quality of boiler feeding water as well as the condensate, should not be exceeded.
- Otherwise, contaminants such as rust particles from the conducting system may cause corrosion or lead to a high content of silicic acid, which may lead to discolouration of the instruments.
- Due to heating and cooling down during the sterilisation process, a surgical instrument with a closed ratchet may suffer from tension, stress, which causes stress cracking in joints or deterioration of the clamping force. Therefore ensure that such instruments have are sterilised either in open conditions or closed on the first ratchet only.
- After sterilisation, instruments have to be stored dry until they are used again. Instruments as well as the inner covering of sterilised goods have to be absolutely dry after having cooled down to room temperature.
- MIS-instruments and rigid endoscopes can be sterilized by conventional methods using suitable packing. Optical systems suitable for autoclaving should be processed at 134oC instead of at 121oC due to the shorter thermal stressing. To avoid damage of optical systems by sterilization, you can store them carefully following the instructions of the manufacturer.
- When elastic instruments are autoclaved, ensure that the cavities, e.g. edge of mask, bellows, are open in order to avoid damage due to changes in pressure. Prior to sterilization, cavities closed with a valve (e.g. bellow catheters) have to be suctioned free of air and water by means of a syringe.
- Functional parts of breathing systems can be autoclaved at a maximum temperature of 134oC. Bear in mind that cavities must not be closed, in order to prevent damage to the valves.
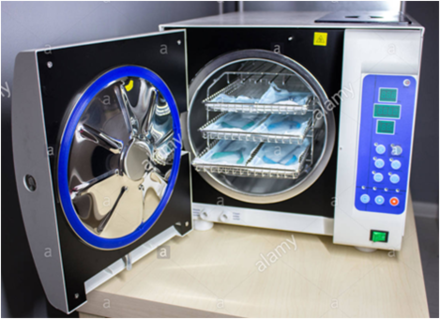
Dry Heat Sterilisation[edit | edit source]
- It is used to sterilize anhydrous oils, petroleum products, talcum powder, which steam or ETO cannot penetrate.
- It can be used for instruments that cannot be disassembled.
- Products in jars and canisters take long to sterilise with this process.
- An exposure time of 6-4 hours is needed for this process:
- The dry heat percolates the materials slowly & unevenly
- Microorganisms are destroyed slowly
- A minimum time of 6 minutes is required for unwrapped items at 400`F (204`C), and up to 6 hours for unwrapped items at 250`F (121`C)
- Instrument with delicate, sharp, cutting edges are sterilised with this process.
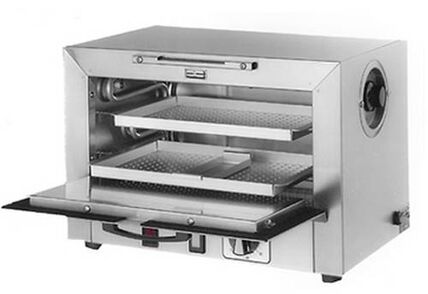
Low Temperature Sterilisation[edit | edit source]
This type of Sterilization is useful for temperature and moisture sensitive critical medical devices. They include:
- Ethylene Oxide
- Gas plasma systems
- Sterns
Ethylene Oxide (ETO)[edit | edit source]
- It is Widely used for the sterlisation of temperature and moisture sensitive equipment.
- An Exposure time of greater than 2 hours at 129`F (54`C), followed by aeration time of 12-14 hours at 55`C is required. For PVC tubes, 24 hours aeration time is required.
- Gas concentration and relative humidity of at least 35% - 85% is needed.
- Items should be completely dry before sterilisation using ETO.
- At completion ,the door has to be left open by 2 inches for 15 minutes.
- The personnel should leave the room before unloading.
- Chambers with combination of steriliser and aerator is removed only after aeration.
- ETO gas is vented outside before opening and removing instruments.
- If absorbed on skin, burns or blisters are seen.
10.If inhaled, it acts as a mucosal irritant. Prolonged exposure can cause chemical carcinogenic effect.
11.Patients are affected by improperly aerated polyethylene, rubber or silicon.
12. ETO is mixed with HCFC (hydro fluorocarbons in 1:9 ratio) to act as stabilising agent.
Hot-Air sterilisation[edit | edit source]
- When surgical instruments are hot-air sterilised, please ensure that you load and operate the sterilisers properly. To ensure safe sterilisation, the temperature should not be below 180oC but should also not exceed 200oC. This may cause structural changes leading to irreversible damage, especially as far as microsurgical instruments are concerned. Instruments with parts of rubber, plastic or textile as well as plastic-coated instruments and handles for electrodes are not suitable for hot-air sterilisation.
- The general use of lubricating agents should be omitted prior to hot air sterilisation with the exception of the joints and ratchets of surgical instruments. For this, you can use paraffin oil according to the valid pharmacopoeia. Excess oil should be removed because of the occurrence of brown discolourations due to thermal changes of the lubricating oil.
- Remember that MIS-instruments and rigid endoscopes are not suitable for hot-air sterilisation because of high temperatures.
- Elastic instruments and breathing systems are not suitable for hot-air sterilisation.
Gas sterilisation[edit | edit source]
It is a type of sterilization involving a chemical gas.
- Gas sterilisation should only be used when no other method is suitable.
- Motor components should only be gas sterilised when explicitly recommended by the manufacturer.
- Optical systems of non-autoclavable rigid endoscopes may be gas sterilised. However, follow the instructions of the manufacturer.
- Goods sterilised with ethylene oxide require sufficient aeration times before being used again.
- Elastic instruments made of thermolabile plastics are not autoclavable but can be gas sterilised if the manufacturer gives instructions about a suitable procedure.
- Elastic instruments of rubber and functional parts of breathing systems do not have to be gas sterilised, as they can be steam sterilised.
Gas Plasma Systems[edit | edit source]
It consists of a single diffusion phase (Hydrogen Peroxide vapours) and a plasma stage. Instrument is placed in a chamber. Now, 59% Hydrogen Peroxide is injected into it, vaporised and allowed to diffuse throughout the chamber. Then radio frequency energy is allowed to create hydrogen peroxide plasma. At the end of it the chamber is retuned to atmospheric pressure and the cycle is complete.
The advantages and disadvantages of the Gas Plasma system are given below.
| Advantages | Disadvantages |
|---|---|
| No toxic residue remains | Does not penetrate lumens |
| No aeration required | Inability to process paper, linen & liquids |
| Simple to operate | |
| Fast cycle time of 7 minutes |
Paracetic Acid (STERIS) System[edit | edit source]
It is a liquid immersion sterilisation process that is fully automated.
- Sterilant is 35% paracetic acid and an anticorrosive agent is supplied in a single dose container. The container is penetrated as the door is closed.
- A temperature of 50`C to 55`C is maintained.
The advantages and disadvantages of the STERIS system are given below
| Advantages | Disadvantages |
|---|---|
| No toxic wastes given out | Small number of instruments can be sterilised in a cycle |
| Short cycle time of 30 to 45 minutes | Used for immersible instruments only |
| No long term sterile storage , it is called just-in-time sterilisation | |
| It is Expensive |
Gamma Ray Sterilization[edit | edit source]
- It includes Irradiation with cobalt 60 gamma rays .
- It is limited to industrial use only.
- Industrial use is also limited to heat sensitive and moisture sensitive items.
Microwave Sterilisation[edit | edit source]
- It includes low-pressure steam with non-ionising radiation.
- Ozone Gas is used for sterilisation
a) It sterilises by oxidation
b) It is corrosive to metals and destroys natural rubber.
Newer homologies[edit | edit source]
Newer methods of sterilization use:
- Vapour phase paracetic acid
- Vaporised Hydrogen Peroxide
- Gaseous chlorine dioxide
- Pulsed light
Treatment of Brand New Instruments[edit | edit source]
During treatment of brand new instruments, you must always ensure that:
- Shipping-packing of brand new instruments have to be removed and instruments have to be stored in dry rooms, open to air. Temperature fluctuations may otherwise lead to condensation within the plastic packing and thus corrosion.
- Under no circumstances you must store instruments in cupboards or rooms where chemicals are kept, which can produce corrosive vapours.
- Prior to first use, brand-new instruments have to be prepared. First remove any protective caps or foils. Cleaning, rinsing, lubrication, inspection and sterilisation have to be carried out according to the procedures previously described.
- Prior to the first preparation, microsurgical instruments have to be placed in racks or holding devices to avoid damage.
- Elastic instruments have to be kept in their original pacing and stored in a dry, cool and dark place. When ordering, please keep in mind that in addition to wear through use, elastic instruments are prone to aging even when in storage.
- Functional parts of the breathing system frequently contain valves or membranes, which can get sticky when stored for a longer period. Such valves or membranes have to be tested and operated before use.
Water for preparation[edit | edit source]
- Instruments must have certain characteristics in order to fulfill their function (e.g. cutting ability of scissors, clamping force of clamps and forceps). Only a very limited number of steels meet these requirements. Unfavourable water composition can, therefore, have a detrimental effect on such steels. Consequently, the quality of water must be taken into account when planning the sanitary installations.
- Make it a basic rule to use demineralised water for final rinsing.
- Even when using an ion exchanger for demineralisation, tarnishing can occur due to penetration of salicic acid. The remedy is in-time regeneration of the exchanger. Always consult an expert.
Corrosion[edit | edit source]
- Contact corrosion can occasionally be observed when surgical instruments are machine cleaned. Metallic contact of instruments and unfavourable cleaning and rinsing conditions, e.g. tap water containing chlorides, can cause rust.
- Particularly severe contact corrosion occurs if stainless steel instruments get in contact with non-stainless goods, such as needles, cutters etc. Chromium-plated instruments with chipped surfaces also cause contact corrosion.
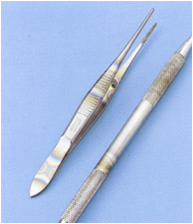
Course Materials[edit | edit source]
Basic principles and techniques of laparoscopic procedures[edit | edit source]
Guidelines for setting a laparoscopic unit[edit | edit source]
Open laparoscopy[edit | edit source]
Port placement in laparoscopy[edit | edit source]
Principles of laparoscopic organ retrieval[edit | edit source]
Complications of laparoscopic surgery[edit | edit source]
Laparoscopy during pregnancy[edit | edit source]
Proper maintenance of instruments[edit | edit source]
Educational Videos[edit | edit source]
Basic Techniques[edit | edit source]
- Peritoneal Entry
- Diagnostic Laparoscopy
- Application of ligaclips
- Hook Dissection
- Hydro – Dissection
- Cholangiogram
- Specimen Retrieval
- Extracorporeal Knotting
- Gall Bladder Aspiration
- Steps
- Adhesiolysis
- Callot's Triangle Dissection
- Callot's Triangle Dissection1
- Callot's Triangle Dissection2
- Callot's Triangle Dissection3
- Callot's Triangle Dissection4
- Callot's Triangle Dissection5
- Callot's Triangle Dissection6
- Callot's Triangle Dissection7
- Callot's Triangle Dissection8
- Callot's Triangle Dissection10
- Callot's Triangle Dissection11
- Callot's Triangle Dissection12
- Callot's Triangle Dissection13
- Impacted Cystic Duct Stone- Suturing
- Post Branch of Cystic Artery
- Liver Bed Dissection
Operative Procedure[edit | edit source]
- Level 1
- Level 2
Challenges & Troubleshooting[edit | edit source]
- Bleeding
- Bile Leak
- Stone Spillage
- Viscerd Injuries
- Diathermy Injury to the Gall Bladder
Special Cases[edit | edit source]
Questions[edit | edit source]
- QUESTION : WHAT DOES ONE DO WHEN CBD IS DILATED
- Question 2
- Question 3: WHAT DO U DO
- Question 4: HOW DO U GRASP THE FUNDUS OF THIS GB
Answers[edit | edit source]
Animation Videos[edit | edit source]
Clip Application[edit | edit source]
Cystic duct clipping[edit | edit source]
Direction of dissection in Callot's triangle[edit | edit source]
Direction of dissection in the Callot's triangle[edit | edit source]
Hook dissection animation[edit | edit source]
Lateral traction to expose cystic duct[edit | edit source]
Cystic duct anamolies[edit | edit source]
Cystic Artery Anamolies[edit | edit source]
Recent Developments[edit | edit source]
During the last three decades there has been a dynamic shift in the field of surgery. Other specialties have also switched to Laparoscopy, having seen the transformation it has brought into the field. Today, more than 15 million LC's are performed around the world every year. However, a third of them are performed in the US alone. This is primarily due to the lack of knowledge and expertise to perform these surgeries in other developing countries, thereby creating a huge gap. With IntelliVision, our team has taken upon this challenge to bridge this gap.
Self Assessment[edit | edit source]

Quiz