
NREMT Skillset/Long Bone Splinting
| Part of | NREMT Skillset |
|---|---|
| Subskill of | Circulation |
| Subskills | Alertness and Orientation Assessment (A&O) Donning and Doffing PPE Scene Assessment Upon Arrival (PENMAN) Circulatory Motor Sensory Testing (CMS) |
| Equipment | EMS Jump Bag Prehospital PPE Splint Triangular Bandage |
| Acting roles | EMT emergency medical technician paramedic |
| Pathologies | fracture |
| Body systems | respiratory system nervous system |
| Body parts | Hands arm(s) leg(s) |
Long Bone Immobilization is included in this California-based EMT program as it is required for skills verification for California Registration.[1]
In pre-hospital trauma calls, EMTs are often called upon to provide immobilization of limb and joint fractures to both protect the patient's limb from further harm, and to increase their comfort during transport. After you have performed your initial trauma assessment, and addressed any immediate threats to life, all fractures, dislocations and sprains should be splinted prior to moving the patient. These are essential skills for EMTs, as extremity fractures that impair circulation or nerve function in distal tissues are urgent conditions that require careful assessment, prompt transport and continuous reassessment to preserve function.
All splinting should be performed with patient comfort and the protection of circulatory and nervous function in mind.
Upper Extremity
[edit | edit source]Wrist, Radial, Ulnar, and Humeral Fractures
[edit | edit source]- Remove clothing from the area of fracture up past the proximal joint above the fracture.
- Manually stabilize the fracture by holding the area above and below the injury site (have a partner maintain this stabilization until splinting is complete)
- Assess Circulation, Motor, and Sensory (CMS) function in the hand of both the injured limb and in the opposite side uninjured limb for comparison.
- Control any bleeding and cover open wounds with a dry sterile dressing before splinting.
- For shaft fractures with significant deformity - especially in situations where the limb has impaired circulation, use gentle manual traction to align the limb before splinting. Do not attempt to manually replace protruding bones into open fractures, and if you encounter significant resistance to limb alignment, splint in the deformed position.
- Choose a splint. As an EMT you will likely have disposable cardboard splints available, but any lightweight rigid material of the right size may be used as an improvised splint. You will discover that there are many commercial splints utilized in EMS systems, ie, air splint, ladder splints, traction splints, Sam Splint, etc that have their specific pro's and con's in their use. The EMT should not use these devices unless they understand manufactures requirements first to avoid any undue harm to the patient's limb.
- For shaft fractures, choose a splint long enough to span the fracture and fully immobilize the joints above and below the injury site.
- Pad the splint to avoid pressure points, and to fill the voids between the limb and the rigid splint.
- Have the person holding manual stabilization assume holding the board against the arm.
- Place the patient's hand and fingers in a position of function with the hand/fingers in a gentle curve around a roll of gauze and the wrist in a neutral, un-flexed position. Incorporate the hand and fingers into the splint to prevent wrist movement.
- Secure the splint with cravats, tape, roller bandage or other material on hand wrapped circumferentially around the limb and the splint. Secure the limb to the splint both above and below the injury site leaving a window for checking the radial pulse. Do not secure directly over the site of injury.
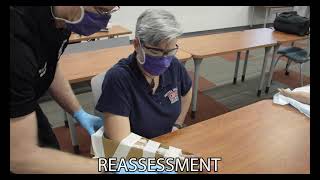
- Recheck CMS function and note in the patient record. If splinting has resulted in a significant decrease in circulatory function, the bandaging or cravat securing the splint to the limb may need to be loosened or reapplied.
- Consider applying an ice pack or two to minimize pain and swelling.
- Proceed to securing the patient to a backboard if required. If the patient will be walking, after splinting further stabilize the arm with a sling/swathe (see below).
- Transport
Clavicle Fractures
[edit | edit source]For a shoulder or proximal arm injuries, including clavicle and scapula fractures, the patient's torso plays an important role in stabilizing the injury above and below the injury site for transport. The limb is supported against pulling on the injured area by the use of a sling (supporting the weight of the limb using the opposite, uninjured shoulder), and secured against lateral movement using a swathe (a bandage that passes completely around the chest and secures the limb to the patient's side). Splinting material may be added to distribute the pressure of a swathe on the upper arm. The sling for clavicle fractures should never pass over the fracture site; use an alternate method! An example of this would be performing a normal application of a sling and swathe, but with the sling passing through the gap between the arm and body again to be secured behind the body; this is known as a figure-8 sling or modified sling and avoids placing pressure on the injured clavicle.
Sling and Swathe Application
[edit | edit source]- Manually stabilize the limb with respect to the patient's chest and shoulder to avoid moving the injury site.
- Assess Circulation, Motor, and Sensory (CMS) function in the hand/wrist of both the injured side and the opposite side for comparison.
- Place a Sling to support the injured side:
- Place one end of the material for the sling (such as a cravat or triangular bandage) at the patient's neck on the uninjured side. Pass the other end behind the patient's neck towards the injured shoulder, down around the forearm on the injured side passing the end back up between the forearm and the patient's chest, and then across the patient's chest back to the starting point on the uninjured side.
- Ensure that the point of the triangular bandage is oriented towards the patients elbow. Tie a knot in this corner, creating a pocket to "catch" the elbow, or use the "safety pin" by folding the tip of the triangular bandage over the elbow and pin the material to the sling.
- Form the sling by lifting the ends of cravat and cradling the arm until the patient feels that their arm is being supported.
- Tie the ends of the sling behind the neck at that height, and place padding for comfort. The knot should be positioned on the side of the patient's neck, avoiding having the knot put pressure on the patient's spine.
- Stabilize the arm to the torso with one or two swathes:
- Form a swathe by folding a cravat so that it is about 2-3" wide.
- For a humeral fracture, place a splint alongside the bone on the outside of the arm.
- Wrap the swathe around the injured arm's humerus (including the splint if using) and the torso and secure with a knot, leaving the other arm unrestrained.
- Wrap a second swathe around the torso and the forearm, and secure with a knot, holding the forearm to the chest wall. For splinted forearm injuries, this is the only swathe required.
- Pad under the knots and ensure that neither the swathes nor the knots pass over an injured area.
- Recheck CMS function and note in the patient record. If placing the sling or swathe has resulted in a significant decrease in circulatory function, the bandaging or cravat securing the limb to the torso may need to be loosened or reapplied.
Lower Extremity
[edit | edit source]Closed femur fractures are commonly secured via traction splint. In the event that your patient has an open femur fracture or cannot be placed in a traction splint for other reasons (distal fractures, no foot, etc.) the bone may be splinted using conventional techniques.
Femur, and Tibia/Fibula Fracture
[edit | edit source]- Remove clothing from the area of fracture up past the proximal joint above the fracture.
- Manually stabilize the fracture by holding the area above and below the injury site (have a partner maintain this stabilization until splinting is complete)
- Assess Circulation, Motor, and Sensory (CMS) function in the hand of both the injured limb and in the opposite side uninjured limb for comparison.
- Control any bleeding and cover open wounds with a dry sterile dressing before splinting.
- For shaft fractures with significant deformity - especially in situations where the limb has impaired circulation, use gentle manual traction to align the limb before splinting. Do not attempt to manually replace protruding bones into open fractures, and if you encounter significant resistance to limb alignment, splint in the deformed position.
- Choose a splint. As an EMT you will likely have disposable cardboard splints available, but any lightweight rigid material of the right size may be used as an improvised splint. You will discover that there are many commercial splints utilized in EMS systems, ie, air splint, ladder splints, traction splints, Sam Splint, etc that have their specific pro's and con's in their use. The EMT should not use these devices unless they understand manufactures requirements first to avoid any undue harm to the patient's limb.
- For shaft fractures, choose a splint long enough to span the fracture and fully immobilize the joints above and below the injury site.
- Pad the splint to avoid pressure points, and to fill the voids between the limb and the rigid splint.
- Have the person holding manual stabilization assume holding the board against the leg.
- Place the patient's foot in a position of function with the ankle in a neutral, un-flexed position. Incorporate the foot into the splint to prevent ankle movement.
- Secure the splint with cravats, tape, roller bandage or other material on hand wrapped circumferentially around the limb and the splint. Secure the limb to the splint both above and below the injury site leaving a window for checking the dorsal pedal or posterior tibial. Do not secure directly over the site of injury.
- Recheck CMS function and note in the patient record. If splinting has resulted in a significant decrease in circulatory function, the bandaging or cravat securing the splint to the limb may need to be loosened or reapplied.
- Consider applying an ice pack or two to minimize pain and swelling.
- Proceed to securing the patient to a backboard if required. If the patient will be walking, after splinting further stabilize the arm with a sling/swathe (see below).
- Transport
Documentation
[edit | edit source]Documentation of limb immobilization should be included in the Patient Care Report (PCR) in the form:
- "Patient assessment reveals obvious deformity to the left arm distal to the elbow after bicycle accident. Left arm immobilized with carboard splint and sling/swathe. Padded cold pack placed over injured area. CSM intact before and after application. Patient ambulated without issue to gurney and loaded into ambulance."
Self Assessment
[edit | edit source]- Practice with the Long Bone Immobilization skills lab
- Test your knowledge with this quiz.
Tips and Tricks
[edit | edit source]- Ice packs may be incorporated into the splint so long as they are: easily removable, and are covered to prevent thermal damage.
- Gauze wrap may be used as a securement device alternative to tape; just be sure the gauze is secure and will not slip. Certain carboard splints come with premade holes for this exact purpose.
Additional Resources
[edit | edit source]TBD - extra videos to watch, links to other pages for more reading
References
[edit | edit source]| Authors | Global Surgical Training Challenge |
|---|---|
| License | CC-BY-SA-4.0 |
| Cite as | GSTC, JHantke (2021–2025). "NREMT Skillset/Long Bone Splinting". Appropedia. Retrieved July 17, 2026. |