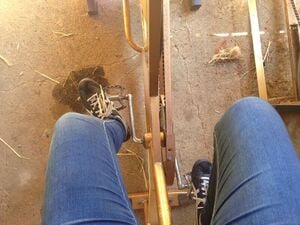
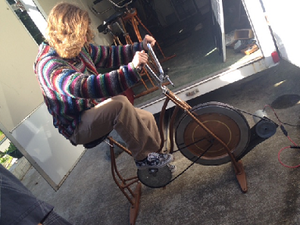
For the Spring 2015 Engineering 305 class at HSU, the bike powered tools team's goal is to make a bicycle powered system to provide an outlet primarily for the use of power tools in the Campus Center for Appropriate Technology (CCAT) tool shed. Currently, CCAT has to use a few extension cords that draw energy from the grid to run their power tools. The bicycle power system uses the energy provided by the rider to charge a battery to be used for power tools. Since a human can usually maintain around 100 Watts of power output for around an hour,[1] a battery is needed to be able to power tools such as a chop saw that needs between 1080-1200 W of power to run.[2] Ultimately, the stationary bike will turn a motor that will charge a battery that will have power tools plugged into an inverter. This bike powered tool station is an appropriate technology for generating electricity at CCAT. The project will help CCAT achieve net zero energy use by creating renewable energy on site for power tools.
Background[edit | edit source]
This is an appropriate technology project for Engineering 305 in the Spring Semester 2015. The project's purpose is to design and build a bicycle powered electricity generator to be used for power tools and other appliances at the Campus Center for Appropriate Technology (CCAT) at Cal Poly Humboldt in Arcata, California. The project is set to be completed by May 2015.
Problem statement[edit | edit source]
The objective of this project is to develop a way to power tools by using electricity that is generated by off-grid bicycle power. By using off-grid energy, this will be a sustainable way to generate electricity and help CCAT move towards reaching Net Zero.
Criteria[edit | edit source]
The following criteria will be used to measure the success of this project. These criteria listed below have been chosen based on the collaboration of a CCAT representative and the students of Engineering 305 who are working on the bike powered tools project. The scale (1-10) represents the importance level of meeting the constraint of each listed criteria.
| Criteria | Constraints | Weight (1-10) |
|---|---|---|
| Ease of Use | Must be easy to use with little direction | 10 |
| Safety | Must not be hazardous to users or environment | 10 |
| Mobility | Must be easy to move for one or two people | 9 |
| Life Span | Must be durable | 9 |
| Cost | Must be within $600-700 range | 8 |
| Educational Aspect | Must include labels for users (something to explain or highlight the benefit or creation of a bike powered tools) | 6 |
| Recycled Materials | The structure could include recycled materials, but batteries must be brand new | 5 |
| Aesthetics | Must look inviting and professional | 5 |
Literature Review[edit | edit source]
Below is research of the available literature that pertains to the CCAT bike powered tools project.
Appropriate Technology[edit | edit source]
Appropriate technology (AT) focuses on the design and practical implementation of inexpensive appliances, technologies, and tools of everyday life.[3] It is most definitely a relevant and cost-effective movement.
According to an energy fact sheet,[4] AT can be summed up as:
- Decentralized
- Technologically sophisticated, though simple in design
- Environmentally friendly
- Deals with social problems
In short, Appropedia defines Appropriate technology as technology that is designed to be "appropriate" to the context of its use.
AT is small when possible, requires fewer natural resources and produces less pollution in order to be sustainable.
Renewable Energy[edit | edit source]
There are many different kinds of renewable energies out there, among the most popular and well know are solar, wind, biomass, biogas, microhydro and nuclear energy. Yet human energy is overlooked. Human kinetic energy can be transfered in multiple ways, it can be used to pedal a bicycle to generate electricity.[5] According to AE News, "Some third world organizations are implementing human powered technologies to generate electricity to power computers and other appliances."[6] In developing countries, if human power was implemented where demands amounted to a average electrical power consumption below 20 Watts per capita it could impact human development directly.[7] Renweable energy is here to stay and it is important to know what energy source would be most appropriate for a location. For CCAT, it would be easy to implement bike powered tools and use human kinetic energy to make it all happen.
Human Power[edit | edit source]
A Human Powered Energy Generator (HPEG) designed to work with bicycles has been able to produce a maximum current and voltage of 1.4 amps and 215 volts respectively. The HPEG system can also produce 300 W with a rotation speed of 790 rpm.[8]
Bike Power[edit | edit source]
Examples:
- Pedal-A-Watt Bicycle is a stationary bike power generator that can be used to power lights and small appliances. Any bicycle can be used with the Pedal-a-Watt Stand as long as its in good condition and the wheel is 20 inches or greater.[9] According to AE News, "With the Pedal-A-Watt Stand it takes 15 seconds to drop your bike in and create anywhere from 100 to 300 watts depending on how strong you are."[10]
- UpCycle Eco-charger is a bicycle generator kit that can help turn almost any bike into a pedal generator.[11] A bike attaches right to the sprocket of the UpCycle Eco-Charger and supplies up to 36 Volts of DC electricity.[12]
Reducing Fossil Fuel Dependence[edit | edit source]
Using human power to pedal a bike to generate power gives you the ability to never be powerless again. To produce electricity without fossil fuels is a great way to respond to climate change. "The generation of electricity produces the largest portion (40%) of U.S. carbon dioxide emissions."[13] There are two ways to reduce the amount of fossil fuels we use: (1) encouraging conservation and efficiency and (2) switching to cleaner and renewable energy sources."[13]
Energy, Power and Work[edit | edit source]
ENERGY: "The capacity to do work."[14]
Units:
- Joules (J)
- Kilowatt hours (kWh)
POWER (P): "Work or energy per unit time."[14]
Units:
- Watts (W)
WORK:
"Work is the transfer of energy"[15]
"In physics we say that work is done on an object when you transfer energy to that object"[16]
Work equals the amount of force multiplied by the displacement or distance
Electricity[edit | edit source]
"The effect produced by moving charges give rise to what generally is called electricity."[14] Alternating Current (AC) electricity is the main form of electrical generation, transmission, and distribution. Usually generated at one voltage level, the AC voltage level can easily be changed using transformers.[17] "AC is produced by constantly changing the voltage from positive to negative to positive and so on."[14]AC power is used for running electric motors commonly found in household electronics. Along side AC current there is also DC current. "Direct current is a bit easier to understand than alternating current. Rather than oscillating back and forth, DC provides a constant voltage or current."[18]
Electrical Components[edit | edit source]
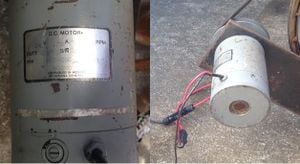
- Generator: "is a device that converts mechanical energy to electrical energy for use in an external circuit. The source of mechanical energy may vary widely from a hand crank to an internal combustion engine."[19]
- Inverter: "is an electronic device or circuitry that changes direct current (DC) to alternating current (AC).The input voltage, output voltage and frequency, and overall power handling depend on the design of the specific device or circuitry. The inverter does not produce any power; the power is provided by the DC source. A power inverter can be entirely electronic or may be a combination of mechanical effects (such as a rotary apparatus) and electronic circuitry."[20]
- Multimeter: a device used to measure AC or DC voltage and electrical resistance.[21]
- Charge Controller: "is an essential part of nearly all power systems that charge batteries, whether the power source is PV, wind, hydro, fuel, or utility grid. Its purpose is to keep your batteries properly fed and safe for the long term."[22]
For more on information on our specific charge controller click, MPPT Solar Charge Controller Model: CPT-LA05
Batteries[edit | edit source]
Battery University provides tutorials that evaluate the benefits and constraints of battery chemistries, give advise on choosing the best battery and recommends ways to extend battery life. At Battery University crucial battery knowledge is broken up into three parts to be easily studied. Part One: Basics You Should Know, focuses on addressing battery mechanics, chemistries, charging and discharging techniques. Part Two: The Battery and You, goes into detail about battery personalities and examines ways to get the most out of packs. Priming, storing and recycling is also looked at. Part Three: Batteries as Power Source, considers the battery in portable, stationary and electric powertrains applications. Lastly, there is an inspection on the kinetic power and expense of the battery in contrast to fossil fuel.
Safety[edit | edit source]
According to Power Generation Inc,[23] some easy ways to stay safe while working with electricity include:
- Not using equipment that has been damaged or improperly modified.
- When using cords they should be completely free of damage and/or deterioration.
- When using extension cords make sure to do so properly and temporarily.
- Not unplugging cords by pulling on a wire.
- Not wearing items such as jewelry and watches that might come in contact with exposed, energized parts.
- Always using equipment according to the manufacturer's specifications.
- Not operating electric tools by touching or standing on a wet surface.
According to NoOutage.com,[24] when working with batteries:
- Be sure to read the manufacturer's instructions before using any backup power source.
- Wear eye and clothing protection when working around a lead acid battery and avoid touching eyes.
If the battery acid makes contacts with your skin or clothing, wash immediately with soap and water. If acid gets into your eye, immediately flush eye with running cold water for at least 10 minutes and get medical attention a.s.a.p.
- NEVER smoke or allow a spark or flame near the battery.
- Be extremely careful to reduce the risk of dropping a metal tool onto a battery. It could spark or short circuit a battery or other electrical parts that may result in an explosion.
- Make sure vent caps on batteries are tight.
Also, power inverters contain capacitors and when they are first connected to the DC supply they will draw a high current to charge the capacitors. Yet, this is normal and will usually end in a spark where the last connection is made. Therefore, NoOutage.com recommends that this last connection be made AWAY from the battery. The following sequence accomplishes this:
- connect the inverter's negative terminal to the battery negative terminal
- connect a small gauge temporary insulated jumper wire at least several feet long to the battery positive terminal
- touch and hold this wire to the end of the inverter positive cable away from the vicinity of the battery (a spark is normal and indicates the capacitors are charged)
- remove the temporary wire and connect the positive cable from the inverter to the battery (no spark should occur if the capacitors are charged)
This sequence is NOT covered by inverter instruction manuals that NoOutage.com has checked to-date. NoOutage.com advises to be absolutely sure that you have properly identified the positive and negative terminals on the battery. Reversing polarities when connecting the cables may blow the inverter internal fuses and cause permanent damage!
Recycled Materials[edit | edit source]
This project will be assembled from mostly recycled parts and materials, most of which are already located at CCAT. However, other recycled supplies will be acquired at the following locations:
Construction[edit | edit source]
To achieve the goal of constructing a bike powered tools station at CCAT a timeline and budget were implemented to ensure the completion of all project activities and to stay within the budget range.
Timeline[edit | edit source]
In order to complete CCAT's bike powered tools project a timeline was created to meet the deadline completion day of May 8th, 2015.
| Date | Objective |
|---|---|
| March 1 | Complete budget and provide all necessary cost associated with project |
| March 6 | Complete research and update changes to be made to existing research |
| March 8 | Complete purchasing of materials and update budget accordingly |
| April 18 | Complete testing and begin building process to construct all project components |
| April 26 | Turn in document draft which will be this Appropedia page |
| April 28 | Finish all analysis necessary for project's success and Appropedia page |
| May 8 | Project wrap up and submission of final document |
Costs[edit | edit source]
The costs from Table 1 are associated with the materials needed to complete the CCAT bike powered tools project. Some materials have already been provided through CCAT free of charge. All other materials will be bought locally and online. Materials will be purchased based on quality but also pricing, as mentioned in the criteria the budget has a constraint of being within the range of 600-700 dollars. As a highly weighed criteria for the project the proposed budget will aim to stay within the client's desired range.
| Quantity | Materials | Source | Cost $/unit | Our Cost $ | Total Cost $ |
|---|---|---|---|---|---|
| 1 | Bike | CCAT donation | 150.00 | 0.00 | 150.00 |
| 1 | Multi-Meter | Lonny Grafman Donation | 8.00 | 0.00 | 8.00 |
| 2 | Motor Leads | Hardware Store | 3.00 | 6.00 | 6.00 |
| 1 | Diodes | Hardware Store | 4.00 | 4.00 | 4.00 |
| 4 | Battery Leads | Hardware Store | 8.00 | 32.00 | 32.00 |
| 1 | Battery | CCAT purchase | 100.00 | 0.00 | 100.00 |
| 1 | Inverter | Harbor Freight | 88.00 | 88.00 | 88.00 |
| 1 | Charge Controller | Online | 44.87 | 44.87 | 44.87 |
| 1 | Generator | CCAT donation | 100.00 | 0.00 | 100.00 |
| 1 | Circuit Breaker | Online | 28.00 | 28.00 | 28.00 |
| 2 | Wheels | Hardware Store | 15.00 | 30.00 | 30.00 |
| 1 | Wires, Connections, Fuses | Hardware Store | 50.00 | 50.00 | 50.00 |
| Materials Sub Total | 242.87 | 640.87 |
Design[edit | edit source]
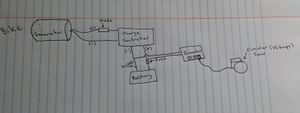
The design of the CCAT bike powered tools project requires multiple components. The design was constructed on paper first and used as the project's blueprint.
Components:
- Belt
- Chain
- Diode
- Battery Leads
- Battery (12 volt, 33 amp hour)
- Breaker (100 amp in line)
- Generator (24 volt,.75 amps, DC Motor)
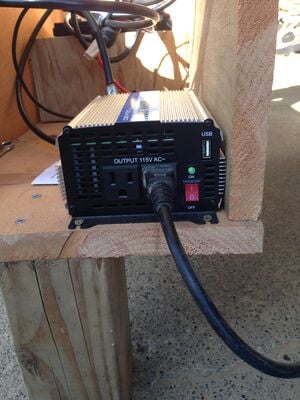
- Inverter (DC to AC inverter, 1200 Watt, 2000 Watt Peak)
- Charge Controller (100V peak)
- Stationary Bicycle
Mobile components[edit | edit source]

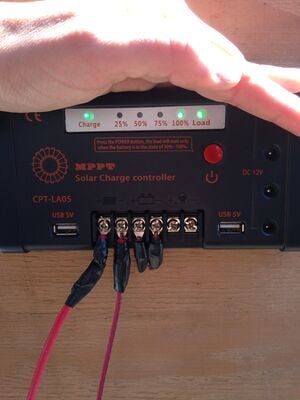
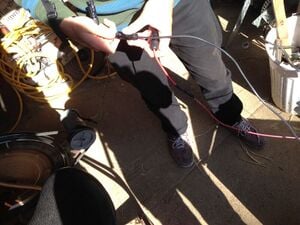
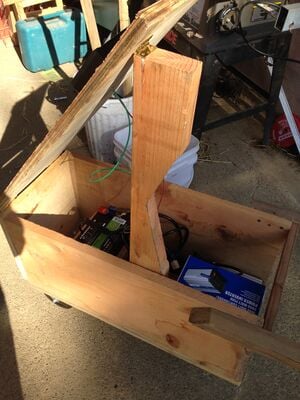
The construction of CCAT's bike powered tools project began with constructing a housing unit for the battery, inverter, and charge controller using mostly recycled materials. The only purchased materials were hinges and wheels. The battery and inverter went inside the unit for protection. The charge controller was screwed down onto the lid for easy display.
-
Fig 3a: Housing unit for CCAT's bike powered tools station
-
Fig 3b: CCAT's bike powered tools station's inverter
-
Fig 3c: CCAT'S bike powered tools project's charge controller
-
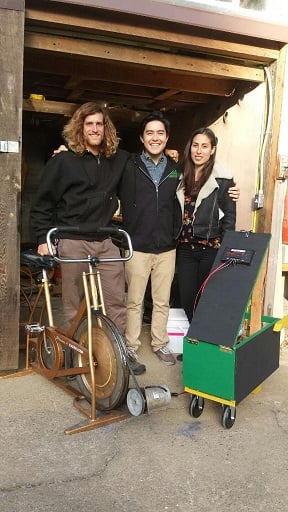
Fig 3d: Finished CCAT bike powered tools station.
Wiring[edit | edit source]
To complete the CCAT bike powered tools project, wiring must be done to connect all electrical components.
Determine size of wire needed based on amperage going through the system.
Cut wires to desired length.
Strip around 1 cm of wire coating.
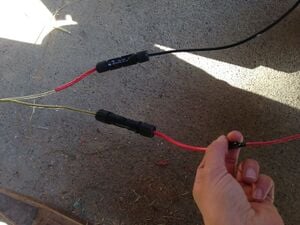
Place leads over exposed wire and securely crimp the lead to the wire.
Put wires from charge controller, battery, and inverter into an electrical nut, one for positive and one for negative
If wire is exposed, cover with electrical tape.
Attach wires to inverter.
Attach open wires to battery, negative first.
Operation[edit | edit source]
Maintenance[edit | edit source]
Before performing any maintenance
- Breaker is switched in the "off" position to cut off the current from the battery
- Bike and generator are disconnected from the charge controller
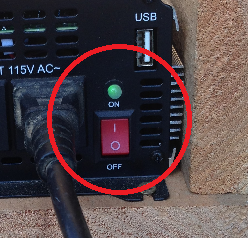
- Inverter is switched into the "off" position
Deep Cycle Battery Tips To Extend Life[25]
- Cycle the battery lightly (20% or less depth of discharge) the first few cycles. This helps complete the forming process of the plates (in case they are not completely finished forming).
- Always allow batteries to "cool off" after charging. The cooling time is very important because heat is generated during the recharge and discharge cycles. Without the cooling time the heat grows, accelerating grid corrosion, which is one of the major causes of battery failure.
- Opportunity charging (quick charging between uses) is detrimental to battery life. While it is true that the shallower the cycle, the more cycles the battery can deliver, opportunity charging is not good because the cooling time is eliminated, shortening life. (I.e. One charge cycle per day is preferable.
- Never charge a wet battery with a sealed (gel cell) battery charger.The wet battery needs the higher voltages to finish the charge and without it the batteries never come back to 100% and sulfation can occur.
- Never charge a sealed (gel cell) battery with a wet battery charger. The higher voltages (above 14.8 volts) that a wet battery charger generates causes excessive gassing too fast for the sealed battery to recombine, causing dry-out and battery failure.
- Never let the electrolyte level of a wet battery fall below the plates. Lack of maintaining the electrolyte in a wet battery causes damage (sulfation) to the exposed portion of the plate that reduces capacity.
- Never store a battery in a discharged state. The sulfate that forms during discharge should not be ignored for an extended time period because severe sulfation will take place sometimes, making the battery impossible to recharge fully.
- Always fill your serviceable, wet batteries with water (preferably distilled) after they have been charged). If the electrolyte level is at least above the plates, do not fill the battery until after recharge. The electrolyte expands during charging and if you fill them before recharging, the electrolyte will possibly bubble out of the battery. The plates must be covered with electrolyte for recharge but be careful not to overfill.
- Always keep the tops and terminals of batteries clean and free of corrosion. The film on top of the battery can cause the current to migrate between the posts, accelerating self-discharge.
- A fully charged battery will give you the best and longest service. Be sure the batteries are fully charged before testing or using your R..Vs. A fully charged battery, without a drain or load, after the surface charge has dissipated, is 12.63 volts for a 12 volt battery. Other states of charge are: 12.60 volts = 93% charged 12.55 volts = 89% charged 12.50 volts = 85% charged 12.45 volts = 80 % charged 12.18 volts = 50 % charged.
- An overly discharged battery may need to be cycled a few times before it can recover fully. If a battery begins to heat before coming up to a full state of charge, it may be necessary to discharge the battery and recharge it a few times. This charge and discharge cycle may help the current acceptance of the battery and facilitate its recovery to a usable condition.
- In situations where multiple batteries are connected in parallel, series or series/parallel, a replacement battery(s) should be of the same size, age and usage level as the companion batteries. Do not put a new battery in a pack that has 50 or more cycles. Either replace with all new or use a good used battery(s).
- Deepcycle batteries need to be equalized periodically. Equalizing is an extended, low current charge performed after the normal charge cycle. It helps keeps cells in balance. Actively used batteries should be equalized once per week. Manually timed chargers should have the charge time extended about 3 hours. Automatically controlled chargers should be unplugged and reconnected after completing a charge cycle.
- As batteries age, their maintenance requirements change. Generally their specific gravity is higher. Gassing voltage goes up. This means longer charging time and/or higher finish rate (higher amperage at the end of charge). Usually, older batteries need to be watered more often. And, their capacity decreases.
- Inactivity can be harmful to deep cycle batteries. If they sit for several months, a "boost" charge should be given; more frequently in warm climate (about once a month) than in cold (every 2-3 months). This is because batteries discharge faster at higher temperatures than at colder temperatures.
All Batteries should be checked at service intervals for:[26]
- Correct clamping and tightening of lugs
- Cleanliness of top, around lugs and connectors
Bicycle Tips
- DO NOT PEDAL TOO FIERCELY OR WITH TOO MUCH FORCE, the bicycle generator and system is designed to charge the battery with the most efficiency possible, so pedaling at a steady pace for a few minutes will charge the battery much faster than pedal with extreme force for a few seconds. Also, the stationary bike and components are somewhat old and pedaling extremely hard can damage the system and components.
- Bicycle Chain Cleaning:[27]
- Brush out the links with a firm brush (an old toothbrush also works).
- Relubricate the links from time to time with a chain lubricant.
- Wipe off excess lubricant with a clean, dry rag. Over-lubricating can actually attract new dirt.
MPPT Charge Controller
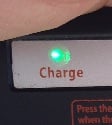
- Charging status indicator: When the connection of the bike generator is correct, and the bike generator is being pedaled, the charge indicator light will be Constant On
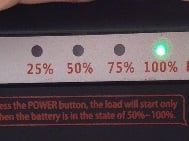
- Battery 25% indicator: Constant On:(When the voltage of battery is higher than 10.5V, lower than 12V) Flashing:(When the voltage of battery is lower than 10.5V)
- Battery 50% indicator: Constant On:(When the voltage of the battery is higher than 12V, lower than 12.6V)
- Battery 75% indicator: Constant On:(When the voltage of the battery is higher than 12.6V, lower than 13.8V)
- Battery 100% indicator: Constant On:(When the voltage is higher than 13.8V)
Schedule[edit | edit source]
This section is a how to on maintaining CCAT's Bike Powered Tools station.
- Daily
- Make sure to keep battery at least 75% charged at all times.
- Keep all wiring neat and away from water.
- Keep housing unit dry.
- Weekly
- Keep battery charged and housing unit neat.
- Monthly
- Make sure to keep housing unit clean.
- Check connections and wiring for corrosion.
- Yearly
- Make sure that the battery can still hold a charge.
- Every 5-10 years
- Replace battery as needed.
Instructions[edit | edit source]
This section includes step-by-step instruction on how to operate CCAT's bike powered tools station.
How to operate CCAT's bike powered tools station:
Conclusions[edit | edit source]
Testing results[edit | edit source]
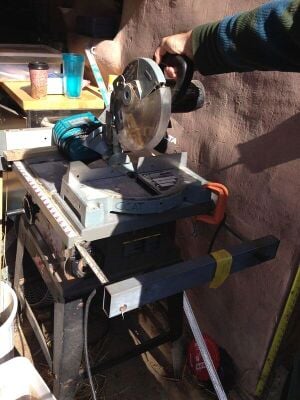
After fully charging the battery, a chop saw was used intermittently for around 45 minutes making around 30 cuts into wood. Afterwards, the charge controller read 50%. It took around 30 minutes of pedaling to get the charge controller back to reading 100%. After pedaling enough for the charge controller to read 75%, it takes an additional 15-20 minutes of pedaling to get the charge controller 100% light to stay on for around 5 seconds.
Discussion[edit | edit source]
Through the testing process, a few issues were discovered. The first is that our connections throughout our system are not very secured. We did not have any experience with soldering and did not have a soldering iron available so we connected most things with electrical tape and crimping. However, these connections are not very secure and thus, it was difficult to keep a steady flow to charge the battery. Second, the inverter tended to peak out if the circular saw was stuck in the wood while we were cutting. The circular saw can run constantly through small pieces of wood or if it is making clean cuts, however, when it is cutting through thick pieces and gets stuck it pulls too many amps and the inverter cuts out. So, a sharp blade is recommended and also, small chopping motions are recommended to prevent the blade from getting stuck in the wood and not cutting through it. Lastly, our charge controller is difficult to read and not accurate all of the time. The lights on the charge controller will read actual battery percentage once the saw is not running. While the saw is running, the charge controller may read 25%, but once the saw is switched off, the charge controller will read what the battery is actually at. This is true as well while charging the battery, the light may read 100% while pedaling, but once the pedaling has the stopped, the light may go down all the way to 50%. Thus, it is recommended that the system can be used until the 25% light is blinking and the system should not be put away until the 100% light is lit for at least 10 seconds after the pedaling has stopped.
Lessons learned[edit | edit source]
- More research needs to be conducted before we begin to build. If we had a better understanding of electricity it would have saved us a lot of trips to the hardware store for different materials and parts. We didn't realize that the when we converted from DC voltage to AC voltage the watts remained the same, thus, bringing our amps up to 90 - 100amps on the DC side. This changed our project dramatically and we had to upscale everything from the size of our wire, to the size of our inverter.
- Start to build earlier. Once we were actually at CCAT with our materials, we realized how much work we had in front of us and how much time it actually was going to take to get this stuff done, and it was overwhelming. Also, we spent a lot of our group meet up times talking hypothetically about how we were going to build the project and our end result was something completely different. If we had been at CCAT and building early, our ideas would have been more realistic and productive.
- Mistakes are part of the building process. As frustrating as it was, going back and forth to the hardware store and ordering new parts online after already paying for parts that didn't work was the all part oft he learning process. We had to make all the wrong purchases in order to know which purchases were correct and why we shouldn't make those same mistakes twice.
- Always ask the experts for help. Lonny Grafman was a huge help in guiding us in the right direction to find all the parts we needed. He also was the one to help us realize that we were gonna be pulling 90 - 100amps in our system, and if he hadn't had told us that, we probably would have melted our wiring or broke our inverter. We learned that the experts know best and their knowledge is very valuable.
- It is possible to make off-grid electricity devices at home. This project has inspired us to look into other forms of off-grid electricity and motivated us to want to build our own solar power or bike power devices.
Next steps include[edit | edit source]
- Getting a new diode
- Soldering the connections between wires together
- Adding a switch for increased safety
- Getting a larger inverter to handle more load
- Getting a larger battery to power the tools for a longer period of time
Troubleshooting[edit | edit source]
This is only how to troubleshoot basic operation. For complex issues, contact Alex Takahashi.
| Problem | Suggestion |
|---|---|
| Tool is not working or not turning on |
|
| The inverter is making a buzzing noise and tool is not working | * Turn the inverter off, you are using a device that is pulling too many amps, too much voltage, or a combination of the two |
| The tool works but only for a short period of time |
|
| You are pedaling, but the "Charge" light is not turning on |
|
References[edit | edit source]
- ↑ (http://www.motherearthnews.com/renewable-energy/pedal-powered-generators-zmaz08onzgoe.aspx)
- ↑ (http://www.donrowe.com/usage-chart-a/259.htm)
- ↑ Daniel M. Kammen - Michael R. Dove - Environment: Science and Policy for Sustainable Development Vol. 39, no. 6 (1997): 10-41
- ↑ http://lsa.colorado.edu/essence/texts/appropriate.htm
- ↑ http://www.alternative-energy-news.info/technology/human-powered/
- ↑ http://www.alternative-energy-news.info/technology/human-powered/
- ↑ Abigail R. Mechtenberg,Kendra Borchers,Emanuel Wokulira Miyingo,Farhan Hormasji,Amirtha Hariharan,John Vianney Makanda,Moses Kizza Musaazi "Human Power (HP) as a Viable Electricity Portfolio Option below 20W/Capita." Energy for Sustainable Development Vol. 16, no. 2 (2012): 125-45. Accessed February 1, 2015. http://www.sciencedirect.com/science/article/pii/S0973082611001116.
- ↑ Hsieh, Ming Chun, and David King Jair. 2014. Design and Realization of a 300 W Human Power Energy Generator System on a Bicycle. Energy and Environment Research. 4, no. 2: 73.
- ↑ http://www.econvergence.net/The-Pedal-A-Watt-Bicycle-Generator-Stand-s/1820.htm
- ↑ http://www.alternative-energy-news.info/pedal-a-watt-stationary-bicycle-generator/
- ↑ http://www.thegreenmicrogym.com/the-story-of-the-upcycle-eco-charger/
- ↑ http://www.thegreenmicrogym.com/the-story-of-the-upcycle-eco-charger/
- ↑ 13.0 13.1 Withgott, Jay, and Scott Brennan. "Global Climate Change." In Environment: The Science Behind the Stories, 504-539. 3rd ed. San Francisco: Pearson Benjamin Cummings, 2008.
- ↑ 14.0 14.1 14.2 14.3 Shipman, James, Jerry Wilson, and Aaron Todd. An Introduction to Physical Science. 12th ed. Boston: Houghton Mifflin Company, 2009.
- ↑ http://zonalandeducation.com/mstm/physics/mechanics/energy/work/work.html
- ↑ http://zonalandeducation.com/mstm/physics/mechanics/energy/work/work.html
- ↑ Lynn, Paul A.. Generating Electricity. Electricity from Wave and Tide. 125-183.
- ↑ https://learn.sparkfun.com/tutorials/alternating-current-ac-vs-direct-current-dc/direct-current-dc
- ↑ http://en.wikipedia.org/wiki/Electric_generator
- ↑ http://en.wikipedia.org/wiki/Power_inverter
- ↑ Brittian, L.W.. The Laws That Control and Explain Electricity. Audel Electrical Trades Pocket Manual. 1-9.
- ↑ http://www.wholesalesolar.com/solar-information/charge-controller-article
- ↑ http://powergenerationinc.com/electrical-safety-for-everyday-life/
- ↑ http://www.nooutage.com/Safety.htm
- ↑ http://www.batteriesnorthwest.com/batteryschool.cfm?TID=2
- ↑ Robertson, Stewart. Automotive Electrical Maintenance. London: E. Arnold, 1994.
- ↑ http://web.archive.org/web/20200924152949/https://www.rei.com/learn/expert-advice/bike-chain.html


