A heated print bed has multiple advantages. The biggest advantage of a heated print bed is the ability to print higher temperature materials and do so without warping. even many lower temperature materials will benefit from e heated print bed and see reduced warping. AS heated print bed also has the advantage of being able to use a surface like PEI (polyetherimide) to print onto. This material is great because when heated it will adhere very well to many of the commonly printed plastics (PLA, ABS, PET, Nylon). However when it is cooled down the parts can be easily broken free from the build plate. Also by using a material such as PEI to print onto there is no need to clean left over gluestick from the printed parts.
Metal Bandsaw (handheld jigsaw could also be used)
Drill Press (handheld drill could also be used)
#2 Screw Driver
File
Wire Stripper
Adjustable wrench (1/8" box end wrench can also be used, alternatively you can simply hand thread the nuts using the printed thumb wheel when necessary for additional torque)
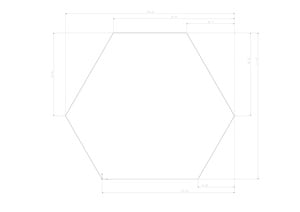
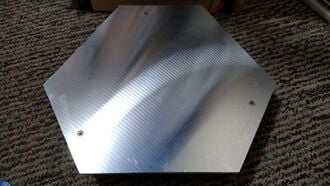
Cut aluminum plate to size.
Drill and countersink holes in aluminum plate.
Drill holes in printer base.
Install heater on aluminum plate
Install bolts and nuts on aluminum plate
Install magnets with sugru on bottom of aluminum plate
Install assembled aluminum plate on printer base.
Wire thermistor, SSR, and silicone heater
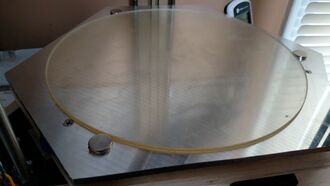
install PEI sheet onto glass
wrap magnets in silicone tape
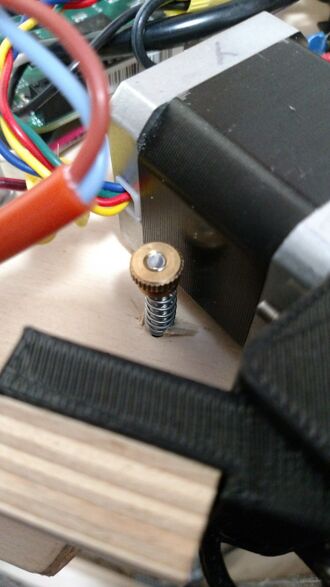
Level print bed using thumb wheels and a square
Add the heated bed in Franklin.
Set Temps to 2
Check the box labeled bed next to the new temp
Set thermistor values (for the thermistor built into the heater use R0 = 10, R1 = Infinity, Rc = 100, Tc = 25, Beta = 3950).
If you do not have the skills or tools necessary for cutting the aluminum plate to the hexagon shape you can order a 10" X 11.5" plate and adapt the design slightly
The Current version of Franklin doesn't seem to properly support heated bed G-Code. This means that you have to manually set the bed temperature. One potential workaround is to uncheck the box that says bed. You can then change your start g-code to set the temperature of the second extruder to the desired bed temperature.
The magnets wrapped in silicone don't seem to provide enough holding support to hold the glass plate perfectly in place one potential solution would be to use bigger magnets. Another workaround option is to simply hold the glass bed down with tape.
The temperature sensor built into heater mat does seem to sometimes produce some weird and jumpy results. One potential solution to this would be to drill a small hole into the bottom of the plate that doesn't go all the way through and insert a thermistor into this hole. This would likely produce better and more accurate results.
Putting the power supply underneath the heated bed in the same compartment as the rest of the electronics can cause it to get quite warm and in some cases cause thermal shutdown. My solution was to mount the power supply to the outside of the printer but still run the wires to the bottom compartment so that you only need one power cable connected.