| Line 466: | Line 466: | ||
{{How to | {{How to | ||
|title=How to | |title=How to Wire Batteries and Panels in Series or Parallel | ||
|File:Bpack bike trailer - demo 1.jpg | | |File:Bpack bike trailer - demo 1.jpg |Black wires are negative and red wires are positive |1 |Differentiate the wires between positive and negative | ||
|File:Aleiha dish.jpg | | |File:Aleiha dish.jpg |wires split in half, preparing to be connect with another wire |2 |For each wire, split the exposed parts in two | ||
||What wiring looks like for series|3|For series Connect the positive wire to the negative wire, making an X with the split pieces | |||
||Wires will form one single wire when finished|4|Cross the two wires and twist | |||
||Fold wires down|5|Once the wires are twisted, fold them down for the best possible connection | |||
||Multimeter on one positive and one negative|6|You can use a multimeter on the solo wires of each panel or batter to check for voltage and amps | |||
||Parallel wires, positive to positive and negative to negative|7|For parallel wiring, connect positive wires to positive wires and negative wires to negative wires | |||
||Multimeter directly touching the positive and negative wires|8|When using a multimeter, you can directly touch the positive and negative ends directly onto the twisted wires | |||
||Use alternative amp measurement for large amps|9|Due to amps of the panel being large, make sure you switch amp readings to the larger measurement | |||
}} | }} | ||
Revision as of 16:38, 27 June 2015

Abstract
Background
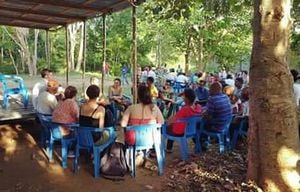
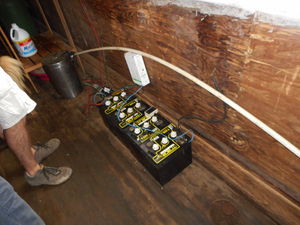
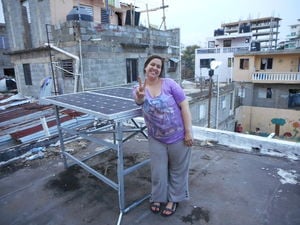
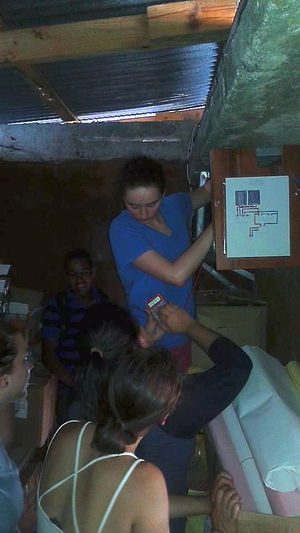
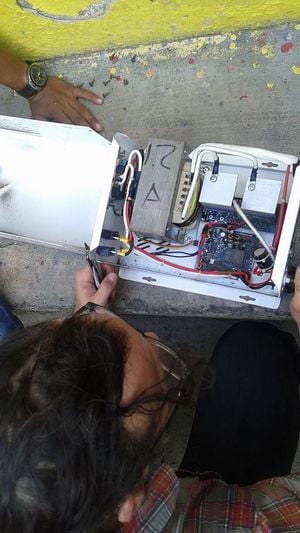
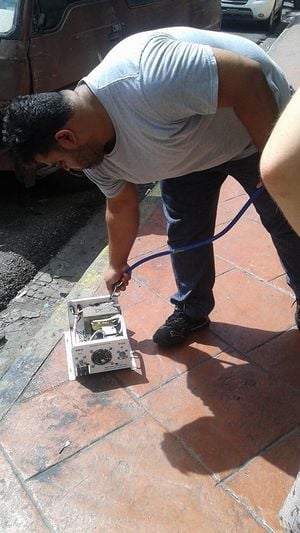
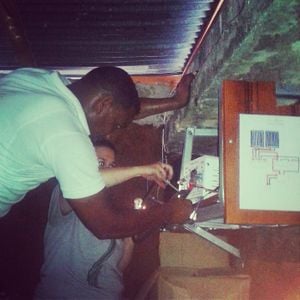
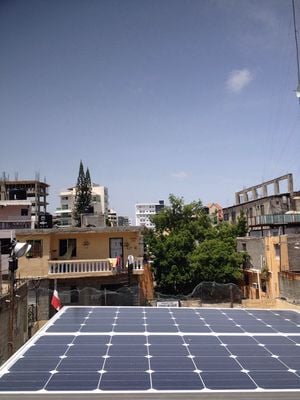
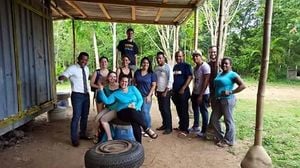
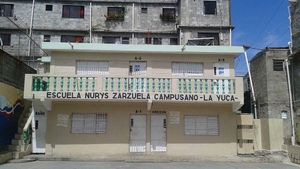
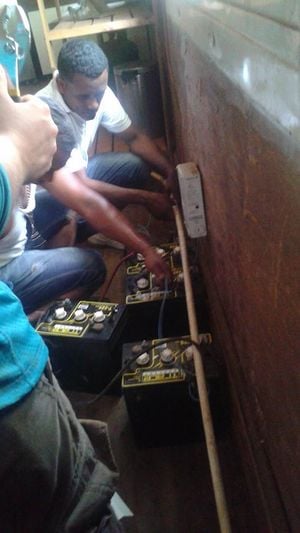
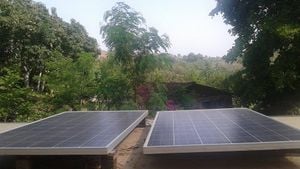
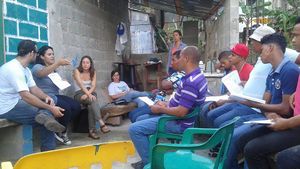
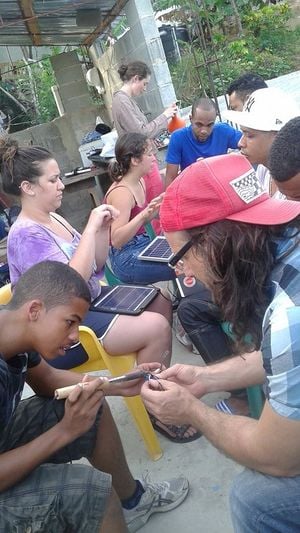
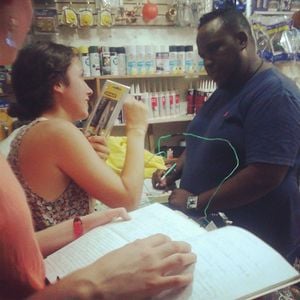
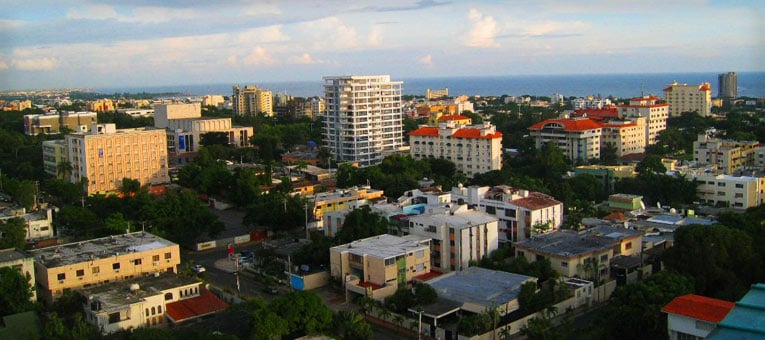
In the summer of 2015, Practivistas from Humboldt State University and Universidad Iberoamericana joined with three communities around Santo Domingo, Dominican Republic to improve previous Practivistas solar systems as well as build a new solar photovoltaic system. La Yuca, Ghetto2Garden, and Las Malvinas are communites that Practivistas have worked with in the past. In 2014, a solar system was installed in a small La Yuca school to power lights and fans. The goal of the 2015 team was to run tests to check the health of the battery, to fix any issues found with the system, and to attach a battery monitor. The same was needed for Ghetto2Garden, the team secured a solar array that was installed in 2014 and analyzed the functionality of the system. The final challenge was to teach community members in Las Malvinas how solar systems work, and by bringing everyone's knowledge together, construct a small solar system. The system was installed in a public location in Las Malvinas to power an LED light with help from the community. Amongst all these projects, it was a priority to educate and involve members of the communities so that each system can be maintained by the people who use them.
Problem statement
The objective of our project is to improve current solar panel systems in the communities of La Yuca and Ghetto2Garden. As well as hold classes in Las Malvinas to educate community members in order to collaboratively construct a new solar system in a publicly accessible location.
Criteria
After meeting with the community of Las Malvinas, Tomas of Ghetto2Garden, and the director of the school in La Yuca, our group thought these were the most important criteria of the three different solar projects.
| Criteria | Weight | Constraints |
|---|---|---|
| Durability | 9 | The outdoor equipment must be able to withstand 5 mph winds which is a common wind speed in Santo Domingo (view weather section). |
| Education | 7.5 | Through workshops, members of the community must be able to learn the concepts behind solar energy and maintain the systems, as well as learn how to build solar systems themselves. |
| Security | 7 | The solar systems must not be visually obvious to passersby. |
| Maintenance | 8 | The systems must be low maintenance so community members can keep them in working order without the need for solar experts. |
| Cost | 5 | It is necessary to spend all of the set budget. |
| Safety | 6 | The solar systems must not be able to be tinkered with by children in the area. |
| Effectiveness | 10 | The systems must supply energy at a sustainable rate, when turned on, so that the communities benefit from the energy resource. |
Literature Review
Climate
In Santo Domingo, Dominican Republic: "The average temperature for the year in Santo Domingo is 79.0°F (26.1°C). The warmest month, on average, is June with an average temperature of 81.0°F (27.2°C). The coolest month on average is January, with an average temperature of 76.0°F (24.4°C).The highest recorded temperature in Santo Domingo is 102.0°F (38.9°C), which was recorded in August. The lowest recorded temperature in Santo Domingo is 63.0°F (17.2°C), which was recorded in January."[1] "The shortest day is December 21 with 11:01 hours of daylight; the longest day is June 20 with 13:15 hours of daylight. The average high of direct sun is in March and is about 7:23 hours and the low is 5:40 hours in December.[2]The median cloud cover ranges from 53% (partly cloudy) to 81% (mostly cloudy). The sky is cloudiest on September 23 and clearest on February 9. The clearer part of the year begins around October 8. The cloudier part of the year begins around May 18."[3]
Solar Photovoltaic Systems
A Brief Introduction
Solar Energy
The sun is extremely powerful and solar power technology enables people to harness the Suns energy to use for their own commercial or independent need. This is possible by solar cells, referred to as photovoltaic cells, which make up the solar panels. Photovoltaic cells are made from a semiconducting material that captures the Suns energy converting the light into electricity. "Photovoltaics is the direct conversion of light into electricity at the atomic level. Some materials exhibit a property known as the photoelectric effect that causes them to absorb photons of light and release electrons. When these free electrons are captured, an electric current results that can be used as electricity." [4] A Solar Photovoltaic (PV) System converts energy from the sun into Direct Current (DC), which can be used directly by a load (appliances, lights etc.) or can be stored in batteries and then converted into Alternating Current (AC) by an inverter. Most home appliances run off of AC, although some appliances can be powered off of DC. Therefore, some systems do not require an inverter, it all depends on what the system will be powering.
Grid tied Vs. Off-Grid
Off-grid solar panel systems require batteries to store the energy not being used at that moment. Batteries make it possible for people who live off-grid to have electricity at night or on a cloudy day. The photovoltaic cells are just one component of the photovoltaic system that make up the weather sealed modules(panels). Solar power is great for small applications that use little or no land and result in minimal environmental impacts. When the PV system is grid-connected it allows the excess energy to flow into the grid. Most PV systems are connected to a grid, this allows extra generated electricity to go into a power plant and in most cases you can be paid to generate power for the energy companies. Off-grid systems however may be located in a remote area or are not connected to the main electrical grid. In this case, the system will cases have batteries in order to store the extra energy that is generated so it can be used when less sun is available. Off-grid and grid-tied systems have similar and varying components but it is crucial to have surge protectors and charge controllers no matter the system. [5]Most photovoltaic systems have a capacity of 5 kW or less which is enough to provide power to homes and small buildings. This means that by having solar panels it is possible to live sufficiently off grid providing enough energy to sustain a household unconnected to the utility electrical grid.[6]
Electrical Wiring
Electricity must flow through a closed circuit and ultimately be used by appliances or stored within the batteries. Installing solar panels implies that an electrical circuit will be created. There are two types of circuits: series and parallel. The batteries and solar panels will be connected in either series or parallel and sometimes both. Depending on how you wire your system, there will be a difference in voltage, current and resistance within the system. In order to choose the size and connection that best fits your energy needs, calculations must take place to design the system you are building.[7]
All Components Comprising a Photovoltaic System
• "Solar photovoltaic modules
• Array mounting racks
• Grounding equipment
• Combiner box
• Surge protection (often part of the combiner box)
• Inverter
• Meters – system meter and kilowatt-hour meter
• Disconnects:
- Array DC disconnect
- Inverter DC disconnect
- Inverter AC disconnect
- Exterior AC disconnect
If the system includes batteries, it will also require:
• Battery bank with cabling and housing structure
• Charge controller
• Battery disconnect” [8]
Solar System Terms to Know
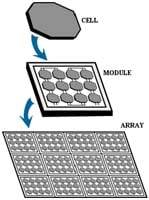
Cell : A single photo-voltaic
Panel/ Module: A bunch of cells together
Array: Panels that are connected together
Charge Controller: regulates batter voltage and charging rate
Inverter: changes direct current to alternating current
Load: Any electrical component that draws power from a system
Circuit breakers/fuses: Over current protectors
Disconnects: allow the system to be turned off for maintenance and safety
Connecting a System
Site Assessment
There are many factors that must be taken into consideration for a successful solar photovoltaic system for it to reach peak efficiency. These factors include climate and location on earth as well as physical placement, position and orientation of the solar panels. Harnessing the maximum direct sunlight available at a site is the goal of every solar panel installation. Solar energy is most successful in regions where there is an abundance of sunshine. For a successful system, it is ideal to install the panels in a location that receives a great amount of sun from times 8am-5pm.[10] It is especially best where there is less deviation and refraction of the solar rays, or in any region where radiation levels exceed 1,700 Kwh/m^2 yr. At the location of PV system installation the physical orientation, placement and position of the solar panels are adjusted to harness the most sunlight that area can receive. For example, in regions close to the equator a low tilt is recommend to maximize solar gain.[11]
[12]
In order to correctly size your PV system you must calculate the intended loads that the system will be required to power, the design current, and calculate the system array size. You must also calculate the system battery size, the DC and AC wire size, as well as determine if lightning protection, and ground fault protection is needed.
Efficiency of System
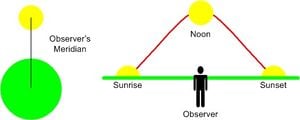
Knowing when solar noon occurs is helpful in finding the peak sun hours for the solar system. [13] If the time at sunset if subtracted form the time at sunrise and divided by two, solar noon is calculated. The power output per unit area determines the panel efficiency. Calculating the efficiency of the solar photovoltaic cells is necessary when determining what cell efficiency and quantity is best in meeting one's needs. Space constraints require individuals to calculate the efficiency necessary per cell. The equation is shown below:
maximum efficiency = maximum power output / incident radiation flux*area of collector [14]
The amount of sunlight that hits the earth's surface in W/m^2 is the incident radiation flux. It depends on one's geographical location, however, most often in standard test conditions the incident radiation flux is 1000 W/m^2.[14] It is important to include the area of the frames in one's calculations, although they are not necessary part of the panel, they will still take up roof space. If one has ample amount of roof space to install solar panels, she may not need to calculate the efficiency needed because using many low-cost less efficient panels would be a viable option. Using reflective materials, such as mirrors to concentrate light on efficeint photovoltaic cells is known as Concentrating Photovoltaics (CPV). Doing this will increase the overall effectiveness of the system.[15]
Wiring the Components
It is crucial to have good battery care in a PV system as there is a high risk of over charging your batteries due to high voltage at peak sun hours. With a charge controller you are able to limit this risk within the system and protect the battery [16] It is also crucial to have cabling in order to connect he solar panel system to the household power line and direct alternating and direct currents. "A series of cabling infrastructure is necessary to actually bring the converted power into homes and business. In essence, the solar cable is an wire that interconnects all parts of the solar PV system. Cabling networks can vary, but typically are designed to be UV and weather resistant and capable of dealing with extreme fluctuations in temperature (both heat and cold), since one common factor for these system is that they're used outdoors. The most common type of cabling used is a DC voltage of 1.8 kV and a temperature range from - 40 degrees Celsius to 90 degrees Celsius. Another important feature of the solar cable is that it must be insulated well enough to withstand the thermal and mechanical loads. To achieve this, most solar cables use plastic that are cross-linked using electron beams. This protects against the weather elements, including the sun's radiation and humidity that would otherwise erode the system over time." [17]
Key Components of a System
Solar Panel (Module)
There are a variety of solar panel designs that result in differing efficiency and cost. The most practical and relevant panels on the market are crystalline silicon based. Crystalline silicone is the most expensive, but the most efficient available. There are two types of crystialine silicon, for example, monocrystalline and polycrystalline but there is also amorphous-silicon which deviates from crystalline. Of the three varieties, mono crystalline is the most efficient but the most expensive upfront. Even though it is the most expensive, it is the most common because of its has an average efficiency of 15-18% and reaching as high as 20%[18]. It is also the most popular in the market comprising of 80% of the photovoltaic systems installed. Polycrystalline is cheaper and is meant to increase production at a cheaper cost. This results in a cheaper solar panel at a cost of a less efficient system. The average efficiency of polycrystalline is reduced to a peak of 15%.[19] Diverging from the crystalline silicon technology, amorphous silicon cells were developed and have an even lower efficiency of 8%.[20]
Deep Cycle Batteries
Batteries are needed to store the solar energy generated; so that loads requiring energy when sunlight is unavailable can be used. The electrical energy produced by the PV panels is converted into chemical energy through the battery cells. The chemical energy is then changed back into electrical energy as needed. [21] When a lead-acid battery is not completely charged, nor completely discharged for as little as three days, the battery's carrying capacity begins to diminish. This is due to the soft lead sulfate material, that forms on the battery plates during discharge, not being able to recombine with the electrolyte solution. The sulfate crystallizes on the plates rather than being lifted from the plates during the recharging process. The insulating barrier continues to become thicker and thinker until the battery cannot accept a charge at all. The sulfation on the plates created by lack of recharging is destructive to the battery.[22] The lead acid deep cycle batteries used for solar systems should last from 4-8 years with proper maintenance. [23] Lead acid batteries are one of the first rechargable batteries. The term secondary battery can be used to refer to a rechargable battery. A lead acid battery requires ventilation and must be kept upright if it is the unsealed kind. Voltage spikes and water in the battery seperates into oxygen and hydrogen if the battery is overcharged. If this occurs, there is a chance for a small explosion. [24] A hydrometer is used to measure the quantity of sulfuric acid contained in the electrolyte fulid of the lead acid battery. The optimum sulfuric acid to water ratio needed in the electrolyte fluid is 7 parts sulfuric acid and 13 parts water. If the sulfuric acid reading is low, the sulfur is resting on the battery plates. As the battery is recharged, the sulfur will recombine into the electrolyte. [25].
Inverter
The inverter is a very crucial component of the system because it converts the Direct Current(DC) received by the solar panels to Alternating current(AC) which feeds into the electrical grid. Inverters come in different sizes to accommodate for varying systems. At a minimum the size of your inverter must be able to supply the minimum surge and usual power. Surge power is the maximum power the inverter can supply but only for a short period of time. The usual power is the average power the inverter should sustain on a daily basis.[26] For an off grid system, the inverter will be connected to batteries so the size of the inverter must be able to support the voltage(V). If a system is composed of two batters that are 6V connected in series,then the inverter should be able to support 12V DC converting to 120V AC. The same goes for a system with four 6V batteries in series, the inverter should be the size of 24V, feeding 240V AC.[27] There are two different kinds of common investors a modified sine wave and a pure sine wave. The sine wave is the current that feeds into the electrical utility unit, so you want it to produce the clearest power. Modified sine wave inverters are less expensive but have a decrease in efficiency by 20%.[28] The pure sine wave inverter produces an almost perfect sine wave almost equivalent to grid power making it very compatable with AC electronic systems. Although, it is more complex and costs more per unit power.
Charge Controller
The purpose of a charge controller is to protect the battery from overcharging and discharging completely. The component intersects the wire connection from the modules to the batteries allowing it monitor constantly the current into the batteries. It also can detect when no energy is coming into the system to prevent a reverse current when sun is not available. This regulation helps extend the batteries life and prevents the battery from being damaged. There are two types of monitors, a MPPT and PWM that allow the input of current in different manors. Maximum power point tracking (MPPT) is the more expensive monitor that is a newer technology but is the most expensive. It will give your system 30% more power and is mostly used for larger systems. Pulse width modulation (PWM) are less expensive and work by sending spikes of charge into the batteries. It is an older technology but are still very efficient and very widely used.[29]
Battery Monitor
This component is connected to the battery but is not an essential part to the entire PV system. Although it doesn't provide or enable the power within the system, it does help a person understand the battery and the functioning of a battery. Battery monitors vary greatly and depending on the budget, a battery monitor can provide the current state of battery's voltage, current, battery capacity, and more. A monitor can even have alarms to signal an alert when the battery exceeds a desired depth of discharge. Battery monitors are very helpful because they translate the state of the battery into a language that a person can easily understand. If one does not own this device, the only way to proceed with maintanence checks is by using a voltage meter which to an untrained eye makes a simple maintanence check more complicated.[30]
Circuit Breakers
In common Photovoltaic systems, breakers are installed for the modules and the batteries. Meaning, there is a breaker in the wire connection between the modules and the Charge controller and between the charge controller and the batteries. These breakers can very in amps and by a simple switch can either stop the current to these components or enable it. It is very handy to install these breakers so if any maintenance on the system is needed you can shut off the current with a simple switch. By having two separate breakers for the batteries and the solar panels it allows one to work on different areas of the system that can no require no incoming solar energy but still require the batteries for testing or vice versa. The size of breakers are only sold in standard sizes, so you must round up the total ampacity of the system. If budget is of concern, this is not an essential component but it will make the maintanence process much easier.[31]
Ground Fault Circuit Interrupter (GFCI)
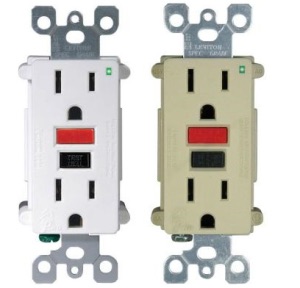
A GFCI protects individuals from being shocked by malfunctioning electrical devices. A person who is using such a device and is also touching a wet, conductive surface becomes the pathway from the device to the ground. The electrical current going through the body can be harmful and even deadly. GFCIs can be installed in electrical outlets or extension cord circuits.[32]
Lightning Arrestor
A lightning arrestor (or surge arrestor) is an important factor if you are in an area that gets frequent storms. Lightning can overcharge your system thus damaging your equipment. "Arrestors are typically installed on transmission lines and they divert lightning and utility switching surges to ground, clamping (or limiting) the voltage of the surge." [33]
Basic Tools Needed for Installation
"Angle finder
Torpedo level
Fish tape
Chalk line
Cordless drill (14.4V or greater), multiple batteries
Unibit and multiple drill bits (wood, metal, masonry)
Hole saw
Hole punch
Torque wrench with deep sockets
Nut drivers (most common PV sizes are 7/16”, ½”, 9/16”)
Wire strippers
Crimpers
Needle-nose pliers
Lineman's pliers
Slip-joint pliers
Small cable cutters
Large cable cutters
AC/DC multimeter
Hacksaw
Tape measure
Blanket, cardboard or black plastic to keep modules from going “live” during installation
Heavy duty extension cords
Caulking gun
Fuse Pullers”[34]
Education
Lesson plans are helpful when informing children and adults in the community about solar energy. Teaching the community about the basics on how solar panels work and the importance of sustainability and renewable energy aids their understanding about the solar system installed in their community. [35] By bringing in solar-powered lights which can be disassembled, students will be able to gain hands-on experience. Incorporating tactile learning as well as visual and auditory learning is key to making sure the students understand the concepts being presented. [36]The class's goal should be to make sure the students know how the electricity is being generated. It is also intended that the students leave with knowledge on what renewable energy is and why it is needed. [37] For more advanced classes, the objective is to have community members learn the calculations needed to size a solar array and other calculations to further their knowledge of solar technology. With this knowledge combined with their previous knowledge of wiring, they will be able to install a system themselves.
Past Projects
Ghetto2Garden 2012,2014
Ghetto2Garden (G2G) is a shelter for dogs and cats have been abandoned and severley injured. In 2013, a solar panel system was installed to sustain a vaccine refrigerator. This sstem was very sucessful and stored medicine for the animals; it was called the Solar Lighting Cube. [38] In 2014 Practivistas Dominicana students installed a US legal system at Ghetto2Garden (G2G).The shelter is a safe haven for animals that were on the street. There is a housing unit on the property that needed electrical power for lighting and a refrigerator. The most important aspect of the system for the team was functionality, durability, safety, security and easy maintenance. The system was set up and running at the end of the program, summer 2014. Some of the lessons that the team learned during the process of this project were to contact help as soon as possible, always over-estimate the load, air flow is necessary for the panels, and a bigger gauge is needed when using DC compared to AC. The next steps for this project that were sited were to change the battery monitor to monitor all batteries instead of just one and to make the panels/system more secure. Also labels should be added to help with future maintenance. [39]
La Yuca Project 2014
Practivistas Dominicana installed a solar power energy system in La Yuca, a community in Santo Domingo. Its goal was to design and implement an efficient source of energy for two school rooms where there are frequent power outages."Upon completion of the installation of the solar power system in La Yuca, the team was successfully able to verify the working condition of the system."[40] To improve this project, future practivistas can add a battery monitor that will show the battery voltage so they can be taken care of appropriately extending the battery life. Also to establish seemingly permanent system, the wires are needing be secured from the control panel to the control box. The system was a success and was fully functioning providing energy to the two schoolrooms.
Construction
Very complete description of how final project is made. This large section should have lots of pictures. Please consider making a timeline in addition or instead. Use the Help:Images#Galleries and probably Template:How_to (e.g. Barrel O' Fun Worm Bin Instructions).
Timeline
The following table outlines the tasks completed by the solar 2015 team.
Budget
| Materials | Unit Price $(DOP) | Quantity | Cost $(DOP) | Cost $(USD) |
|---|---|---|---|---|
| Solar Panel 250W / 24V | 90,000 | 1 | 90,000 | 2,000 |
| Feet of cable to Panel | 35.00 | 15 | 525.00 | 11.67 |
| Connector Panel | 500 | 1 | 500 | 11.11 |
| Nationwild Batteries 115AMP / 12V | 9,500 | 2 | 19,000 | 422.22 |
| Jumper 6" | 70 | 1 | 70 | 1.55 |
| Jumper 36" | 600 | 2 | 1,200 | 26.67 |
| DC 30 Breaker | 625 | 1 | 625 | 13.89 |
| DC 63 Breaker | 625 | 1 | 625 | 13.89 |
| Electrical Wire | 300 | 7 | 2,100 | 47.72 |
| AC Breakers | 150.00 | 6 | 900 | 20.45 |
| Fix La Yuca Inverter | N/A | 1 | 1,000 | 22.20 |
| Fix Ghetto2Garden Inverter | N/A | 1 | 7,000 | 155.66 |
| Barello Wire #18 | 190 | 1 | 190 | 4.22 |
| Soldering Iron | 236 | 2 | 472 | 10.48 |
| Solder | 637.20 | 1 | 637.20 | 14.16 |
| Soldering Paste | 94.40 | 1 | 94.40 | 2.10 |
| Electrical tape | 60 | 1 | 60 | 1.33 |
| Heat Shrink | N/A | 1 | 50.00 | 1.11 |
| Zip Ties | N/A | 1 | 20.00 | 0.45 |
| Printing Expenses | N/A | N/A | 1,085 | 24.11 |
| Plywood | 980 | 1 | 980 | 21.78 |
| Screws | 1.20 | 24 | 28.80 | 0.64 |
| Nails | N/A | 12 | 5.00 | 0.11 |
| 20" Enlate | 215 | 2 | 430 | 9.56 |
| Total Cost | $127,097.00 | $2,836.68 | ||
Operation
This is how to operate. It should have a brief introduction and very useful images with labels. Also it may work best for your project to use the step by step how to template {{How to}}. See #Troubleshooting for an example.
Maintenance/ Testing
Introduce this maintenance section.
Using this battery test, one will be able to learn how many hours certain loads can be used without sun. This test will also provide information about how long it takes the battery to reach full charge on a clear day.
- On a clear day, turn off inverter and turn off all loads in order to charge the battery 100%.
- Turn the breaker for the solar panel and the breaker for the battery on
- To check that the battery has reached its maximum capacity, consult the charge controller. Some charge controllers will blink green lights when the battery is fully charged. Take a voltage reading with a multimeter that is set to 20 Direct Current Voltage (DCV). Consult the table on this site to determine if the battery is fully charged based from the DCV reading http://www.solar-electric.com/deep-cycle-battery-faq.html Proceed with steps once the battery is 100% charged.
- Turn on all loads that would replicate the amount of power needed from the solar system by the user normally.
- Turn off both breakers: the one for the panel and the one for the battery.
- Finally, have one person turn on the inverter while another person starts a 10 minute timer.
- Every 10 minutes check the DCV of the battery and record findings.
- The battery should never be discharged more than 20%, reference the table from the link in step three to calculate what the DCV should be when the battery has reached an 80% depth of discharge (DOD).
- Once the battery has read the desired DOD, turn off all loads and the inverter, but turn on the breaker for the battery.
- To begin the recharging process, have one person turn on the breaker for the solar panel, while another person starts a 10 minute timer.
- Monitor the DCV every 10 minutes until the battery is fully charged.
Schedule
This is when to maintain what.
- Daily
- A daily task
- A daily task
- Weekly
- a weekly task
- a weekly task
- Monthly
- a monthly task
- a monthly task
- Yearly
- a yearly task
- a yearly task
- Every __ years
- task
- task
Instructions
This is how to use and maintain it. The step by step how to template {{How to}} is most likely best for this part.
Conclusion
Testing results
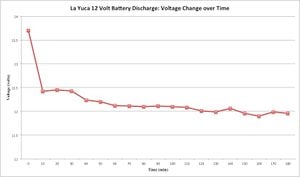
Discharging the La Yuca batteries
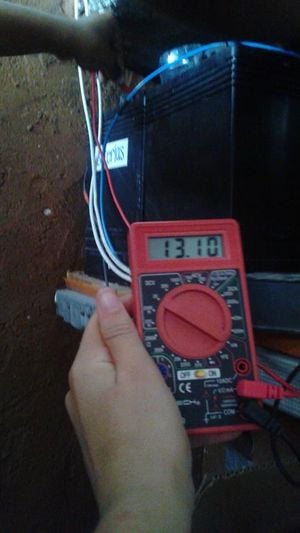
The two 6V batteries initially read 13.7V when the system was completely charged. After three hours with the loads from the table below on, the voltage of the batteries read 11.96V. According to the Depth of Discharge table from http://www.solar-electric.com/deep-cycle-battery-faq.html, the batteries were discharged 60%. This means that the La Yuca school can run their loads for three hours on a cloudy day and still have some energy left in their batteries.
| Load | Quantity | Power (Watts) |
|---|---|---|
| Fan | 2 | 55 |
| Incandescent Light Bulb | 1 | 100 |
| Compact Florescent Light Bulb | 1 | 18 |
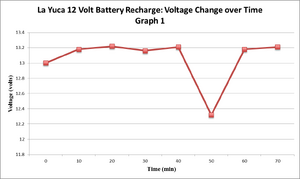
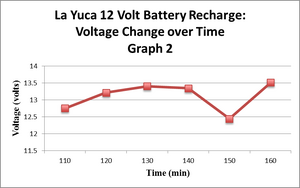
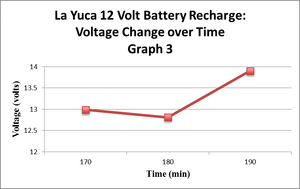
Recharging the La Yuca Batteries
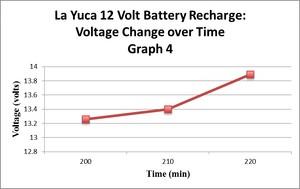
In order to evaluate the health of the batteries, the amount of hours it should take to recharge the 12V system was calculated and compared with the amount of time it took to recharge the batteries in actuality. Below is the equation used to determine how long the batteries should take to discharge:
[Total Amperage*Depth of Discharge*1.1(Derate Factor)*12V]
/ Solar Panel Wattage
The series of four graphs to the right represent the recharging process. The seperation of data by graph clearly shows at what time and for how long the team turned off the solar panel breaker in order for the true voltage of the battery to be determined. Reading the graphs consecutevly, one can view the voltage drop after each time the solar panel breaker was turned off and an accurate battery voltage could be recorded.
Discussion
Discuss the testing results.
Lessons learned
1. It is very important to establish a leader in the beginning and express what needs to be done and accomplished daily so everyone can be as efficient as possible and do what is best for the team.
2. We should have known exactly what steps needed to be made before we went to La Yuca to test the batteries as we found out you can damage the batteries by discharging them too low. We would have been more time efficient if we did not have to keep going out to the site without the knowledge needed to successfully complete the task we set out to do.
3. It is crucial to be able to adapt to the information given to us as we need to best prepare for the upcoming deadlines we need to accomplish. Overall, it is best to use time wisely and communicate with others as what is needed to be done.
4. The community members have been extremely helpful and are more knowledgeable on the subject than us and we are grateful they are willing to share their time and know-how on any subject with us. It is vital to learn useful phrases in Spanish to express your gratitude for them and communicate what needs to be done so we can complete our project.
Next steps
Discuss any next steps for the project as it goes on into the future.
Troubleshooting
This is only how to troubleshoot basic operation. For complex issues, the solution might just say contact ________. It should be a table in this format:
| Problem | Suggestion |
|---|---|
| Example issue | Example solution or suggestion |
| Does not turn on | Make sure it is plugged in |
| Another issue | Et cetera |
Team
Grading criteria for the remaining sections:
- Grammar and spelling +1
- Formatting +1
- Depth, breadth and accuracy of content +7
- Project documentation's potential for impact (e.g. reproduction) +1
References
Make sure to include other relevant categories at the bottom, e.g. [[Category:Rainater]], [[Category:Upcycling]], etc.
- ↑ http://www.weatherbase.com/weather/weather-summary.php3?s=68487&cityname=Santo+Domingo%2C+Distrito+Nacional%2C+Dominican+Republic&units
- ↑ http://www.santo-domingo.climatemps.com/sunlight.php]
- ↑ https://weatherspark.com/averages/32486/Santo-Domingo-Dominican-Republic
- ↑ http://science.nasa.gov/science-news/science-at-nasa/2002/solarcells/
- ↑ http://www.blm.gov/pgdata/etc/medialib/blm/wo/Communications_Directorate/public_affairs.Par.64859.File.dat/Attachment%201%20Solar%20Energy%20Systems%20121806.pdf
- ↑ https://www1.eere.energy.gov/solar/pdfs/43844.pdf
- ↑ http://unesdoc.unesco.org/images/0013/001332/133249e.pdf
- ↑ http://www.energy.wsu.edu/documents/solarpvforbuildersoct2009.pdf
- ↑ http://www.energyquest.ca.gov/story/chapter15.html
- ↑ http://www.sciencedirect.com.ezproxy.humboldt.edu/science/article/pii/S1364032110002455
- ↑ http://www.sciencedirect.com.ezproxy.humboldt.edu/science/article/pii/S1364032110002455
- ↑ http://www.powerfromthesun.net/Book/chapter01/chapter01.html
- ↑ Brighton Webs: Statistics for Energy and the Environment. (2011) [Online] Available http://www.brighton-webs.co.uk/energy/solar_earth_sun.aspxl, June 5, 2015.
- ↑ 14.0 14.1 Stell, J (2002). "PV Power." Oil & Gas Journal [H.W. Wilson - AST], 100(30), 15. [Online] Available http://www.pvpower.com/assets/Measuring-PV-Efficiency-Solar-Panels.pdf, June 5, 2015.
- ↑ Kalogirou, S. (2014). Solar Energy Engineering: Processes and Systems. Academic Press, Waltham, Mass.
- ↑ http://users.humboldt.edu/arne/AJTips_No8_Solarnet_v7n1_2005.pdf
- ↑ http://www.altenergy.org/renewables/solar/how-solar-really-works.html
- ↑ http://search.proquest.com.ezproxy.humboldt.edu/docview/1539810032?pq-origsite=summon
- ↑ http://www.sciencedirect.com.ezproxy.humboldt.edu/science/article/pii/S1364032111000050
- ↑ https://www1.eere.energy.gov/solar/pdfs/43844.pdf
- ↑ Northern Arizona Wind and Sun: Deep-Cycle Battery FAQ. (2015) [Online] Available http://www.alternative-energy-tutorials.com/solar-power/deep-cycle-batteries.html, June 11, 2015.
- ↑ Marine Energy Solutions: Battery Maintence 101. (2015) [Online] Available http://https://www.emarineinc.com/Batteries-Maintenance-101, June 9, 2015.
- ↑ Alternative Energy Alternatives: Deep-Cycle Batteries. (2010) [Online] Available http://www.solar-electric.com/deep-cycle-battery-faq.html#What%20is%20a%20Battery?l, June 11, 2015.
- ↑ Wholesale Solar: An Introduction to Charge Controllers. (2015) [Online] Available http://www.wholesalesolar.com/solar-information/charge-controller-article, June 15, 2015.
- ↑ Battery Basics: A Layman's Guide to Batteries. (2012) [Online] Available http://www.batterystuff.com/kb/articles/battery-articles/battery-basics.html, June 17, 2015.
- ↑ http://www.solar-electric.com/inverter-basics-selection.html
- ↑ http://www.photonicuniverse.com/en/how-to-choose/ac-inverter/
- ↑ carisol.org
- ↑ http://www.carisol.org/products/solar-power-systems/charge-controllers/
- ↑ http://www.xantrex.com/power-products/power-accessories/linkpro-battery-monitor.aspx
- ↑ http://www.thesolarplanner.com/steps_page8.html
- ↑ Ground Fault Circuit Interrupters. (2009) Washington, D.C.: Office of Compliance.
- ↑ http://www.aptsurge.com/lightning-arrestor-surge-arrestor.aspx
- ↑ http://www.altestore.com/multimedia/Images/Tools.html
- ↑ EFMR Monitoring Group: Solar Energy Lesson Plans. (2009) [Online] Available http://www.efmr.org/edu/solar2009.pdf, June 6, 2015.
- ↑ National Energy Education Development: The Sun and Its Energy. (2014) [Online] Available http://www.need.org/files/curriculum/guides/The%20Sun%20and%20its%20Energy.pdf, June 8, 2015
- ↑ Kandpal, T. C. and Broman, L. (2014) "Renewable Energy Education: A Global Status Review" Science Direct, 34(10), 300-324. [Online] Available http://www.sciencedirect.com.ezproxy.humboldt.edu/science/article/pii/S1364032114001762?via%3Dihub
- ↑ http://www.appropedia.org/Ghetto2Garden_solar_power
- ↑ http://www.appropedia.org/Ghetto2Garden_renewable_energy_2014
- ↑ http://www.appropedia.org/La_Yuca_renewable_energy_2014
