
Prusa i3 MK3S E-Axis Assembly
Procedure
[edit | edit source]The following steps differ from the normal Prusa directions.
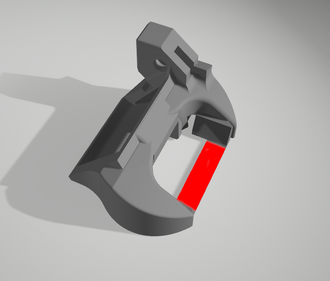
Fan Shroud STL Render With Cutaway Highlighted - If you printed the fan shroud, then you will need to remove the cutaway support (see image to the right).
- Step 46 - X-axis belt parts preparation
- You may need to the belt to size
- Step 55 - Nylon guide parts preparation
- If your kit does not include nylon filament you can use 3.00 mm ABS filament

Navigation
[edit | edit source]| Prusa i3 MK3S Home Page |
| Assembly |
| Before You Start |
| Y-Axis Assembly |
| X-Axis Assembly |
| Z-Axis Assembly |
| E-Axis Assembly |
| LCD Assembly |
| Heated Bed & PSU Assembly |
| Electronics Assembly |
| Authors | |
|---|---|
| License | CC-BY-SA-3.0 |
| Cite as | Swflynn (2019–2025). "Prusa i3 MK3S E-Axis Assembly". Appropedia. Retrieved July 12, 2026. |