
Humboldt Makerspace PPE management

| Type | |
|---|---|
| Authors | efs31@humboldt.edu Hark Sequoia Duran080 |
| Status | Deployed |
| Years | |
| Made | Yes |
| Replicated | No |
| Uses | education, science |
| Map | |
|---|---|
| Location | Arcata, United States |
| Coordinates |
Personal protective equipment storage (PPE) solution with integrated eye protection UV sanitization cabinet was designed for the Cal Poly Humboldt Makerspace. This project was designed and built in the Fall 2023 semester for Engineering 205: Introduction to Design. The project is intended to make PPE accessible and organized for students and staff in the Makerspace.
Background
[edit | edit source]This project was made for the Introduction to Design class at Cal Poly Humboldt, the intention of which is to give students an opportunity to learn about design processes through a hands-on approach. This project, which is taking place in the Fall of 2023, focuses on providing solutions to problems currently persisting in the Makerspace on campus. The Makerspace, which is a relatively new addition to campus, is a hands-on learning space for future and current engineering students to prototype and build projects. The solutions designed in this project are expected to be functional and lasting.
This team which consists of Sequoia Dixon, Raudel Duran, Erik Schubert, Harkiran Singh set out to tackle the problem of eye protection and PPE storage in the Makerspace. The team has worked closely with the director of the Makerspace, Devin Ketchum, to define the current problems related to eye protection and PPE storage so the team can provide the best possible solution.
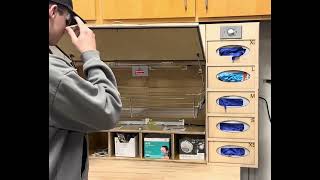
The PPE used in this space includes disposable masks, ear plugs and gloves as well as reusable shared eye protection. The space currently hosts several classes of twelve students who regularly use the space. In order to facilitate a safe work environment it is important that the students have easy access to well maintained PPE as well as the ability to disinfect the shared safety glasses. In the figures below the condition of PPE storage before our storage solution was implemented is depicted.
- Background Images
-
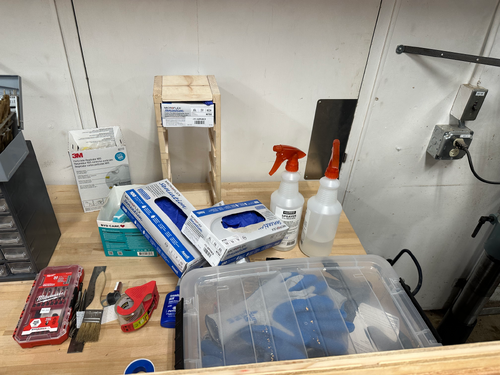 Disorganized PPE equipment on a workbench in the Cal Poly Humboldt Makerspace
 -
 Eye protection disorganized and stored in the wrench drawer in the Cal Poly Humboldt Makerspace


Problem statement
[edit | edit source]The objective of this project was to work with the client to evaluate the problem of PPE storage at the Cal Poly Humboldt Makerspace and to design a practical storage solution for PPE that would meet the needs of the Makerspace. This storage solution needed to provide organization and accessibility for PPE in the Makerspace as well providing a sanitization function for eye protection. The team observed the Makerspace, interviewed the users and collaborated with Devin Ketchum, the director of the maker space, to create a list of criteria seen bellow.
Criteria
[edit | edit source]The criteria below were used to guide the team in making a practical solution for PPE storage in the maker space (0-10 highest).
| Criteria | Description | Weight (1-10) |
|---|---|---|
| Cost | Under $400 in material costs | 10 |
| Capacity | Minimum of 12 saftey glasses and space for all other disposable PPE | 10 |
| Ease of Use | Quick access to PPE for users of the maker space | 8 |
| Sanitization | Under 1 Hour to sanitize 12 pairs of saftey glasses. | 10 |
| Saftey | Confoems to the saftey standards of the Makerspace | 10 |
| Durability | Holds up to regular use for a minimum of 3 years | 8 |
| Aesthetics | Confoems to the aesthetics of the Makerspace. | 7 |
| Replicability | Reproducable by future students. | 3 |
Prototyping
[edit | edit source]The team used several rounds of prototyping to come up with the design for the final PPE storage solution. Each round of prototyping focused on answering different questions about our final design.
Prototyping 1:
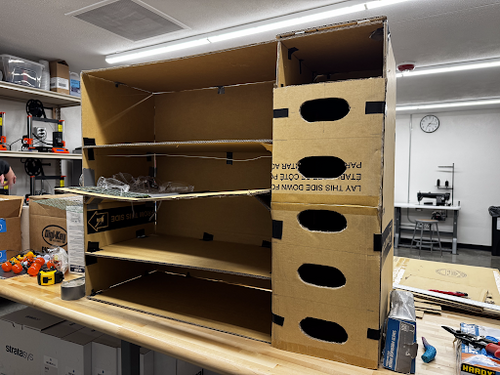
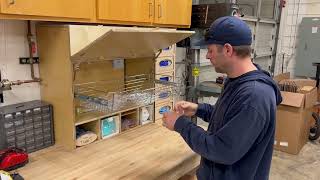
The first round of prototyping was to determine whether or not the approach of building a large cabinet with different compartments for various PPE containers was a good approach to solving the PPE disorganization in the Makerspace. For this round the team built a very rough prototype cabinet that fit on top of the workbench with shelves for PPE and a dimensioned out section for the glove boxes that took up the bottom section. The team left the prototype in the makerspace for a week and found that the staff of the maker space had started to fill the shelves with PPE products. Through interviewing the staff we found that this cabinet style approach was a valid solution and step in the right direction.
- Prototyping 1 Images
-
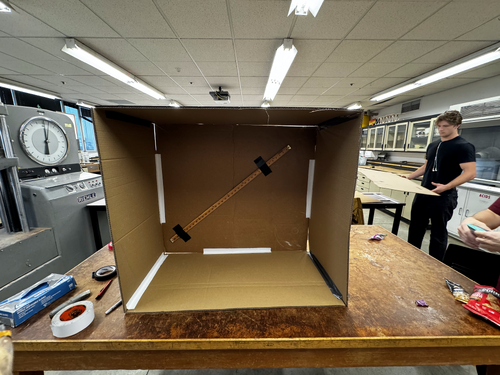 Prototype 1 - Roughly dimensioned cardboard cabinet
 -
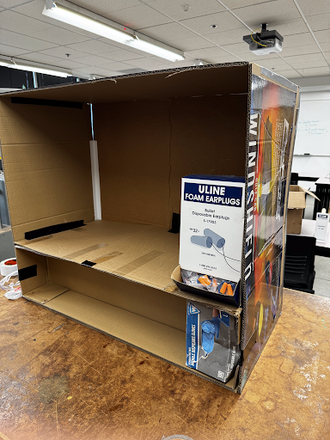 Prototype 1 - Cardboard cabinet with glove box section and ear plugs.
 -
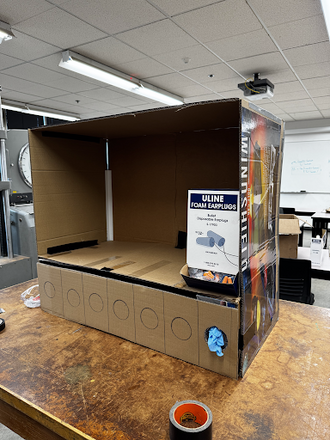 Prototype 1 - Cardboard cabinet with glove box section with front plate.
 -
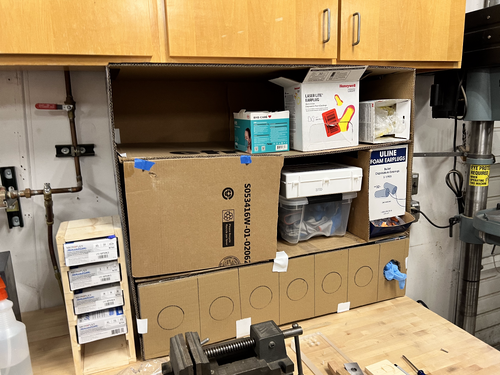 Prototype 1 - Cardboard cabinet filled with PPE after being left in the Makerspace.


Prototyping 2:
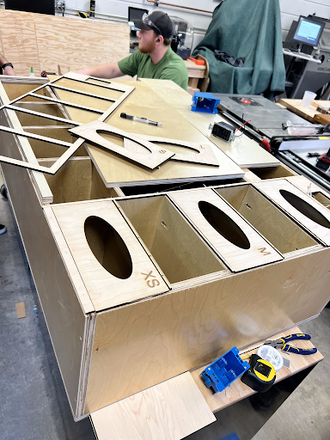
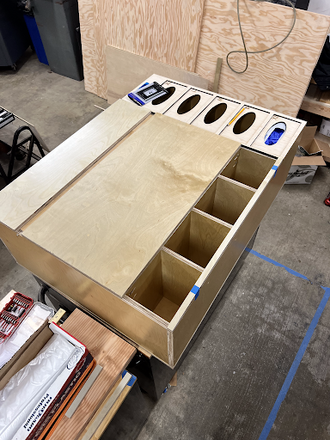
With the second round of prototyping, the goal was to perfect the cabinetry style design by paying special attention to finding the right dimensions and using cardboard panels that would be replicable with plywood. The team cut out panels out of cardboard and used 3D printed corner joints to hold the panels in place. Using this accurately dimensioned cardboard model we started to protype the various ways in which we could create compartments for other PPE that needed to be stored. The orientation of the glove compartments was also changed from vertical to horizontal as it gave volume to work with for storing glasses and other PPE.
- Prototyping 2 Images
-
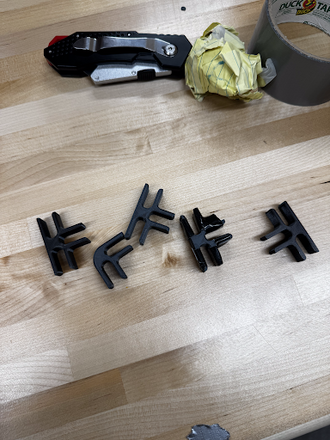 Prototype 2 - 3D printed corner pieces to reinforce corners
 -
 Prototype 2 - With bottom shelf and vertical section for gloves
 -
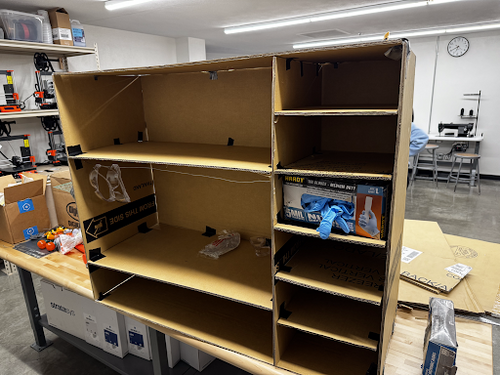 Prototype 2 - With top shelf and glove subdivisons added.
 -
 Prototype 2 - With golve section cover pannel installed


Prototyping 3:
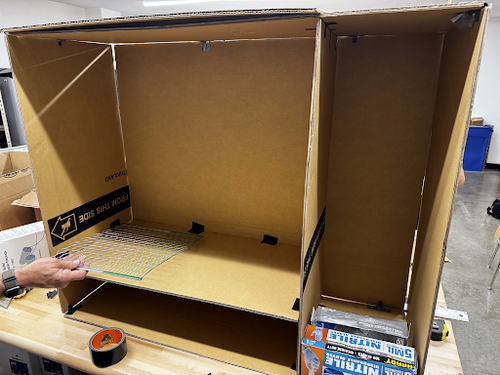
In this prototyping phase, having finalized the cabinet dimensions in the previous phase, addressing how to store the 3D printed classes was the goal. 3D printed glasses racks, chicken wire trays, various metal racks, a wire to hang the glasses from a metal basket were tested. Feedback for these various approaches was given, and it was found that students much preferred a storage solution that didn't require fine motor skills and would let them toss their glasses into a space carelessly. The storage basket fit this desire best and became our storage method of choice.
- Prototyping 3 Images
-
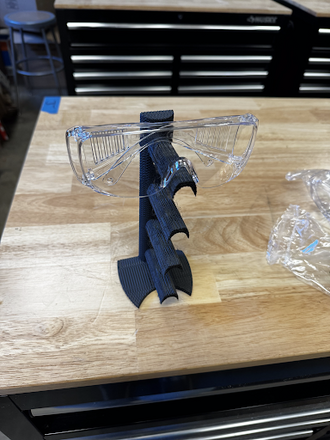 Prototype 3 - 3D printed glasses holders
 -
Protype 3 - Glasses hanging from wire in carboard storage cabinet
-
Protype 3 - Chicken wire rack that was considered as a glasses storage solution (bottom left).
-
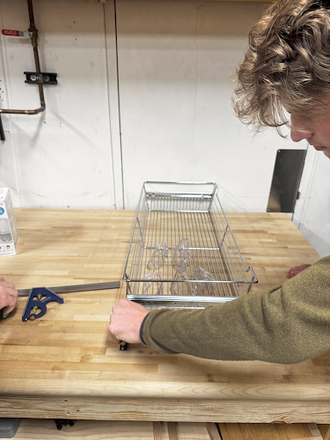 Protype 3 - The wire rack tray that recieved positive feedback because students could toss in their eye protection.


Final product
[edit | edit source]This final product, nicknamed the “Grab ‘n’ Go storage solution”, is a continuation of cabinetry style design we optimized through prototyping phases. It is durably built and provides storage and sanitization for glasses and makes other single use PPE accessible and organized making this a one stop shop for PPE in the Makerspace.
Below the layout out of single use PPE is explained with labels:

Below the glasses storage and sanitization section explained with labels:

Construction
[edit | edit source]The project was constructed over a couple weeks using mostly basic woodworking tools found in the FR Makerspace.
Box Construction
Exterior 3/4" plywood panels cut to full dimensions to construct exterior shell.
Panels predrilled and attached to each other with 1-1/4" screws.
Interior panels cut out of 5/8" plywood.
Interior panels predrilled with pocket hole jig and attached with 1-1/4" screws to establish shelves.
Wire drawer slides attached with 1/2" screws to center of interior of largest cabinet.
Doors hung with brass hinges attached at inside top of door with 3/4" and 1/2" screws.
Door lift stops installed with 1/2" screws to hold doors open.
1/4" closed cell foam weather striping installed on inside rim of largest door to prevent UV light leakage.
Cabinet double roller clasp door latch installed on inside bottom middle of largest door to hold door closed tight during UV operation.
Electrical
Lights installed in largest cabinet above and below wire drawer.
Safety deactivation switch mounted at top middle front of largest cabinet so that switch is activated with the door is closed.
5/8" holes drilled in back corner of cabinet shelfs top accommodate wires from lights to switch in upper right hand shelf of cabinet that houses timer switch.
1.5" hole drilled in back panel of cabinet into electrical shelf to accommodate electrical plug.
Wires run from lights to timer switch and from safety switch to timer switch. Electrical plug run through hole in back panel to timer switch for main power supply.
All wires attached with wire nuts and screws, electrical tape where appropriate.
Glove Storage Compartment
Laser cut exterior glove compartment openings and slides to hold glove boxes in place and allow access to gloves.
Exterior glove compartment laser cut panel secured with brad nails.
Interior spring mechanism for each glove compartment constructed with 5/8" plywood, 1/4" plywood, 1" and 1/2" PVC, 4" metal springs.
Finishing Touches
Sand sharp edges, wipe down and compressed air to remove built up sawdust and debris.
- Construction Images
-
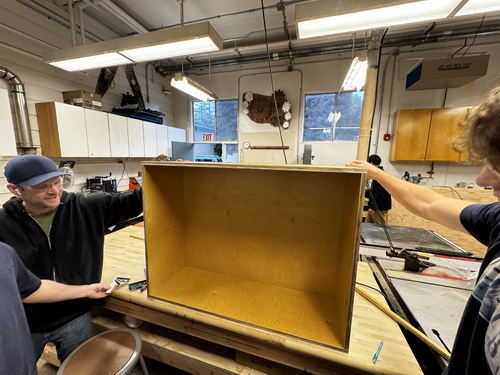 Constuction of the outer walls of the storage cabinet
 -
 Constructing the shelves for the PPE cabinet.
 -
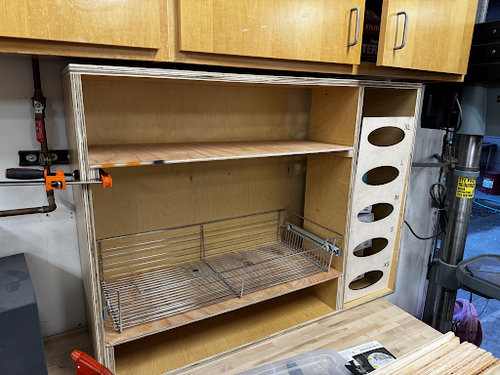
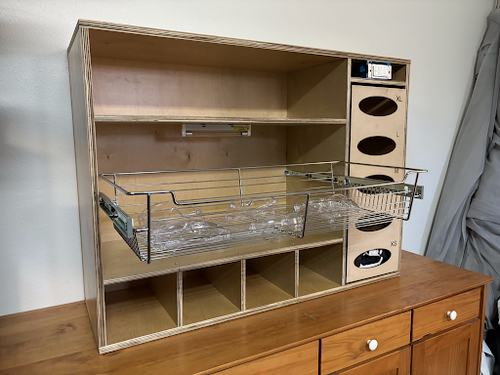 PPE cabinet with shelves, lights, sliding tray, and bottom compartments installed.
 -
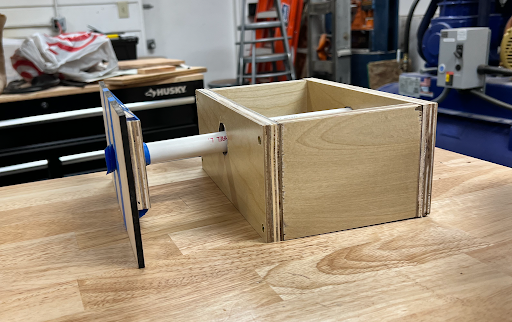
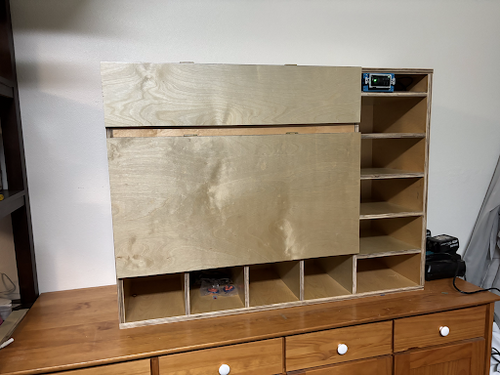 PPE cabinet with cabinet doors installed and glove compartment on the right subdivided.
 -
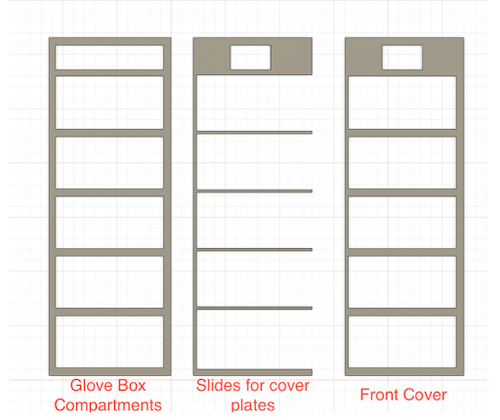 3d models for the Glove front cover.
 -
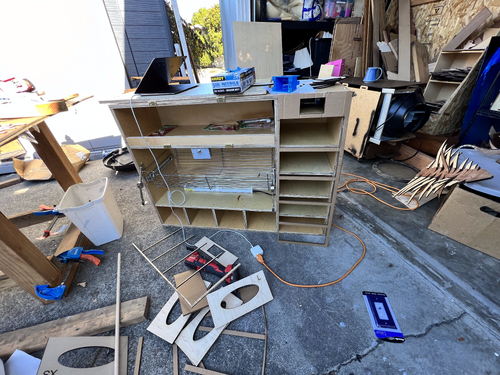 image showing the cardboard lasercut glove box cover being checked against the cabinet before the piece is cut out of wood.
 -
 Instaltion of slides and channels used to create the front face of the glove box compartments.
 -
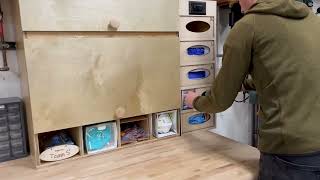
 Instalation of the glove box covers in FR maker space
 -
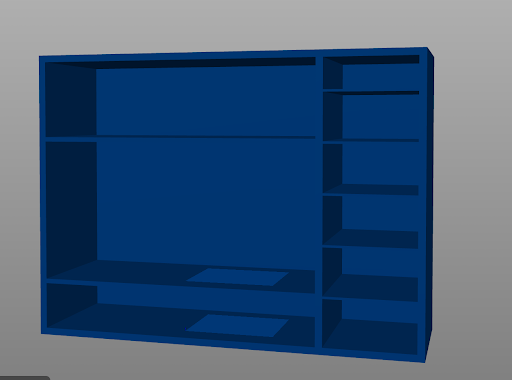 CAD for main cabinet for PPE storage cabinet
 -
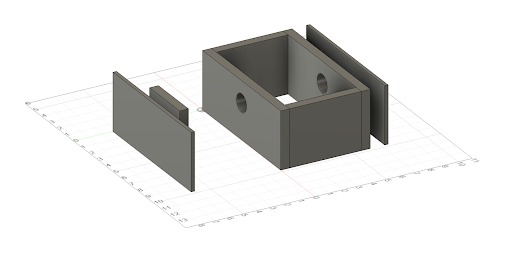 CAD for spring loaded mechanism
 -
 Construction of spring loaded mechanism in the glove compartments.


Bill of materials
[edit | edit source]Bellow is a break down of the material cost of this project. This section is broken down in two sections, the first being materials the team had to purchase and the second being materials that were repurposed at no cost to the team.
| Purchased Materials: | Cost: |
|---|---|
| Plywood ¾”, 4’x8’ prefinished | $69.93 |
| Plywood ¼”, 3’x4’ unfinished | $20.23 |
| Plywood ⅝”, 4’x8’ prefinished | $69.93 |
| Slow Close Hinge | $16.99 |
| Screws | $4.25 |
| UVC Lights x2 | $63.94 |
| Compression Spring ⅜” x5 | $10.57 |
| Glasses Slide Drawer | $64.20 |
| Safety Light Switch | $13.95 |
| PVC Pipe | $20.00 |
| Tax: | $30.09 |
| Total cost: | $384.08 |
| Repurposed material at no cost: |
|---|
| Door Hinges |
| Doorknobs |
| Miscellaneous Screws |
| Light Timer |
| Electrical Materials |
Operation
[edit | edit source]Operation of this PPE storage solution is intuitive and simple by design. Below is a collection of videos that show how to operate the PPE Storage cabinet.
Maintenance
[edit | edit source]This PPE storage solution is designed to require as little maintenance as possible however there are still some tasks that need to be preformed to keep it up and functional.
- Are there any needed actions for maintenance?
- Yes, the most frequent being replacing the PPE when it runs out, for a more detailed maintenance plan refer to the maintenance schedule below
- How often is maintenance necessary?
- Depends on the task, please refer to the maintenance schedule below.
- Who should perform maintenance?
- Regular maintenance like cleaning off saw dust or replacing PPE can be done by any users of the space. Replacing UVC bulbs and making any major repairs or adjustments should be left to the Makerspace staff.
- How do I make repairs if something is damaged or needs replacement?
- Look at the construction section, you will find images, CAD drawings, and written instructions.
Maintenance schedule
[edit | edit source]Here is an suggested maintenance schedule based on the expected usage in the maker space, certain tasks like bulb replacement and restocking of PPE are dependent on frequency of usage.
- Daily
- Turn on sanitizing light to sanitize glasses.
- Weekly
- Check to see if any PPE needs to be refilled.
- Reorganize if users have made a mess.
- Monthly
- Use perssurized air to remove built up saw dust in and around the box and wipe down with a wet paper towel if necessary.
- Clean out sawdust that may have built up in the sliding channels for the glove compartment covers.
- Yearly
- Replace UVC Bulbs if necessary.
- The wood might expand and contract which may require hinge placement and glove compartment cover sizing to be adjusted.
- Check for major damage and make repairs if necessary.
Conclusion
[edit | edit source]Testing results
[edit | edit source]Testing conducted after initial installation provided positive feedback on functionality and aesthetics. Testing also highlighted the need for clear labeling to help direct users to proper opening and closing of the cabinet as well as UV sanitization instructions including timer operation. Pre installation testing also identified short comings of overly complicated digital timer for light activation.
Discussion
[edit | edit source]After testing feedback we installed stickers highlighting location of glasses, caution of UV light and direct eye contact. Complicated digital timer replaced with simple 15 minute twist style timer. Feedback on new timer was positive.
Lessons learned
[edit | edit source]The team should have transitioned to building the final box earlier than what was done, while aiming keeping the design simple. Making big design decisions early speeds up the design process. Spending the extra time to create high quality CAD models makes construction and communication easier. If this project were to be recreated, it is recommended that a thinner or lighter material be used to construct the cabinet to reduce overall weight of the design without reducing durability.
Next steps
[edit | edit source]Building some trays that fit into the lower compartments would be a nice addition to the project. As well as decoration so that students can really make it their own. Replacing the slides for the glove box with an acrylic cover so that there is less friction when taking them in and out.
Troubleshooting
[edit | edit source]| Problem | Suggestion |
|---|---|
| No power. | Check power cord is plugged in. |
| Doors don't stay open. | Tighten door lift mechanism. |
| Bulb needs replacing. | Replacement bulb and instructions stored in upper cabinet. |
Team
[edit | edit source]This team is composed of the following Engineering 205 students at Cal Poly Humboldt:
References
[edit | edit source]
| Authors | |
|---|---|
| License | CC-BY-SA-4.0 |
| Organizations | Cal Poly Humboldt |
| Cite as | Eschubert, Lonny (2023–2026). "Humboldt Makerspace PPE management". Appropedia. Retrieved July 25, 2026. |