
Cosmos in the Stacks tsunami tank 2026

| Type | Tsunami Demonstration Tank |
|---|---|
| Authors | Lonny Grafman Emilio Ben Bracco Jav62 Sebastian Uselman Diego Mendez |
| Status | Deployed |
| Years | |
| Made | Yes |
| Replicated | No |
| Uses | education, science |
| Map | |
|---|---|
| Location | Arcata, United States |
| Coordinates |
Students from the Cal Poly Humboldt Engineering 205 class of 2026 designed and created a Tsunami Wave Tank Demonstration for the Cal Poly Humboldt Library’s Hall of Simulations. Designed with intentions to intrigue library patrons through interact ability and aesthetics so that they are more inclined to explore the Humboldt Library’s stacks.
Background
[edit | edit source]Our client, The Cal Poly Humboldt Library, has tasked us with a project to create a tsunami wave tank demonstration on the 2nd floor in the Hall of Simulation, along with many other projects. The library is trying to create its own type of Exploratorium in its Hall of Simulation, which will bring many more patrons to the library. The goal of this tank is to inspire patrons to look through the book stacks and use the book call numbers to learn about more things they are interested in. The library wants the space to become a place where people of all ages can go to learn interactively.
Another Engineering 205 group was tasked to make this project in a previous semester, but unfortunately they were unable to make it work and it leaked. We plan on learning from their mistakes and creating a tsunami tank that will last over 10 years.
Problem statement
[edit | edit source]The Think Tank is working to create a Tsunami Wave Tank for the Cal Poly Humboldt Library and its patrons to enjoy while learning about our simulation of a tsunami in the Arcata Bay.
The objective is to successfully design, build, and test a fun and reliable interactive tsunami wave tank display for the Cal Poly Humboldt Library and its patrons as seen in our black box concept, Figure 1-2. Our project will be completed when we have a working tsunami wave tank for the Cal Poly Humboldt Library that will show the library's patrons the impacts of what would happen if there were a tsunami threat to the Humboldt area. This project will spark curiosity for patrons while giving them a reason to visit the Hall of Simulation.
Criteria
[edit | edit source]Criteria and constraints are used for parsing a problem into components that can be argued individually.
| Criteria | Description | Weight (1-10) |
|---|---|---|
| Cost | Less than $650, with $250 from the library and $400 from the team. | 8 |
| Portability | 2 people can move it (table with wheels) | 4 |
| Educational Value | People will learn at least 2 things about real local tsunamis | 7 |
| Aesthetics | Makes people drawn to it and want to use it. | 9 |
| Accesibility | People of all ages and with an average amount of strength will be able to use it. | 6 |
| Maintainability | Will only need attention every two weeks to a month. | 8 |
| Durability | Lasts at least 10 years with no leaks. Withstands regular usage. | 10 |
Prototyping
[edit | edit source]The first stage of prototyping consisted of learning how to build and assemble a water tank (see figure 1-1). The second stage of prototyping was lots of 3D printing of Crescent City bathymetry (see figure 1-3) and a wedge mechanism prototype to experiment with angles and how they change wave shape (see figure 1-2)
- Sample gallery
-
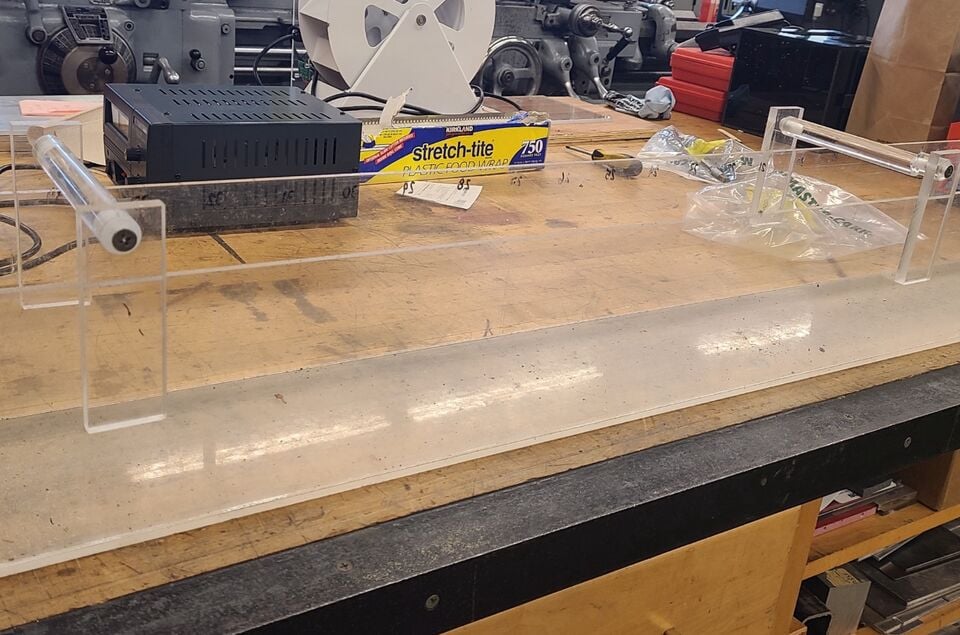 Figure 1-1, a water tank prototype that was built out of scrap plexiglass. Its purpose was to teach us how to cut and join plexiglass with the intention of making it leak-proof.
 -
 Figure 1-2, demonstrating wave formation with roughly 6 gallons of water inside our first prototype water tank. The green 3D print of wedge mechanism is being tested for it’s shape and how it connects to the formation of waves.
 -
 Figure 1-3, A 3D model of Crescent City, CA Bathymetry


Final product
[edit | edit source]
The final product features a hand wheel that turns counter clockwise to make waves. It has a clear, acrylic mount for the drive wheel. There are two 3/4 inch acrylic rods that are glued in place to hold the supports together. The supports are glued together to the top of the tank with a thin weld on adhesive. There is a support that is glued right under the top of the tank to fight against the tank bowing in. It features geography that is inspired by Crescent City. When the hand wheel is turned, the wedge lifts up and down to produce waves that crash onto the model of Crescent City.
Construction
[edit | edit source]

The Tsunami Wave Tank Demonstration was built using a 4 x 4, 1/4 in plexiglass sheet that was cut to make the dimensions of a 48in x 4in x 12in tank. The sheets were joined together using Weld-On Adhesive and further sealed with silicone caulk on the inner corners of the tank. (See figure 1-5)
This design relies heavily on 3D printing. The wedge mechanism and the bathymetry of Crescent City, CA are all printed using Prusament PETG Filament with varying infill percentages. For structural stability, the infill of the wedge mechanism ranged from 40-60%.
The designing of the Tsunami Wave Tank was created solely in Fusion and began immediately after deciding what the type of wave mechanism to create (See figure 1-9). The prominent components in the design are the drive wheel, connection rod, wedge, hand wheel, and bathymetry. The mechanism works by spinning the hand wheel, which in turn spins the drive wheel. The drive wheel has a pin that allows the connecting rod to be spun in a circular motion. The distance between the pin and the drive wheel spinning axis is 3 inches. This makes sure that when the drive wheel makes half a rotation, the connecting rod’s height changes by 6 inches. Because the drive wheel and wedge are connected by the connecting rod, and the wedge can only move up or down, the wedge fluctuates between being against the bottom of the tank and 6 inches above the bottom during rotation.
-
 Figure 1-6, Fusion model design of the wedge mechanism.
 -
 Figure 1-7, Fusion model design of the rod mechanism and the drive wheel mechanism that attaches to the wedge mechanism (Figure 1-6).
 -
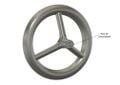 Figure 1-8, Fusion model design of the hand wheel attached to the wave tank mechanism. Used as a way to operate the wave tank.


The final wedge was printed with 40% infill to combat buoyancy while not using more filament than needed. It features a 56° angle for optimal water movement. Features a 0.75 in peg for connecting rod and a slip joint for a 0.75 diameter acrylic rod that will be sandwiched between the top and bottom of the tank. (See Figure 1-6)
The connection rod and drive wheel were printed with 70% infill to promote structural integrity, being that these are the parts that will be under the most force. The drive wheel has a removable 0.75 in pin to allow for easy insertion of the connection rod. There is a 1-inch diameter circle extrusion that the bearing fits around to allow for smooth spinning of the drive wheel. The same extrusion features an insert for the hand wheel key. (See Figure 1-7)
The hand wheel was printed with an infill of 60% and has a cross key that fits snug into the insert on the drive wheel (See Figure 1-8).
Bill of materials
[edit | edit source]Description of costs, donations, and materials used.
| Item | Amount | Cost per unit | Total |
|---|---|---|---|
| Ball Bearings | 2 | USD 13.50 | USD 27.00 |
| Chlorine Tablets | 1 | USD 13.99 | USD 13.99 |
| Prusament PETG Filament | 4 | USD 29.76 | USD 119.04 |
| Plexiglass (48"x48"x0.25") | 1 | USD 0.00 | USD 0.00 |
| Acrylic Rod | 1 | USD 0.00 | USD 0.00 |
| Metal Rod | 1 | USD 0.00 | USD 0.00 |
| Acrylic Weld-on Adhesive | 1 | USD 0.00 | USD 0.00 |
| Silicone Sealant | 1 | USD 0.00 | USD 0.00 |
| Grand total | USD 160.03EUR 137.63 <br />GBP 116.82 <br />CAD 198.44 <br />MXN 3,336.63 <br />INR 11,978.25 <br /> | ||
Operation
[edit | edit source]This is how to operate the tsunami wave tank. Its simple!

Rotate the handwheel to allow the wedge to move up and down. Change the speed to see how it changes the waves.
Maintenance
[edit | edit source]Maintenance for the tank includes adding a spoonful of chlorine with a provided spoon.
- The water in the tank can be replaced if necessary with the provided siphon tube.
Maintenance schedule
[edit | edit source]One spoonful of chlorine per month.
Conclusion
[edit | edit source]Testing results
[edit | edit source]Prototype testing results proved the bathymetry originally scaled wasn’t causing a dramatic enough visualization of the tsunami.
Using the program Map2Model, the topography and bathymetry were tweaked and edited to make sufficient waves by exaggerating the z-axis and playing with the stretch of the gradual slopes in the model.
Additional changes were made to the dimensions of the tank including the width of the tank being halved and the length shortened.
Discussion
[edit | edit source]During the final testing process, there was a focus on balancing aesthetics as well as function in the final product. After realizing a smaller tank width would further increase the dramatization of a wave which would promote more interact-ability and aesthetics, the dimensions changed.
Lessons learned
[edit | edit source]Creating and designing mechanisms, structural stability of materials, topography, bathymetry, the history of tsunamis in Crescent City and tsunamis on Humboldt County’s coastline, and the effects of materials being submerged in a water solution to a molecular level.
Next steps
[edit | edit source]Future additions of this tank could be finding a color or shimmer additive to the water solution for a more intriguing wave aesthetic. Additional suggestions would be changing the scale of the Crescent City, CA bathymetry to make a more to-scale replica of the shoreline printed.
Troubleshooting
[edit | edit source]The design of this tsunami wave tank is relatively intuitive, however there are instances where a problem may arise. Hypotheticals include:
| Problem | Suggestion |
|---|---|
| Leakage | Drain and dry tank, reapply a silicone caulk to all interior joinery. |
| Mechanism joints not moving smoothly | Add a waxing to each joint to ease friction |
Team
[edit | edit source]This design was created during the spring semester of 2025-2026 at Cal Poly Humboldt under the guide and instruction of the Engineering 205 Class led by Lonny Grafman and Joshua Frye.
The Think Tank members include:
References
[edit | edit source]
| Authors | |
|---|---|
| License | CC-BY-SA-4.0 |
| Organizations | Cal Poly Humboldt |
| Cite as | Lonny, Jav62, Benzoil, Suselman (2026). "Cosmos in the Stacks tsunami tank 2026". Appropedia. Retrieved July 14, 2026. |