
CCAT clothing rack

| Type | |
|---|---|
| Authors | Arirob44 Anyabreitbard Scm136 |
| Status | Deployed |
| Years | |
| Made | Yes |
| Replicated | No |
| Uses | education, science |
| Map | |
|---|---|
| Location | Arcata, United States |
| Coordinates |
This project is a Clothing rack to facilitate a clothing swap for the CCAT at Cal Poly Humboldt. The project was carried out by the ENGR 205 team, Los Vatos Verde. This process took place over the course of the Spring 2024 semester.
Background
[edit | edit source]The client for this project is The Campus Center for Appropriate Technology, CCAT, which has a clothing rack they use to facilitate clothing swaps. It is stored inside and must be moved into a more visible area outside for when the clothing swap is running. However, it is difficult to move, unattractive, and worn out.
The project is being facilitated by an ENGR 205 group called Los Vatos Verde for the spring semester of 2024 at Cal Poly Humboldt.
Problem statement
[edit | edit source]The objective is to design, build, and test a clothing rack for CCAT. CCAT will use this clothing rack to help facilitate a clothing swap which will allow CCAT to give clothes a second life and give students access to free clothing.
Criteria
[edit | edit source]Include a brief intro to the criteria and then include a table with constraints and weights (0-10 highest).
| Criteria | Description | Weight (1-10) |
|---|---|---|
| Portability | Adequate size, weight, and disassembly to ease transportation | 10 |
| Durability | Sturdiness, resistance to wear and tear from frequent transportation | 9 |
| Longevity | Capable of withstanding frequent use and maintaining structural integrity over time, built with materials and construction techniques that ensure a long lifespan | 7 |
| Cost | Total cost limited to $500 ($200 from CCAT, $75 from each group member) | 6 |
| Sustainability | Use of recycled/reclaimed materials, eco-friendly manufacturing processes | 10 |
| Aesthetics | Visually appealing/interesting, clean finishes, better-looking than previous model | 9 |
| Storage | Space-efficient design, ability to accommodate clothing and possibly shoes | 7 |
Prototyping
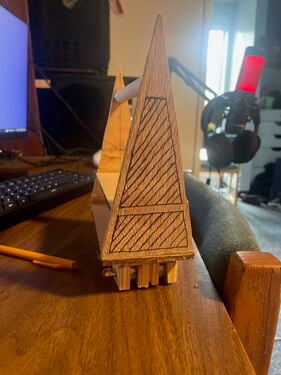
[edit | edit source]The initial drawing shows our initial sketch of the prototype we named the Eiffel Tower. Many of the design elements remained through the process, and made their way into the final design.
The first prototype was all about exploring the aesthetics and overall design of the clothing rack. To achieve this, the team created a small-scale model using scrap wood as the main material with the addition of cardboard cutouts for accessory placement. These cutouts allowed the client to experiment with different arrangements and placements on the prototype which facilitated decision-making regarding the final design.
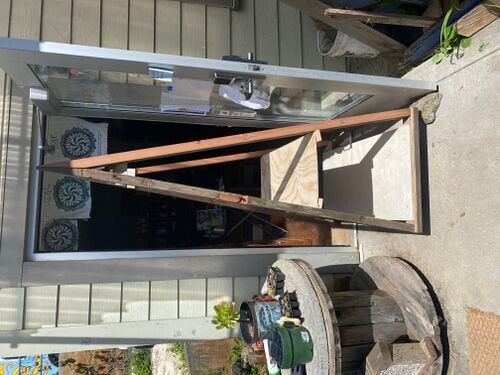
For Prototype #2 the team constructed a full-scale model using scrap wood sourced from CCAT and the Cal Poly Humboldt makerspace. The primary objective of this prototype was to assess the dimensions of the clothing rack, taking into account the constraints posed by the door through which CCAT would need to maneuver the rack for their clothing swap events. Prototype #2 not only served to test the dimensions required for door clearance at CCAT but also provided invaluable insights into the logistics of building and structuring the clothing rack.
- Sample gallery
-
 The first prototype for CCAT clothing rack.
 -
 The second prototype for CCAT clothing rack.


Final product
[edit | edit source]Our final product contained components from both prototypes to create a durable and aesthetic design. It has all the aesthetic features from the first prototype like the mirror, Clothing swap sign, and oil finish. It also has the design of the second prototype with minor tweaks to add durability to the structure, like the bases for the shelves to keep the triangle sides more supported.
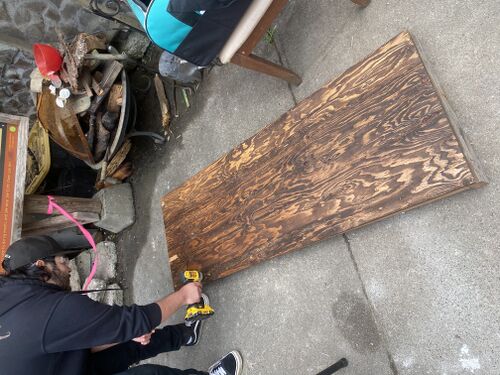
Construction
[edit | edit source]To start the construction, we took apart our second prototype to use wood for our final design. We used the recycled wood to create the bases for the shelves and the wheels to sit on. we did this by measuring the wood to be 64 1/4in by 27in for the first base, and 64 1/4in by 21in for the second base shelf.
After completing the bases, we started working on our triangle sides. To do this, we cut 2 2x4's in half to give us skinnier sides. we then cut the wood to 64in for the height of the clothing rack. We then used a jig angled to 11.1% to cut the angle the triangles connect at. After we cut the bottom of the 2x4's at the same angle to fit on our bottom base.
After having our triangular sides complete, we cut plywood to the same dimensions of both the bases to add on top.
After having all the parts cut and completed, we started joining all the components using screws. We started noting our rack was a little unstable, so we added hinges and laser engraved signs to add support to the rack
We completed the build by adding our last touches like the oil finish as well as the aesthetic features like the mirror and sign
- Sample gallery
-
 Construction, sanding, of CCAT clothing rack.
 -
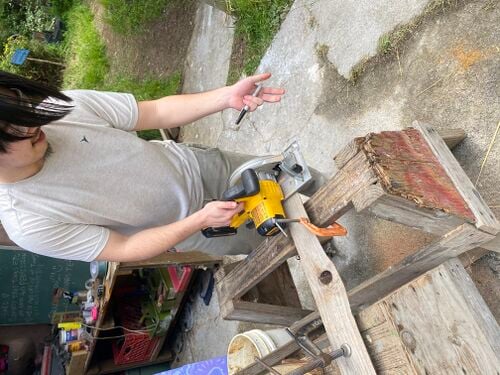 Construction, cutting, of CCAT clothing rack.
 -
 Construction, drilling, of CCAT clothing rack.


Video instructions
[edit | edit source]For further clarification on how to use the clothing rack Instructional Video for CCAT clothing rack.
Bill of materials
[edit | edit source]Description of costs, donations, the fact that this is just proposed, etc. For a simple cost table, see Help:Table examples#Cost Table and Template:Bill of materials for two nice formats.
| Item | Amount | Cost per unit | Total |
|---|---|---|---|
| 2x4x10 | 2 | USD 5.30 | USD 10.60 |
| 4x8 Plywood | 1 | USD 41.44 | USD 41.44 |
| Closet Rod | 1 | USD 6.45 | USD 6.45 |
| 1-1/4in Screws | 1 | USD 8.49 | USD 8.49 |
| 2-1/2in Screws | 1 | USD 8.49 | USD 8.49 |
| Clear Lacquer | 1 | USD 18.99 | USD 18.99 |
| Chesnut Stain | 1 | USD 13.99 | USD 13.99 |
| Hooks | 2 | USD 4.29 | USD 8.58 |
| Swivel Caster Wheels | 4 | USD 8.99 | USD 35.96 |
| Paint Brush | 1 | USD 2.60 | USD 2.60 |
| Mirror | 1 | USD 7.56 | USD 7.56 |
| Grand total | USD 163.15EUR 140.31 <br />GBP 119.10 <br />CAD 202.31 <br />MXN 3,401.68 <br />INR 12,211.78 <br /> | ||
Operation
[edit | edit source]This is how to operate. Our product is very simple and similar to any other clothing rack. It contains two shelves to have clothes or shoes stored. It also has wheels to add mobility.

Add desired clothes to the pole or onto the shelves.

To move the clothing rack with ease, push using the wheels and lock them when you don't want the clothing rack to move
Maintenance
[edit | edit source]In the maintenance section we will go over
- Make sure the clothing rack is clean
- make sure all the screws are tight
- check parts for damage
Maintenance schedule
[edit | edit source]This is when to maintain what.
- Weekly
- Wipe down the clothing rack with a non-toxic cleaning solution rag
- Yearly
- Check if the visible screws are all tight
- Every 5 years
- refinish the worn parts of the clothing rack
Conclusion
[edit | edit source]Testing results
[edit | edit source]The testing results revealed the clothing rack was able to easily be moved through the door at CCAT by one person. Testing also revealed that is was stable enough to support the weight of a person.
Discussion
[edit | edit source]The testing showed the team they met all our criteria.
Lessons learned
[edit | edit source]This process has enlightened the team in many ways. If they were to do it over, they would suggest being more exact with straight cuts to allow for easier assembly.
Troubleshooting
[edit | edit source]| Problem | Suggestion |
|---|---|
| Loose hanger | Carefully use screw driver to tighten screws |
| Stuck wheel | Make sure to unlock all the wheels, and potentially clean and lubricate the bearings in the wheel |
Team
[edit | edit source]- Ariana Robinson
- Anya Breitbard
- Jesus Rivera
- Shaun Masuda
References
[edit | edit source]
| Authors | |
|---|---|
| License | CC-BY-SA-4.0 |
| Organizations | Cal Poly Humboldt |
| Cite as | "CCAT clothing rack". Appropedia. 2024. Retrieved July 22, 2026. |