
CCAT DIY solar suitcase

| Type | |
|---|---|
| Authors | Sophie Chloe Tati Hannah |
| Location | Arcata, California, United States |
| Status | Prototyped |
| Years | |
| Made | Yes |
| Replicated | Yes |
| Uses | energy generation |
Spring 2022, Cal Poly Humboldt, Engineering 305 Appropriate Technology students create a portable solar powered device. This is a consistent project in the curriculum of Lonny Grafman's Engineering, Appropriate technology course. Our women led team, Divine Ecolutions, is set to design a complete photovoltaic system installed inside a suitcase with easy and fun accessibility for the Campus Center for Appropriate Technology (CCAT), widely known as CCAT. They will use it to power a blender to make whatever they feel fit and grab people's attention to solar powered tabling sessions. This spring semester project is intended to be replicated by any individual who has an interest in generating their own solar energy.
Background
[edit | edit source]This team is made up of a powerful group of women interested in creating consistency in Sustainable design. We aim to provide an example of appropriate technology, portable style, through a solar powered device that generates electricity. This DIY project will be created mostly for students, by students, and displayed at Cal Poly Humboldt's Campus Center for Appropriate Technology (CCAT). CCAT would like an engaging portable power device to use while tabling on campus, this will educate students on how appropriate technology can be applied anywhere. During tabling, the portable power cube will be used to make smoothies and it can also be used at CCAT to charge students and volunteers devices such as laptops or phones. With that being said, the process of building this power cube will be thoroughly documented on this page so that anyone can learn how to build their own. We will complete this project over the course of Spring semester 2022. The group members working on this project are Tatimadriaga, Sophicimo10, Chloebb and Hannah.
Here you can follow along with our project progress and timeline.

Problem statement
[edit | edit source]The objective of this project is to provide an example of solar powered sustainable technology that can be used on a daily, weekly, or monthly basis.
Criteria
[edit | edit source]This is the criteria that we will be focusing on for our project. The criteria is weighted from (1-10) with 10 being the most important and 1 being least important. Within the criteria we have included constraints in the description. This criteria is weighted by the CCAT co-directors.
| Criteria | Description (include constraint in the description) | Weight (1-10) |
|---|---|---|
| Power | Able to power devices (loads) during a blackout. | 9 |
| Aesthetics | Visually appealing to students and workers, especially when tabling. Draw people into the CCAT community. Having the look be educational. | 8 |
| Functionality | Should be able to move/transport anywhere on campus with ease. Suitable to power different devices at a time and different types of devices. This will be accessible to people at CCAT, and for people to use during tabling events. | 8 |
| Replicability | Easy for others to replicate, DIY methods. | 7 |
| Durability | Resistance to elements. | 7 |
| Sustainability | Using as many environmentally friendly materials as possible. (Carbon footprint, locally sourced) | 6 |
| Cost | Staying within the budget given by CCAT. What is the cost of the materials. We also want this to be affordable for other people to recreate | 4 |
Literature Review
[edit | edit source]Our Literature Review can be accessed on this link.
Prototyping
[edit | edit source]Image 1. Once our team chose the suitcase instead of the rolling tool box as the final portable cube design, Tati beautifully drew up our final prototype with appropriate materials CCAT will be using for tabling sessions such as a 250 Watt blender.
Image 2. Our team wanted to be consistent in the sizes of our prototypes, so this image is shown to explicitly illustrate dimensions, ours in which are 24 x 16 in. Although the wheels in our current suitcase design are more adaptable in a 360 rotation. This can be seen more clearly in construction section below.
Image 3. Our team realized extra support will be needed to harness down all components within the suitcase so they don't move around for this could be very dangerous in creating our system. We first decided wood, but came to conclusion something lighter would work better for the portability aspect of our design. (Also, can be found in construction section below) Our final design will not have the extension cord component but all other components will be further implemented.
-
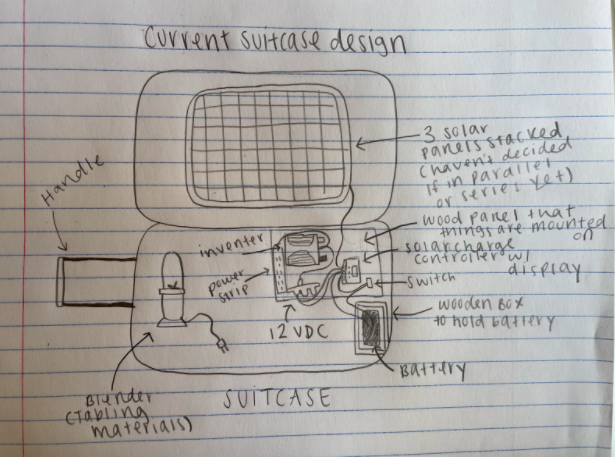 Image 1. Final design on paper before utilizing components from lab and bought material.
 -
 Image 2. Back of prototype suitcase, 24 x 16 inches.
 -
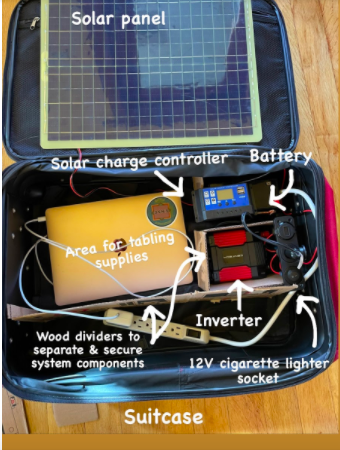 Image 3. This is our first prototype of the suitcase design using lab components.


Construction
[edit | edit source]Non-electrical
[edit | edit source]Image 4. Divine Ecolutions team doing some non-electrical construction cutting the peg board to fit the inner lining of our suitcase. At first we only had the sides of the cubby, although we thought it would be in our benefit to include a back to be more secure.
Image 5. This shows the compartment in which the battery will fit on the inside. This peg board works perfectly because there are holes already in the material which makes it easier to construct the boxes with zip ties in order for everything to stay protected and not move around.
Image 6. Our team troubleshooting how and where they wires will lay within this design. We came to the conclusion that the wires can potentially be weaved within these holes, (or around, on top of) getting them out of the way of components.
Image 7. Without the electrical construction started yet, this labeling is to start visualizing the ergonomics of our design. We are thinking about the accessibility, and positioning in which CCAT will plug and unplug their devices. Making it user friendly and educational is a goal in which our team strives to accomplish.
-
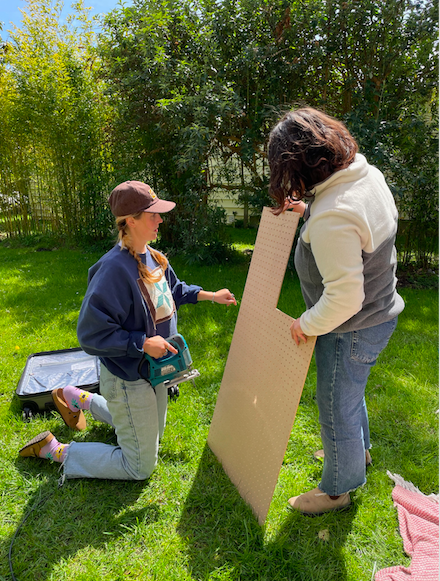 Image 4. Sophie and Hannah cutting right dimensions of peg board with a hand held saw.
 -
 Image 5. Final product of the cubby made for battery and inverter.
 -
 Image 6. Peg board backing fitting nicely inside our suitcase design.
 -
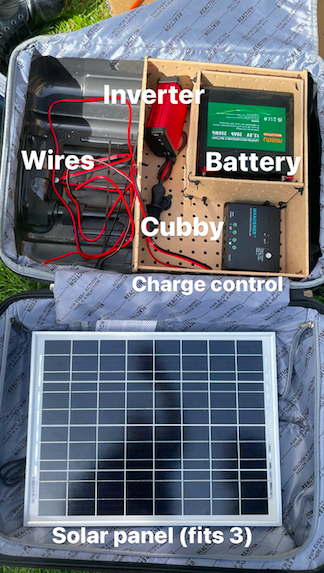 Image 7. Current components laid out to visualize format.


Electrical
[edit | edit source]Image 8: Below we see that the wires are connected to the battery using terminals.
Image 9: here we see that the wires are going into the solar charge controller. We also see the use of lever nuts that are use to secure the wires together. First we insert the wires from the battery into the charge controller and then follow that with the panel wires. THIS IS AN IMPORTANT STEP. If you do not do battery first and panels second you can blow your charge controller.
-
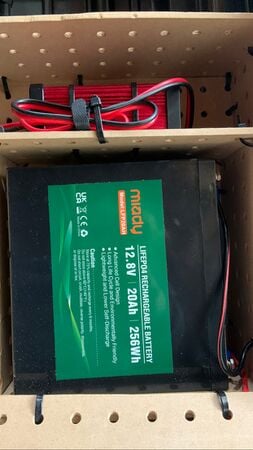 Image 8. Connect wires to battery using terminals. Terminals are attached onto exposed with and then crimped on. terminals make for easy attachment.
 -
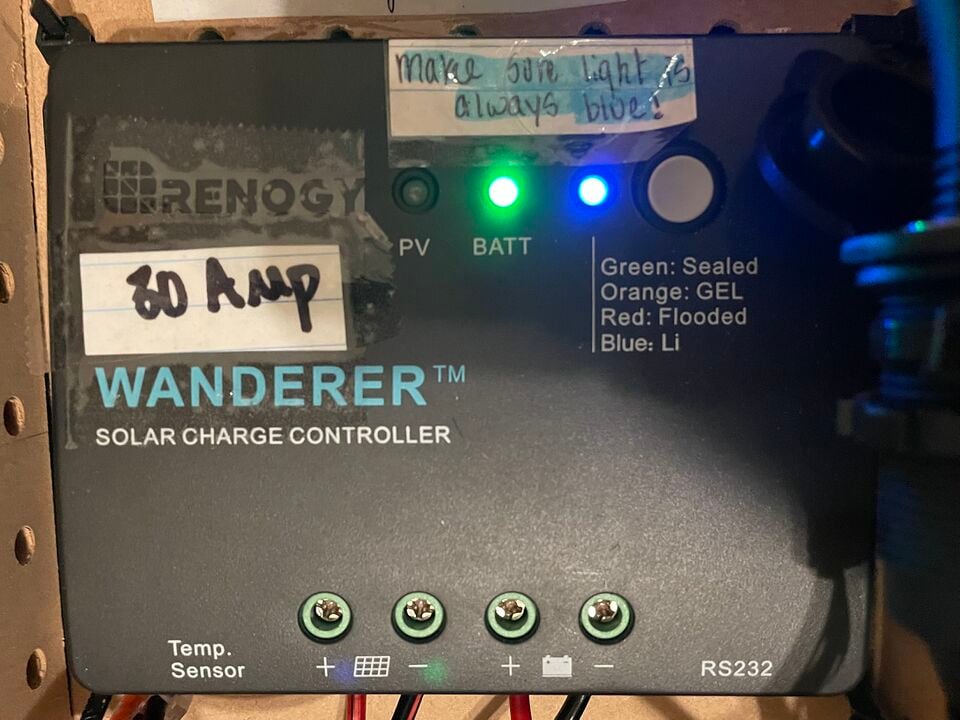 Image 9. First insert the battery wires into the charge controller. Once inserted, use a screw driver to screw down the clamp onto the wires to secure them. Then follow these steps again for the panel wires.

Tools used for construction
[edit | edit source]- Wire stripper and crimper - to strip and crimp the wires.
- screw driver
- hand held electrical saw
- drill
- scissors

Video instructions
[edit | edit source]
Proposed Timeline
[edit | edit source]This is the tentative timeline for our Spring 2022 Solar Powered project (subject to change), providing a week to week schedule to keep us in flow and on track.
| Date | Description |
|---|---|
| Week 7: (2/28/22-3/3/22) | begin prototyping and come up with a list of supplies, come up with three different options (alternative wattages) |
| Week 8: (3/7/22-3/11/22) | present prototypes and come up with a tentative budget, ($ local vs amazon $) meet with ccat. |
| Week 9: (3/14/22-3/18/22) | (spring break) possibly look for supplies we can use |
| Week 10: (3/21/22-3/25/22) | buy materials, potential energy for the system figured out, start testing procedure |
| Week 11: (3/28/22- 4/1/22) | build on project design & 1st photos, start permissions & present project design to CCAT |
| Week 12: (4/4/22- 4/8/22) | project design & 2nd photos, present design to ccat |
| Week 13: (4/11/22- 4/15/22) | project design & 3rd photos, present design to ccat |
| Week 14: (4/18/22- 4/22/22) | edit and update drafted appropedia page, test solar design |
| Week 15: (4/25/22 -4/29/22) | complete entire appropedia page, and build complete fully generated system! |
| Weel 16: (5/2/22 - 5/6/22) | final Video Compilation, Reflection, Final timesheet, Evaluations |
Timeline Discussion:
Reflecting on our proposed timeline, our team actually kept mostly on track. Even though we did have to buy another charge controller, the list of our supplies stayed the same in the week the task was for. Actually building our project could have happened more gradually, instead of doing it all in a single weekend, so it almost felt rushed. Still editing Appropedia page considering we're missing some information in designated sections.
Bill of materials (Spring 2022)
[edit | edit source]Most of these material costs are determined through amazon website, or other corporate platforms. I'd like to possibly get some of these materials locally, or second hand, yet this is why our budget is a tentative, proposed chart for now. Our team may find local wood piles, if wood is needed, and we have been donated what seems to be the right Power Tester, once we are ready for that.
| Item | Amount | Cost per unit | Total |
|---|---|---|---|
| Solar Panel — New | 3 | USD 39.50 | USD 118.50 |
| Solar Charge Controller — New | 1 | USD 44.45 | USD 44.45 |
| Power Inverter — New | 1 | USD 42.99 | USD 42.99 |
| 12 Volt Lithium Iron Phosphate Battery — New | 1 | USD 71.60 | USD 71.60 |
| PV Connectors — New | 1 | USD 3.00 | USD 3.00 |
| Fixed Thread Cig Power Socket — New | 1 | USD 15.97 | USD 15.97 |
| Suitcase | 1 | USD 76.46 | USD 76.46 |
| Wire Stripper | 1 | USD 9.00 | USD 9.00 |
| Peg Board | 1 | USD 13.49 | USD 13.49 |
| Screws/Nuts/Bolts | 1 | USD 4.00 | USD 4.00 |
| 250 W Blender | 1 | USD 40.00 | USD 40.00 |
| KiloWatt, Amp, Volt, Power Testing Device | 1 | USD 0.00 | USD 0.00 |
| Grand total | USD 439.46EUR 377.94 <br />GBP 320.81 <br />CAD 544.93 <br />MXN 9,162.74 <br />INR 32,893.58 <br /> | ||
Operation
[edit | edit source]Step 1- transport to desired location
Step 2- Set out solar panels in full sun
Step 3- Let battery charge if it was not charged recently
(You will know that the battery is being charged when the green light on the charge controller is blinking where it says PV. You will know that it is fully charged when the green light is blinking where it says battery.)
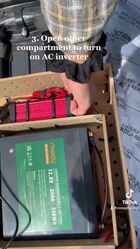
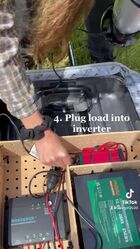
Step 4-Turn on the inverter
Step 5- Plug in any loads to the inverter
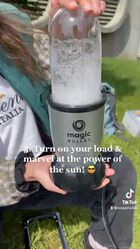
Step 6- Turn on the load
-
 step 1
 -
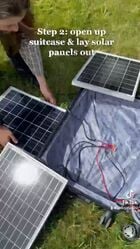 step 2
 -
 step 3
 -
 step 4
 -
 step 5


Maintenance
[edit | edit source](pictures of key components that might fail and how to replace them)
Schedule
[edit | edit source]This is when to maintain what. Please keep the format the same as it populates the kiosk in CCAT.
- Daily
- keep the t shirts in between solar panels when putting them away to avoid damages
- Make sure that the solar charge controller is always on the blue setting
- Make sure that inverter is turned off when you are done using
- Weekly
- Charging the solar panels
- Monthly
- Making sure that the battery is above 75% if it is being stored for longer than 2 weeks
- Yearly
- Checking wires in terminals
- Making sure that wires are secure
- make sure that zip ties are attached properly
Every 8ish years
- replace battery

Conclusion
[edit | edit source]Testing results
[edit | edit source]About eight minutes of charging for every one minute of blending. As for charging things like Phones and computers this battery would many hours for powering phones and computers. Research conducted at the Lawrence Berkeley National Laboratory shows a mobile phone charger, while charging a phone, uses an average of 3.68 watts. Current equals wattage divided by voltage, so the average phone charger is drawing 0.3 amps from a 12-volt battery. A 30 amp hour battery will allow for 30amps for 3 hours.
Although this battery has a lot of life I would recommend always having the panels in the sun unless the battery is fully charged.
Discussion
[edit | edit source]Overall this project was fairly easy to build. With the right knowledge and the right power tools you could get this project done with ease. I think that if you are going to be replicating this project you should first figure out your ideal uses/purpose. We have a very large battery for this system because we are powering a blender. I think that it is important to note this for future replications. I also think that an important tip is to make sure that you have the right charge controller for the type of battery that you are using.
Lessons learned
[edit | edit source]We are almost done with our project, but so far we have learned that time management is important as well as buying stuff earlier than later. We wish we would have done more research because we bought some things that were the wrong size.
Our team could have potentially blew out our charge controller because we inserted panel wires before battery wires.
Next steps
[edit | edit source]If we spent more time working on this project we would add a few things to it including: a power monitor, possibly different solar panels, and a stand for the solar panels. A power monitor would be helpful so we could not only test how much energy is used and created, but for educational purposes as well. While the solar panels we used for this project work well with our system, lighter solar panels would have made the suitcase easier to transport. Our design allows the solar panels to be taken out and leaned along the side of the suitcase or placed on top of something else, but a stand to lean them on could have been added for an easier set up.
Troubleshooting
[edit | edit source]| Problem | Suggestion |
|---|---|
| Wrong charge controller | make sure to look that it is compatible for the type of battery that you are using. |
| Fuse went out | Change out the fuse at the fuse holder next to the battery. |
| Another issue | Etc. |
Team
[edit | edit source]Introduce team and semester in the following format:
- User:Sophicimo10, Environmental Studies Student, Appropriate Technology emphasis, Spring 2022
- User:Chloebb, Environmental Studies Student, Appropriate Technology emphasis, Spring 2022
- User:Tatimadriaga, Environmental Studies Student, Appropriate Technology emphasis, Spring 2022
- Hannah Dominguez, Environmental Science, Energy and Climate, Spring 2022
References
[edit | edit source]<ref>Grafman, Lonny, and Joshua Pearce. "3.1, 4.3." To Catch the Sun, Humboldt State University Press, Arcata, CA, 2021, pp. 34–82.<ref>
| Authors | |
|---|---|
| License | CC-BY-SA-4.0 |
| Organizations | Cal Poly Humboldt |
| Cite as | Chloebb, Lonny, Tatimadriaga, Sophicimo10 (2022–2026). "CCAT DIY solar suitcase". Appropedia. Retrieved July 25, 2026. |