
CASA Student Farm rainwater harvesting
| Type | Rainwater Harvesting System |
|---|---|
| Authors | Lonny Grafman Emilio Carter |
| Location | Student Farm Cal Poly Humboldt |
| Environment | Farmland |
| Status | Deployed |
| Years | 2025 |
| Made | Yes |
| Replicated | No |
| Uses | education, science |
| Map | |
|---|---|
| Location | Arcata, United States |
| Coordinates |

This rainwater catchment system provides non-potable water to an otherwise underserved area. We built a freestanding structure that catches and funnels rainwater into three storage tanks to be used throughout the year. We built it for use by a university owned farm, focusing on reliability, ease of use, and data collection.
Background
[edit | edit source]We were connected to our client, Dr. Renee Byrd, through our engineering course, ENGR 205 Intro to design in the fall semester of 2025. Cal Poly Humboldt’s newly acquired student farm was getting water trucked in monthly to one side of the property. Then, workers would cary water to the other side when needed. Dr. Byrd requested a rainwater catchment system to serve the side of the CPH student farm where the majority of the farming would be done.
Problem statement
[edit | edit source]The objective of this project is to create year round access to non-potable water in needed areas of the CPH Student Farm. We would create a system that could be used for decades to come and be used by upcoming students for farming and research.
Criteria
[edit | edit source]Criteria provide a measurable system that can be used to compare our projects with. Each specified criteria is given a description and weight out of 10, being the highest and most important, for clarity.
| Criteria | Description | Weight (1-10) |
|---|---|---|
| Cost | The project materials in its entirety must cost no more than $550. | 8 |
| Durability | The structure should last a minimum of 20 years without large rebuilding or maintenance. | 7 |
| Maintenance | There should be minimal regular maintenance. However, sensors and measuring devices will need to be checked regularly. | 4 |
| Materials | All materials used should be local availability, and non pollutants. | 5 |
| Outdoor Agricultural Usage | The water that is collected will be used for agricultural purposes such as watering corps and washing tools. Thus, it must be safe or treated if it not. | 10 |
| Aesthetic | The project will be on land used by many people, is should not stand out too much and should blend in with the surrounding environment. | 2 |
| Ease of Use | The system will be used by many people, it should be intuitive and understood by all. In addition, the data collected should be easy to comprehend. | 9 |
| Water Pressure | The water exits the system through a spigot, which may occasionally be attached to a hose. thus, the water pressure should mimic that of an average American home's. | 7 |
Prototyping
[edit | edit source]Foster Farms produced four prototypes for the rainwater collection system a popsicle stick model to test the desire ability of the design with the client, a CAD model to further show the details of the design to the client, a prototype first flush system to determine if the design would work, and a prototype of the connections between the main support beams.
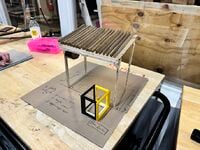
The popsicle stick prototype's purpose was to determine the ideal dimensions for the structure, the location of the main tanks, and how much the client liked the design. From this prototype we learned that the client liked the structure as well as its size and wanted the tanks outside of the covering provided by the structure.
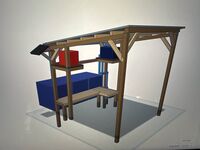
The C.A.D model prototype was used to finalize the positions of each of the components used to build the structure as well as to gauge the clients desire for the object to be built. The client expressed joy with the model as well as desire for the structure to be built.
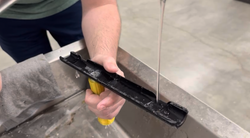
The first flush prototype was used to demonstrate how a first flush system worked. When water filled the upper pipe it flowed until it reached the first flush system where it fell into a large semi sealed vertical tank which raised the ball inside until it closed the opening allowing water to continue flowing keeping the original water introduced in the system. The first flush prototype functioned as intended, effectively diverting the first flow of water from the gutter into the first flush system. The ball mechanism inside the system was successful in closing the valve after the initial water filled the chamber, preventing potential contaminants from entering the main tanks.
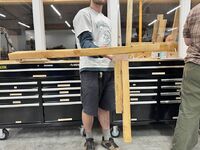
The Joint connection prototype was used to determine how the posts would connect to the roof structure. With the lower posts being 4x4s cut at a 9.5° angle with and two perpendicular 2x4s the first 2x4 is connected to the 4x4 with two deck screws. The upper 2x4 is connected to the lower 2 by 4 with two deck screws.
- Prototypes
-
 Joint Test
 -
 first flush test
 -
 C.A.D model
 -
 popsicle stick model


Final product
[edit | edit source]The rainwater collection system is designed to provide a sustainable source of non-potable water for agricultural irrigation, equipment cleaning, and general outdoor use. The system utilizes a slanted roof to collect rainwater, which is directed through a filtration and storage process involving multiple tanks and a solar-powered pumping system. This setup enables users to access pressurized water for various tasks such as watering crops, filling buckets, and washing boots to reduce the spread of invasive microorganisms. The overall design emphasizes durability, ease of maintenance, and the use of renewable energy. The following subsections describe the main components of the system: the structure, water transportation system, and electrical system.
Construction
[edit | edit source]Steps:
Prepare Materials:
- Cut all wood
- (2x) 12ft 4x4 unmodified (roof support)
- (2x) 11ft 4x4 cut at 9.5 degrees (Tall posts)
- (2x) 10ft 4x4 cut at 9.5 degrees (Short posts)
- (8x) ~3ft braces cut at ~45 degrees on all sides to help brace the roof against wind & weather
- (5x) 12ft 2x4 (roof support)
- Cut roof panels to size
- (4x) 12'x3' corrugated poly carbonate panels
Assemble Materials:
- Vertically stabilize the posts in the ground by digging a 1.5 foot hole, temporarily securing the post in the right position, and then pouring concrete to permanently secure it.
- Secure roof supporting wood along the top of the frame in preparation for mounting the roof
- Secure all assembled wood with brackets and trusses.
- Set up large water tanks, attach them together with PVC piping, and attach all three to the gutter.
- Attach lower and higher tanks together with PVC piping and the RV pump.
Set Up System:
- Attach solar panel to the side of the catchment system.
- Connect solar panel to the battery.
- Connect the battery to the RV pump and micro controller.
- Connect the micro controller to the sensors installed in the various water tanks.
- Construction Photos
-
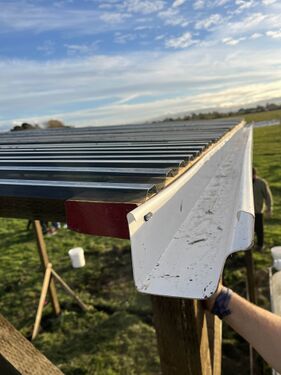 side view of gutter
 -
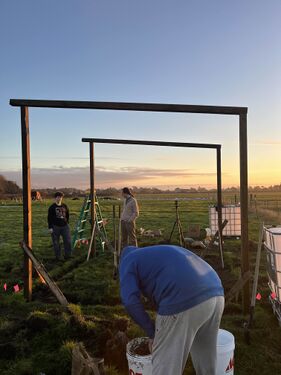 middle of construction
 -
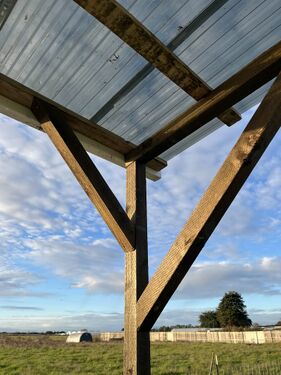 roof/post supports


Video instructions
[edit | edit source]Video Instruction Script
[edit | edit source]Opening Scene – Wide shot of the structure
Narration: "Welcome! In this video, we’ll show you how to properly use and maintain our rainwater collection system."
Cut to: Camera panning across the system, showing the tanks and roof
Narration: "This system collects rainwater from the slanted roof, which is filtered and stored in the main water tanks. The collected water can be used for a variety of tasks around the greenhouse and work area."
Cut to: Valve and spigot next to the bench
Narration: "Here’s how to use the system: next to the bench, you’ll find a valve. When you turn it on, water will flow out from the lower spigot."
Visual: Turning the valve, water flowing out
"You can use this water to wash tools and boots to help prevent cross-contamination, fill buckets, or connect a hose to water plants in the greenhouse."
Transition to: Close-up of the first flush system on the side of the structure
Narration: "To keep the system working efficiently, regular maintenance is important. The first step is cleaning the first flush system."
Visual: Unscrewing the cap at the bottom of the first flush pipe
"At the bottom of the first flush pipe, you’ll see a screw-off cap. Unscrew this cap and empty out any sediment that’s collected inside. Once it’s clear, screw the cap back on tightly."
Transition to: Ladder placed at the edge of the roof
Narration: "The other key maintenance task is cleaning the gutter filter. Using a ladder, go up to the lower edge of the roof where the gutter meets the downpipe."
Visual: Showing the mesh filter
"You’ll see a small mesh filter that catches leaves and larger debris. Simply remove any buildup and discard it"
Closing Scene – Wide shot of the structure again
Narration: "That’s it! By following these simple steps, you’ll keep the rainwater collection system clean and ready for use whenever you need it."
Bill of materials
[edit | edit source]The following table outlines the proposed materials, estimated retail prices, and actual project costs for the construction of the rainwater collection system. Several materials and components were donated, which significantly reduced overall expenses. All listed costs are approximate and may vary depending on supplier availability and future project revisions.
| Object | Our Cost | Retail Price |
|---|---|---|
| Corrugated roof panels | Donated | $204.00 |
| K gutter screws | Donated | $7.00 |
| Truss/mending plates | $22.00 | $22.00 |
| Wood screws | $14.00 | $14.00 |
| Panel screws | $14.00 | $14.00 |
| 10 wood posts | Donated | $200.00 |
| 9 roof supports | $55.80 | $80.00 |
| 4 bags of concrete (80 lb) | $38.36 | $38.36 |
| Pump | $71.00 | $71.00 |
| 2 gutters | $20.00 | $20.00 |
| 2 small tanks | $15.18 | $15.18 |
| 3 water tanks | Donated | $1,260.00 |
| Primer and cement for PVC | $12.00 | $12.00 |
| Pressure sensor | $12.90 | $12.90 |
| Temperature sensor | $6.90 | $6.90 |
| pH sensor | $29.50 | $29.50 |
| Computer | $5.00 | $5.00 |
| Battery | Donated | $82.00 |
| Total | $316.64 | $2,013.84 |
Operation
[edit | edit source]How to use the Rainwater Catchment System:

Use Spigot to clean Tools, Hands, and Boots with gravity-fed water from the higher water tank.

Every once-in-a-while, check the first-flush system for debris that may be impeding its ability to drain water effectively.
Maintenance
[edit | edit source]The regular maintenance includes:
- Cleaning First-Flush System
- Cleaning Gutter
- Cleaning Roof
- Check Tanks for Algae
Maintenance schedule
[edit | edit source]This is when to maintain what. Please keep the format the same as it populates the kiosk in CCAT.
- Daily
- N/A
- Weekly
- N/A
- Monthly
- Clean Roof as needed
- Clean Gutter as needed
- Clean First-Flush as needed
- Yearly
- Check All Water Tanks for Algae
- Every _3_ years
- See if Battery needs to be replaced
- See if Pump needs to be replaced
Conclusion
[edit | edit source]Testing results
[edit | edit source]During testing, the rainwater collection system successfully captured and stored water from simulated rainfall. The pump transferred water efficiently to the elevated tank, which provided adequate water pressure for tool washing and greenhouse irrigation. The sensors (pressure, temperature, and pH) functioned properly and provided consistent readings. Overall, the system operated as intended with no major leaks or flow issues detected.
Discussion
[edit | edit source]The testing confirmed that the system design effectively meets its primary objectives: collecting, storing, and distributing rainwater for agricultural and cleaning purposes. Water flow from the elevated tank was sufficient for daily use, and the filtration components prevented debris from entering the tanks. The solar-powered system provided enough energy for operation under average daylight conditions. However, efficiency may vary with weather changes or increased water demand, suggesting that larger storage capacity or backup power could improve performance for future requirements.
Lessons learned
[edit | edit source]Throughout the project, the team learned the importance of prototyping models of the system to create final dimensions of the 4x4 posts as well as the roofing panels. The finalization of the size of our structure helped us start thinking about where the main reservoir water tanks would be situated as well as how we would mount the raised water tank. We also realized that planning maintenance access (such as to the gutter filter and first flush cap) is essential for ease of use for younger visitors or those with limitations.
Next steps
[edit | edit source]Moving forward, the next steps for this project include long-term monitoring of water quality and collection efficiency during actual rainfall. Data from the sensors can be used to refine water management practices and adjust the filtration system if needed. In the future, the design could be scaled up or replicated for larger agricultural projects.
Troubleshooting
[edit | edit source]| Problem | Suggestion |
|---|---|
| Dirty water entering system | Clean First-Flush system |
| No water coming from spigot | Check water tanks for water.
Check RV pump function. |
Team
[edit | edit source]Introduce team and semester in the following format:
- Carter Dawson
- Theodore Hamilton
- Zackary Outram
- Joan Sevillia
References
[edit | edit source]
| Authors | Carter Dawson, Zakk Outram, Joan Sevillia, Theo Hamilton |
|---|---|
| License | CC-BY-SA-4.0 |
| Organizations | Cal Poly Humboldt |
| Cite as | Carter Dawson, Zakk Outram, Joan Sevillia, Theo Hamilton (2025–2026). "CASA Student Farm rainwater harvesting". Appropedia. Retrieved July 27, 2026. |