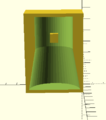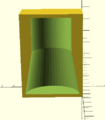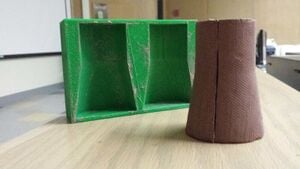
This project sought to demonstrate the viability of 3D printed PLA as a mold material for custom ceramics, investigated through an application to shield gas covers for metal 3D printers.
Users of weld-based metal 3D printers sometimes complain of shield gas loss affecting the quality of their prints. A nozzle that fits the weld gun holder could keep the shield gas more local and improve print quality. A nozzle for this purpose must address certain issues:
- Material. The material must hold up in a welding environment.
- Size. The nozzle must be designed to fit a certain size after all processing steps.
- Shape. The shape of nozzle dictates how the gas flows through the weld area.
3D printing is used in this project either as a medium for the nozzle itself or as the medium of the mold the nozzle is cast in. In the case of a mold, the mold must also be prepared to receive the nozzle material.
Background Information, what you need to know[edit | edit source]
Ceramics[edit | edit source]
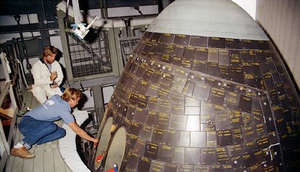
Ceramics have been used for over 27,000 years for a variety of purposes including structural, artistic, and engineering.[3] Ceramics are inorganic, non-metallic materials, which were considered for this study for also being refractory.[4]
Molding Techniques[edit | edit source]
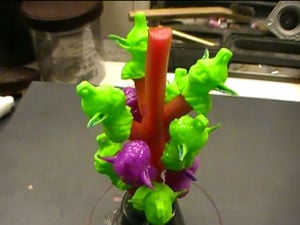
There are two schools of thought on using 3D printed PLA objects to make molds. One school is to do investment casting, where instead of melting wax the PLA is being melted and drained out.[5] The other school of thought is to use the plastic molds to create a plaster cast.[6] This is fairly common, and one recommended product that seems to produce reliable results is "Permastone" which has been described as a stronger plaster.[7] The downside to plaster molds are that they are fragile and can break easily.
Metal 3D Printers[edit | edit source]
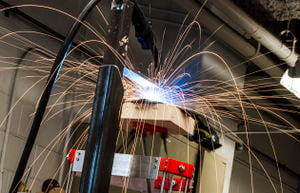
Open-source metal 3D printers use a welding gun and print bed to achieve additive manufactured metal parts. The welding gun can be affixed above a moving print bed or a welding gun can be fixed to move above a stationary print bed. The following study was accomplished on the latter, though could be easily modified for the former.
Design[edit | edit source]
Material[edit | edit source]
Plastic - PLA
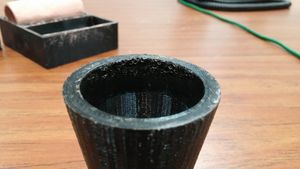
Polylactic Acid (PLA) was chosen as the material to be 3D printed due to its versatility, cost to purchase, and overall mechanical properties for 3D printing.
Additionally, PLA can not be used as the final material because it can not withstand the heat generated by the metal splash from metal printing.[8] It locally melted and destroyed the printed part within five seconds of testing. Furthermore, the UV light generated would degrade the polymer and weaken its mechanical properties.
Ceramic - Red Clay
Red Clay was chosen as the end nozzle material due to its availability, in-expense, and ease to work with. Below is a table indicating our experimentation with different thicknesses for this particular project.
| 1/8inch thickness | 1/4inch thickness |
|---|---|
| Cure Time: 24hours | Cure Time: <48hours |
| Recommended | Not recommended |
Results: Red clay was found to be convenient to work with due to ease of deformability and favorable mechanical properties during the molding process. These are discused in more detail below. The clay is fired at a temperature of 981C(about 1800F).
Conclusion: Recommended.
Surface Finish and Coatings[edit | edit source]
As printed, no post processing[edit | edit source]
Various layer thicknesses can be used. Currently we have printed with 0.25mm and 0.2mm layer thicknesses for molds. Both have worked well
Results: As printed surface, no post processing, have proven to be a viable surface for red clay as a mold surface.
Conclusion: Works very well, and can even style designs into the outside surface(the clay take on the indentation of the printed PLA).
Post processing, sanded[edit | edit source]
0.25mm layer thickness molds were printed and then sanded with 240 and 400 grit sandpaper. This was done to reduce the surface roughness from the as printed state. Different grit sizes were used to make a smoother finish. The idea is to create better adhesion of the red clay by providing a smooth PLA surface.
Hypothesis: The sanded surface may provide better adhesion for the red clay, because it may create a smoother contact.
Results: No perceivable difference was observed between the sanded side of the mold and the as printed side.
Conclusion: unnecessary step - avoid.
Post processing, sanded and epoxied[edit | edit source]
0.25mm layer thickness molds were printed, sanded with 240 and 400 grit sandpaper, and then epoxied with two different epoxy times to test effectiveness as seen below:
| QuickSet (test) | EpoxySet (ideal finish) |
|---|---|
| Ratio: 2-1 powder-liquid | Ratio: 100-12 resin-hardener |
| Cure time: 6-8 minutes | Cure time: 8 hours |
Hypothesis: The epoxy may provide better adhesion for the red clay, because it may create a smoother contact.
Results: No perceivable difference was observed between the epoxied part of the mold and the as printed side.
Conclusion: unnecessary step - avoid.
Issues to consider when using epoxy on printed parts:
- Getting a uniform coating of the epoxy may prove difficult as its viscosity changes as it cures. To combat this we applied a small amount of epoxy and then swirled it around until it coated the inside surface of the mold. All excess epoxy was then removed by upending the mold. This thin layer of epoxy then stuck onto the part.
- If there were gaps in between the layers of the printed surface, the epoxy fell in between them and drain into the mold and by extension whatever the mold was positioned on.
Post processing, sanded and plastered[edit | edit source]
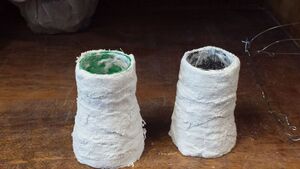
Action was taken to create plaster molds, but this line of investigation was discontinued after the normal printed surface was concluded to be sufficient when used directly with moist red clay.
Conclusion: unnecessary step - avoid.
Shape[edit | edit source]
One problem which any welding operation can face is inconsistent cover gas envelopment of the weld surface. Inconsistency in cover gas protection can lead to oxidation of the internal surfaces of the welding line which leads to undesirable mechanical properties. The different designs created during this project are an attempt to determine the most viable physical shape for cover gas to most effectively stay on the weld surface.
The cover gas used is primarily argon, which is heavier than air. This is beneficial to the project, because when stationary, the argon will flow downward due to the force of gravity. This means it is unnecessary for the molded nozzle to tightly fit the weld gun.
Below are several molds (negatives) and nozzles (positives) designed to be initially printed in PLA and used in the process of creating a ceramic shield gas nozzles. The design is parametric. Some variables have been built into the model to account for contraction of the ceramic as it goes through the firing process. These values may differ on a case to case basis depending on the type of clay used.
- Initial Design concepts
-
End Product general concept.
-
Mold concept, side one, with the slot to attach the cone to the metal 3D printer.
-
Mold concept, side two.
- Final Design concepts
-
End Product concept with a flair in.
-
Mold with a lower internal radius of 11mm creating a flair in.
-
End Product concept with no flair.
-
Mold with a lower internal radius of 14.4mm creating no flair.
-
End Product concept with a flair out.
-
Mold with a lower internal radius of 19.5mm creating a flair out.
Process[edit | edit source]
The general process for this type of method: Creating ceramic parts using a PLA mold is as follows:
Design and Print Mold[edit | edit source]
Design the mold (negative) of the part that is desirable to create. This project used OPENSCAD, which is an open-sourced computer-aided design software. Alternatives could be Blender, or FreeCAD. If the shape is one that can be extruded from a 2D state Inkscape is recommended. All of these open-sourced software packages have benefits and can be used together.
After the design is exported from one of the programs above as an .STL file it is imported into a slicer such as Cura. This program is used to determine the print settings of the mold. Cura was then used to output g-code which was uploaded and printed via Repiter and/or Franklin. Cura settings are seen below:
-
Basic Cura settings used for molds.
-
Advanced Cura settings used for molds.
Manipulate and Apply Clay[edit | edit source]
The clay was removed from plastic bags(to prevent moisture from drying the clay overtime) and kneaded to mix it thoroughly. This is an essential step because mixing the clay will remove the different interfaces which will promote ideal mechanical properties. Water should be added as necessary for desirable consistencies. After mixing, the clay is flattened and rolled to thicknesses needed for the mold to be used. For this project, the 1/8th inch thickness was determined to be ideal.
After the clay is the desired thickness it is applied to the molds. This is done by cutting sections of clay to fit the mold cavities. In this project a butter knife was used to cut the clay to correct shapes. Afterward, the clay was pressed into the mold cavities with fingers. It is important to maintain uniform thickness throughout the part so that the mechanical properties are homogeneous.
-
Overview of applying clay
-
Close up of fingers applying clay
Dry and Fire Clay[edit | edit source]
Drying of the molds initially takes place in plastic bags to ensure consistent drying throughout the part. If the mold is dried non-uniformly the clay will locally experience different rates of shrinkage as the moisture leaves the clay. If the drying process needs to be expedited, the molds can be put in front of a fan or in a dry environment, but this can lead to problems in the clay structure.
The nozzles in this project(1/8th inch thickness) dried sufficiently within about 24 hours. They were dry and shrank to the extent that the molds were simply upended and the nozzles came loose. Before the nozzles can be fired their halves need to be connected. This is done by scoring the flat surfaces, water added and mixed to create a more adhesive clay surface.
-
Example of clay piece after drying but before firing
-
Example of nozzles in molds
-
Example of printed structure being imprinted upon the red clay surface
-
Process of wetting the interface between the halves to combine them.
-
Using water and fingers to combine halves together
The process of firing the clay was experimentally determined as the team did not have access to a traditional kiln. A furnace was used and a rate determined for optimal heating. A rate was used to ensure slow homogeneous heating of the parts. The specific process is described below:
- 5°C per minute starting from room temperature and ending/holding for 20 minutes at 980°C.
The nozzles were cooled in the furnace until they stopped glowing. Then they were removed and set upon an insulating block until they cooled to room temperature.
-
Furnace used for firing red clay
-
Furnace after reaching max temperature(980°C) for 20 minutes
Test the Nozzle[edit | edit source]
After the firing process, the nozzle is ready for use. The team fired a total of five different nozzles into hard ceramic material of quality to be used on the metal 3D printer. Due to the inexperience of the team with the production process of red clay, only one of the nozzles fit close enough to be used comfortably.
After application of the nozzle which fit the best, it fractured upon attaching to the metal 3D printer. This caused the team to use zip-ties to keep the nozzle on the metal 3D printer. After running a test run, the nozzle did not meet the clearance of the printed metal and fractured again, this time one side split into 3 pieces. It was repaired with super glue and then reattached, higher, on the printer without a set screw and only zip-ties. Another test was run with the nozzle attached, and then again with wet clay closing the cracks on the side of the two halves to contain metal splash.
-
Test 5, nozzle post 1st crack and attached snugly
-
Hole side of mold split into three pieces after collision
-
Test 7, nozzle sides covered with clay
-
Nozzle view from below with metal wire
-
Still of metal 3D printer in action with nozzle attached
-
Metal splash collected on nozzle underside
To validate this process and test the nozzle's affect on print quality and its containment of the cover gas, a tensile bar was printed. A bar was printed both with(Test 8) the nozzle and without(Test 9-10) and then compared. The ten tests shown below are the progression of calibrating and experimentation for testing phase of this project.
- 3D Metal Printer Test Runs
-
1. Print parameters wonky
-
2. Shield gas turned off
-
3. Shield gas turned on
-
4. Control - Normal print
-
5. Nozzle cracked - premature stop
-
6. Repaired nozzle
-
7. Repaired nozzle side cracks covered
-
8. Nozzle test - crashed at the beginning of layer five
-
9. Normal test comparison - Shield gas inconsistancies
-
10. Normal test comparison 2 - Same conditions except wire thickness (0.035m used not 0.030mm)
Finished Production[edit | edit source]
Limitations[edit | edit source]
Limitations were discovered in the effort to get a finished product. Choosing the correct size and dimensions for the mold correctly will prevent cracks in the finished product from the stresses of its environment. The complexity of the mold is another limit, it must not only be printable, but it should refrain from sharp angles. Sharp angles such as the ones that the original negative mold had(90°) makes it hard to pull out the clay after it dries and shrinks. For this project the clay thickness should be 1/8th inch. This allows for the ceramic nozzle to safely resist the metal splatter as well as be more structurally sound once attached to the 3D printer. The final limitation was the print surface to nozzle vertical clearance. The ceramic nozzle is brittle and will be destroyed if it is forced into anything while attached to the printer.
Costs[edit | edit source]
This is not a standard accessory, and therefor for a group to accomplish this without a 3D printer would need to hire out the creation of the mold and probably the creation of the nozzle itself. While no official quote was given, it was discovered that the minimum starts in the $300 range for custom ceramics. By custom ceramics, we mean fully custom dimensions based on drawings, most other places are offering personalization for messages on the ceramic and not the shape itself. If one does not have access to a kiln, there are other methods to heating up clay. This website goes into more detail about how a kiln heats the clay. One can use this knowledge to approximate the heating style of the kiln in other places.
For these cost calculations, PLA has be valued at $24 for a kilogram. Red clay can be gotten in small quantities (~1 kg) for about $10. The table below shows the material cost for three different style nozzles based on the bottom radius.
| Flare (r) | PLA Mold (g) | Red Clay (g) | Total Material Cost |
|---|---|---|---|
| 11 | 107 | 25 | $2.82 |
| 14.4 | 106 | 30 | $2.84 |
| 19.5 | 153 | 33 | $4.00 |
The cost of a single nozzle is less than $5 for materials. This is a significant cost savings, as mentioned before, contracting out to another company starts at $300. That is a cost savings of almost 99% for even the most expensive nozzle. In fact with this method, 75 nozzles can be created for the cost of one. This means experimenting with different shapes to find the best fit is much more feasible now than previously. This cost analysis forgoes the cost of epoxy, plaster, or sandpaper because throughout this project it was discovered that naked PLA is actually a very good material to use for molds and does not require these extra steps and expenses.
Conclusions[edit | edit source]
Material: PLA is a recommended mold material for red clay.
Surface finishes: The printed surface produced mechanically reliable ceramic parts. There is no need to use any other surface finish.
Shape: No conclusions can be made as only one variation in shape design was tested.
Design and Print Mold: The software used(OpenSCAD, Cura, and Franklin) was effective at designing and printing mold/plastic nozzles.
Manipulate and Apply Clay: It is recommended that the application of clay be done be done by someone with some ceramics experience for the quality of the finished product. It is difficult to attach the two halves of the nozzle and keep the opening circular.
Dry and Fire Clay: An actual kiln is not necessary for firing; any furnace that can reach 980C that can allow steam and other volatiles to escape during heating can work. Additionally, the volume of moisture in these parts was largely insignificant when compared to the chamber volume of the furnace used.
Test the Nozzle: Each apparatus is slightly different and the weld gun could be sitting in a different place relative the weld gun holder each time a user sets the machine up. Take care to measure clearance of the part and give at least 5mm clearance between the bottom of the nozzle and the weld surface.
limitations: Aspects to consider are the complexity/size of the mold, thickness of clay to be used for a given part, size of part in its function. All of these limitations will be different for each project using this concept and must be taken into account otherwise part failure is likely.
Costs: The process described by this project is significantly cheaper than any method found for comparison if the initial cost of a 3D printer for PLA material is ignored. General costs for PLA filiment and red clay are overall very low. The time cost for fabrication is also low if the process is understood and method tested. If understood it is feasible to design, print, mold, apply clay, dry, fire, and use a part within a two-three day period.
Next steps[edit | edit source]
Future studies on the subject would be benefited by testing nozzles with different diameter bottom openings to optimize shield gas flow. Additionally, the use of a positive plug during the process of attaching the two halves of the nozzle would ensure a more circular nozzle to fit on the weld gun holder more reliably.
Ramifications of Project - Fields of Molding Fabrication and 3D Printing[edit | edit source]
This research provides insight into areas of manufacturing which has not had much attention in research to date.
- Capability of 3D printers to create molds.
- The viability of PLA as a molding material for ceramic part construction.
This project has proven it is possible to print PLA molds for use with ceramics. This process is inexpensive and relatively simple for taking an idea, creating a concept mold, filling the mold with red clay, and then firing it to make a usable ceramic part.
Alternate usage:
- This process can be used to create art.(the ceramic material takes the surface finish of the printed mold well with good resolution, so designs can be added)
- The positive module in the .scad file can be used by make custom nozzle parts out of PLA.
Gallery[edit | edit source]
- Gallery of Everything
-
3D printed mold.
-
Effect of metal splash on PLA nozzle
-
End Product general concept.
-
Mold concept, side one, with the slot to attach the cone to the metal 3D printer.
-
Mold concept, side two.
-
End Product concept with a flair in.
-
Mold with a lower internal radius of 11mm creating a flair in.
-
End Product concept with no flair.
-
Mold with a lower internal radius of 14.4mm creating no flair.
-
End Product concept with a flair out.
-
Mold with a lower internal radius of 19.5mm creating a flair out.
-
Basic Cura settings used for molds.
-
Advanced Cura settings used for molds.
-
Plastic nozzle with a bottom radius of 10
-
Plastic nozzle with a bottom radius of 14.4
-
Plastic nozzle with a bottom radius of 20
-
No Flare, Flare out, and Flare in
-
Two nozzles being used to create a plaster mold
-
Left: Epoxy with quickset, thin layer Right: Epoxy with quickset, thick layer
-
Left:Sanded 240 and 400 grit Right: As printed at .2 layer thickness
-
Left: 8 Hour epoxy Right: As printed at .25 layer thickness
-
Prefired Nozzle in two pieces
-
Overview of applying clay
-
Closeup of fingers
-
Example of clay piece after drying but before firing
-
Example of nozzles in molds
-
Example of printed structure being imprinted upon the red clay surface
-
Process of wetting the interface between the halves to combine them.
-
Furnace used for firing red clay
-
Furnace after reaching max temperature(980°C) for 20 minutes
-
Overview of applying clay
-
Close up of fingers applying clay
-
Example of clay piece after drying but before firing
-
Example of nozzles in molds
-
Example of printed structure being imprinted upon the red clay surface
-
Process of wetting the interface between the halves to combine them.
-
Using water and fingers to combine halves together
-
Test 5, nozzle post 1st crack and attached snugly
-
Hole side of mold split into three pieces after collision
-
Test 7, nozzle sides covered with clay
-
Nozzle view from below with metal wire
-
Still of metal 3D printer in action with nozzle attached
-
Metal splash collected on nozzle underside
-
1. Print parameters wonky
-
2. Shield gas turned off
-
3. Shield gas turned on
-
4. Control - Normal print
-
5. Nozzle cracked - premature stop
-
6. Repaired nozzle
-
7. Repaired nozzle side cracks covered
-
8. Nozzle test - crashed at the beginning of layer five
-
9. Normal test comparison - Shield gas inconsistencies
-
10. Normal test comparison 2 - Same conditions except wire thickness (0.035m used not 0.030mm)
Code[edit | edit source]
The following code is for the positive of the mold.
/* MY/EE4777 Gas nozzle mold
11/9/15

Designed By: Wayne Helminen
 					Adam Pringle
 					Holden Hunt
 					Rachel Clark
 					Brad Lafata
 					Spencer Allen

This is a ceramic mold for a metal
3D printer to force the inert gas
to remain near the weld of the printer

* /

$fn = 1000;
MU = 1.35; // Fudge Factor - Mark Up Value
a = 28.8 * MU; // Diameter of the top cylinder
b = 30 * MU; // Length of top cylinder
c = 35 * MU; // Length of nozzle
r = 11* MU; // End radius of nozzle - .5a < r < 30
d = 15 * MU; // Distance from start of flare to the bolt
s = 6.5 * MU; // Width of slot
l = 7* MU; // Length of slot
CL = 5 * MU; // Block Clearance
cleanUp = .02; // Makes differences look nice
T = 5*MU; // Thickness of the walls in mm
m = 0; Used in a comparison for creating the block that the mold is subtracted from.

module ShapeOfPlasticNozzle(){

 		 difference(){
 					 union(){
 							 translate([(2*r+CL)/2, (r+CL), c+(CL/2)])
 							 cylinder(h=b, d=a+T, center = false);

 							 translate([(2*r+CL)/2, (r+CL), CL/2])
 							 cylinder(h=c, d1=2*r+T, d2 = a+T, center = false);
 							 }
 					 union(){
 							 translate([(2*r+CL)/2, (r+CL), c+(CL/2)])
 							 cylinder(h=b+cleanUp, d=a, center = false);

 							 translate([(2*r+CL)/2, (r+CL), CL/2-cleanUp])
 							 cylinder(h=c+2*cleanUp, d1=2*r, d2 = a, center = false);
 							 translate([(2*r+CL)/2-(s/2), ((r+CL)-a/2-T), c+(CL/2)+ d/2])
 							 cube([s,2*T,d], center = false);
 							 }
 						 }


}
The following two modules are for creating the 3D printed mold.
module gasNozzleSlot(){

 	 m = ((2*r)>a) ? 2*r : a; //if 2*r is greater than a, then m = 2*r else m = a

 	 difference(){
 			 cube([m+CL+T,m/2+CL+T,c+b+CL], center = false);
 			 union(){
 				 translate([(m+CL+T)/2, (m/2+CL+T), c+(CL/2)])
 				 cylinder(h=b, d=a+T, center = false);

 				 translate([(m+CL+T)/2, (m/2+CL+T), CL/2])
 				 cylinder(h=c+cleanUp, d1=2*r+T, d2 = a+T, center = false);
 					 }
 						 }
 	 hull(){
 	 translate([(m+CL+T)/2-(s/2), ((m/2+CL+T)-(a+T)/2), c+(CL/2)+ d/2])
 	 cube([s,T,l], center = false);
 	 translate([(m+CL+T)/2-(s/2), ((m/2+CL+T)-(a+T)/2), c+(CL/2)+d/2-l/2])
 	 cube([s,.01,2*l], center = false);
 	 }

 							 }

module gasNozzleNoSlot(){
 		m = ((2*r)>a) ? 2*r : a; //if 2*r is greater than a, then m = 2*r else m = a

 	 difference(){
 			 cube([m+CL+T,m/2+CL+T,c+b+CL], center = false);
 			 union(){
 				 translate([(m+CL+T)/2, (m/2+CL+T), c+(CL/2)])
 				 cylinder(h=b, d=a+T, center = false);

 				 translate([(m+CL+T)/2, (m/2+CL+T), CL/2])
 				 cylinder(h=c+cleanUp, d1=2*r+T, d2 = a+T, center = false);
 					 }
 						 }

 }

// Functions calling the modules
gasNozzleSlot();

rotate(a=[0,180,0])
mirror( [0, 0, 1] )
gasNozzleNoSlot();

