No edit summary |
No edit summary |
||
| Line 46: | Line 46: | ||
# Clip one chain link onto the one attached to the t-bar. | # Clip one chain link onto the one attached to the t-bar. | ||
# Clip one last chain link onto the previous chain link. | # Clip one last chain link onto the previous chain link. | ||
# Clip the last chain link onto the top loop on the cup. | |||
# To add more cups, add three chain links in a row onto the bottom loop then add a cup and repeat. | |||
# Once rain chain is to appropriate length, a weight may need to be added onto the bottom with string and a metal bob. | |||
Print time estimate | |||
T-bar: 15 min | #T-bar: 15 min | ||
Chain link:3 min | #Chain link:3 min | ||
Cup:2 hr 21 min | #Cup:2 hr 21 min | ||
Ring: 7 min | #Ring: 7 min | ||
# Assembly time: About 3 hours to print the chain with 1 cup down. | # Assembly time: About 3 hours to print the chain with 1 cup down. | ||
Revision as of 05:55, 3 December 2019
Rain Chain
Project developed by [hpgetsch|hpgetsch]
Template:Statusboxtop Template:Status-design Template:Status-prototype You can help Appropedia by contributing to the next step in this OSAT's status. Template:Boxbottom
Abstract
- I have created a rain chain for gutters of houses. I have seen these used on houses before when a gutter continuosly overflows and water puddles up in bad places. The rain chain directs the water down the chain from the spout and can be collected into a bucket or place where a puddle is okay to form.
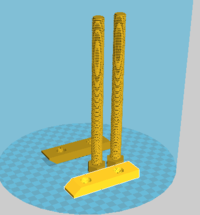
- Picture of completed print using your printer

Bill of Materials
Provide a full BOM -- 1 T-bar 3 Chain links per cup 1 Cup 2 Split rings 1 Metal bob 1 String
There are four files needed for this:
https://www.youmagine.com/designs/rain-chain
Tools needed for fabrication of the OSAT
MOST Delta RepRap or similar RepRap 3-D printer
Skills and Knowledge Necessary to Make the OSAT
- No Skill needed for this OSAT
Technical Specifications and Assembly Instructions
BOM
1 T-bar 3 Chain links per cup 1 Cup 2 Split rings 1 Metal bob 1 String
Instructions-
- Drill two holes in the end of the gutter for the t-bar to hang.
- Take one of the chain links and clip it onto the circle part of the t-bar.
- Clip one chain link onto the one attached to the t-bar.
- Clip one last chain link onto the previous chain link.
- Clip the last chain link onto the top loop on the cup.
- To add more cups, add three chain links in a row onto the bottom loop then add a cup and repeat.
- Once rain chain is to appropriate length, a weight may need to be added onto the bottom with string and a metal bob.
Print time estimate
- T-bar: 15 min
- Chain link:3 min
- Cup:2 hr 21 min
- Ring: 7 min
- Assembly time: About 3 hours to print the chain with 1 cup down.
- Including drawings or pictures of the device at stage of assembly at minimum. (https://www.youmagine.com/designs/rain-chain)
Cost savings
- Print cost: $8
- Commercial semi equivilent rain chain [1]
- $39 savings and %83 savings
Benefited Internet Communities
- Name and add links to at least 5 using single brackets around [url name]
References
- The sources of information (e.g. engineering handbooks, journal articles, government documents, webpages, books, magazine articles etc.). References should use the <ref> </ref> and <references/> tags and can be in any format but should include all the information necessary for someone else to find the same information you did. For example: [1]
- ↑ web page: Department of Energy (DOE) Landscaping and Energy Efficiency, DOE/GO-10095 (1995) Available: http://www.eren.doe.gov/erec/factsheets/landscape.html
Based on the developmental needs addressed (e.g. food, heat, electricity, clean water, health care, etc.) be sure to label your device in the proper categories e.g. use [[Category:Water]]. Be sure to categorize your device so that it will be easy to find – for example “Low voltage connection basics” is categorized in [[Category:How tos]] [[Category:Electricity]] [[Category:Electric lighting]].