(→Lamps) |
|||
| Line 6: | Line 6: | ||
In order to switch the lamps on, you must flip the green switch to on. | In order to switch the lamps on, you must flip the green switch to on. | ||
*Click start button | *Click start button | ||
*Wait for the machine to set up | *Wait at least ten minutes for the machine to set up before starting program | ||
*There should be a loud cranking noise, and if it does it means that the machine is working correctly. | |||
<gallery> | <gallery> | ||
Image:spectroscopy_switchon.jpg|UV spectroscopy unit switched to on | Image:spectroscopy_switchon.jpg|UV spectroscopy unit switched to on | ||
Revision as of 20:08, 20 June 2014


what is it - -make model link to spec sheet - photo
Lamps
In order to switch the lamps on, you must flip the green switch to on.
- Click start button
- Wait at least ten minutes for the machine to set up before starting program
- There should be a loud cranking noise, and if it does it means that the machine is working correctly.
-
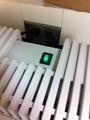
UV spectroscopy unit switched to on

Cuvettes
-
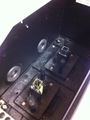
Reference is to the right, samples to the left

The reference cuvette is the one that is farthest away from the front of the machine.
- Located near the back of the UV chamber.
A beam of light will be split into two beams
- These beams will shine through your sample and a reference then compare the two wavelengths
The sample cuvette should be placed in the sample cuvette holder
- The sample should be taped as flat as possible against the cuvette's outer layer
- do not tape sample to the inside of the cuvette
-
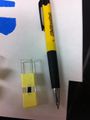
Samples attached with tape to cuvette

Idle
1. Auto zero the machine by pressing autozero
2. Put samples into respective places
3. Click the start button
Export
XY data by column
Raw spectrum file