m (Houcke moved page 3D Printable Geniometer to 3D Printable Goniometer: Misspelling in title) |
|||
| Line 16: | Line 16: | ||
## Upload and link to all source files from open source CAD | ## Upload and link to all source files from open source CAD | ||
## Upload and link to all STLs | ## Upload and link to all STLs | ||
1. Printed parts linked above | |||
# Cost: 16 cents total filament cost | |||
2. Pencil | |||
# Cost: <$1.00 to purchase, however they are very common and can be borrowed at no cost | |||
3. Small piece of paper | |||
# Cost: Take from recycling/garbage (This should be found for free with no issues) | |||
== Tools needed for fabrication of the OSAT== | == Tools needed for fabrication of the OSAT== | ||
Revision as of 06:52, 5 December 2019
3D Printable Goniometer
Project developed by Eric Houck, Houcke
Template:Statusboxtop Template:Status-design Template:Status-prototype You can help Appropedia by contributing to the next step in this OSAT's status. Template:Boxbottom
Abstract
- Paragraph description of the OSAT - why is it Appropriate? What need does it fulfil? Are there case studies you have found of a technology being used successfully?
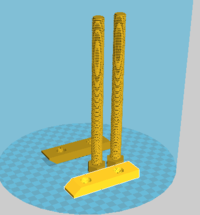
- Picture of completed print using your printer

Bill of Materials
- Provide a full BOM -- Materials needed for fabrication of device and alternative materials if they are not available, prices/sources of non-printable parts
- Upload and link to all source files from open source CAD
- Upload and link to all STLs
1. Printed parts linked above
# Cost: 16 cents total filament cost
2. Pencil
# Cost: <$1.00 to purchase, however they are very common and can be borrowed at no cost
3. Small piece of paper
# Cost: Take from recycling/garbage (This should be found for free with no issues)
Tools needed for fabrication of the OSAT
- MOST Delta RepRap or similar RepRap 3-D printer
- Paper
- Pencil
- Straightedge
- Scissors
Skills and Knowledge Necessary to Make the OSAT
- If you used special skill – link to relevant Wikipedia or Wikiversity articles/courses
Technical Specifications and Assembly Instructions
- Provide directions for print/assembly - be detailed enough in your “how to” to ensure that someone could construct the device from your description. Consider the elegance of IKEA like instructions.
- Include print time estimate
- Include assembly time estimate
- Including drawings or pictures of the device at stage of assembly at minimum. (http://www.appropedia.org/Special:Upload)
- Consider video if appropriate
| Example video summary of textbook |
|---|
Error in widget YouTube: Unable to load template 'wiki:YouTube' |
Common Problems and Solutions
- Include common mistakes/problems to avoid in building your OSAT and how to overcome them
Cost savings
- If your solution is not a low cost one then it is not really appropriate.
- Estimate your costs
- Find a commercial equivalent, cite it and put the [url in square brackets]
- Calculate $ savings and % savings
Benefited Internet Communities
- Name and add links to at least 5 using single brackets around [url name]
References
- The sources of information (e.g. engineering handbooks, journal articles, government documents, webpages, books, magazine articles etc.). References should use the <ref> </ref> and <references/> tags and can be in any format but should include all the information necessary for someone else to find the same information you did. For example: [1]
- ↑ web page: Department of Energy (DOE) Landscaping and Energy Efficiency, DOE/GO-10095 (1995) Available: http://www.eren.doe.gov/erec/factsheets/landscape.html
Based on the developmental needs addressed (e.g. food, heat, electricity, clean water, health care, etc.) be sure to label your device in the proper categories e.g. use [[Category:Water]]. Be sure to categorize your device so that it will be easy to find – for example “Low voltage connection basics” is categorized in [[Category:How tos]] [[Category:Electricity]] [[Category:Electric lighting]].