Documenting devices in Appropedia[edit | edit source]
Welcome! If you are here it means that you have created, replicated or adapted an open hardware device and now you want to share your knowledge with the world. Kudos to that!
This page will guide you through the steps to share the information about your device in the most efficient way, so others can use it or contribute to its development.
Initial checks[edit | edit source]
First things first: go to the Devices homepage
There you will find a comprehensive list of all devices already documented in Appropedia. Do you find any device that is similar to what you have made or adapted?
When should I create a page for my device?[edit | edit source]
- Your device is an original creation
- Your device is a replica of an existing design that is not already in Devices homepage
- Your device is a variant of an existing design that is not already in Devices homepage
Once you create your page, you can follow the steps in the next section to ensure your design is reusable.
In all other cases, the best thing to do is to enhance the documentation in the existing page, taking the steps in the next section as a guide.
Device documentation structure[edit | edit source]
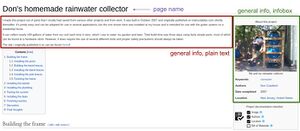
In Appropedia, information can be found in two main formats: plain text, and templates. There are many available templates: infobox, steps, notice are some examples.
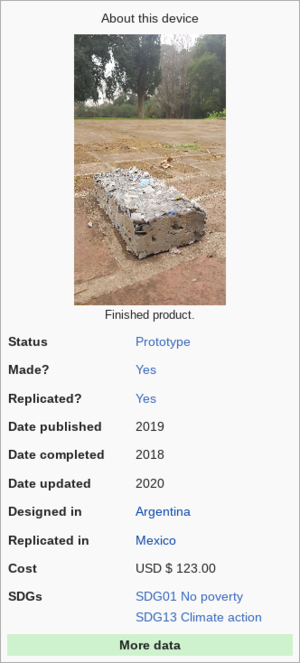
Right after you create a new page for a device, you will find yourself completing a form with many fields. These fields will be displayed using the infobox template on the right side of the page. All other information you see in the page is just plain text, that you can add and organize by editing the page.
Learn more about the structure of Appropedia's pages here: Help:Getting started
An example device[edit | edit source]
Take a look at the following example, that complies with all the minimum documentation requirements.
[[EXAMPLE]]
Steps for devices documentation[edit | edit source]
Your device may be analog, electronic, simple, complex, a replica, a fork, an original creation... We love them all!
Just make sure you follow these 8 steps to document it, and anyone will be able to build it and use it.
Creating & naming your device page
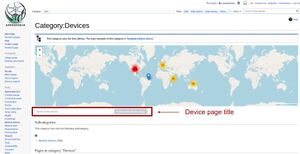
You can create the page from Category:Devices page (see the picture on the right).
The name of your page should reflect the main feature of your device. Use a clear and descriptive name, in lower case except for proper names, and avoid these symbols: & # < > [ ]
Populating the infobox
Right after you create the device page, you will find a big form. We suggest, as a start, to complete the following fields:
image
caption
language
status
made
replicated
date-published
designed-in
replicated-in
cost-currency
cost
sdg
For a full description of the infobox, its fields and accepted values, visit the Template:Infobox device.
Provide a general description
One or two paragraphs containing, in a clear and concrete way, information on the following:
- What is the function of the device, what does it do?
- Why did you make this, which situation motivated you?
- Is the device to be used only in specific situations or contexts, which ones?
- Links to other platforms where the design is published, if applicable
Provide a list of necessary materials
Using the template Bill of Materials, make a list of all items (with part number when applicable) required to build your device, how many of each are needed and their cost.
You can also turn the names into links to the website where you ordered the part. If you think some components are difficult to find, try to indicate a possible replacement.
Do not forget to specify the currency you are working with!
Using the Steps template you can easily list instructions for users in a readable way (just like this list of steps you are reading).
Good assembly instructions are clear, avoid jargon and provide images when possible (you can even embed videos using the Video template).
You will probably need to create two different sections, one with instructions for people to replicate your design, another for people to use it.
Share your source files
Different kinds of designs will make use of different source files (CAD, schematics, drawings). Besides these differences, what makes your design open is that we can access and edit those files.
Add a section called "Source files" with links to 'ready to use' files, but also make sure you include links to their editable forms. E.g. if your project includes 3D printing, you can share the STL but we should also be able to download the STEP files.
Don't forget to add code, if your project needs it!
Open hardware designs are released under specific licenses. You can learn more about this here
Licenses are important, as they enable downstream users to legally (re)utilize your design.
Just add a section called "License" and the text
This hardware design is released under [your choice of license here]
You have completed the minimum requirements that ensure Appropedia visitors will be able to reuse you device: you should be proud!
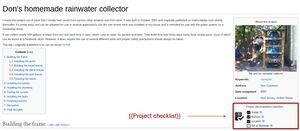
Show the world all the work you've done by adding this snippet in your page
{{Project checklist}}This will add a section, below the infobox, showing a checklist of all complete documentation items.
Pending stuff[edit | edit source]
- Make a use case and link it here
- Add a next steps section for people who want to certify oshwa
