
Trillium Charter School cob bench with tunnel

| Type | Cob bench |
|---|---|
| Authors | Cookieclaire D3comp0sing Zoe Banks |
| Location | Arcata, California, United States |
| Status | Deployed |
| Years | |
| Made | Yes |
| Replicated | No |
| Uses | education, science |
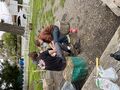
Our team Hold My Bench!, made a bench out of cob and recycled materials for Trillium Charter School (Arcata, CA). It was designed and built from February 2023 to May 2023. Our motivation was to create a new fun seating space for the children at the school, that would also look pretty and teach them something. The intended users of the bench are the children of the school.
Background
[edit | edit source]The Spring 2023 semester class of Engineering 215: Introduction to Design is partnering with Trillium Charter School for a semester-long design project. Trillium is an elementary school, with two classes: a tK-2nd grade class and a 3rd-5th grade class. Their classes are very focused on protecting the environment and kindness to their peers. Trillium is a very small school, with a max school size of 45, and their campus is located in a renovated house. They have several add-ons to the home and a large backyard that doubles as a blacktop and recess area. The goal of Hold My Bench’s project is to create a lasting bench that students can enjoy during recess time and help them learn about eco-friendly building techniques.
Problem statement
[edit | edit source]The objective of this project is to provide Trillium Charter School students with a permanent, interactive seating area made of recycled materials. The bench will provide students with a chance to socialize and an opportunity for outside learning.
Criteria
[edit | edit source]This project, due to its purpose, usage, and location within Trillium Charter School, raises considerations that must be acknowledged during the design of the project. The most important considerations of this project are those involving the longevity and proper construction of the bench, and its use by children in the recessed area, including the safety and usage considerations. Considerations are as follows: Proper use of either cob or cement for the bench, and how longevity can be achieved by using either material, the desired location for the bench installation has a mound, which must be flattened and removed for the bench to be built properly in the area the client desires. Additionally, to maintain its longevity, drainage systems must be engineered on the bench to prevent pooling, and erosion of the material. Regarding safety and usage of the bench by the kids of Trillium, structural damage from kids using the bench in unconventional ways, including jumping off, pushing, and kicking the bench. All these actions the bench structure must be able to withstand. Below is a table of the criteria and their definitions that guided the considerations.
| Criteria | Description | Weight (1-10) |
|---|---|---|
| Safety | Safer than the splintering wooden picnic table at Trillium Charter. | 10 |
| Cost | The total price for the construction of the project is less than 700$ in total. | 9 |
| Aesthetics | Look at least as good as the wooden picnic bench or the other plastic colored benches in Trillium. | 8 |
| Durability | Harder to destroy than a plastic bench or wooden bench. | 7 |
| Environmentally Friendly | Less embedded energy and is less environmentally toxic than a Fisher-Price plastic bench and Reflects the values intrinsic to Trillium Charter School | 7 |
| Ergonomics | More comfortable than the wooden picnic table in the front of the school. | 6 |
Prototyping
[edit | edit source]Some images of the prototypes are below.
- Prototyping Gallery
-
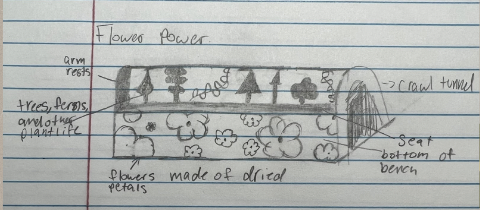 This is our base beginning pencil drawing of what we wanted our bench to look like. Given the fact that we were required to use a tube it was important that we draw a ton of options of how we get the tube incorporated into the bench and fully incorporated into the cob as well. We also spent a lot of ton of time deciding on the flower design between flowers or space themed but the children after interviews, revealed they liked the flower idea far more.
 -
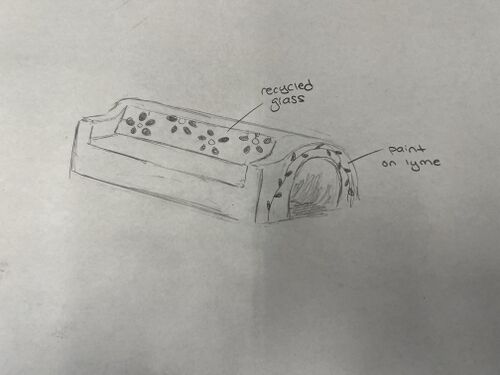 Here is another sample drawing of our beginning design process.
 -
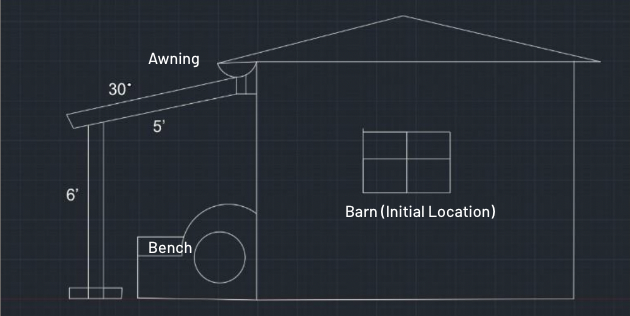 This is an example of our awning over the bench in CAD. Since the climate in Arcata is so rainy, We needed to account for how to protect the Earthen Materials.
 -
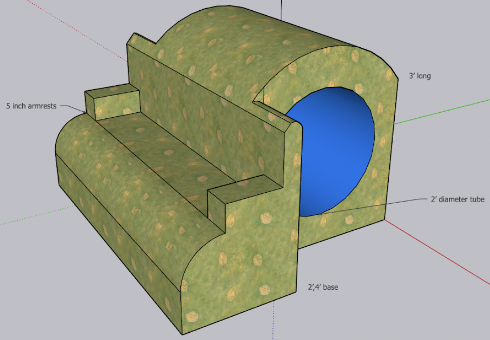 This is a SketchUp drawing of the bench with the tube in it, we had originally planned for armrests but got rid of them in the final design.
 -
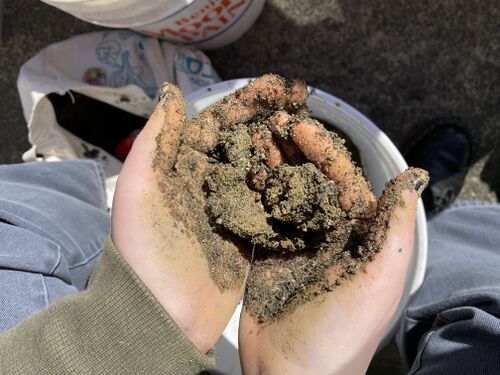
 For the physical cob we decided to test 8 different recipes of cob, and put them into bricks to let them dry and then test them with several tests.
 -
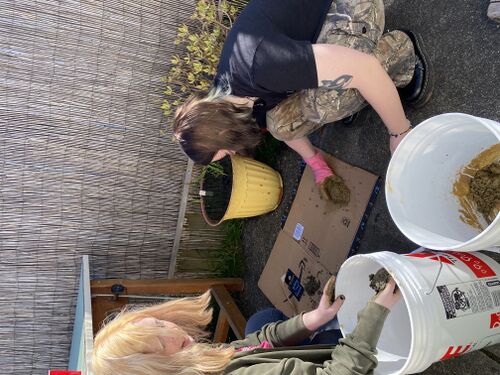
 We chose to hand mix the cob to save money, which ended up being a very messy intense part of the project.
 -
 Here is another example of our hand mixing progress.
 -
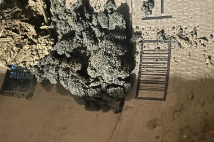 After we let the bricks dry, and sit in the Arcata rain for a week. We began our testing process, right of the bat some of the bricks crumbled, just like these did.
 -
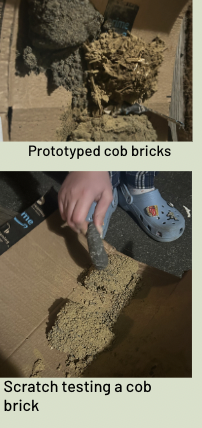 Some of the bricks stayed up well and then we scratched the bricks with a rock, hit them with the rock, and stood on them to see which was the sturdiest.
 -
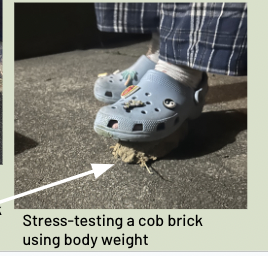 The strongest brick that we had, one of our team members could actually stand on it and nothing happened. It was a mixture of 40% fine sand, 40% clay, 10% straw, and 10% water.
 -
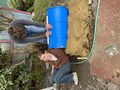
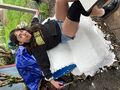
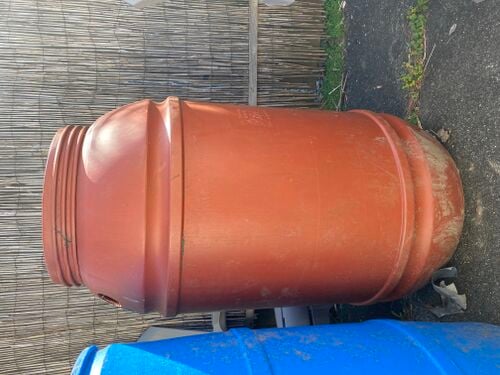 To finish out our prototyping process, we procured several rain water barrels to sit upon and crawl through to see which would actually fit the best for a child. This tube was too narrow to crawl through.
 -
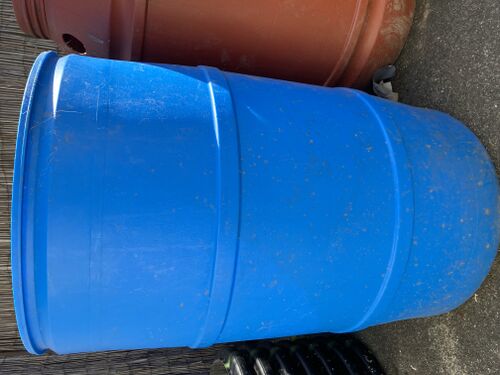 This is the tube we ended up using, it held the weight of team members well and also was big enough for grown bodies to crawl through.
 -
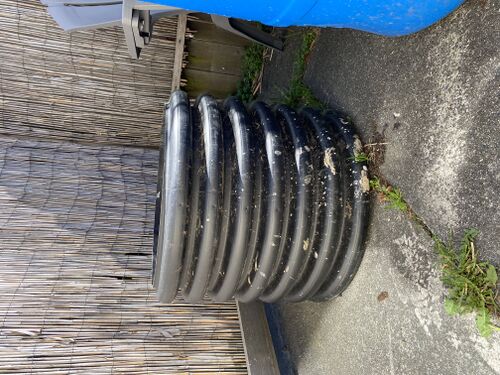 We had considered using two of these corrugated barrels in a row, for the tube but they ended up being way too narrow to crawl through.


Final product
[edit | edit source]An image of the final product is below.

Construction
[edit | edit source]- Construction Directions and Gallery
-
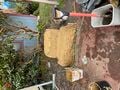
 First we collected supplies for this bench, starting with a ton of Urbanite cement chunks we found on craigslist for free to build the base of the bench with and the drainage system with.
 -
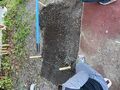 We then went to the site and mapped out the are where we would be digging a 6-inch deep pit to place the base cement chunks and gravel to create the drainage system and base for the cob to rest on.
 -
 Here is another picture of what out 4' x 2' rectangle looked like.
 -
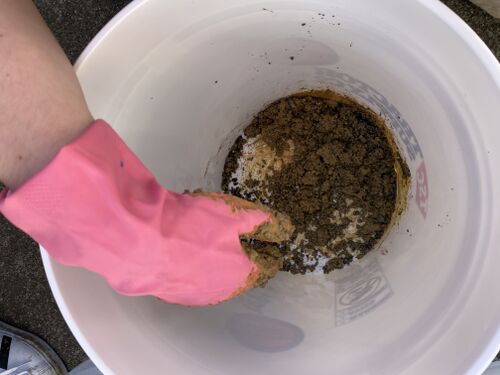
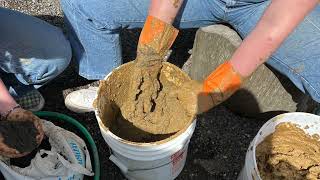
 Then we had to spend several days mixing buckets full of our cob recipe 40% Sand, 40% Clay, 10% Water, 10% Straw, to be able to cover the whole bench frame.
 -
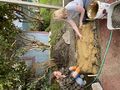 We then covered the cement we used as a seat of the bench first, and laid a pile of cob underneath where the tube would end up laying on the bench.
 -
 We then used a jigsaw to cut the end off of the rainwater barrel and used nylon screws and nuts and bolts to secure wooden plank panels onto the barrel to ensure the structural safety of the bench and allow the cob to stick to the plastic of the barrel better.
 -
 We then covered the barrel with cob to finish out thick 2 inch layer of cob all over the bench. We then left it to sit for 2 weeks to dry. We would recommend letting the cob sit for even longer if you have the chance to allow it to fully dry.
 -
 We used a lime plaster to seal the bench, created by mixing hydrated lime powder with water and letting it sit for several weeks before laying it onto the bench in thick layers and then letting it dry for a week.
 -
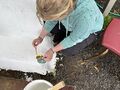
 We let the bench rest for a week before we began using a lime wash paint mix (of the lime plaster, extra water, and acrylic paint) to paint native California Flowers and their names on to the bench.
 -
 We also made sure ro weight test the bench before we painted it to make sure the plaster was dry enough to paint upon.
 -
 This is the final product once we painted all of the flowers and theit names onto the bench.


Video instructions
[edit | edit source]Some video instructions are below.
Bill of materials
[edit | edit source]The total cost was $196.48 for the construction of the final product. See the cost breakdown in the table below:
| Item | Amount | Cost per unit | Total |
|---|---|---|---|
| Clay — Buckets Full - Free Donation | 10 | USD 0.00 | USD 0.00 |
| Sand — Tote Bags Full- Free | 4 | USD 0.00 | USD 0.00 |
| Lime Plaster — 50lb Bag | 1 | USD 28.00 | USD 28.00 |
| Wooden Stakes | 4 | USD 2.50 | USD 10.00 |
| Nylon Screws | 12 | USD 1.30 | USD 15.60 |
| Wooden Planks | 2 | USD 7.00 | USD 14.00 |
| Rainwater Barrel | 1 | USD 30.00 | USD 30.00 |
| Nylon Nuts and Bolts | 12 | USD 1.16 | USD 13.92 |
| Gravel — Buckets Full- Free | 2 | USD 0.00 | USD 0.00 |
| Buckets — 4 Donated | 5 | USD 6.00 | USD 30.00 |
| 4 | USD 7.00 | USD 28.00 | |
| Paint | 3 | USD 3.99 | USD 11.97 |
| Paint Brushes — Pack | 1 | USD 14.99 | USD 14.99 |
| Grand total | USD 196.48EUR 168.97 <br />GBP 143.43 <br />CAD 243.64 <br />MXN 4,096.61 <br />INR 14,706.53 <br /> | ||
Operation
[edit | edit source]This is how to operate. As it is just a simple bench the instructions are uncomplicated.

Walk up to the bench. Sit on the seat.
Maintenance
[edit | edit source]Minimal maintenance cost is associated with the bench installation, however, if the surface of the bench were to be damaged from children at Trillium, the reparations for the cob structure should not cost more than $2 for the materials for any repair that would need to be made. The lime powder and bucket have been left with Trillium should they need to repair the plaster, this will account for any costs needed for repair as there is much lime left. The only thing they would need to do it mix the lime with water, let it sit, and then coat the area that needs repair and leave it to dry for one week.
Maintenance schedule
[edit | edit source]- Yearly
- Repair the Lime Plaster if it Chips
- Go over design with paint when it starts to fade away
Conclusion
[edit | edit source]Testing results
[edit | edit source]When using natural clay from Bayside soil, we learned that a 40% clay, 40% sand, 10% straw, and 10% water would be the best mixture for the strongest cob. The lime plaster protects the cob from water damage in the Arcata weather.
Discussion
[edit | edit source]We tested 8 different recipes like the one we ended up deciding on. We spent a lot of time on-site during build days making different decisions as to what needed to be done.
Lessons learned
[edit | edit source]This bench has gone through many trials and errors. The first large mistake we ran into was not taking into account for the wet weather we are currently having in Arcata. Because of this our bench took over twice as long as our prototype did to dry. This is a large issue because it pushes back our timeline and puts us behind of where we need to be. Another lesson we learned is to properly plan out everything with every part. We made five trips to Ace Hardware in one day purely because of the lack of planning for parts. This also increased our time and gas cost.
Next steps
[edit | edit source]The next step is to just ensure that the bench has a strong and consistent layer of plaster on. Since it is under an awning, there should not be too much weathering, but that being said the kids will eventually wear down the bench. The plaster should be applied once every few years when the bench seems like it is getting worn down.
The tunnel is not safe for students to sit or stand on top of. The tunnel will need to be bolstered, replaced, or removed during summer 2023.
Team
[edit | edit source]Hold My Bench! 2023 Engr 215
- Zoe Banks
- Claire Cason
- Jenna Crum
- Noah Mireau
| Authors | |
|---|---|
| License | CC-BY-SA-4.0 |
| Organizations | Cal Poly Humboldt |
| Cite as | Lonny, Itsmezoe (2023–2026). "Trillium Charter School cob bench with tunnel". Appropedia. Retrieved July 24, 2026. |