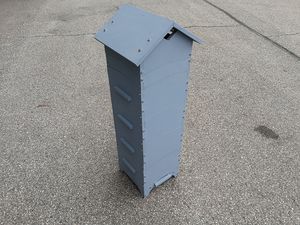
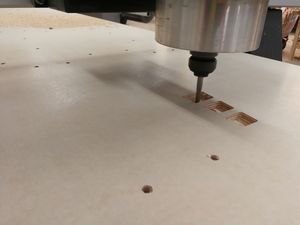
In the industrialized world in which we live, bees are constantly losing their natural habitat. To address this issue, although on a rather small scale, and to tickle my own fancy, I built a beehive my senior year in high school. I took woods class twice before; the first time I made a keepsake box; the second I made a wooden bike (which is to be continued), and this year I decided to make a beehive. Due to my extensive work with my high school's CNC router last year on the bike, and my experience on the robotics team, I decided to make my beehive entirely using the CNC router.
The natural world has always interested me, the trees, the birds, the bees, and I thought I'd try my hand as an apiarist. What seemed like a simple project to begin with, the aptly named Honey Forge took a lot more thought and time than I initially imagined. There are many different types of beehives. You have your classic Langstroth hive, WBC, CDB, Beehaus, Top-Bar, Perone, and many other types of hives. All of which have different characteristics that affect the bees kept within. I chose the Warré hive. Instead of using the typical, one may say stereotypical, super-and-frames design seen in the widely known Langstroth hives, a Warré hive uses simple top bars for the bees to more naturally build their honey combs. The Warré beehive was the simplest and cheapest to make, and will be the easiest to maintain and harvest honey from in the future. As an amateurish bee keeper, I found these traits to be quite necessary. After doing research in Warré hives themselves, I found the optimal dimensions for the individual boxes and began the design process.
Materials[edit | edit source]
Because I was going to use the CNC Router, I needed sheet material to work with. A beehive must weather years and years of, well, weather, and to ensure my hive stands the test of time I used high-density-overlay, HDO, plywood instead of regular plywood. HDO is coated with a layer of waterproof plastic to reduce the harmful effects of rain, and more importantly, snow on the wood itself. Using normal wood, such as pine or maple, the beehive boxes often become warped due to the heat of the sun and the wetness of the rain, but the HDO should stand strong and straight for years. Made specifically for outdoor signs, I am not worried about anything warping.
The smooth plastic surface is designed to adhere well to paint, so in the end I coated the exterior of the hive in three coats of an acrylic latex paint typically used on the outside of houses. Holding all the interlocking parts together are stainless steel, 1/4" lag bolts. The top bars are made out of strips of pine that the bees will build the honey comb from. The materials I put into the Honey Forge are meant to ensure a long life of beekeeping, and are safe for the bees to inhabit.
The total cost of this beehive was right around $100, which is half the price of a smaller Warré hive one can find available on the internet.
CAD Design[edit | edit source]
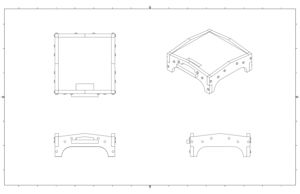
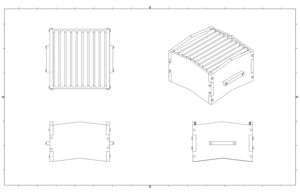
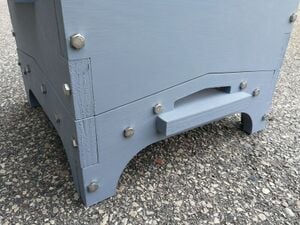
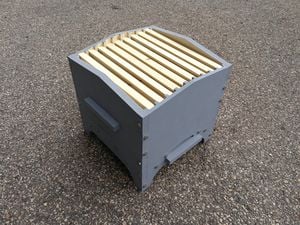
I used Autodesk Inventor to design the Honey Forge. A Warré beehive consists of boxes stacked on top of one another, a base with an entrance where the bees enter, a quilt layer that keeps the queen bee inside the hive, and a roof that protects the structure from the elements and helps regulate the hives temperature.
Usually Warré hive boxes are very standard rectangular prisms. All they need to do is stack on top of one another, and flat surfaces work rather well. The Honey Forge is a little different. Each box fits perfectly into the next box with an original nesting design. Since both the front/back and side/side are reinforced with a slanted edge, the boxes nest more securely into each other both on the x and y axis. This decreases the chances of heavy winds, falling branches, and hungry bears from knocking over the Honey Forge. The base, quilt, and roof are all outfitted with these slants so the entire beehive is secure.
Along with the separate components of the beehive fitting together nicely, each individual component fits together much like a puzzle. The corner joints of each part are teeth joints reinforced with the 1/4" lag bolts.
Once all the parts were cut out, I painted each piece with three layers of a cool grey acrylic latex paint. This further waterproofs the already waterproof HDO, and also looks pretty schnazee.
Files[edit | edit source]
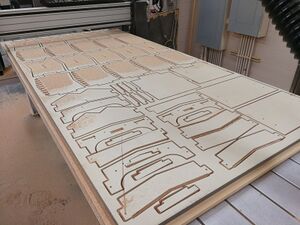
Here are all the design and CNC router files I used to make the Honey Forge. Anyone out there looking for a new beehive is more than welcome to use my design. After making the hive, there are definitely a few things I'd change building the next one. The files here though are exactly what I used to make the current Honey Forge, so it works. Be warned, the Hive MasterCam tool path should be changed. It actually cuts two unwanted slices out of two box walls. The plans are for five boxes, but because of this, there are only four. That's my bad, I didn't double check the program before I put it in the machine. Oops. An easy change to the tool path will fix that.
Open Source Link to project files: https://osf.io/w6pvn/
Run the Holes program first with a 15/64" bit, and then the Hive program with a 1/4" flat end mill bit.
Plans for the Future[edit | edit source]
So I have this beehive, what am I going to do with it? Right now I don't have the space nor the time to start a colony of bees, but when I go to Michigan Technological University next fall, I hope to get the Honey Forge up and running. To my knowledge Michigan Tech doesn't have a beekeeping club, so I hope to found an apiary club that will be open to anyone interested in beekeeping. I honestly don't know anything about beekeeping, but that's not the point. I want to learn. I want to figure out how to keep a colony of thousands of bees alive. Beekeeping is a great way for students to connect with nature because bees are an integral part of the natural world, and I want to spread what I learn to my peers at Michigan Tech.