
Cosmos in the Stacks Tsunami demo

| Type | |
|---|---|
| Authors | kgv8@humboldt.edu Alexander J Fick Jonas Norman |
| Location | Arcata CA, Cal Poly Humboldt |
| Environment | Swetman Makerspace |
| Status | Prototyped |
| Years | |
| Cost | 140 USD |
| Uses | education, science |
| Map | |
|---|---|
| Location | Arcata, United States |
| Coordinates |
The Cosmos in the Stacks Tsunami Demo is a wave simulation tank for Cal Poly Humboldt Library. It's one of 6 interactive displays in the Cosmos in the Stacks, designed to provide interest to the library's 3rd floor Stacks bookshelves.
Background
[edit | edit source]Students of the Humboldt Engineering 205 class were tasked to design this project by Cal Poly Humboldt Library's Dean Cyril Oberlander for the spring 2025 semester.
The Tsunami demo was initially built to highlight the Stacks bookshelves geology, geophysics, and oceanography section, however due the design containing water it was paced in the Hall of Simulation section on the library's 2nd floor.
Problem statement
[edit | edit source]To students and visitors of the Cal Poly Humboldt Library, the Stacks Bookshelves are underutilized. The geology section especially, due a low enrollment for Geology Students. There are also many misconceptions when it comes to Geology, and especially Tsunami's. Tsunami's are often mistaken as "Tidal waves" when in reality they are a seismic displacement of a water column. In the December 2024 earthquake that's epicenter was located in close proximity to Humboldt Bay, there was a widespread panic after a digital Tsunami warning was released. Many residents were unsure of where to flock to safety due to their minimal understanding of the local Tsunami Safety Zone.
The Tsunami Demo idea was conceptualized to mildly inform visitors of the Cal Poly Humboldt of the geophysics behind Tsunami's, provide an interest for geology, and to educate them on where the local Tsunami Safety Zone is.
Criteria
[edit | edit source]The engineering students who were tasked to design the Tsunami Wave tank compiled a Delphi matrix in order to determine criteria importance. Based on their understanding of the problem, they decided on the following criteria and weighed their importance:
| Criteria | Description | Weight (1-10) |
|---|---|---|
| Cost | The total price of all the materials utilized to design the Tsunami Wave Tank. Not exceeding the budget of 200 USD. | 8 |
| Durability | The ability to withstand wear, pressure, and damage over a 10 year time frame. | 8 |
| Minimal Upkeep | Requiring little care or maintenance over a 10 year time frame. | 10 |
| Interactivity | How interactive the demo is to the audience. | 8 |
| Informative | The quality of providing information about Tsunami safe zones and threats. | 9 |
| Attractiveness | Including features that peak interest. | 6 |
| Water Usage | Utilizing water or not. | 5 |
| Simplicity | Ease of use and being incomplex. | 4 |
| Accuracy | Providing an accurate depiction of how Tsunami's work and are formed. | 6 |
Prototyping
[edit | edit source]- Prototyping Gallery
-
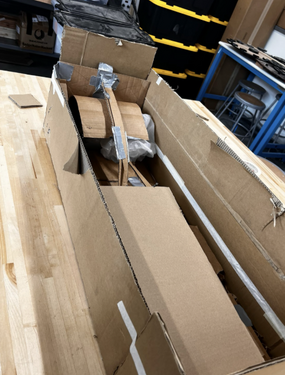
 Prototyping Tsunami Wave Tank Demo with cardboard as the material showing the size of the tank to scale, without the tank sides themselves, and the wave mechanism.
 -
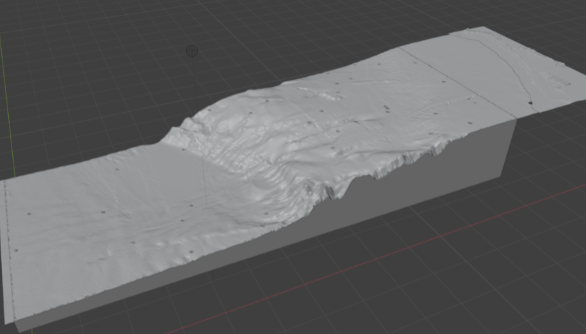 Prototyping Tsunami Wave Tank Demo topographic map of Arcata in software to be 3D printed to go in the bottom of the tank.
 -
 Prototyping Tsunami Wave Tank Demo with cardboard as the material within a to-scale cardboard box representing the tank.


Final product
[edit | edit source]Below are pictures of the final Tsunami Wave tank, which can be visited at the Cal Poly Humboldt Library Hall of Simulation.
- Final Project
-
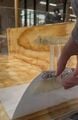 Photo of the wave lever mechanism on the right side of the tank.
 -
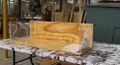 Photo of the wave tank from a right side perspective.
 -
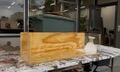 Photo of the wave tank from a left side perspective.
 -
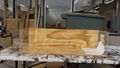 Photo of the wave tank from a frontal view.


Construction
[edit | edit source]The Cal Poly Humboldt Makerspace, located at Swetmans Hall Lab100 provided a workspace for the engineering students tasked to construct the Tsunami wave tank, as well as every other student project for The Cosmos in the Stacks.
The Tsunami Wave tank was constructed out of the following materials:
- Plywood
- Transparent Acrylic
- Silicone
- Epoxy Resin
- Synthetic Rubber Caulk
- Neodymium Magnets
- Superglue
Construction began with the acrylic and plywood being cut out for the tank. The plywood was cut using a table saw provided by the The Cal Poly Humboldt Forestry Woodshop and the acrylic sheets were cut out using the laser cutter accessible in the Cal Poly Humboldt Makerspace. These pieces were than assembled into a box using epoxy resin as a bond. The box constructed measures 36" long x 12" wide x 10" tall and serves as the enclosure of the Tsunami wave tank.
The wave mechanism for the Tsunami wave tank was also cut out of acrylic using the laser cutter. Scraps from the acrylic supplied to construct the box were used to construct the wave mechanism. The wave mechanism consists of 2 mirrored pieces that go on the inside and outside of the tank. These pieces were than superglued together for easy assembly.
- Construction gallery
-
 Tsunami tank sides getting glued with resin.
 -
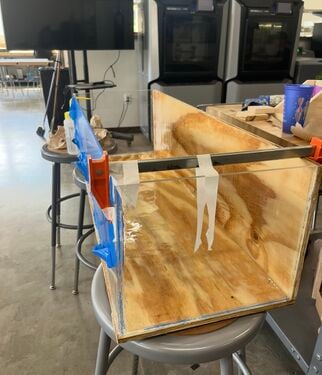 Tsunami tank front piece getting glued with resin right side perspective.
 -
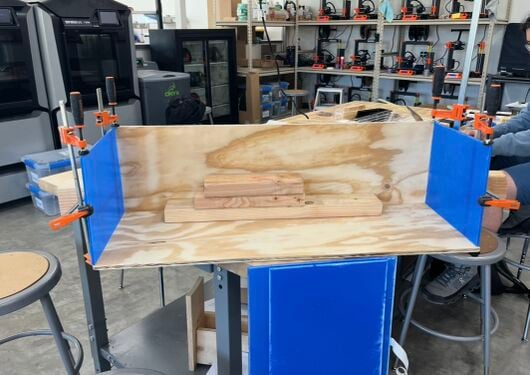
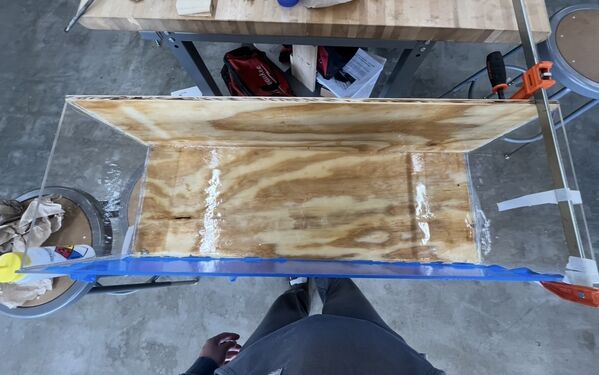 Tsunami tank front piece getting glued with resin top down perspective.
 -
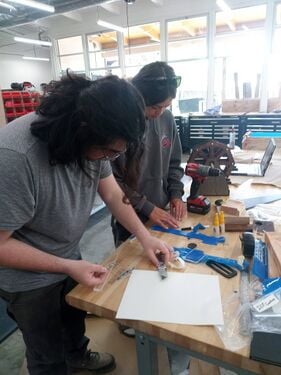 Kayla and Jonas of the 205 Cookers working on the construction and gluing of the wave lever mechanism.


Video instructions
[edit | edit source]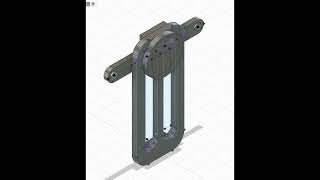
Bill of materials
[edit | edit source]Many of the materials were purchased from Hansel's Ace Hardware, aside from the acrylic. The plywood was scrap donated by the Cal Poly Humboldt engineering makerspace.
| Item | Amount | Cost per unit | Total |
|---|---|---|---|
| Clear Acrylic Sheet — Dimensions: 40 in. L x 24 in. W x 0.2 in. D Get at: https://www.mcmaster.com/8589K64/ | 1 | USD 94.84 | USD 94.84 |
| Magnet SourceSilver Super Disc Magnets — Dimensions .118 in. L x .315 in. W 10 pcs included Get at: https://www.acehardware.com/departments/tools/hand-tools/magnets/2102259 | 1 | USD 11.99 | USD 11.99 |
| Gorilla High Strength Clear Epoxy Resin — 0.85 oz Get at: https://www.acehardware.com/departments/paint-and-supplies/tape-glues-and-adhesives/glues-and-epoxy/1590793 | 2 | USD 8.59 | USD 17.18 |
| White Silicone Sheet — Dimensions: 9 in. L x 12 in W x 1/16 in. D Get at: https://tinyurl.com/bderp2zm | 1 | USD 11.01 | USD 11.01 |
| Sashco Lexel Clear Synthetic Rubber All Purpose Caulk — 10.5 oz Get at: https://tinyurl.com/btwdduc7 | 1 | USD 13.54 | USD 13.54 |
| Grand total | USD 148.56EUR 127.76 <br />GBP 108.45 <br />CAD 184.21 <br />MXN 3,097.48 <br />INR 11,119.72 <br /> | ||
Operation
[edit | edit source]Utilizing the materials listed above, you can recreate the exact build of this Tsunami Wave Tank Demo.


after modeling your tank, create a sketch in fusion of how your parts should be cut out of your chosen sheet of acrylic then click on the sketch and click export to dxf

cut out your parts using your dxf files that you made.

when glueing make sure to hold the parts together so they don't move

coat the plywood with epoxy so that it is water proof and also put caulk on all the connections to make sure that water won't get out.

put magnets into the holes in the magnet bar then put felt ontop. make sure the magnets are facing the right direction when you put them in. glue together the parts that you cut out of acrylic.
Maintenance
[edit | edit source]The outside of the Tsunami wave tank should be cleaned regularly to remove dust and fingerprints. If there is every any visible algae, the inside should be cleaned out. Since the box is sealed from all sides, the top must be removed to access the inside. The tank should be cleaned using a rag with water and soap; cleaning products that use solvents, such as windex should be avoided when cleaning the acrylic
Since the Tsunami wave tank contains water, there is a potential risk of it leaking, however that risk is unlikely due to the materials used for the tank. In the event that the tank were to leak, the tank has been placed in the library Hall of Simulation instead of the Stacks bookshelves to reduce potential damage caused to the library. Most leaks can be easily repaired with the use of a purchased backup roll of Flextape Clear, and the tank can be easily refilled with distilled water.
Maintenance schedule
[edit | edit source]It's recommended the tank is cleaned regularly every 1-2 months to remove dust and fingerprints.
Conclusion
[edit | edit source]Testing results
[edit | edit source]After testing our demo with water we concluded there were no leaks and the lever mechanism was operational.
Lessons learned
[edit | edit source]Lessons we learned in this project is get a head start and stay on top of all the assignments. Once you start submitting assignments late, all of them will be late and they will pile up last minute.
Next steps
[edit | edit source]Our suggested next steps are to make the mechanism more fine tuned and to possibly create a better tank for the demo in general.
Troubleshooting
[edit | edit source]| Problem | Suggestion |
|---|---|
| Leaking water | Use flex tape/waterproof sealant where the leak is |
| Mechanism breaks | Use superglue or gorilla glue to glue pieces back together |
Team
[edit | edit source]S25
References
[edit | edit source]
| Authors | |
|---|---|
| License | CC-BY-SA-4.0 |
| Organizations | Cal Poly Humboldt |
| Cite as | Lonny, 1234567890, AJFick, K6w3 (2025–2026). "Cosmos in the Stacks Tsunami demo". Appropedia. Retrieved July 13, 2026. |