
Cómo hacer un horno solar de cartón/en

| Type | Solar cooker |
|---|---|
| Authors | Felipe Schenone |
| Status | |
| Years |
On this page, I explain how to make a cardboard solar oven . After experimenting with several models, I describe the one I consider the best in terms of complexity, effectiveness, efficiency, and aesthetics.
Building a solar oven is easy, fun, and inexpensive. It helps us gain energy independence, saves us from heating the kitchen in summer, and reduces our gas, electricity, and firewood emissions.
Materials
- Two cardboard boxes - They must fit one inside the other, for example, one measuring 50 cm x 40 cm x 40 cm and another measuring 40 cm x 30 cm x 30 cm. Old boxes can be reused, but they should be in good condition to prevent heat loss and for aesthetic reasons.
- Two sheets of clear acetate - Each sheet should be large enough to cover the larger side of one of the boxes. In the example above, one sheet measuring 50 cm x 40 cm and another measuring 40 cm x 30 cm (or a single sheet measuring 50 cm x 70 cm cut in two).
- Roll of aluminum foil - 10 meters should be left over.
- Black pot with black or transparent lid - Must fit inside the smaller box.
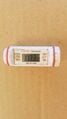
- Kitchen thermometer (optional) - Must withstand at least 150 degrees.
Tools
- Scissors - For cutting cardboard and acetate
- Cutter - For cutting cardboard and acetate
- Ruler - For measuring and marking cuts and folds
- Pencil - For measuring and marking cuts and folds
- Vinyl glue - To glue cardboard and aluminum
- Small container - For diluting vinyl glue in water
- Old brush - To apply vinyl glue
- High-temperature glue - For gluing acetate to cardboard
Instructions
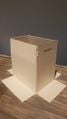 Inner box 40 cm x 30 cm x 30 cm.
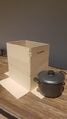 Mark for cutting, making sure there is room for the pot.
 The diagonal cut facilitates the entry of light.
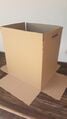 Outer box 50cm x 40cm x 40cm.
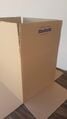 Mark for cutting, with the same inclination as the inner box and in pencil so that it can be erased.
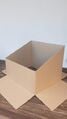 The second line is for making a fold.
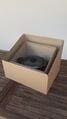 Outer box, inner box and pot, presented.
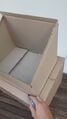 Place the base boxes together and mark the outline of the inner box.
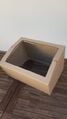 Cut off the base of the outer box.
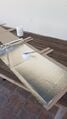 Open the outer box and line it with aluminum.
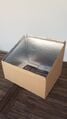 Outer box ready.
 Do the same with the inner box.
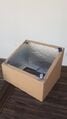 Fold and glue the edges.
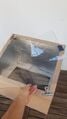 Cut two pieces of acetate, one for each box.
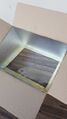 Glue the acetate on the inside using high-temperature glue.
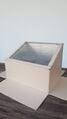 Inner box ready.
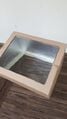 Do the same with the outer box.
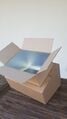 Insert the inner box through the base of the outer box.
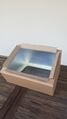 Cut off the excess cardboard.
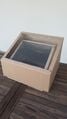 Oven body ready.
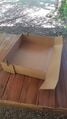 Build a base with a large piece of cardboard.
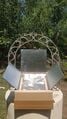 Build and glue reflectors.


Results
 113°C reached on the first day of testing, with an ambient temperature of 33°C.
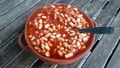 Sun beans.
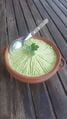 Solar hummus.
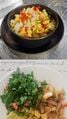 Solar vegetables.
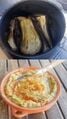 Solar babaganoush.
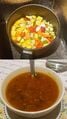 Solar soup.
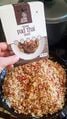 Solar rice.
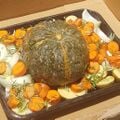 Sun pumpkin.


See also
- Gallery - All the photos of all the solar ovens I made
- Minimum Solar Box Cooker - The simplest model that served as my inspiration and starting point
- Video tutorial I uploaded to YouTube on how to make a model very similar to the one in this guide.
- How to make a solar dehydrator with a box - Another guide with similar techniques
| Authors | Felipe Schenone |
|---|---|
| License | CC-BY-SA-4.0 |
| Cite as | Felipe Schenone (2023–2026). "How to make a cardboard solar oven" . Appropedia . Retrieved May 21, 2026 . |