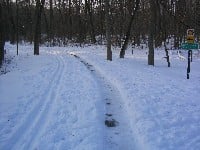
After years of not having much success riding my road bike in the snow, I discovered the seat could be raised high enough on my daughter's mountain bike for me to ride comfortably. Although the bike handled well in new snow, compacted, icy snow with hundreds of footprints and a few other bike tracks was a bit treacherous. I soon realized the amount of time it would take me to shovel the bike path would be paid back in a few days of quicker and easier riding. Additional motivation for this was the lack of any safe alternative route for a section of the forest preserve path. I could go across town to safer side streets but that would add almost 20 minutes each way on what is normally about a 30 minute commute. My first test at clearing a path was walking with a regular snow shovel. This worked fine although the constant lifting and dumping quickly tired my arms and back. Scraping the shovel on the pavement for a mile or so also wore down the metal tip. Heavier steel proved to be much more durable.
(Original web pages with more ramblings and designs that didn't work can be found here [1])
A Walking Push Plow[edit | edit source]
My general laziness and keen engineering skills soon came to good use as I designed a pushable plow that would roll the snow out of the way and not require any lifting. It is like walking while pushing a baby stroller although in deep, wet snow it is like pushing a baby stroller carrying a 100 pound baby who is dragging his feet.
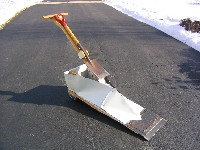
The push plow with integrated shovel holder.
The shovel is useful for chipping away at drifted or compacted snow.
The rear box turns out to be a handy place to put my hat and jacket once I start getting sweaty.
The "T" handle is removable so the whole unit fits in the trunk of a Honda Civic. The frame is made from 3/4" plywood and assorted 2x2 and 2x4 lumber. The top cover is shaped from aluminum flashing. The dark steel blade on front pivots on hinges to follow the contour of the pavement. The square front has the disadvantage of catching on most cracks.
The whole unit is about 16" wide. Although one can ride a bike on a narrower path (and I did try a 7" plow), the snow tends to fall back into the cleared area and bike pedals will hit any snow deeper than a couple of inches. Most bikes need a width of about 15" to clear the pedals.
The orange front wheel was added after I realized the front blade would gather a large mound of wet snow and the plow would become very difficult to push. There is an additional set of "wings" that bolt onto the rear to roll the snow out at a 30 degree angle. Heavy wet snow tends to form fairly large (almost 12") snow balls on the deck and they fall back into the plowed path if the wings are not used.
This plow was used for four major snowfalls during the 2001-2002 winter season and performed well even in 7" of wet snow.
A key lesson learned: Get out and clear the path soon after the snow stops, before it gets walked on and compacted!
Something faster is needed[edit | edit source]
The winter of 2002-2003 started out with a light 1" snowfall. The push plow did a nice job of clearing a narrow path but the effort of transporting the plow down to the bike path, walking while pushing it two miles and bringing it back home seemed to be a bit of overkill for such a light snow.
Since I commute to work on my bike, something I could carry with me would be very convenient. I started experimenting with plows that could be towed behind a bike. I considered this to be safer than a front blade after my experiences jamming the push plow on cracks and bumps in the pavement. The first test plow was built out of vinyl gutter pieces. It had an apex angle (blade to blade) of about 40°. Experience with the push plow proved wheels to be useful. I found inexpensive scooter wheels at a local surplus store. They met the requirements of being durable, narrow and had nice bearings. The plow was pulled by a rope attached to the rear rack on the bike. It had fairly low mass so the front tended to lift every time the rope pulled taut. The plow would bounce as the plastic blades flexed and touched the pavement. The plow also tended to swerve side to side since the rope provided very little lateral stability. With a 16" rear width, the plow ended up being almost too long with such an acute apex angle. The plastic blades became very brittle in the cold and pieces broke off during the first test run but it did a good job of clearing the snow off of the path.
After the first test run the essential features seemed to be:
- A rigid hitch for lateral stability
- A low angle hitch to prevent lifting
- Wheels for a smooth ride
- Steel blade edges for durability
- Capability of folding up for transport
I contemplated what an appropriate apex angle would be. An equilateral triangle had an appealing symmetry but I decided an isosceles right triangle would be enough for light snow and would provide maximum outward velocity of the ejected snow.
A plow towed behind a bike[edit | edit source]
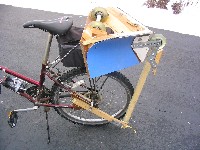
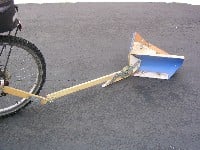
This shows the plow deployed behind a bike. The carriage bolts on top mate with the rear rack holes during transport.
The photos below show the original hitch design but click here to see the latest hitch design.
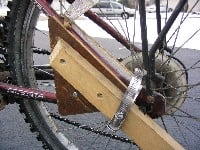
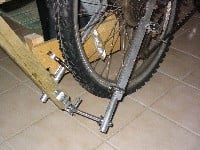
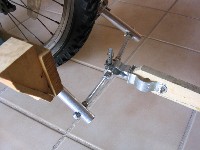
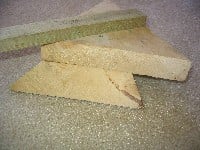
Detail of the hitch attachment. A triangular piece of wood with slightly larger plywood sides is captured in the stays ahead of the rear axle.
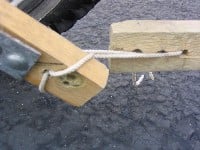
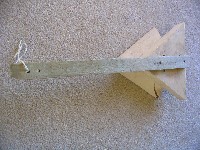
A piece of rope at the joint near the tire provides a flexible connection for cornering and tilt. The metal bracket holds the tip of a shovel in case I want to bring one along.
A bolt and wing nut secure the flexible joint when the unit is up for transport. The yellow wire just makes removing the bolt easier.
Detail of test ice breaking tooth. The clearance is adjustable. This tooth helped keep the wheel low but did occasionally catch on cracks. The stress of stopping the bike eventually cracked the main hitch bar and so the tooth was removed.
Each steel blade meets the ground at a 45° angle. The sides are made from two pieces of 1x6 (actual size 3/4" x 5-1/2") wood fastened 90° to each other so the top of the blade tilts out at a 45° angle. I added a filler piece of wood to reinforce the joint. The cross section of the blade looks roughly like three sides of an octagon. The blue plastic is from a cheap roll up sled with the shiny side out. It helps keep wet snow from sticking to the blade.
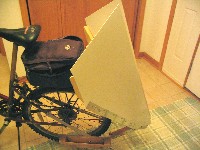
The plow flips up and rests on the bike bag for transit. A bungie cord holds it in place. A newer rack design can be seen here.
The Plow in Action[edit | edit source]
(Action photos courtesy of Gary Ross.)
A test scraper attachment is stowed on the top of the plow. It attaches behind the plow and is designed to skim down the hard packed crust that the main plow can't get.
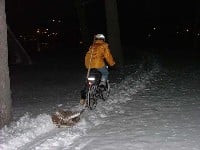
This is what the plow does. Note the relatively clean ski tracks to the sides of the plow track. These photos were taken only three days days after a snowfall with wind and drifting.
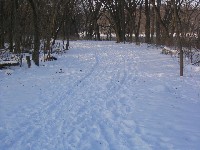
Here is what the path looks like where it is not plowed. Note the ski tracks and foot prints and footprints all over the ski tracks.
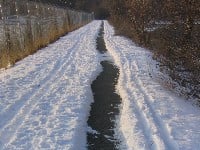
And nearby where the plow has been. Again, note the ski tracks and foot prints.
Ongoing Improvements[edit | edit source]
Wet snows in February 2004 showed the need for more lift of the exiting snow. After a few snowfalls the plowed path has deep sides and the current design is not able to fling the snow over the edges of the trough. Wet snow then tends to pile up in front of the plow and can become heavy enough to stop the bike. You can see that happening somewhat even with the shallow track in the action photos.
A modification was made to open up the outer top half of each side to allow a more vertical and outward exit for the snow.
I have received many requests for drawings or parts lists. Those will will included here.
Some comments[edit | edit source]
Although I did not anticipate this, I have received many thanks from walkers, runners, bikers and even skiers. It seems people tend to walk in the most compacted path. A plowed path keeps most of the walkers out of the ski tracks.
I have noticed even dogs will prefer to walk in the clear track.
The plow does not remove the snow perfectly but it certainly is better than nothing at all.
In general:
- Dry pavement is easier to ride on than snowy pavement.
- Thin snow is easier to ride on than deep snow.
- Smooth snow is easier to ride on than lumpy snow.
- Smooth ice is easier to ride on than lumpy ice.
Even during a cold spell when the temperature does not exceed freezing for many days, the plow track will be clear and dry in a day or two just from sublimation. The plow does not have to scrape the pavement completely clean for this to occur.
I have been asked "Why don't you just drive the car when it is too snowy?" There are many reasons why I decided to try to keep a clear path to ride on; the commute along the bike path is so much more peaceful than driving in traffic, it gives me an hour of (usually) low impact exercise at least 5 times a week, many of the side streets are plowed and the bike path is a small but critical portion of the ride, and so many other people can get out and use the path too.
Someone called into the Sound Off for the March 1, 2003 edition of the Kane County Chronicle and said "I want to thank the thoughtful person or persons who, after a snowfall, shovels a single-lane footpath along the east side bike trail between Fabyan and Batavia. It makes our morning walk less hazardous and more enjoyable."
Feature Summary[edit | edit source]
Taking all the good features of each plow and combining them will produce a unit with the following:
- Scooter wheels and steel front.
- Vee shape to reduce chances of catching in cracks.
- Folds up for transport.
- Higher profile to get snow up out of trough.
- Wings to shape sides of trough and fling snow farther out.
- Ability to be pushed by hand in deep snow.
- Not too heavy.
- Room for a bucket if additional weight is needed.
- Simplified construction.
Wheel Placement[edit | edit source]
January 2005 started off with about 8" of wet snow arriving over the course of 24 hours. It started snowing during the day and was about as deep as I could handle (maybe 2" of very wet snow) and still maintain riding speed on my way home from work. Another 6" fell overnight. I was interested in trying out my latest design that put the front wheel just slightly behind the blade so it could cut cleanly down to the pavement.
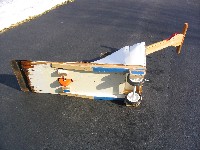
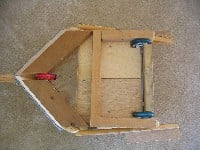
Bottom view of a plow with the front wheel located behind the blade.
Attempting to plow in the morning revealed a critical design requirement: the front scooter wheel should be ahead of the plow blade. The wet base was now icy and packed and the nose of the new design cut right down to the pavement. Even walking I could not make much progress against the ice and heavy snow. I was the first one out in the snow that morning but by noon dozens of walkers had been out and the trail was getting packed down. Even the push plow made little progress in the hard packed snow.
The next morning I reverted to the good ol' blue plow (shown above). The scooter wheel ahead of the blade gives it the advantage of riding up on the hard packed snow and skimming only the lighter loose snow off the top. The aggressive cutting feature of the new design may still prove useful when dealing with ice or soft spring slush.
This plow version has been converted to a pushable plow with a nice Tee handle.
Holding it on the Bike[edit | edit source]
The Hitch on the Bike[edit | edit source]
I decided to try making a hitch that would center the forces and give some symmetry to the installation. It needs to pivot horizontally, vertically and rotate (not that this bike ever tips over).
The conduit clamps are joined by a 1/4"-20 bolt with a nylon insert lock nut. The bolt is tight enough to minimize rattling but loose enough to allow rotation.
Hitch with plow up
Hitch with plow down
The aluminum angles are held against the seat stays by hose clamps. The aluminum tubing is reinforced by a wooden dowel inside. The tubes can be loosened so the bottom tips swing up to provide more ground clearance.
A clevis pin in the small conduit clamp allows for quick release of the plow hitch.
The wooden box on the left side of the bike rack is the shovel holder.
Rack holder[edit | edit source]
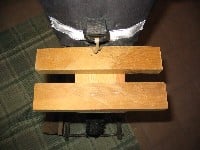
This just uses a piece of pine "base" molding and two 1x2s. The thin pine is wedged between the bike bag and the rear rack. The gap between the 1x2s captures the PVC axle tube. The 1x2s just fit between the plow wheels to keep the plow from sliding side to side.
Plow stowed for transport. Note that the hitch allows the plow to rotate so the bottom can face the bike's wheel.
Other Designs[edit | edit source]
Specialized (bike company) competition winner, a 4 wheel device[edit | edit source]
Pedal Powered Snowplow - a video entry in the Specialized Innovate-or-Die contest. It is pedal-powered snowplow, made from an old riding lawn mower, junk bike parts, and two shovels.
In comparison to the the bike snow plow described on this page, it appears to fill a somewhat different role:
- More effective at clearing a wide path. The bike snow plow clears a narrow path.
- More work to ride, and probably slower.
- A specialized device, rather than an attachment to a regular bike
A Really Simple Plow[edit | edit source]
For those of you needing something quick and simple. This won't drag you down yet will still get some of the snow out of your track. Scraps of 2x8 will make a plow 10" wide.
A Simple Plow
Top View of a Simple Plow
This plow works well to clear enough snow out of the way so the next bike pulling the main plow can get good traction.
The Drift Cutter[edit | edit source]
One January we received about 8" of fairly light snow over a Friday night into Saturday morning. I got out early Saturday and the push plow cut through very nicely. That afternoon and into the night the winds picked up and the snow drifted deeply in some of the open areas. Drifted snow can be very difficult to cut through. By Sunday afternoon there was a hard packed base, a few inches of power and then a crusty top. The push plow could not make much progress since the snow was as deep as the body of the plow and thus the wings were not rolling the snow out but just jamming like a cork in a bottle.
I decided I needed a pushable plow that would have the following features:
- Two wheels to allow me to tilt the blade to cut or skim depending on the base.
- Shallow angle for maximum lifting force.
- 16" total lift height.
- 17" front blade tapering out to about a 32" total width.
- Short enough (4 feet) to fit in the trunk of the car.
I really liked the blue plastic roll-up toboggan that I used on the original bike plow. I had been looking for more of those or something similar to cover the plow and provide a slippery surface. I was considering using the inexpensive self-stick vinyl flooring tiles when I stumbled upon the ideal material. It is a 0.060" thick white plastic wall covering intended for bathrooms and kitchens. It comes in a 4' x 8' sheet for about $14 at the local building supply centers.[2]
Here is what I ended up building:
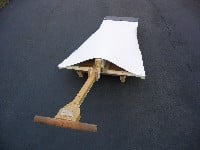
Rear view. Note the handle from the Push Plow
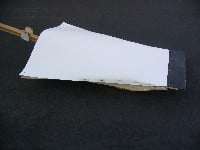
Drift Cutter Side Side view
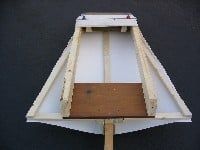
Drift Cutter Bottom Bottom view
The main frame is 2x4s with plywood in the front to hold the steel cutting blade and on the bottom to provide a sledding action when the unit is tilted up.
Some pine 1x10 across the rear support the pocket for the Tee handle. 1x2s are used for the truncated tetrahedral frame. The plastic sheeting is screwed on almost like upholstery.
Scooter wheels are used again. They are placed about 12" back from the front so the blade touches the pavement at about a 20 degree angle.
Initial tests show it works well. The variable blade angle is handy for getting over the ice that would be too hard to cut otherwise.
Plow Physics[edit | edit source]
With the heavy snows of 2005, I decided actually spend some time thinking more about the physics of the plow and if a different shape would help.
Think first of the low speed case or the action when one is using a regular shovel. Obviously some work is involved and it is mostly just moving the snow against the force of gravity to get it up and out. Good old where m is the mass, g is acceleration due to gravity and h is the height of lift.
The high speed case is typical of the action of the plow in thin snow. If you believe in conservation of energy then one can determine the work involved. Assume the plow is easy to pull and the plow surface is frictionless (generally not the case). Assume the snow is just resting on the pavement and not stuck (again, this is often a bad assumption).
The following assumptions are generally true:
- All the snow encountered must exit the plow
- The snow is compressible and the collision with the plow face is fairly inelastic
- The snow might even stick to the plow, be carried along for a bit and then fall off
In the simple case where the plow picks up a blob of snow and carries it along at V, the energy of the snow is
As the plow moves along it is constantly encountering new snow that gets picked up, carried along and dropped off to the side. Since the power required to pull the plow goes like
The mass of snow encountered per unit time is proportional to the speed of the plow so the power required goes like the cube of the speed (as it should).
It is apparent that even a flat plate (i.e 90º half angle) will push snow out of the way but the mound of snow ahead of the plate forms some natural angle of shear.
The blue plow shown above has a nose half angle of 45º. Although a narrower plow would seem to require less power, it turns out other factors come into play. A narrow plow was tested and it looks like compression of the snow and friction with the plow blade absorb a lot of the energy. The snow friction tends to negate any advantage of a long narrow plow, especially if it sticks to the blade. The plow also gets very heavy and the lateral exit speed of the snow is not enough to prevent it from falling back into the plow cut. Also the drag increases rapidly any time the long metal blade contacts the pavement.
A long narrow plow also seems to have trouble tracking well since any lumps of hard snow or bits of ice stuck to the pavement push the plow to the side rather than being sheared off by the plow blade. Once the plow starts to oscillate side to side in the snow trough a huge drag develops and the speed can not be maintained.
One can plug in some numbers for typical snow density, plow angle, bike speed, etc. Ballpark calculations show the power required to pull a frictionless 45º plow 6 MPH in 6" of wet snow is about 127 watts. This does not include the difficulty of riding a bike in 6" of wet snow. Now add factors for snow friction (not small), wheel bearing friction (small), adhesion strength of snow to the pavement (sometimes huge) and you can see it is not easy to pull a plow in much more than a couple of inches of fresh powdery snow.
(Any good refrences to plow physics and snow dynamics would be welcome here.)
Created by Dave Peterson
Original: March 4, 2003
Updated: January 13, 2004 with new photos. February 2, 2004 with electric vehicle information. Feb. 5, 2004 with action photos. Feb. 18, 2004 with path photos. Feb.27, 2004 with links to the next generation. Feb. 2, 2005 added Contents. May24, 2005 changed email to image.
Section 2 original: February 26, 2004 Updated: January 10, 2005, Feb. 2, 2005 with drift cutter. Feb.11, 2005 with Physics and the Sharp Plow.
Adapted for Appropedia January 2007
Most recent update --Dave-Peterson 07:53, 17 January 2007 (PST)
Key phrases: Bicycle pulling snow plow, Bike path plowing, Shoveling the bike path, A plow behind a bike, Bike Snow Plow, Clearing snow from bike path. Snow Plow Physics. A Sharp Plow.
