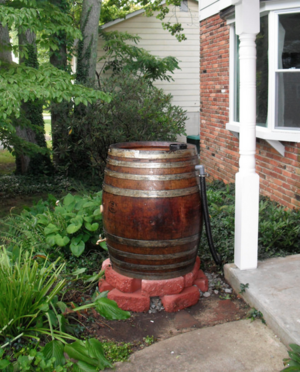
A rain barrel is a very basic way of collecting rainwater. It is easy to make and can be done using a wide variety of barrel-like containers, provided you are certain that the container is non-toxic to humans and plants.
Before making a rain barrel[edit | edit source]
Take precautions to ensure that the rain barrel cannot be accessed by young children or pets. Curiosity can result in drowning. Either fence it off in its location or use a sturdier lid that cannot be moved by small hands or paws.
Choose a suitable location for the rain barrel. It should be located near house or out building gutters, where it can be placed with ease under a downspout.
Choosing the container[edit | edit source]
Naturally, a barrel is the first option. Wooden barrels from wineries and distilleries can often be purchased at a reasonable price after they are no longer needed. If the barrel leaks, you'll need to seal the leaks with food-safe sealant.
Other containers that can make a good rain barrel are garbage cans or similar wide round containers with a decent length. Check that the plastic is good quality and safe for humans.
If you want to use other objects, always check their safety first; water used on gardens where you intend eating from, or for drinking water, should be made of food-safe/food-grade materials. This is less of a concern if the water is intended to keep ornamentals alive but it pays to avoid anything likely to introduce toxins into the garden. Some other possible containers might include large pipes and plastic vegetable oil vats that have been thoroughly cleaned out.
Making a very simple rain barrel[edit | edit source]
- Remove the lid if using a proper barrel. This will require a jigsaw or similar saw and the knowledge of how to use such a saw. Ask for help if you can't do this. Skip this step if you are using another type of container.
- Get window screen. This window screen is important and cannot be left out. The screen acts as a filter to keep out leaves and other debris; it also ensures that if a possum, cat, etc., accidentally falls onto the barrel, it doesn't fall into the water and drown. Importantly, it stops the mosquitoes from breeding in the tank too.
- Cut the window screen to fit over the opening of the barrel. Leave sufficient edges to tie down around the barrel (see next).
- Tie the cut window screen down onto the barrel. Pull down the excess edges left from cutting so that they surround the barrel. Use something to tie the screen tautly in place, such as a used bicycle inner tube, rope or old clothing. You might find other suitable objects to keep the screen in place; what matters is that it stays in place and is taut without gaps but is easy to remove, which is why the inner tube is probably the best choice.
- While it is possible to hold the screen in place with rocks, these can come off all too easily, such as when bumped, when it's windy or from a curious animal pushing them.
- Shift the rain barrel under the downspout. Position it to sit firmly, without wobbling. Position the downspout over the screen; it does not need to be cut into the screen, as the water is meant to filter right through it. If necessary, add a 45 degree angle the the downspout to facilitate placement.
- Wait for rain. Check after the first rains to ensure that the mechanism is working as desired. Make any adjustments that might be needed.
- Excess water won't be trapped, it'll simply overflow. If this is a problem, you'll need to organise a way to move the overflow to where it's desired.
- Take water. Simply remove the item holding the screen in place, and the screen, and dip your water carrying vessel into the water. Take what you need, then return the screen and holder.
Making a lidded or closed-top rain barrel[edit | edit source]
Please feel free to add the instructions for a sturdier rain barrel with lid and downpipe.
See also[edit | edit source]
Rain Barrel [1]