The Spring 2020 semester required rapid adaptation and cooperation in order to stay resilient during the COVID-19 pandemic. As such, our project also had to adapt and change. Our group includes Scarlett Trippsmith, Gilbert Trejo, Christine Marks, and Joseph Hajduk of Lonny Grafman's ENGR 305 course. While we had originally planned to create a project for Abuelita's Garden, a community garden in Eureka, CA, we had to change plans after finding ourselves in quarantine. Our project now reflects the spaces and resources we are limited to and our ability to adapt!
Problem statement[edit | edit source]
The objective of the project is to display four different methods of vertical gardening, adapting to our respective space and resources available.

Project Evaluation Criteria[edit | edit source]
The following criteria will be used to assess the success of this project. These criteria were chosen based on the suggestions of the project coordinator as well as the diligent students who are working on the vertical garden entrance. The scale (1-10) represents the importance level of meeting the constraint of each listed criteria.
| Criteria | Constraints | Weight (1-10) |
|---|---|---|
| Cost | Will be below the budget of $300 | 5 |
| Maintainability | Will be easy to repair when needed and will require minimal upkeep outside of normal operations | 4 |
| Aesthetics | Must be pleasing to the eye and look professional | 3 |
| Educational Aspect | Must include an educational piece for the community (something to explain the concepts and tools utilized) | 7 |
| Safety & Placement | Must not interfere with walking paths and must be easily accessible | 7 |
| Sustainability | Must consider sustainability in the short and long term in design and function | 8 |
| Functionality | Must sufficiently act as a vertical garden and appealing entranceway | 10 |
| Pest Control | Must take into consideration pest control, especially the local deer issue | 7 |
| Ease of Construction | Design and materials must not be too difficult to work with | 6 |
Proposed Timeline[edit | edit source]
This Timeline is not final. It is expected for this timeline to be updated, through out continuation of the project.
| Final Decisions | Due by | Notes |
|---|---|---|
| Alternative solution | 3/7 | Which Structure we decide to Prototype |
| Plant Choice | 3/27 | Which Native or Edible plants we want |
| Materials Ready | 4/8 | Materials gathered and ready to start construction |
| Finish Prototyping | 4/14 | Make our final failures before building the real thing |
| Building/ Planting Party due to COVID our own individual planting | 4/20 | Planting in our individual Pallet Gardens |
Interview(s) and Observations[edit | edit source]
Interview(s)
Interview 1: on February 14th at 1 pm the "Decision Makers" met with the head of the Abuelitas garden project manager, Matt Drummond. Matt is the manager of three different community garden projects in Eureka. He showed us the Toolshed with lots of tools that will need to be utilized. The garden is on a hill slanted toward a wetland just off the 101 in Eureka. Matt said that last year's biggest issue was that the deer kept getting in. He is building a fence that will be done 2 weeks, in hopes of solving the issue. When asked about the plants he would want to see in the garden he replied with kiwis and hops. I was surprised that there weren't more people there on the regular for volunteering and whatnot.
Observations
Observation 1: The location of this garden is near a wetland behind the freeway. I observed a couple of homeless people walking by and figure if this garden was growing edible foods, it could be utilized by people who are not always able to access healthy food.
Observation 2: One of the striking observations that I came across was the amount of wildlife that flourished around and within the garden. The nearby wetland provided habitat for a countless number of bird species that would swarm around the garden premises. Another observation and concern was the high deer population that threatened the efficiency of the garden last season. With a proposed fence to be built this should solve the issue of deer eating staple food crops this time around.
Literature Review[edit | edit source]
Hugelkulture Basics
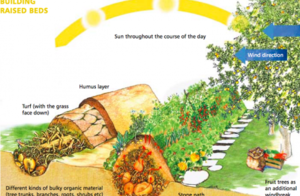
A Hugelkultur is a raised bed, with multiple organic layers of different varieties that decompose over time. This is a great way to use spare tree trimmings lying about, for enriches the soil with biodiversity. These beds are get filled like a lasagna with composts, lawn trimmings, dead logs, manure and so on to make an excellent home for fruits and vegetables.[1][2]
Vertical Garden
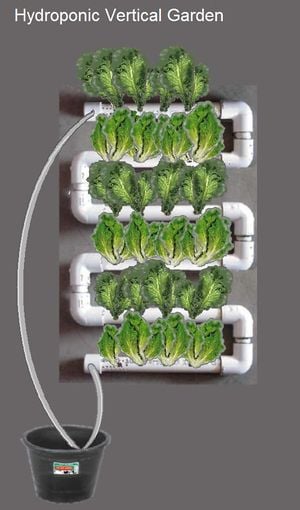
Vertical Gardening has many different components with the process, but the finished product can be super satisfying. We need to create pods for the different plants to make sure that they have room to grow. Irrigation, Light, and Air exposure are key for vertical gardening. Drip irrigation will probably be our best option.[3][4] Vertical Gardening deeply depends on light, water, air, and nutrients. By focusing on natural soil additives that hold moisture. Rather than strain through the soil, you are giving the plants more resilient structures to work with.[5]
Native Plants
A variety of native plants that thrive in Northern California's temperate rainforest climate can be implemented into Abuelita's Garden. Some potential species include the Fuchsia-flowering gooseberry, Pink-flowering currant, Common Snowberry, and the Bluff California Lilac. These specific varieties provide habitat for local wildlife and have aesthetically pleasing blooms or berries during the winter months. While native perennials are not the focus of this project they still do provide positive impacts upon the overall environment especially when companion planted with conventional food crops.[6]
Being aware of the seasonal patterns that affect native plants and all crops, in general, is extremely vital to the success of any garden design. Planting during the winter season must be devised around the potential frosts that could threaten the survival of young saplings or transplants. The best season to plant native species is during the winter months as this provides exponential amounts of rainwater to help establish fresh transplants. Based on the information provided in this book our group will begin planting native species just in time for the newly established plants to receive a substantial amount of rainfall.[7] With Abuelita's Garden having relatively close proximity to the coastline, being aware of potential flooding and threats of sea-level rise in the near future would be very important. Specific native marsh or wetland species would be a beneficial addition to the garden in order to provide education for the public on the preservation of our endemic coastal plants that are currently under threat of extinction.[8]
Community Inquiries
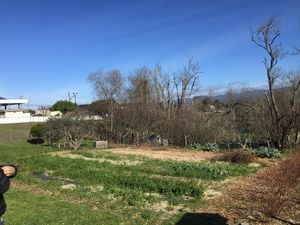
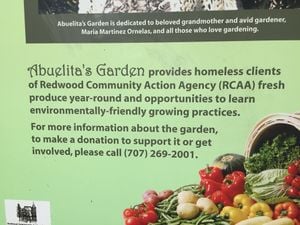
Abuelitas serves Eureka's Homeless Community Garden, the garden is dedicated to providing homeless clients of Redwood Community Action Agency (RCAA) fresh produce year-round, with opportunities to learn environmentally friendly growing practices. In the past Abuelitas has had free workshops on pruning fruit trees and how to nourish the soil.[9]
Community Gardens have adopted a political performance by a number of radical social movements. They are mentioned in writing from global justice and anti-capitalist movements, for example, Cuba went through a Green Revolution after the collapse of the Soviet Union. Cuba was left without resources for food so they started building and creating community gardens so they were able to harvest their own food without relying on other resources. Community gardens are a way for communities to come together and create a sustainable and free way of eating healthy food.[10]
Community Gardens can be beneficial to the environment and to the well being and health of community members. The introduction of community gardens may be able to reduce the impact of food deserts in low-income areas and allow residents an opportunity to access nutritious foods that they may otherwise not have access to. They can be a helpful addition to many communities by increasing the availability of healthy food, strengthening community ties, and creating a more sustainable system. Since we have needed to change the project around due to COVID the rest of this page will reflect each of our takes on vertical gardens and how they can make a beneficial environment in the safety of our own homes.[11]
Construction and Materials
It is preferred to use recycled and sustainable materials when possible. While in the early stages of research, a new fence is planned to be built on the project site around the perimeter of the garden. Different methods and materials were explored in order to find what would be best for the needs of our project. Three different materials were examined for appropriate use: wood, salvaged wood, and bamboo.
Wood
This[12] was an excellent source on both lumber choices and trellis structures, which will likely be incorporated in the project. Cedar, cypress, redwood, and white pine would be optimal for our project for its structural strength and rot-resistance. While the affordability of each wood is still in question and is likely regional, these four will be our go-to's if we decide to purchase new lumber for the project. Salvaged wood was also mentioned in the book as a possible material source and would be much more affordable and environmentally friendlier than purchasing new wood. While another source will be consulted for information on salvaged wood, this book offered fine tips.
Salvaged Wood
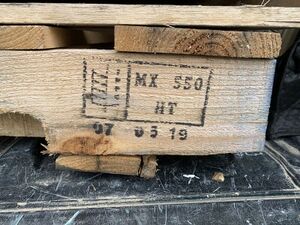
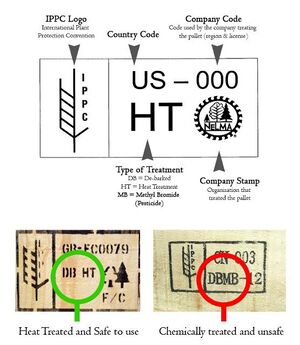
This[13] site offered an insightful guide to finding safe wooden pallets and preparing them for projects. This might be our best choice for building material as there is likely an abundance within a reasonable distance of the project site. Assuming we can acquire safe pallets free or at a cheap price, it would be our most economical choice. Important takeaways include:
- Look for IPPC logo
- If marked with codes DB, HT, or EPAL, it is safe. Otherwise, it is safer to discard
- Avoid all colored pallets
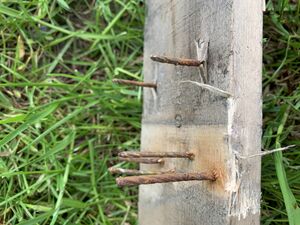
- Break down the pallet carefully using a cat's paw or pry bar
Bamboo
Reading through this[14] manual on bamboo revealed that it is likely not the best option for our project. Sourcing bamboo would be less convenient and likely less affordable than salvaged wood, and the limitations of bamboo make it less than compatible with the project location. While it was an excellent source of learning the uses of bamboo construction and the material could find its place in other parts of the garden, it is likely not our best option.
Methods
Along with methods for constructing a trellis to use as a vertical garden space. The first post setting method was using a concrete substitute that would be more environmentally friendly than conventional concrete. Greencrete[15] was considered, which recycles industrial byproducts such as fly ash and slag cement. It may be worth the extra effort assuming the materials are easily accessible, but in reality it is most likely outside the scope of our project. The second and preferred method is to key[16] the posts. This method includes adding a wide board, perpendicular to the direction the post will be stressed, to the post about an inch under the soil. This adds reinforcement where necessary without the need for concrete, which would likely increase the risk of the post rotting. This method will also make the post easier to replace if necessary. Building a trellis is something we can likely do while integrating the new fence, thus giving it multiple uses. This[17] book gave a brief overview of various trellis designs, which will contribute to the overall design and aesthetic choices of the vertical garden. It also gave insight such as taking into account the foreseen size and weight of the plants expected to climb it, suggesting stringer, thicker wood for woody plants.
Designing interpretive materials
According to ______ interpretive materials for composting should include....
Total Cost| Quantity | Material | Source | Cost ($) | Total ($) |
|---|---|---|---|---|
| 6 | wood, plants, poles, chicken wire, soil, mulch | Hensons | 150.00 | 150.00 |
| 150.00 |
Construction[edit | edit source]
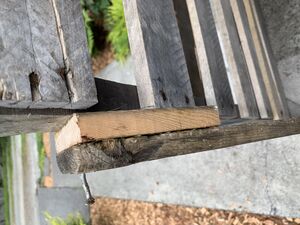
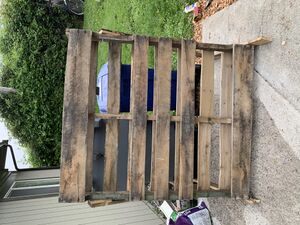
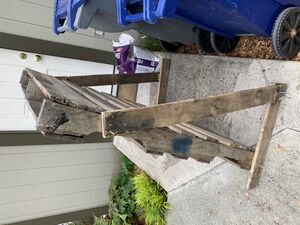
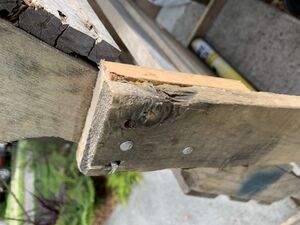
Gil - Vertical Pallet Garden
Required Materials:
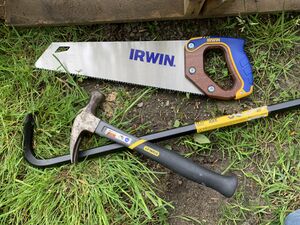
- Pry bar
- Hammer
- Hand saw
- Hack saw
- 2 wood pallets with an HT stamp
- Weed cover
- Nails
- Potting soil (1 1.5 cubic foot bag)
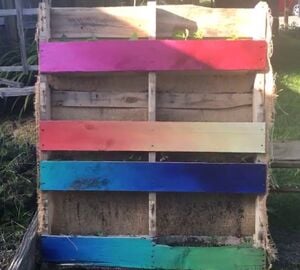
If you wish to paint the boards now is a perfect time! Just make sure you know how long each board is going to be and which sides will be facing out ahead of time
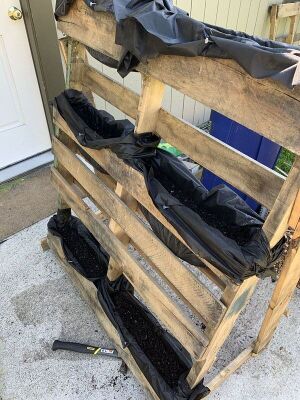
Arrange the pallet and boards to the desired positions and clamp together. Cut the boards to appropriate sizes to remove excess board length, while leaving enough room for the bottom board to extend a few inches in the front (to prevent it from falling forward). Using nails at least long enough to go through the board, space, and pallet, drive two through each of the three spaces the boards connect with.
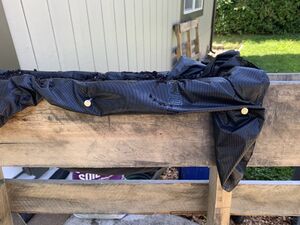
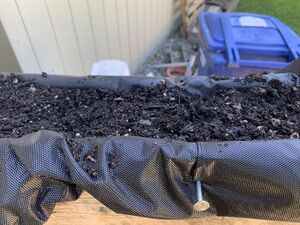
Folding over the weed cover to make two layers, stuff it inside the pallet to form a pocket. Using nails or staples, secure the pockets to the pallet on all four sides. Make sure that the pocket will be as deep as at least 6 inches for soil and some mulch. Be sure not to create tears in the cover with the nails.
Your vertical garden is ready! Transplant plants or sow seeds to enjoy your new pallet garden. Plants that do not have deep roots will work best. This form of vertical gardening would work best as an herb garden. Be sure to add mulch to protect the soil from losing too much moisture too quickly. A thin layer of wood ships would do fine.
Christy:Vertical Pallet Garden

1) Found a pallet and stripped two boards off it 2) Then put burlap on the back of the pallet to contain the soil and plants 3) Drilled the extra wood pallets under the pallets still attached to create three shelves 4) Placed the soil in the pallet shelves and then planted peas, kale
Joseph:Vertical Trellis Garden
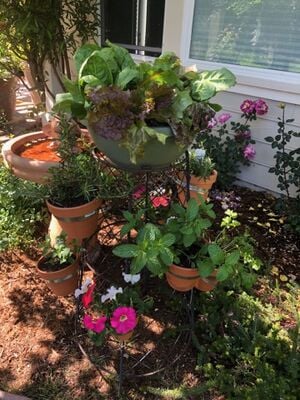
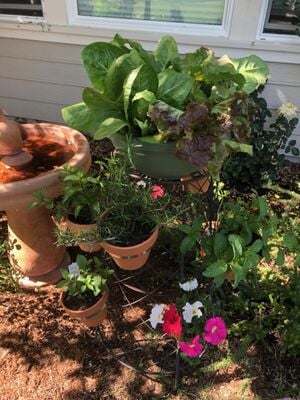
1) Found a metal trellis in my parent's backyard 2) Bought pots, plants, and metal wraps from Lowe's 3) Potted the plants and began to selectively attach them with the metal wraps to strategic parts of trellis 4) Carefully remove the screws from the metal wraps and insert them in the holes in the trellis 5) Reattach the screw and tighten enough to allow the pot to firmly rest in slot 6) Arranged in an aesthetic manner that also provides staggered lighting so that all of the plants receive sunlight throughout the day
Scarlett: Organizer Herb Tower
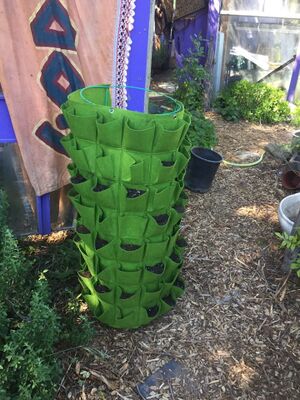
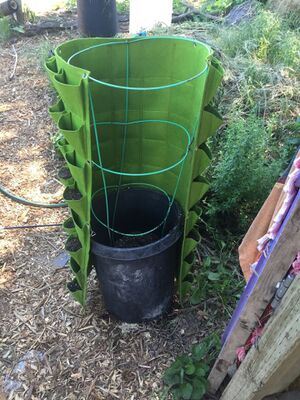
Ingredient
- 1 bag of soil
- 1 (Shoe preferred) organizer
- 1 large bucket
- 1 Tomato Cage
- 2+ Seasonal Herb Starts
Recipe Step 1 - Fill your Large bucket with ½ a bag of soil, be sure to leave enough for your organizer. Step 2 - Place your Tomato Cage inside the bucket now filled with dirt. Step 3 - Using the grommets attach your organizer to the top of the tomato cage. (No grommets: make 3 small incisions at the top of the organizer. Step 4 - Tape down every other row of pockets. Fill non taped pockets with soil (see step 5) Step 5 - So the organizer does not fall to one side during the soil filling, be sure to start filling the middle of the organizer, top to bottom. Making sure the organizer stays balanced alternate filling pockets on each side. Step 6 - Plant your chosen herbs. Water with a drop of molasses. Add soil as needed. Step 7 - Make sure that when your Herb Tower appears constructed, face the middle of the organizer in a sunny are near the kitchen, facing south, for optimal sun exposure.
Timeline[edit | edit source]
Gil: 2-3 days
Christy: The extent of this project took about three days to set up and create
Joey: The project took around 2-3 days to complete once all of the materials were gathered. If not for the brainstorming and having to head back to the story to buy different parts due to improper sizes of metal wraps this project could be complete in the course of a day.
Scarlett: 1-2 days for materials and construction
Individual Costs[edit | edit source]
| Gil | Plants, Burlap, and tools | Ace Hardware | 50.00 | Christy | Burlap and Plants | Ace Hardware | 40.00 | Joey | Clay pots, Plants, and Hose Clamp | Ace Hardware | 50.00 |
| Total Cost | 140.00 | ||||||||||
|---|---|---|---|---|---|---|---|---|---|---|---|
Operation[edit | edit source]
Gil: Daily: Check on plants, and water as necessary. Yearly: Change soil or add small amounts of amendments to prevent the potting soil from depleting . Christy: Open spaces between pallet slats are ideal for dividing rows of small plants. Herbs, lettuce and strawberries are perfect choices for starting. There are many ways of creating a pallet garden and these picture are just a few examples. Its also a great alternatives for areas that do not have space for gardening in beds. You'll want to keep the pallet flat for the next 2-3 weeks while the roots take hold. Continue to water it, just like a regular garden.After that, you can stand it up and lean it against some sort of support. Maintenance:
- Pallet gardens do not take to much maintenance when it comes to weeding, but when it comes to vines growing in the pallet there need to be a structure to support the vines other then the pallet.
Schedule Daily- Making sure the pallet gets plenty of sun Weekly- Depending on the plant it is important to water it two or three times a week Yearly- Making sure the plants are staying healthy and the pallet is staying intact
Joey: Maintaining this trellis garden is fairly simple and practical for the cramped homeowner that would like to grow vegetables in a small amount of space. Picking out the correct trellis materials for your setting is key, and that can range from size to composition of material. Once a desirable trellis is chosen then one can move onto the fun part of picking their favorite plants and pot sizes. You have to keep in mind the size and weights of the pots and how to balance out that weight once you start attaching them to the trellis so that one portion will not become lopsided or aesthetically displeasing. Once attached onto the trellis with the hose clamps you can start watering your plants and enjoy the fruits of your vertical garden! Daily- Make sure your plants are getting water adequately and that they are receiving enough sunlight. Yearly- Change soil and if trellis becomes worn down or broken repair as desired.
Scarlett: Daily: Water with a drop of molasses, and inspect which herbs are ready for picking soon Yearly: change herbs twice yearly to have seasonal yields through out the year
Conclusion[edit | edit source]
Gil:
The biggest lesson I learned through this project was the value of a proper workspace. It was difficult building this without clamps or even a table to work from (I really wish I had bought some clamps!) but I am happy with the way it came out, precarious nails and all. I also learned that even without all the proper tools you can still create useful things that can serve a function. As it stands, it stands! It has enough support to survive any windy or rainy days without toppling over, and the soil pockets hold just fine. In total, I was able to set three different shelves to place herbs in and can fit at least 12 individual plants. This was a fun project during the quarantine and I hope to create a second (prettier) one when I have more space for gardening. Also, if my neighbors are reading this, I apologize for all the hammering!
Christy:
Overall the pallet garden is great alternative for areas that dont have much space for planting or garden beds. Its easy and fun to create and is moveable with little weeding.
Joey:
This project has been really enjoyable to create regardless of all of the ups and downs that the coronavirus has thrown our way over the course of the semester. Even though our initial plan of working at Abueltia's garden had to be cancelled I'm still grateful for my team sticking together and adapting to the situation at hand by creating our own individualized garden projects. My particular project was a blast to create because I already love to garden at home. Showing my parents what you can create from a simple trellis that was ignored in our backyard for years blew their minds and opened their eyes to the endless possibilities that vertical gardening can lead to.
Scarlett:
This project was a really fun project that anyone with a joy for cooking should consider. Having fresh available herbs close by, and using simple items that can be found in most homes if not at a nearby nursery. I recommend using a shoe organizer to give your herb roots space to grow, smaller organizers might not accommodate for this. I feel like especially during this time of shelter in place, people with limited space can utilize this strategy and it could inspire them to cook more with fresh herbs.
References[edit | edit source]
- ↑ Hayden, Nancy J., and Hayden, John P. Farming on the Wild Side: the Evolution of a Regenerative Organic Farm and Nursery. Chelsea Green Publishing, 2019.
- ↑ https://www.permaculture.co.uk/articles/many-benefits-hugelkultur
- ↑ https://www.appropedia.org/Hydroponic_Vertical_Garden_at_Sembradores_Urbanos.
- ↑ Kozai, et al. Plant Factory: An Indoor Vertical Farming System for Efficient Quality Food Production. Academic Press Is an Imprint of Elsevier, 2016.
- ↑ López-Rodríguez, Glenny, et al. "Behavior and Evolution of Sustainable Organic Substrates in a Vertical Garden." Ecological Engineering, vol. 93, 2016, pp. 129–134.
- ↑ Rubin, Greg, and Lucy Warren. The California Native Landscape the Homeowners Design Guide to Restoring Its Beauty and Balance. Timber Press, 2013.
- ↑ Popper, Helen Ann. California Native Gardening: a Month-by-Month Guide. University of California Press, 2012.
- ↑ Garner KL, Chang MY, Fulda MT, Berlin JA, Freed RE, Soo-Hoo MM, Revell DL, Ikegami M, Flint LE, Flint AL, Kendall BE. 2015. Impacts of sea-level rise and climate change on coastal plant species on the central California coast. PeerJ 3:e958 https://doi.org/10.7717/peerj.958
- ↑ People Powered Produce. (n.d.). Retrieved February 16, 2020, from http://www.northcoastgardens.org/
- ↑ Nettle, Claire. Community Gardening As Social Action. Ashgate, 2014.
- ↑ Lawson, Laura J. City Bountiful: A Century of Community Gardening in America. Berkeley: U of California, 2005. Web.
- ↑ Brimer, John Burton. 1971. Homeowner's Complete Outdoor Building Book. [Rev., expanded, updated]. New York: Popular Science Pub. Co.
- ↑ "Preparing Wood Pallets for Upcycling." PartSelect.com. Accessed February 17, 2020. https://www.fix.com/blog/preparing-wood-pallets-for-upcycling/.
- ↑ Janssen, Jules J. A. 1988. Building with Bamboo. Intermediate Technology.
- ↑ Becknell, Natalie Peterson, Micah Hale, Seamus F. Freyne, Stephan Anthony Durham and Anthony J. Lamanna. "Greencrete: A project on environmentally friendly concrete." (2006).
- ↑ "22 Concrete Alternatives for Driveways, Fence Posts and Foundations." Home Stratosphere, December 4, 2019. https://www.homestratosphere.com/concrete-alternatives/.
- ↑ Brimer, John Burton. 1971. Homeowner's Complete Outdoor Building Book. [Rev., expanded, updated]. New York: Popular Science Pub. Co.
