Safety Switch Cover for Power Strip
Project developed by [User:Limitless285]
Template:Statusboxtop Template:Status-design
You can help Appropedia by contributing to the next step in this OSAT's status. Template:Boxbottom
Abstract
- This object was created using FreeCAD for the use of the Principia College Science Department. Its initial use is for their optics lab. One of their power strips is connected to various sensitive light equipment. If they are turned on while the lights are on
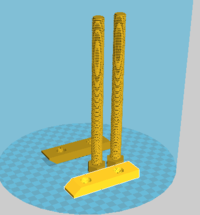
- Picture of completed print using

Source Files / Bill of Materials
- Fortunately, no bill of materials is required for this print. There is no additional hardware- the hinge is the only mechanical part and is printed as one piece.
- [STLs/Open Source Software Source Files can be found at this link]
Tools needed for fabrication of the OSAT
- Jellybox or similar RepRap 3-D printer
Technical Specifications and Assembly Instructions
- Measure size of power strip switch. This should be done with high-accuracy calipers to ensure proper use.
- The size of the switch should match the inside perimeter of the FreeCAD file - adjust for use.
- Ensure height of cover will fit your switch (should be fairly universal)
- Print out at .1 or .2 mm layer height for best precision and hinge-usage.
- Place over switch, secure with epoxy or glue if necessary.
- ESTIMATED PRINT TIME: 5 minutes
- ASSEMBLY TIME: printed-as-one-piece, potential assembly if adhering with epoxy.


Common Problems and Solutions
- Include common mistakes/problems to avoid in building your OSAT and how to overcome them
Cost savings
- 3D printed solution cost:
- Filament: $.03 - Electricity: $.005 Total: $.04
- Commercial Equivalent [Link here
- Cost: $4.00 - Shipping: $13.48 Total: $17.48
- Cost Savings: $13.44
- Almost 350% in savings! - The high shipping cost (a common occurrence with online, specialized equipment, is a huge problem that 3D printing offers a sustainable and low-cost alternative to, perfect in situations like this!).
</nowiki>