Hand Pump Drill (Spring-Loaded)
Project developed by [Limitless285]
Template:Statusboxtop Template:Status-prototype You can help Appropedia by contributing to the next step in this OSAT's status. Template:Boxbottom
Abstract
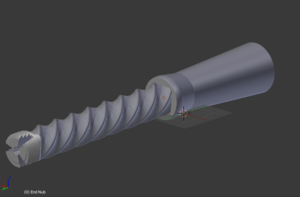
- This Hand Pump Drill is a mechanical drill that utilizes human effort to perform the functions of a drill. In locations where power tools are too expensive or there is little access to electricity, a hand drill is an effective solution. 3D printing these means they can be very cost efficient - less than $0.25 in filament, a spring, and drill bits.
- First Draft
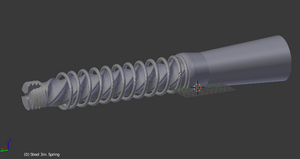
- First Draft w/ Spring
- Final Draft image coming soon!


Bill of Materials
- Materials Needed:
- Drill Bit(s) of varying sizes - any standard drill bits should fit this drill.
- (OPTIONAL) Spring to have spring-loaded capabilities: Purchase here
- STLs and Open-Source (Blender) Source Files Download
Tools needed for fabrication of the OSAT
- Jellybox or similar RepRap 3-D printer
Technical Specifications and Assembly Instructions
- This print should take about 4 hours (I printed three different prints - one with 3 pieces, one with 2, and one with 1). These could all be printed in one go, reducing print time drastically.
- Assembly should take no more than 5 to 10 minutes.
- Print all part at .1 mm resolution (lower resolution may still work, but have not been tested)
- All parts should be printed vertically. The end-handle should be printed with the hole on the narrow end facing up.
- Insert spring-slide over the drill body. After a few rotations, it should revolve smoothly.
- Place the chuck-jaws into the drill body with the jaw-cover screwing into the body over the chuck-jaws
- If a spring is being used, place the spring Spring sized for this print over the drill body before securing the jaw-cover
- Attach the end handle to the spring-slide
Common Problems and Solutions
- Apply lubricant to the drill body (should not be necessary)
- Ensuring the end-handle is printed with the hole facing up ensures accurate sizing and print quality for a snap-fit.
Cost savings
- If your solution is not a low cost one then it is not really appropriate.
- Estimate your costs
- Find a commercial equivalent
- Calculate $ savings and % savings
Based on the developmental needs addressed (e.g. food, heat, electricity, clean water, health care, etc.) be sure to label your device in the proper categories e.g. use [[Category:Water]]. Be sure to categorize your device so that it will be easy to find – for example “Low voltage connection basics” is categorized in [[Category:How tos]] [[Category:Electricity]] [[Category:Electric lighting]].