Whole Earth Engineering - ENGR 114 - Fall 2006 - Cob Oven
By: Shayne, Amber, Niko, Eva and Jill


Timeline
At the begining of the semester our group was going to do a different project. We were going to help redesign the oncampus composting program at Humboldt State University, emphasizing the dorms. Our clients were plant ops, Campus Center for Appropriate Technology (CCAT), and the on campus recycling program (CRP). At the begining our clients were very intersted in our help, and we collaborated in a few meetings, but for some reason our attempts to make further meetings and to begin were ignored until the begining of October. We were told of a scheduled meeting at the last minute and at the meeting we were told that they decided to do the project at a later date. We had less than a month left to do the project and we were lucky enough to find someone who wanted a new Cob Oven.
New Clients
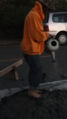
Our new clients became the residents of "the Garden House" in Arcata, California. Our main contact was Greg (one of the residents) who told us exactly what he envisioned. Greg explained that the existing Cob Oven was too small and inefficient. He envisioned a larger cook area, chimney, stove underneath (to keep the fire going while cooking), and a coil for heating water for a possible hot tub in the future. The following is a journal of pictures that shows our process.
The Cob Oven
-
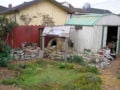
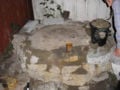
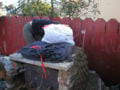
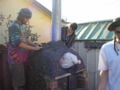
This was the original cob oven built by two of the residents of The Garden House
-
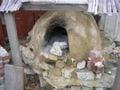
A close up of the oven
-
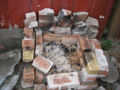
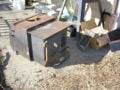
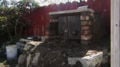
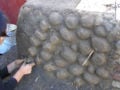
This is a grill that was begun by the residents of "The Garden House. We were asked to incorporate this into the new oven.
-
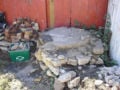
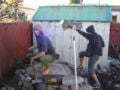
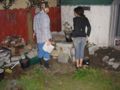
The original cob oven was demolished in order to reuse the materials and the location
-
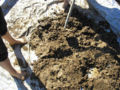
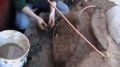
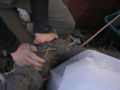
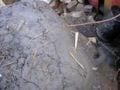
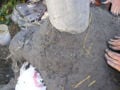
We went through the clay to get out the big, sharp rocks
-
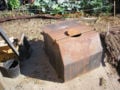
In the mean time a Wood Burning Stove was purchased. The back of the stove
-
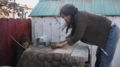
It is a cast iron stove that took many people to move around. The front of the stove
-
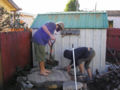
We had to prepare to put the stove on the base,
-
by cleaning it off.
-
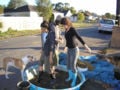
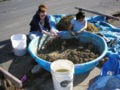
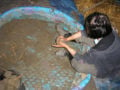
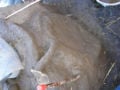
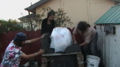
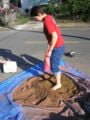
This is our first batch of cob being mixed in the donated kiddy pool.
-

It was so much fun that everyone wanted to help.
-
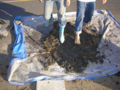
To make the transportation easier we decided to make the cob into balls
-
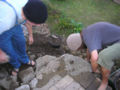
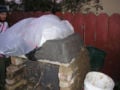
The base was redesigned to support the weight of the stove
-
Making the cob balls took a long time
-
The cob oven's new base was completed in the first night
-
Every day that we got together we discussed the plans for our next meeting
-

This is the wood burning stove half way cobbed
-
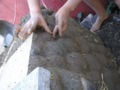
The sides and top were cobbed first
-
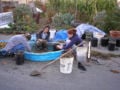
The kiddy pool didn't last long, so we used a tarp instead
-

Eva decorated the sides of the stove with some cob
-
She made the sides look like stones
-

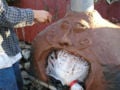
This is the finished cook surface and heat distributer
-
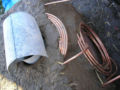
We installed a copper coil into the back to accommodate a future water heater
-
Amber cobbed in the heat distributer, while Jill cobbed in the copper coil
-
The copper coil was awkward to cob over because of its shape and the shape of the back of the stove
-
But it eventually worked out
-
The decorating was time consuming, but worth it
-
Cob batch number three...
-
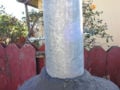
We used some of the left over sand and some bags to make a dome for the top
-

When the top is dry we will let the sand out of the bags. We will have a hollow dome to cook in
-

We placed a tarp over the bags to try and make them more dome shaped
-
We built the walls of the dome around the sand bags
-
This picture show the diference of our techniques in building the sides of the dome
-
The walls of the dome partly finished
-
Another batch of cob...
-

This is Steveo, he wasn't in our class but helped anyways just because he was intersted. Thanks Steveo!
-
This is the completed back wall of the dome
-
This is the top of the dome above the door before the chimney was installed
-
This is the completed dome before we installed the chimney
-
The chimney was also cobbed into place
-
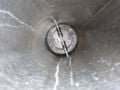
A close up of the cobbed in chimney
-
Niko installed a flue in the chimney
-
The flue is spun so that the operator can control the amount of smoke leaving the chimney
-
Amber, a helper from our class, is mixing the finish layer of cob for the top
-
Niko sculpted a face into the cob while Jill and Amber finished the sides with the cob finisher we made
-

We think the face looks like a chef, so thats what we named it
-
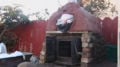
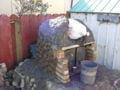
Our cob oven is complete! Now all we have to do is let it dry for a few days, and take out the sand


Analysis
How appropriate was this project? With any project that one may complete, there will be some aspects that are more appropriate than others. Building a cob oven out doors in Arcata, California is a little bit of a risk. Arcata is in a very wet climate. So a structure that is made of clay, sand and hay may be slowly eroded with time. If the cob oven had been built in doors or if we were to build a structure to house it then the project would have been more appropriate. Another factor to consider is fuel consumption. To heat the cob oven to a temperature warm enough to cook in takes a lot of fire, which takes a lot of fuel. Once heated the oven will stay hot for hours. In order to offset this it is probably best to use the cob oven when planning to bake more than just one meal. Also we had to drive all over town to get the hay, clay and sand. One way we offset this was by reusing the cob from the old oven, we recieved some donated cob supplies from another person's project, and whenever we could we got local supplies. As sort of a side project we incorporated the 3/8ths inch copper coil so that the residents of the garden house could heat water with some of the waste heat. The residents plan on using the heated water for a hot tub in the future.