This special page shows all uploaded files.
| Date | Name | Thumbnail | Size | Description | Versions |
|---|---|---|---|---|---|
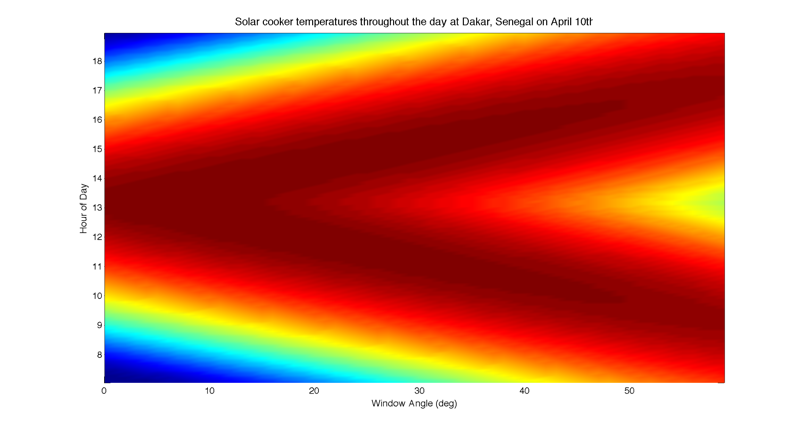
| 12:55, 23 April 2010 | Cookersim dakar 10.png (file) |  |
100 KB | Cooker temperatures throughout the day for April 10 in Dakar, Senegal. | 1 |
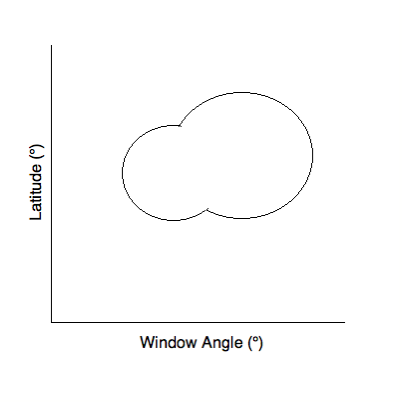
| 08:06, 23 April 2010 | Cookersim design space.png (file) |  |
13 KB | Diagram of Latitude vs. Window Angle, which would display points corresponding to to a high temperature. | 1 |
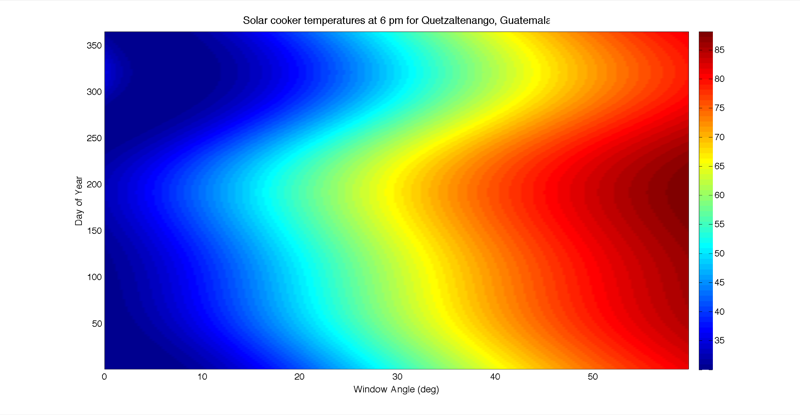
| 07:47, 23 April 2010 | Cookersim quetzaltenango 18.png (file) |  |
112 KB | Reduced scale. | 2 |
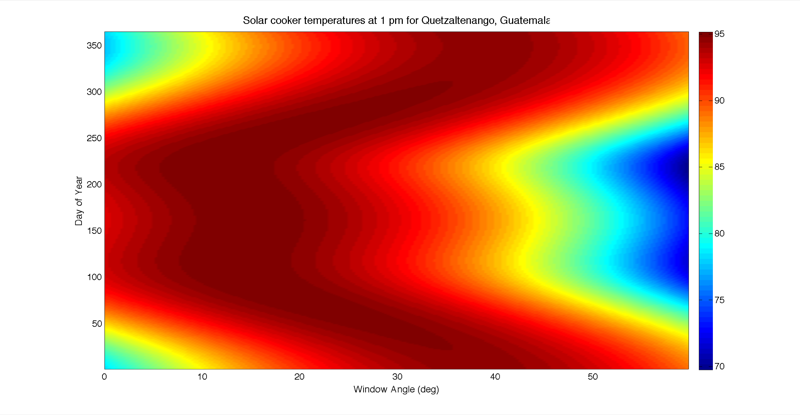
| 07:46, 23 April 2010 | Cookersim quetzaltenango 13.png (file) |  |
118 KB | Added colour bar, reduced scale. | 2 |
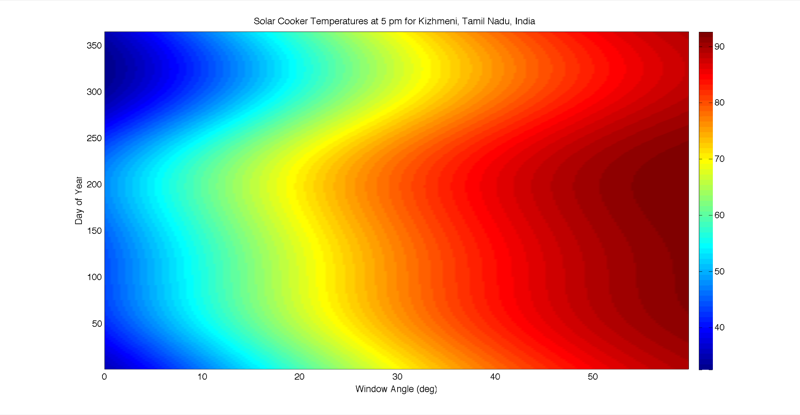
| 07:46, 23 April 2010 | Cookersim kizhmeni 17.png (file) |  |
99 KB | Reduced scale. | 2 |
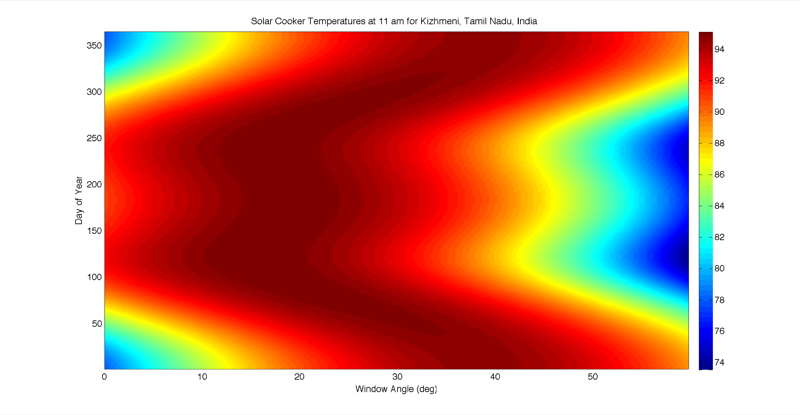
| 07:45, 23 April 2010 | Cookersim kizhmeni 11.png (file) |  |
125 KB | Reduced scale. | 2 |
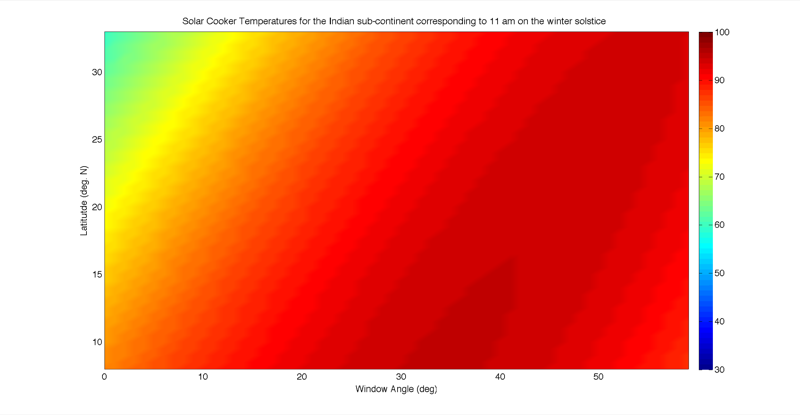
| 07:44, 23 April 2010 | Cookersim India.png (file) |  |
57 KB | Reduced scale | 2 |
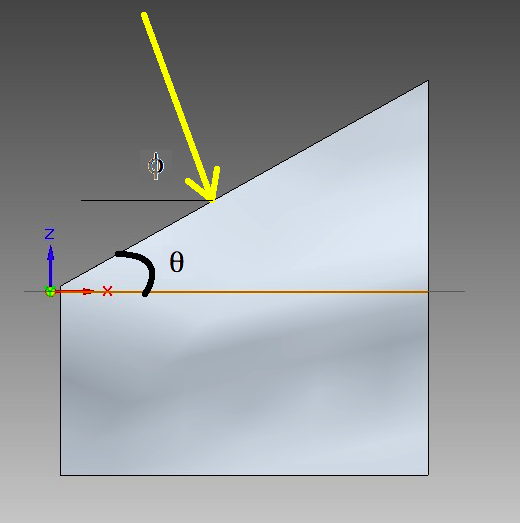
| 11:53, 16 April 2010 | Side view small labelled wray.png (file) |  |
72 KB | 2 | |
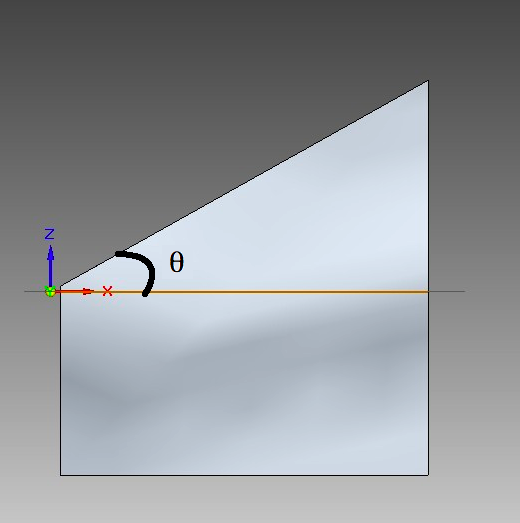
| 11:26, 16 April 2010 | Side view small labelled.png (file) |  |
70 KB | Side view of the solar box cooker with window angle theta labeled. | 1 |
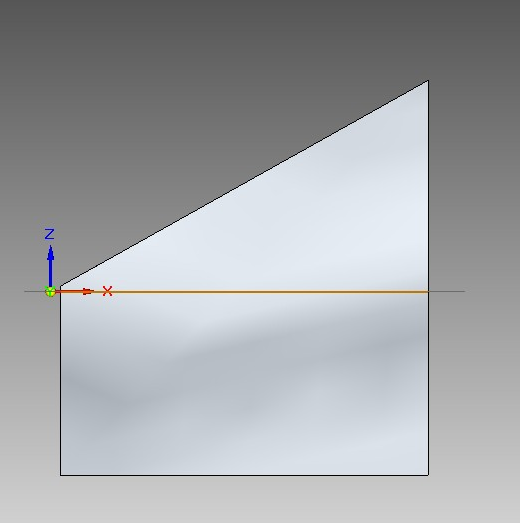
| 11:22, 16 April 2010 | Side view small.png (file) |  |
59 KB | Side view of the solar box cooker. | 1 |
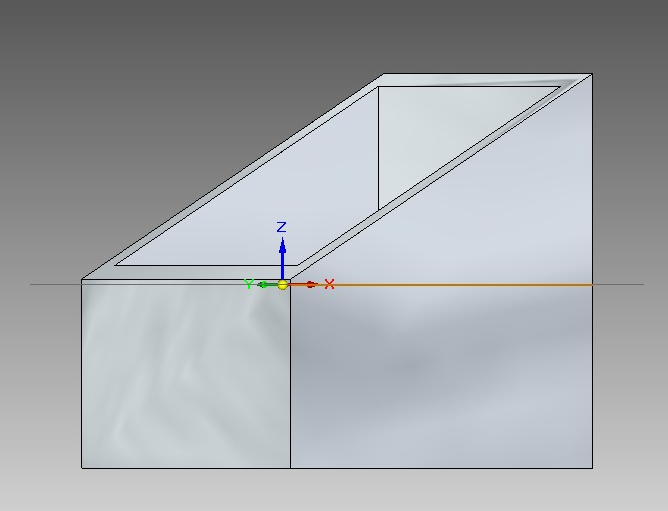
| 11:21, 16 April 2010 | Cooker small.png (file) |  |
91 KB | Profile view of the solar box cooker. | 1 |
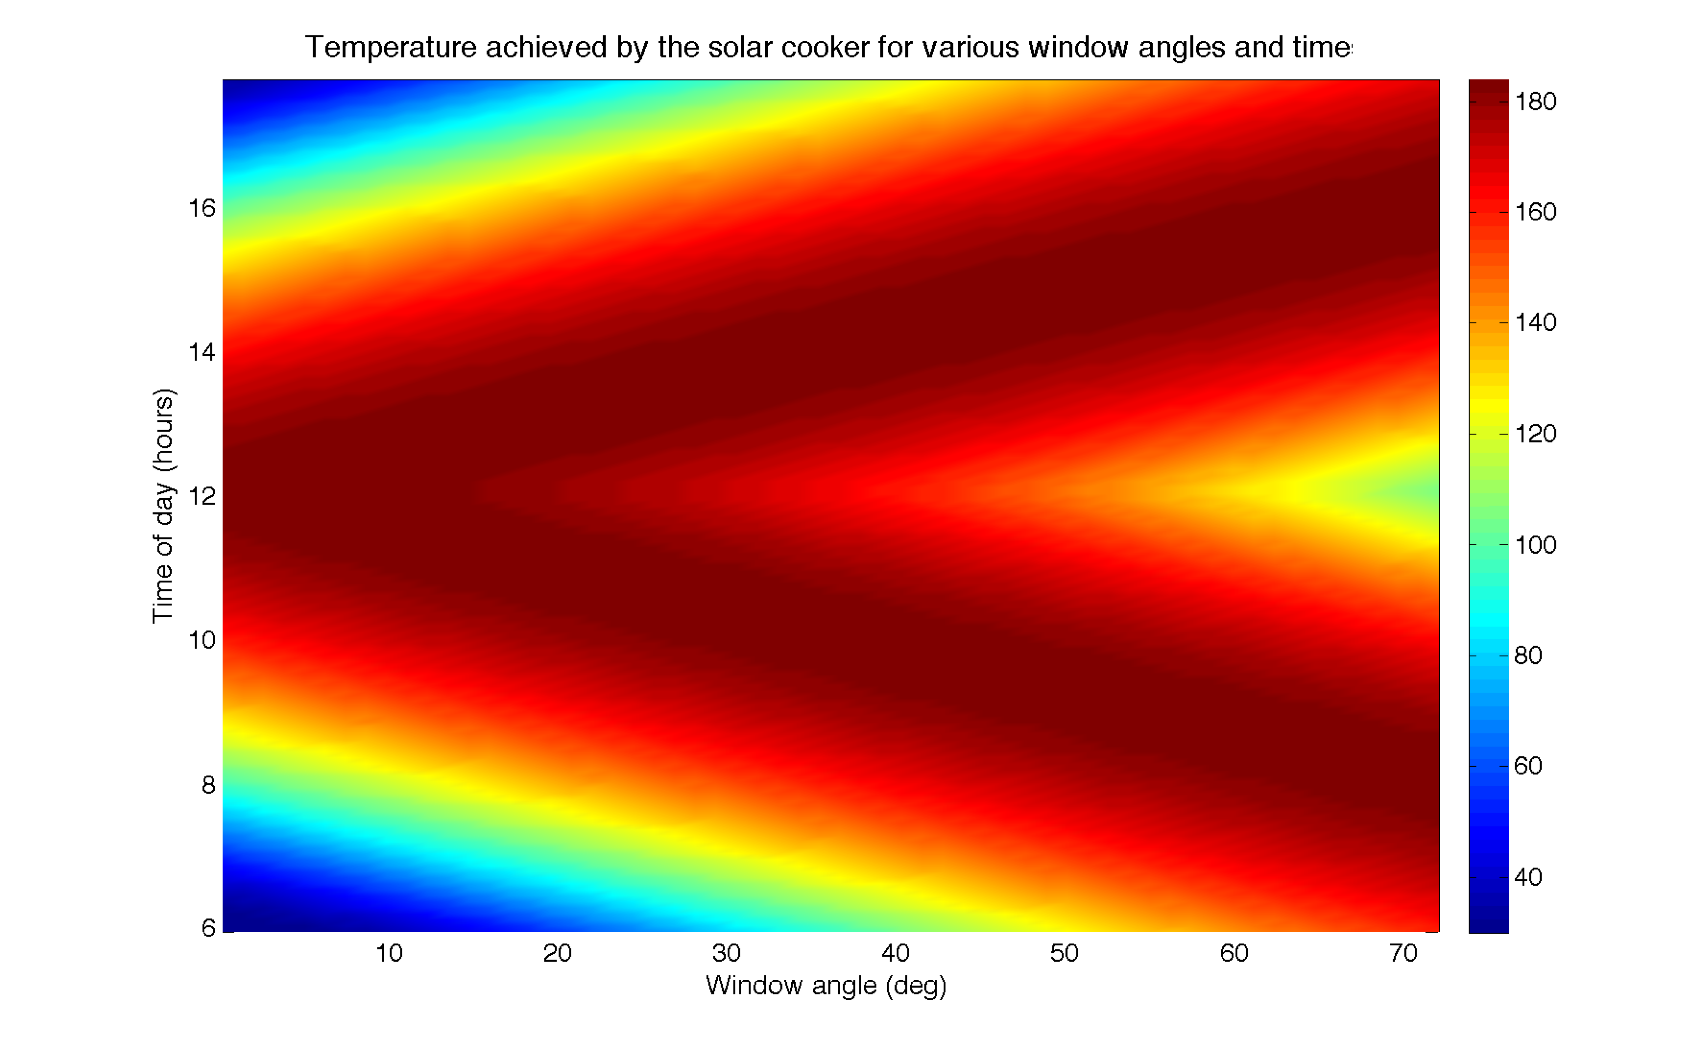
| 10:19, 16 April 2010 | Time angle plot.png (file) |  |
374 KB | Time angle plot of solar cooker. | 1 |
| 09:04, 16 April 2010 | Solarcooker heat circuit.png (file) |  |
4 KB | Solar cooker thermodynamic analysis circuit analogy. | 1 |
| 06:33, 2 February 2010 | Dloates user.jpg (file) |  |
76 KB | David Luke Oates' user page image. | 1 |
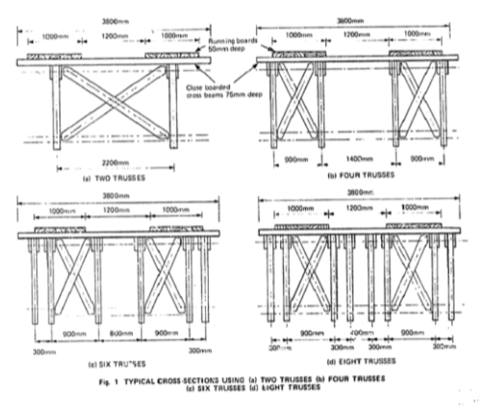
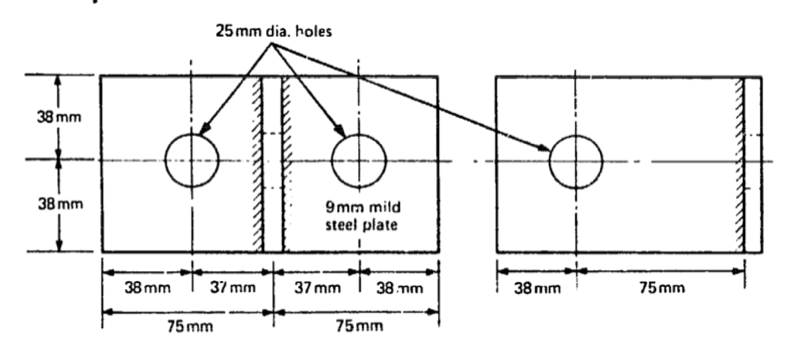
| 03:56, 29 January 2010 | Figure 1 cross sections.png (file) |  |
111 KB | Rotated 90° | 2 |
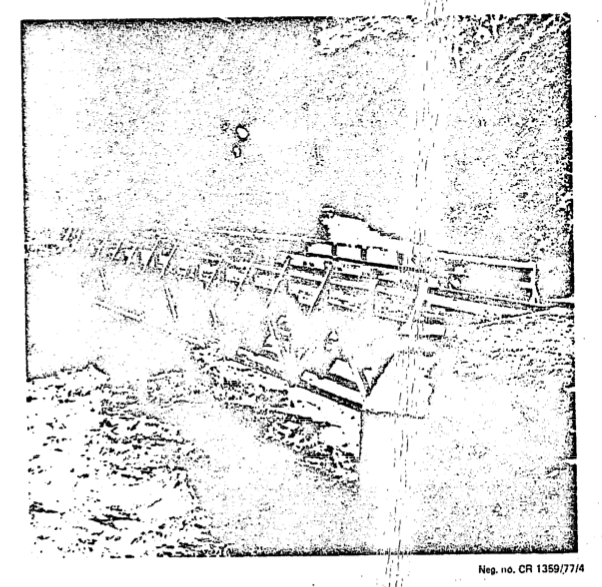
| 05:52, 26 January 2010 | Plate 1 The Four Truss Bridge at Nyeri.png (file) |  |
299 KB | The Kenyan Low Cost Modular Timber Bridge: The Four Truss Bridge at Nyeri | 1 |
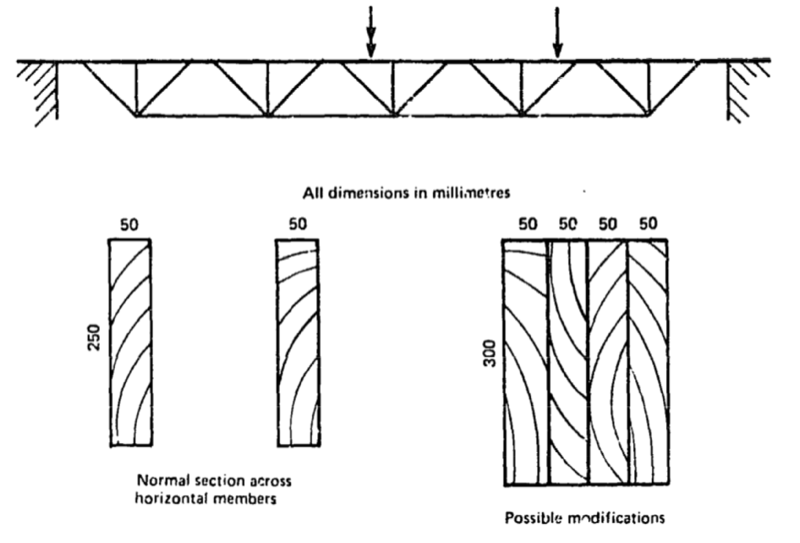
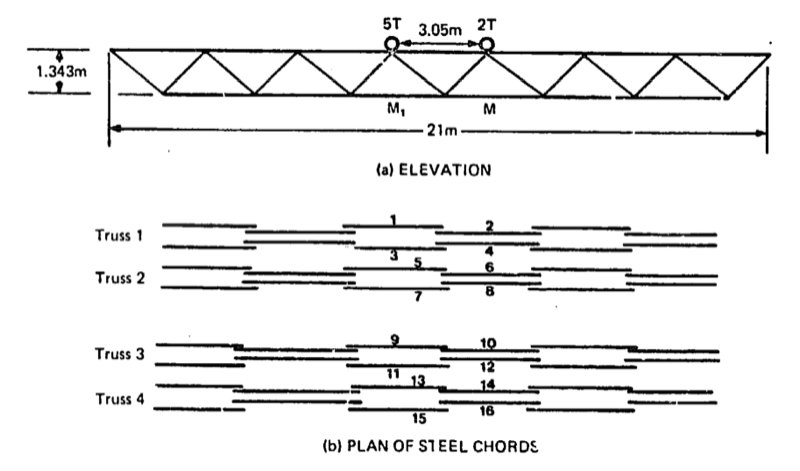
| 05:52, 26 January 2010 | Figure 17 Illustration of Theoretical Overload Condition.png (file) |  |
104 KB | The Kenyan Low Cost Modular Timber Bridge: Illustration of Theoretical Overload Condition | 1 |
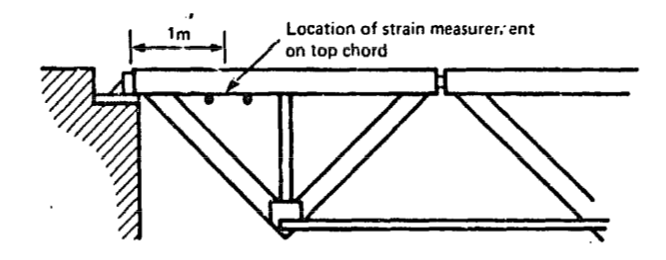
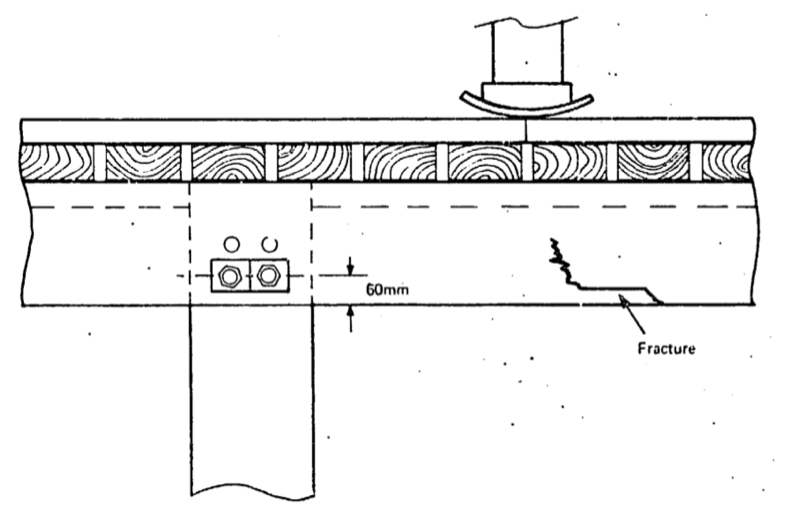
| 05:51, 26 January 2010 | Figure 16 Bridge Tests at Nyeri-Top Chords.png (file) |  |
55 KB | The Kenyan Low Cost Modular Timber Bridge: Bridge Tests at Nyeri - Top Chords | 1 |
| 05:51, 26 January 2010 | Figure 15 Bridge Tests at Nyeri-Bottom Chords.png (file) |  |
87 KB | The Kenyan Low Cost Modular Timber Bridge: Bridge Tests at Nyeri - Bottom Chords | 1 |
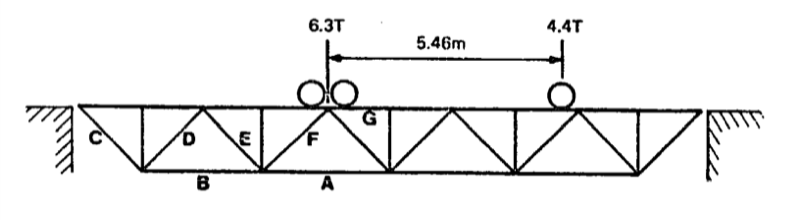
| 05:51, 26 January 2010 | Figure 14 Bridge Test at Isiolo.png (file) |  |
45 KB | The Kenyan Low Cost Modular Timber Bridge: Bridge Test at Isiolo | 1 |
| 05:50, 26 January 2010 | Figure 13 Frame Modifications.png (file) |  |
90 KB | The Kenyan Low Cost Modular Timber Bridge: Frame Modifications | 1 |
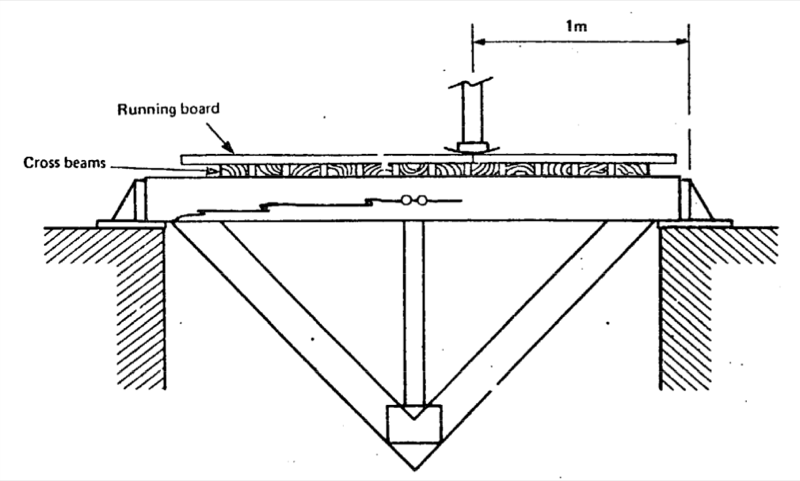
| 05:50, 26 January 2010 | Figure 12 Test Loading a Single Frame.png (file) |  |
96 KB | The Kenyan Low Cost Modular Timber Bridge: Test Loading a Single Frame | 1 |
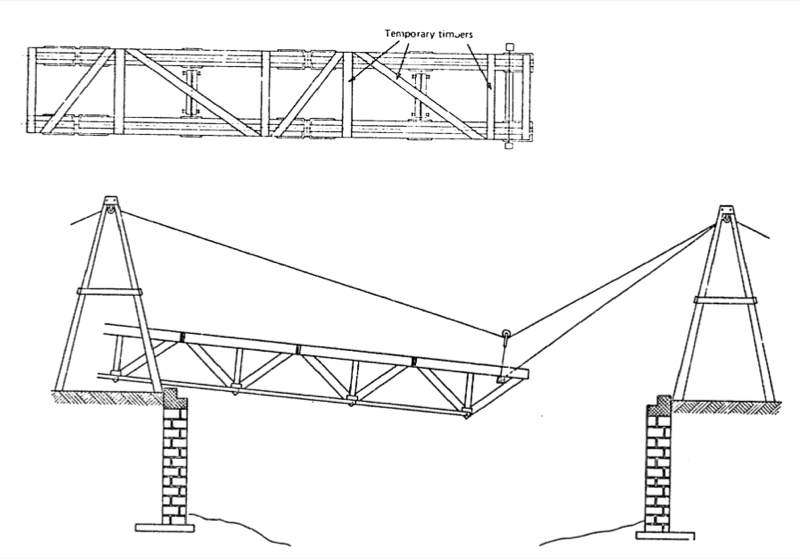
| 05:50, 26 January 2010 | Figure 11 Launching A Pair of Trusses.png (file) |  |
120 KB | The Kenyan Low Cost Modular Timber Bridge: Launching A Pair of Trusses | 1 |
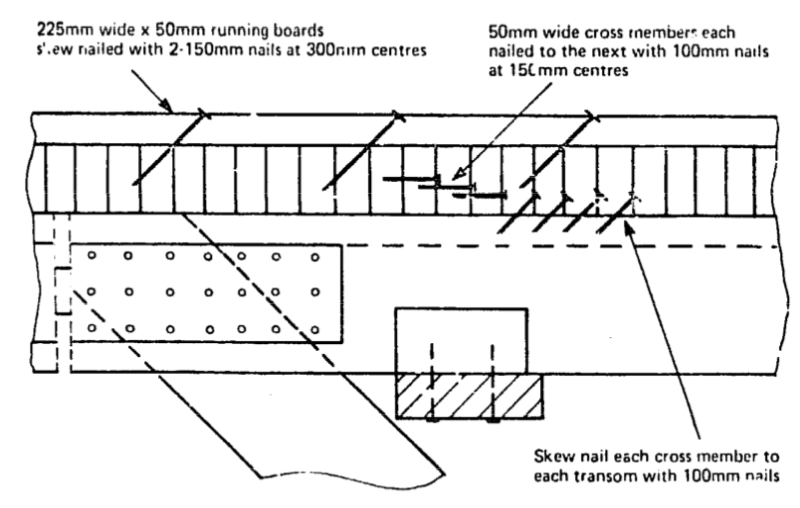
| 05:49, 26 January 2010 | Figure 10 Detail of Deck.png (file) |  |
125 KB | The Kenyan Low Cost Modular Timber Bridge: Detail of Deck | 1 |
| 05:48, 26 January 2010 | Figure 9 Top Bracing Connection.png (file) |  |
80 KB | The Kenyan Low Cost Modular Timber Bridge: Top Bracing Connection | 1 |